

- Home
- After Effects
- Discussions
- Re: Unable to render interlaced footage in AE with...
- Re: Unable to render interlaced footage in AE with...
Unable to render interlaced footage in AE without artifacts

Copy link to clipboard
Copied
I've been having issues problems with exporting interlaced footage - even with no effects or adjustments applied - through After Effects.
I'm working with 720x480 DV AVI files (I know, small, but that's the source and I need to be able to work with them).
They seem to render fine through Media Encoder, but I need to be able to use the Render Queue. (Render Queue is able to handle slight upscaling without quality loss whereas Media Encoder seems unable to do so.) However, when I do export these files through the Render Queue, I get aliasing/jagged lines in the image that appears to be an issue with how it is handling interlacing.
I've made sure the field order matches between the footage and interpretation (lower field first) and when they do, I get the aliasing. I've tested it with the field order set to 'off' in interpretation and also with it left on 'lower field first' there and set to 'lower field first' in the render settings, and both of those options result in the slashed lines in motion of visible interlacing.
I'm not sure how to avoid either type of artifact in exporting interlaced footage through the Render Queue.


 18
Replies
18
18
Replies
18
Copy link to clipboard
Copied
I forgot to note that when I change the field order and get the slashed lines/visible interlacing, it fixes the jagged lines/aliasing issue. I wind up with either issue, though not both simultaneously.

Copy link to clipboard
Copied
Add your comp to the Render Queue. Go to the Render Settings. Make sure the field order in them is also set to lower field first. You should be fine then.
Copy link to clipboard
Copied
I have tried this, unfortunately. When I add it to the Render Queue and go to Render Settings and select 'lower field first' in the Field Render drop-down, I get the visible interlacing (slashed lines in motion), though it does fix the aliasing/jagged lines issue.
Copy link to clipboard
Copied
I saw this advice somewhere and other mentions of doing a frame render, but I'm not sure how to do that:
" If you interpret interlaced footage as whole frame (do not separate fields) and then do a frame render you are not reducing the quality (you cannot do any transforms or blurs this way though) as AE just puts the two fields back at once. True a frame render will be steppier than a field render but it in most cases it's acceptable."
Copy link to clipboard
Copied
I've also wondered if this could be a codec issue, though I'm not sure I know enough to determine that.
Copy link to clipboard
Copied
vintageshtuff wrote
I have tried this, unfortunately. When I add it to the Render Queue and go to Render Settings and select 'lower field first' in the Field Render drop-down, I get the visible interlacing (slashed lines in motion), though it does fix the aliasing/jagged lines issue.
Well, that's because you're probably looking on a viewer or in a progressive NLE timeline. Or on a computer monitor and not a video monitor. So yeah, it'll be interlaced.
Do you want it NOT to be interlaced?

Copy link to clipboard
Copied
Handling interlaced footage requires you to verify the field order, separate fields for your effects work, then put the fields back when you render. Unless required by a broadcaster, there is no real reason to render interlaced. Any modern machine will playback progressive footage just fine, and it looks better.
If you need help verifying the field order and separating fields then check back with us.
BTW, It is also a very good idea to make your comps the square pixel equivalent of the non-square footage you are working with. AE will automatically handle the conversion, you'll have better pixels to work with, then if you absolutely have to render interlaced and non-square, that can be handled easily in the Render Cue. DO NOT use the Adobe Media Encoder to render interlaced footage and do not try and judge the quality of interlaced footage by looking at a frame at a time. Always separate fields when working with interlaced footage when editing and when doing composites (effects).
Copy link to clipboard
Copied
Thank you for that reply.
How do I render it as progressive in AE instead of interlaced, if that's what is recommended?
"If you need help verifying the field order and separating fields then check back with us."
I believe I've already been doing this, but maybe not correctly. The source files are lower field first and I have them interpreting this way when I right click and go into 'Interpret Footage.' As I said above, I've tried both setting 'off' and 'lower field first' in the Render Settings. It seems as if you're recommending that I select 'lower field first' in the Render Settings, maybe, which is not the default but I can select it (and that's where the visible interlacing comes in).
"BTW, It is also a very good idea to make your comps the square pixel equivalent of the non-square footage you are working with."
Thank you for this suggestion. It is new to me and I'm unsure how to do it.
Copy link to clipboard
Copied
I don't want it to appear interlaced. The source footage (which is interlaced) doesn't appear this way in viewers and progressive NLE timelines. Isn't there a way to not have it appear interlaced when I run it through AE? It also doesn't show the visible interlacing artifacts when I run it through Premiere.
Copy link to clipboard
Copied
I wouldn't use AE for this. I'd use Premiere Pro, exporting with Adobe Media Encoder. AME does a good job of deinterlacing, no AE deinterlacing mumbo-jumbo necessary.
Copy link to clipboard
Copied
Unfortunately, I can't use Premiere Pro for this. My original intention was to do so, but I need to slightly upscale the footage. When I use Premiere Pro for that (or when I use AE and go through Media Encoder), I get quality loss in the image. I'm able to upscale (either with Transform or the Detail-Preserving Upscale effect) in AE and go through the Render Queue without quality loss, but then I have the interlacing artifacts to deal with. I only came over to AE after giving up on Premiere Pro being able to handle upscaling.
Copy link to clipboard
Copied
I'll say it again. Separate fields, do the work, render without reintroducing fields. If you properly separate fields in AE there will be no interlacing. After Effects will fill in the missing lines on each frame.
Interlaced footage is always a bit soft because of the time difference between fields, but separating fields properly will solve the problem as well as it can be solved without expensive 3rd party plug-ins.
One more thing. Do NOT use a 720 X 480 comp. That frame size is always non-square pixels. Use the square pixel equivalent and render to that size.
Copy link to clipboard
Copied
"I'll say it again. Separate fields, do the work, render without reintroducing fields. If you properly separate fields in AE there will be no interlacing. After Effects will fill in the missing lines on each frame."
Okay, the fields are separated in the project and sounds like I need to leave Field Render on 'off' in Render Queue, but those render settings are how I still am getting the jagged lines/aliasing. Tested it again and it always comes out this way.
"One more thing. Do NOT use a 720 X 480 comp. That frame size is always non-square pixels. Use the square pixel equivalent and render to that size."
Hmm, with 720 X 480 footage, what comp should I use if not 720 X 480? I'm not very familiar with pixel settings and how to configure this. How would you recommend I set up a comp for this? Thank you for your help and patience.
Copy link to clipboard
Copied
There's a strange new twist now:
When I export my footage with Detail-Preserving Upscale applied and go through the Render Queue, select Render Settings/Field Render and choose 'Lower Field First', I now get exports that don't show either of the aliasing or visible interlacing artifacts, but they do have the quality loss/blurring issue that I'd been getting when trying to upscale in Premiere Pro or with AE through Media Encoder. However, when I leave Field Render set to its default ('off'), I get the aliasing issue I was having initially, but the image quality from the upscaling looks clean and unblurred.
No idea....... Especially perplexing because when I do the initial set of steps (Render Settings/Field Render/Lower Field First) with this footage with no upscaling effect applied, I was getting the slashed lines/visible interlacing in all tests.
Update: I realized that my last bunch of tests when I was getting the visible interlacing in motion, I had been leaving my export setting as 'lossless' in the Output Module. When I change it to DV NTSC (as I had been originally) and then change the Render Settings to 'lower field first' instead of 'off', it gets rid of the visible interlacing and aliasing artifacts, but then I encounter the quality loss issue I'd been having in Premiere and in AE through the Media Encoder.
Copy link to clipboard
Copied
Separate fields in After Effects using File Interpretation from the Menu. Put your non-square interlaced footage with the fields separated in a square pixel equivalent comp. Do the work you need to do. Add the comp to the render cue and, as I said before, unless the client or a broadcaster specifically requires you to deliver interlaced content, DO NOT add fields or interlacing when you render. Just render a suitable visually lossless Digital Intermediate (DI) to use in your production. Do not render an h.264 compressed file as a DI. You'll just add compression and motion artifacts to the final render.
Copy link to clipboard
Copied
"Separate fields in After Effects using File Interpretation from the Menu. Put your non-square interlaced footage with the fields separated in a square pixel equivalent comp. Do the work you need to do. Add the comp to the render cue and, as I said before, unless the client or a broadcaster specifically requires you to deliver interlaced content, DO NOT add fields or interlacing when you render. Just render a suitable visually lossless Digital Intermediate (DI) to use in your production. Do not render an h.264 compressed file as a DI. You'll just add compression and motion artifacts to the final render."
I'm not sure I fully follow this answer.
My original footage is 720x480 AVI NTSC DV and I'm going to that same format. The original is interlaced, lower field first. The fields are separated, I believe. I may have misunderstood you before, but when I render, to not add fields, do I make sure Field Render in Render Settings is turned off? Or is that done elsewhere? I'm unfamiliar with what DI means and how to make sure I'm rendering as you said.
Copy link to clipboard
Copied
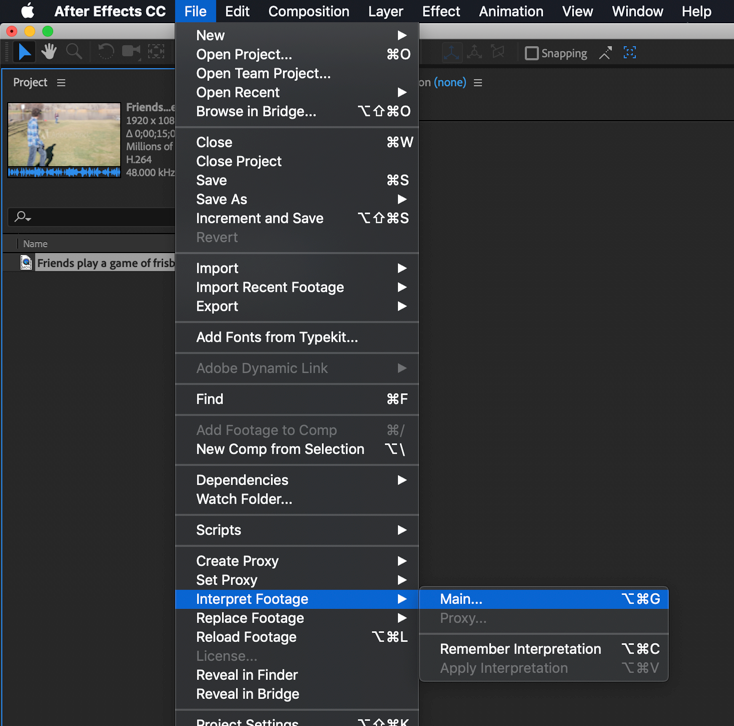
Separating fields id done in the Project Panel. Select the footage, right-click or go to the File menu and choose Interpret Footage (Alt/Option + Ctrl/Cmnd + g). That is where you separate fields. You have to do this manually most of the time and you absolutely must verify that the field order is correct. When you separate fields the footage is no longer interlaced, it is progressive.
When you get the panel open, select your best guess field order. After Effects should have guessed at the Pixel Aspect ratio and selected it automatically. Sometimes AE will guess and separate fields but with almost all footage, you will have to do that by hand.

Once you have separated fields the info section of the Project Panel will show you what has been done:

This footage is not interlaced and it is square pixels. I separated fields so you could see what it looks like.
Now you can open the footage in the footage panel and check to verify that the field order is correct. Just double click the footage in the project panel and step through a few frames one at a time using Ctrl/Cmnd + right arrow. If the action is always in the same direction the field order is correct. If movement is one frame forward then one back then one forward the field order is correct. If you have pairs of identical frames then the original footage was not interlaced and you do not need to separate fields.
If you are just scaling up the footage it is probably OK to just create a new composition from the interpreted footage and apply Detail-Preserving Upscale. If you are doing anything else it is a very good idea to create a new Square Pixel equivalent comp and drop your footage in there. You'll have more pixels to work with and the end result will be higher quality.
The square pixel equivalent frame sizes are in the presets for composition settings. If you created a comp from your footage and everything looks normal when you turn on Pixel Aspect Ratio correction you are ok. If round things are egg-shaped then AE has guessed at the wrong Pixel Aspect Ratio. You can change this in file interpretation. Then, if you decide to work with a square pixel comp (highly recommended) just pick the right preset from the list and change the comp you created from the footage to its square pixel equivalent. After Effects will automatically fit the DV footage to the new square pixel frame.

When you are ready to render you should use the Render Cue and unless you are an expert in compression and have already chosen a suitable Digital Intermediate format, just pick the Lossless preset and render. Do Not add fields, you'll loose have the pixels you created when you scaled up the footage. If you stuck with 720 X 480 just make sure that the PAR matches the Pixel Aspect Ratio in the comp. If you used the square pixel equivalent preset just render the comp and don't worry about resizing. Premiere Pro, Final Cut, even iMovie, and Movie Maker will automatically adjust the footage to fit in a standard DV timeline without any problems.
You should never use Compressed formats like h.264 in the production workflow. Highly compressed formats always make up at least 2/3 of the frames from calculations that predict pixel movement and color changes, they always introduce color artifacts, and they always introduce compression artifacts. A DI, digital intermediate, is a frame based visually lossless video used for production to maintain the highest quality.
I hope this makes sense. The only reason to ever render an interlaced DI is to give that to a client that demands interlaced footage. The only reason to interlace a file you are going to deliver to a broadcaster is to comply with their specifications, but I haven't seen a broadcaster that requires interlaced video for many years.
Interlacing was invented to help television transmission fit in the allocated frequencies it had to use for broadcast. Things were just not fast enough to draw every tv line, so the odd lines were drawn and on the next cycle the even lines were drawn, but your brain couldn't tell that it was only getting half the picture at a time. Those empty lines were dimmer than the current lines because the phosphors that were lit up by the electron beam were dimming, and the TV picture really only had a little more than half of the vertical resolution that the TV was capable of but it had all of the horizontal resolution that the set could deliver. Our brains don't process vertical resolution as well is it does vertical so they got away with it. The nonsquare pixel option (720 X 480) happened because there were no digital devices that were capable of working fast enough to use square pixels. That's also gone away. You can't even buy a consumer camera now that shoots nonsquare by default. There are some pro-cameras that can shoot anamorphic, but that is a whole different ballgame.
When you finish your project in your NLE it would be a very good idea to render a square pixel equivalent compressed version of your project so that it will not be distorted when played in a media player. As I said before, no media player is going to respect nonsquare pixel footage by default.
Beleve it or not, all of this stuff is in the User Guide. You just have to dig for it.
Copy link to clipboard
Copied
Thank you for taking the time to break this down, Rick. I really appreciate it.

Find more inspiration, events, and resources on the new Adobe Community
Explore Now
 AdChoices