• Global community
    • Language:
      • Deutsch
      • English
      • Español
      • Français
      • Português
  • 日本語コミュニティ
    Dedicated community for Japanese speakers
  • 한국 커뮤니티
    Dedicated community for Korean speakers
Exit
0

3D Comera Tracking

Participant ,
Apr 08, 2018 Apr 08, 2018

Copy link to clipboard

Copied

hi

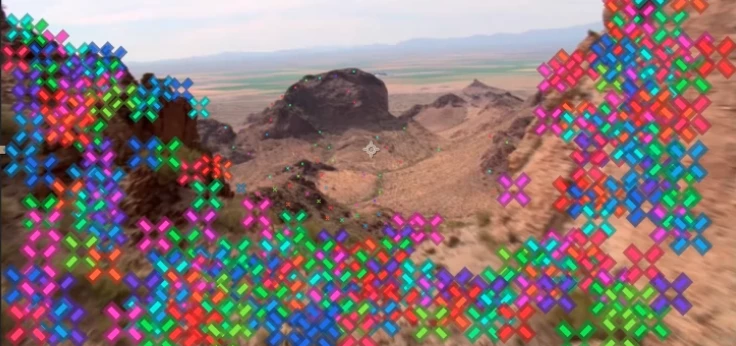
what is the different colors mean in the 3D Camera Tracking:(what is the different between pink color with red or green and so on....)

Views

1.7K

Translate

Translate

Report

Report
Community guidelines
Be kind and respectful, give credit to the original source of content, and search for duplicates before posting. Learn more
community guidelines
Community Expert ,
Apr 08, 2018 Apr 08, 2018

Copy link to clipboard

Copied

This question have been answered a couple of times in this forum. There is no difference between colors, they are track points. What I think (but it is my opinion) is that similar color corresponds to same plane orientation but not sure because there is no documentation for this.

Votes

Translate

Translate

Report

Report
Community guidelines
Be kind and respectful, give credit to the original source of content, and search for duplicates before posting. Learn more
community guidelines
Valorous Hero ,
Apr 08, 2018 Apr 08, 2018

Copy link to clipboard

Copied

The colors have no other functionality other than to provide differentiation and easier identification when selecting solved points. One of the primary issues with AE's Cam Tracker is the display of poorly solved points. The colors go some way in identifying good solved points versus bad solved points. The thing to note about the track points are their sizes - the smaller they are, the further they are from the Camera - vice versa.

Motion Graphics Brand Guidelines & Motion Graphics Responsive Design Toolkits

Votes

Translate

Translate

Report

Report
Community guidelines
Be kind and respectful, give credit to the original source of content, and search for duplicates before posting. Learn more
community guidelines
Community Expert ,
Apr 08, 2018 Apr 08, 2018

Copy link to clipboard

Copied

The most important part of the Camera Tracking workflow is to set an origin and ground plane on a flat piece of horizontal geometry in the scene, then add a solid to the same point, add Effects>Generate>Grid and then check the grid and make sure you have:

  1. Picked the right markers for the surface you want to use for the origin and ground plane
  2. Have a good camera track

If the Grid does not stick to the ground then you either picked the wrong markers or your track is no good. I recognize that shot and it is a difficult one to track because there is very little geometry in the shot that is flat. The origin and ground plane is important to establish so you can arrange things in the scene and make them stick to the geometry in the shot.

Once you get a good origin and ground plane it is a fairly easy thing to attach placeholders or text to other elements in the shot. If you are having problems attaching placeholders or Text to the scene you can sometimes fix the problem by simply opening up multiple camera views and making some small adjustments.  Other times you must delete the placeholder and try and find at least 3 tracking points that line up with a flat surface. Sometimes it is helpful to slowly scrub through the shot and look at the tracking markers, then pick ones that stick around for several frames and seem to be attached to a common surface.

Anything that is moving in the shot can foul up a camera solution. For example, you cannot Camera Track a shot of the ocean or a crowded city sidewalk that is completely full of people because there are not enough surfaces in the shot that are not moving.

I hope this helps. AE's camera tracker works very well if you have the right kind of shot and there is very little lens distortion in the shot. Lens distortion can be fixed, sometimes you can eliminate the trackers that have attached themselves to things, like people, that are moving through the shot. No camera tracking software can successfully track every shot. They all have their limitations.

Votes

Translate

Translate

Report

Report
Community guidelines
Be kind and respectful, give credit to the original source of content, and search for duplicates before posting. Learn more
community guidelines
Participant ,
Apr 08, 2018 Apr 08, 2018

Copy link to clipboard

Copied

thanks of all Masters for your attentions;

Mr.Rick Gerard

would you guide me to a tutorial clip, based on tracking with grid

gratefully

Martin

Votes

Translate

Translate

Report

Report
Community guidelines
Be kind and respectful, give credit to the original source of content, and search for duplicates before posting. Learn more
community guidelines
Community Beginner ,
Apr 08, 2018 Apr 08, 2018

Copy link to clipboard

Copied

Per Martin, I too would like to see a tutorial on setting an origin and ground plane, thanks for the explanations.

Votes

Translate

Translate

Report

Report
Community guidelines
Be kind and respectful, give credit to the original source of content, and search for duplicates before posting. Learn more
community guidelines
Community Expert ,
Apr 10, 2018 Apr 10, 2018

Copy link to clipboard

Copied

Most of the tutorials I found on AE's Camera Tracking are just plain lousy. They have been created by folks that do not really understand the basic principals of Camera Tracking and AE's 3D space. This tutorial by my friend Mathias demonstrates the principal using a tool he developed before Setting the Origin and Grond Plane was a feature of AE's Camera Tracker. It explains why you would do it.

In practice, it is really simple. You just Camera Track, check the accuracy in the ECP (Effects Control Panel), delete any points that are fouling up the camera track, then pick at least 3 points on a horizontal surface you want to be your ground plane and set the origin and ground plane. Then you use the same Target to add a camera and a solid. You can hold down the Ctrl/Cmnd or Alt/Option key to move the center of the target and adjust the size of the target which will change the size of the placed solid. Once you have the solid added to the scene apply Effects>Generate>Grid. This will give you a grid you can see through and then you visually check the alignment of the grid with the surface you have chosen. When that is done you are ready to start adding your additional 3D elements and their position should make sense.

The Orient World Script that Mathias developed is a useful tool, but the most important function it performs is now included in the Camera Tracker.

You should also take some time to carefully read the Help file on Camera Tracking. There is a lot of good stuff in there. It will take you about 15 or 20 minutes to digest everything and play with the controls. It will be time well spent. You will find it by typing Camera Tracking in the Search Help field at the top right corner of AE. Search Help is another feature of AE that you should become very familiar with. I use it all the time to see if there are any new techniques out there or better ways of doing things.

Votes

Translate

Translate

Report

Report
Community guidelines
Be kind and respectful, give credit to the original source of content, and search for duplicates before posting. Learn more
community guidelines
Valorous Hero ,
Apr 10, 2018 Apr 10, 2018

Copy link to clipboard

Copied

LATEST

Using the Ground Plane and Origin features are a post-tracking routine - they have nothing to do with getting a good track. Their utility comes in helping you to better align/scale your insert layers.

The most critical aspect to tracking is having footage that is trackable - for AE's 3D Camera Tracker, this means tracking footage that has sufficient parallax in its content. The second most critical aspect to Camera Tracking in AE is to check on the Average Error after the tracking + solving processes have completed. An Average Error between 2.5-3 is not promising but you may get lucky. Anything above 3 is far from good and chances of getting good solved track points throughout the footage is unlikely. Anything below 1 is, truly, too good to be true. Between 1 to 2.2 is quite good. Between 2.2 to 2.5 is common and provides solved track points that are viable for most uses.

The last thing to be very mindful of is to pick only good solved track points when creating your (3-point or single point) target - when creating insert layers. To accomplish this, you will have to scrub the Timeline to keep a very close eye at the area for your insert(s). Lookout for points that stay on screen throughout - these are the best points. Points that are ephemeral are not ideal solved points. The ones that stay the longest are better than the ones that stay for a short number of frames.

Motion Graphics Brand Guidelines & Motion Graphics Responsive Design Toolkits

Votes

Translate

Translate

Report

Report
Community guidelines
Be kind and respectful, give credit to the original source of content, and search for duplicates before posting. Learn more
community guidelines