

- Home
- After Effects
- Discussions
- Re: After Effects Color Keying Out White (inside o...
- Re: After Effects Color Keying Out White (inside o...
After Effects Color Keying Out White (inside of objects and out)

Copy link to clipboard
Copied
Hey everyone,
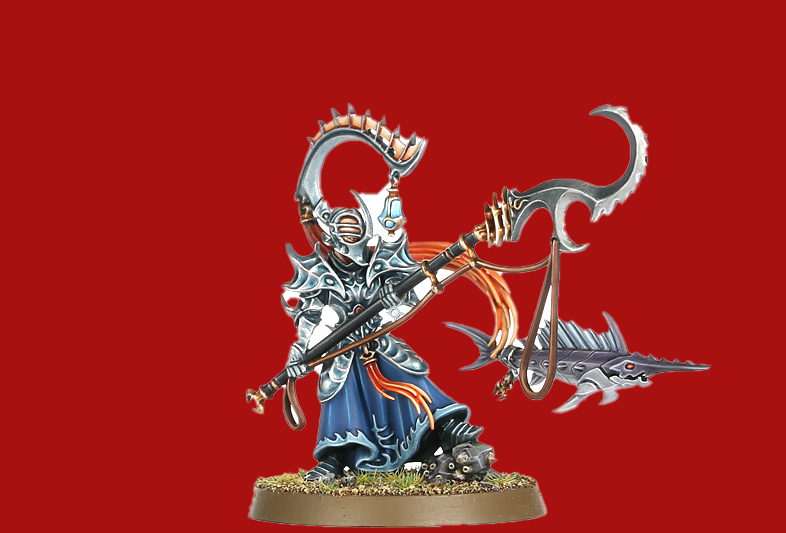
I realize there's dozens of color keying tutorials out on youtube and the web but they're never quite what I need. So after frustration of trying to figure it out on my own, I figured I'd reach out and specifically show you what I'm trying to do. To preface this, I've tried the Rotobrush, Color Keying Effects, Masking, and even just straight up Masking in photoshop (it works the best but it takes much longer than I want it to). The problem is that the background is white, and the model has pure white highlights due to a camera flash. So when keying white, it just eats all the white on the subject.


As a side note, the program I need to import this into really only needs the transparency/Alpha. I've also been trying to use the "Shift Channels " and " Remove Color Matting " with " Invert Alpha " to see if I can just export a separate image as an Alpha.
Any help would be amazing, as I usually use the Paint Bucket, invert fill, and animate the fills to remove all the white (took awhile) but it was still faster than Photoshopping out the white. Sometimes I have 48 images to do, sometimes I have over 300.


 10
Replies
10
10
Replies
10

Copy link to clipboard
Copied
If you've got loads of these to do on a regular basis - and it sounds like you do, first priority is to have a word with your photographer. With a bit of co-operation you could make this massively faster.
If the models have many reflective parts shooting them against a different background - even chromakey green - wont help as the curved edges will reflect the green bg.
I think the best way for you to do this is photographically - with two shots for each model:
Set up some lighting so you can shoot the model twice - with the camera locked down.
1. Shoot the model as above (Beauty shot)
2. Switch lighting to shoot the model against the bright white background - but with the model itself as un-lit and dark as possible - so you end up with a silhouette of the model against white.
In AE:
Layer 1: Silhouette.
Layer 2: beauty shot - set TrkMat menu to 'Luma matte inverted'
Job done.
Copy link to clipboard
Copied
Unfortunately for the older sets I don't have this option sadly.
At the moment I'm using some keying tools, then making a Shape layer of white that I draw with the Pen tool, and I've got keyframing turned on to animate the mask frame by frame.
But as I thought, it's more of a source material issue then. I've seen scripts for sale online ranging from $20-140 but I figured most of them just use what's already in AE just in various ways.
Thanks!
Copy link to clipboard
Copied
It I was doing it I'd probably be looking at Photoshop for a still image mask. Magic wand tool with a low tolerance and 'contiguous' on - so it doesn't select interior white pixels inside any 'boundary' pixels. Select the white background pixels. Make a layer mask from that, invert it and tweak as required. The Quick mask tool is another good option - it may be better / maybe worse depending on your specific image.

Copy link to clipboard
Copied
Are these image sequences or just stills?
If you’re just working with individuals still images I would do it in Photoshop. That’s a no brainer.
If this is an image sequence (video) I would experiment with overlaying a solid or using Colorama give you some kind of a color that you could key. Then I would use hold out masks to solve that problem. The goal would be to create a track matte that you could use over the original to pull the key. Your biggest problem is trying to do everything on one layer.
Copy link to clipboard
Copied
These images are full 360's, anywhere from 48 to 100 images. I import them into AE to get a good keying on models that aren't so heavy in white highlights/blown out and it does pretty well. But as mentioned above the pure white highlights get eaten up.
I'll try the matte and creating a function to batch process, that I hadn't thought of.
I am aware (to anyone who mentioned) of Photoshops masking tools, I was just trying to avoid using it. I used to manually mask every image, but I was hoping to find a much faster way. It was working quite good w/ AE until I encountered a lot of white/heavy highlights.
Thanks for all the replies so quick though.
Copy link to clipboard
Copied
Your biggest problem is trying to do everything on one layer. Concentrate on generating a good matte. You can try Colorama. And also try overlaying a solid and experiment with blend modes. Want you develop a good Matte all you have to do is put it above the original and use it as a track Matte.
If these are just stills however, I would just do it in Photoshop.
If I get a chance later I will throw your original image in After Effects and try a couple of things.

Copy link to clipboard
Copied
Have you tried using the "select object" function in Photoshop? It's incredibly smart and always surprises me. This image seems like a perfect job for it.
Just select the magic wand tool and the "select object" button will appear up on the task bar or menu bar or whatever its called.
Obviously once it's selected you have to invert the selection and delete it. Then save it in a format with an alpha channel. Create an action for it. Batch process....Mind blown

Copy link to clipboard
Copied
Eesh. That's a tough one.
Well, I'd like to add to the list of possible options!
In recent versions of Photoshop, this sort of work has gotten a lot easier. For example, with your example, I went to the Select menu and chose "Subject". It automatically generated this.
Now, that's left some holes you need to punch through, but it's a good starting point.
Literally less that five minutes of playing around in the new Select and Mask workspace, I got this:
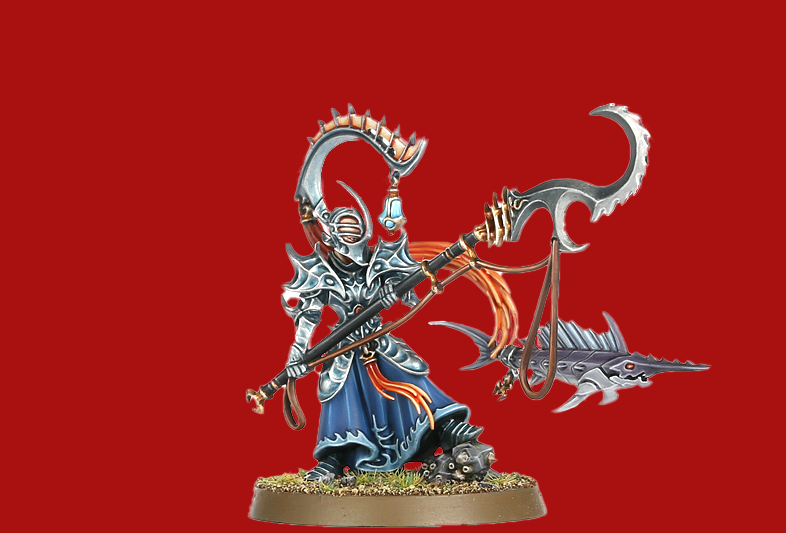
You can always tweak stuff like this, but it doesn't take much time to get halfway decent results in Photoshop.
Now, this is a no-go if you're doing video, but it's handy for just doing stills.
If you want to do it in AE, have I got a crazy tip for you: The Paint Bucket effect!
It's a very underused little tool, but it's got some handy uses.
One instance of the effect looks almost identical to "Select>Subject" in Photoshop. A few more instances and:
.png)
Better for video, but the more instances of it you need to use, the longer time it'll take (and, if you're needing to punch tiny holes in a moving video...)
Anyway, here's the file to see how to do it: Dropbox - Paint Bucket on badly lit model.aep
Copy link to clipboard
Copied
That's the exact tool I was talking about and I got the same results as you with default settings. I love this new tool or the new algorhythm it uses. It's reduced what used to take me 5-15 minutes down to a single button press. It's like magic
Copy link to clipboard
Copied
Yeah I've used the Paint Bucket Effect, it works nicely I was just trying to see if there was a faster more automated way. I throw a few effects of that on and then animate the hit points and it worked pretty good (it's my go to method).
As for the subject selection in Photoshop, that works great but I ran into a snag. Maybe because I'm new to batching commands but the
" Make " command won't trigger.
I select subject, mask, then save. But MAKE is what is making the mask and it shoots me an error..
Any idea's?


Find more inspiration, events, and resources on the new Adobe Community
Explore Now
 AdChoices