Animate the scaling of a mask
Copy link to clipboard
Copied
I am trying to create an animation where a blue solid is animated from the horizonal center and expands to fill the entire screen. Then a mask would use that same animation to then hide the blue to reveal another layer and text underneath of it. In short, the color would be filling the entire screen at the horizonal center, and then the solid would split at the horizonal center and the two halves would shrink near the top and bottom edges of the stage.
I can't seem to find this information anywhere, as everything I've found deals with revealing things by moving the position of the mask and not by animating what the size the mask is. Not sure if this is even possible. If there is a way (assuming I explained well enough the effect I'm going for). I could do it simple if it wasn't for me wanting to reveal two layers at the same time when the solid "splits" into two. If there's a better way to do this effect, that would be cool, as well.
Copy link to clipboard
Copied
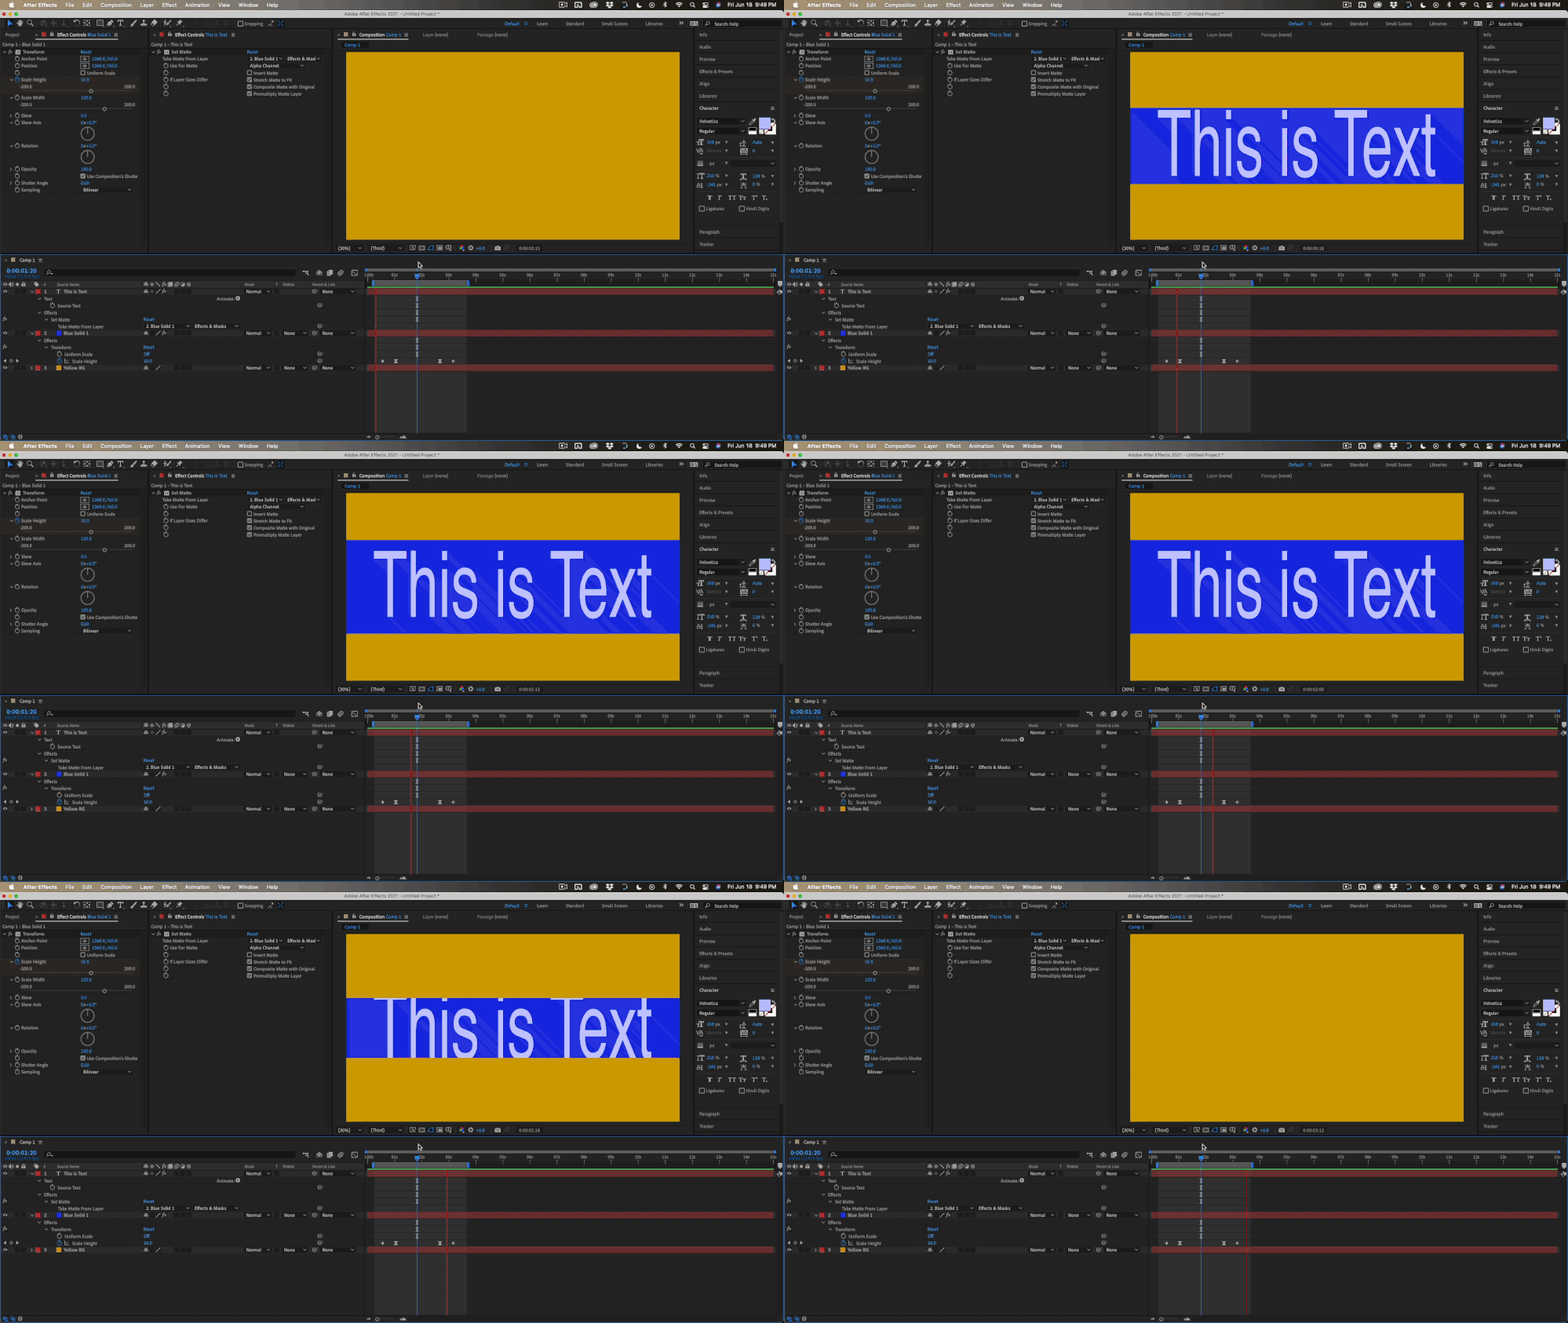
You can use the alpha (transparency) of one layer as a source for transparency by setting up a track matte. If you want one layer's scale property to control another layer you can use parenting or tie the scale properties together. You could also apply the Transform effect to the blue solid and scale it vertically, then use Set Matte on the Text layer to look at the alpha channel of the animated blue solid. You would need to turn on Effects and Masks for the source layer in Set matte and you can't use Scale from the transform property directly because of the rendering order. From what I get from your description the comp would look something like this:
A screenshot embedded showing where you are so far with your comp would help. The screenshot I embedded shows you everything I did. The Effect/Transform/Scale Height keyframe values are 0, 50, 50, and 0.
* The "Drag & Drop here..." area is buggy and should not be used to share images. Please use the toolbar or just drag your images to the reply field.
Copy link to clipboard
Copied
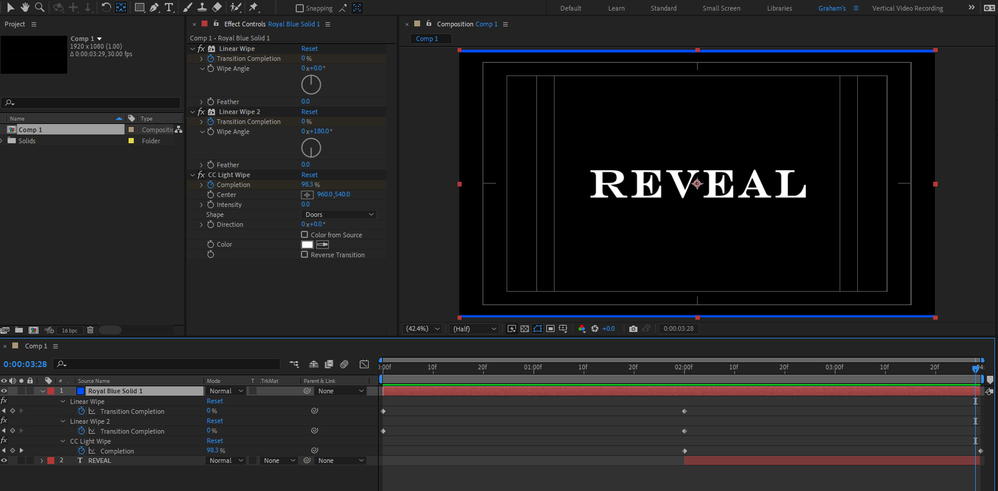
To get the blue layer to split in the middle and expand out, I think you can probably get away with using CC Light Wipe with the intensity set to 0:
Copy link to clipboard
Copied
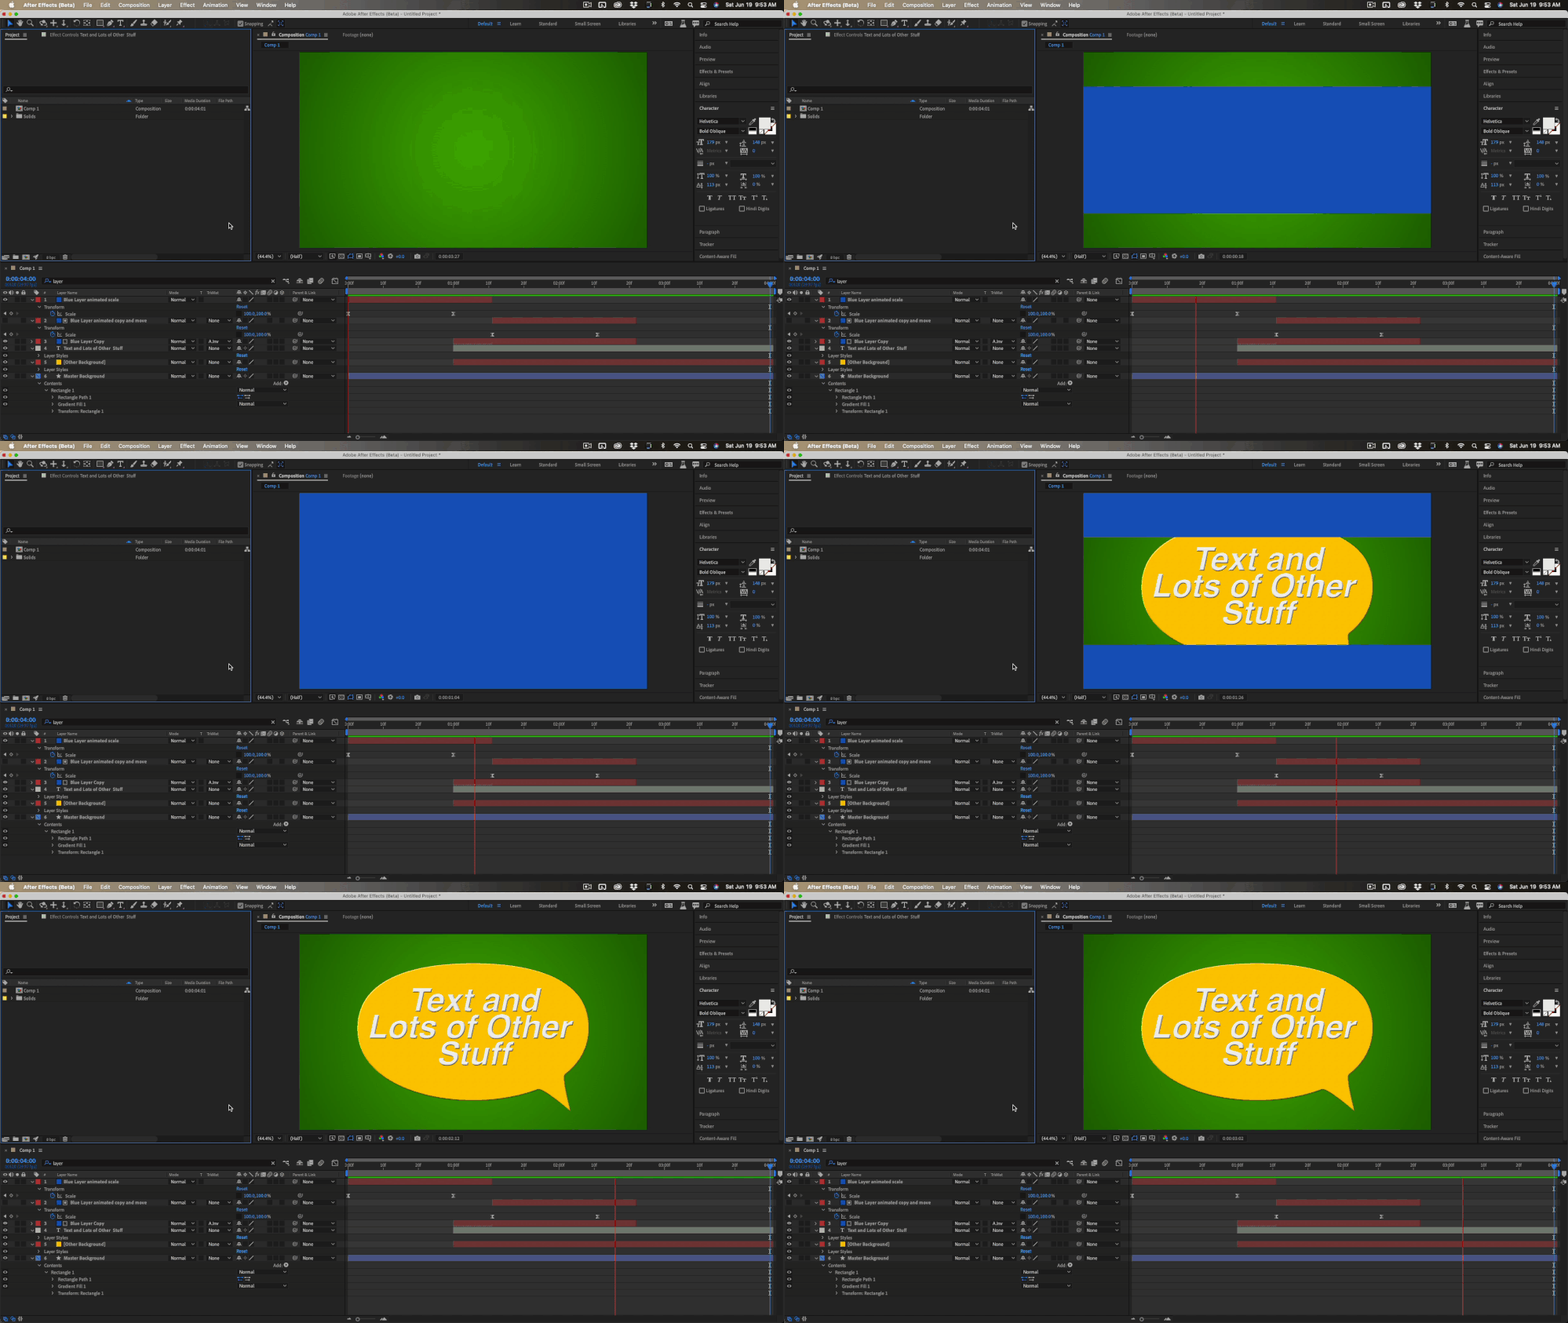
As I read your explanation again I see other options. By far the simplest solution is to use more than one blue layer.
Layer 1 (Blue layer)
- animate scale from [100, 0] to [100, 100] to make it expand from the center and fill the screen
- set the out point for layer a few frames the last keyframe for scale
Layer 2 (Blue layer copy)
- Move down the timeline so that the in point is where you want the transition to begin again
Layer 3 (Blue Layer Copy without any animation or keyframes)
- Set Layer 2 as an alpha inverted track matte
- Match the in point with Layer 2
Layer 4 (Text layer)
- Set in point the to the same as Layer 2
Layer 5 (Other stuff)
- Set the in point to the same frame as Layer 2
Layer 6 (Main Comp Background)
- In point of the layer is the first frame of comp
It looks like this:
There are about 3 other simple ways to do the same thing. Some don't require as many layers. One uses an animated mask, but I think this approach is one of the easiest.
Copy link to clipboard
Copied
I'm trying this method, and I'm running into some roadblocks.
- What did you do on the master background layer, and does that matter to the animation working right?
- When I went to make the layers, I had parented the third layer to the second and put the Alpha Inverted Matte to layer 3 as shown, but it looks like it's not doing anything to the second layer. It looks like all it's doing when I try it this way is that the second layer just repeats exactly what the first layer did, and the first layer goes away when it hits the out point in the timeline. I feel like there's a step I didn't do here (although I didn't make the master layer). Do I have to reverse the animation I have in the second layer when I go to make that? What am I missing besides the master layer that causes the animation to just repeat instead of it having the desired effect?
Copy link to clipboard
Copied
I am showing you everything that was done to the layers.
Layer 1 only has the scale modified so that it expands horizontally.
Layer 2 is a copy of layer 1 that has been moved down the timeline. No keyframes have been changed, the timing is just different
Layer 3 is another copy of layer 1 but there is no animation and the scale is set to 100, 100 so it fills the frame. Layer 2 is used as a track matte for this Layer 3 set to inverted alpha so that the transparent area of the track matte makes Layer 3 visible. This makes layer 3 appear to split in the middle and open up. This makes a hole that reveals Layer 4, the text layer, and Layer 5, and Layer 6. You can't see layer 6 because it is below layer 5.
There is no parenting. All I have done is hidden everything below Layer 1 by animating the scale, then used a track matte to reveal everything below layer 3 by using a track matte after layer 1 ended. Layer 1 and 3 are identical so that when the cut is made between Layer 1 and Layer 3, you do not see the change.
The master background is a green gradient shape layer with no animation. The Other Background (Layer 5) is just the Yellow Text Bubble to show you that when the hole is made in Layer 3, the blue solid layer, you can see everything below layer 3.
If you only have one layer below your text layer then it should work. If all you have is the first 3 layers, then the text will be revealed.
If the second layer is still showing then you have either turned the visibility of Layer 2 back on or you have not set it as an alpha inverted track matte for Layer 3.
It would really help me help you if you just took a minute to select all your layers, press the 'u' key twice to show all modified properties, then took a screenshot of the entire UI and embedded it in your reply using the toolbar's Insert Photos tool.
Find more inspiration, events, and resources on the new Adobe Community
Explore Now


