• Global community
    • Language:
      • Deutsch
      • English
      • Español
      • Français
      • Português
  • 日本語コミュニティ
    Dedicated community for Japanese speakers
  • 한국 커뮤니티
    Dedicated community for Korean speakers
Exit
0

Changing the values in the Raw Camera settings when importing a Raw Photo Sequence for each photo.

New Here ,
Dec 05, 2022 Dec 05, 2022

Copy link to clipboard

Copied

Hello!

I have a time-lapse of 500 raw sunset photos. When importing a photo sequence into After Effects, RAW camera are made settings only for the first photo and saved in XMP file. The result is bad for the last images or in the middle because these photos require different settings in the RAW camera. 


How can this problem be solved? Is it possible to make keyframes in the RAW camera settings?

For example, I need to put a keyframe for the first frame and the last frame in Shadows, so that for the frames in the middle there is a linear interpolation for the Shadows settings. I understand that it is necessary to create an xmp file for each photo in the sequence. How can I do that?


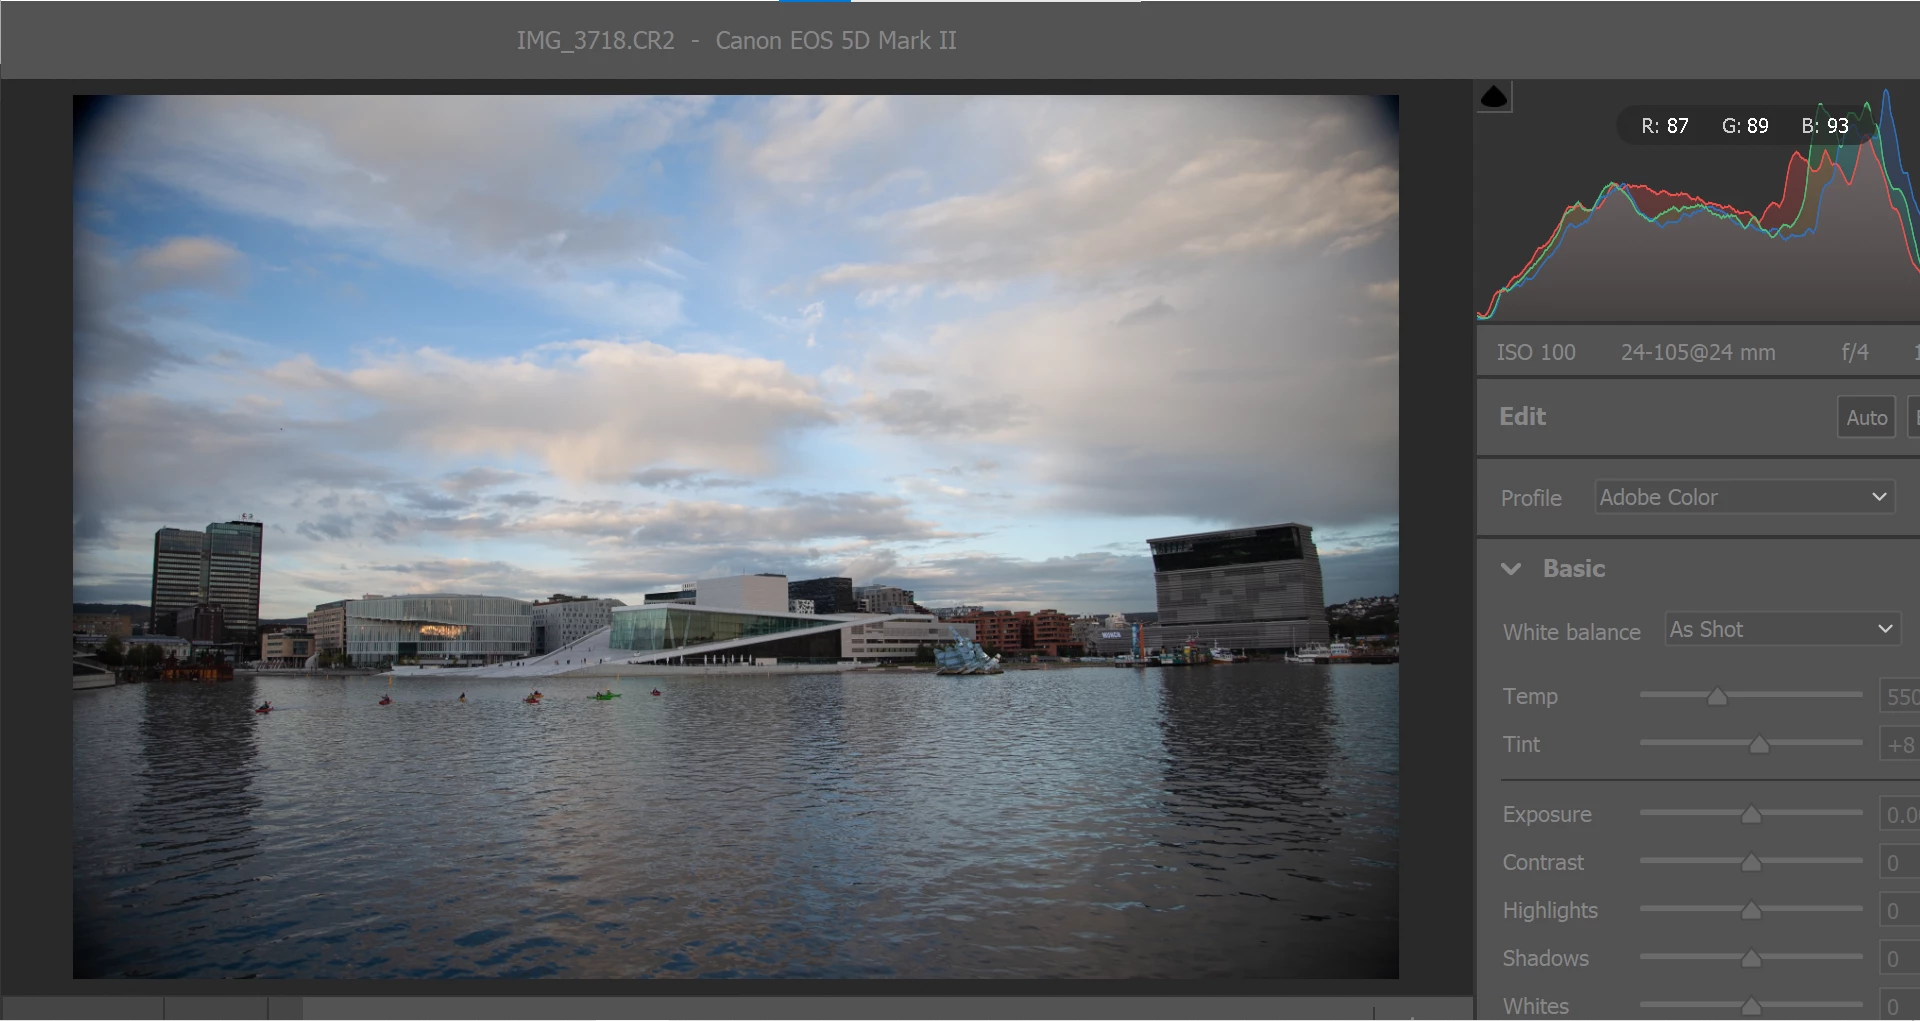
And the second question. I have a bug in the RAW camera settings window. The window does not fit into the screen and it cannot be made smaller. What is in the picture is all that fits into the screen. I can't even lift it up to see the "OK" and "Cancel" buttons. Who knows what's the problem here?


yanm24868867_0-1670279935633.png


TOPICS
Error or problem , Import and export , User interface or workspaces

Views

305

Translate

Translate

Report

Report
Community guidelines
Be kind and respectful, give credit to the original source of content, and search for duplicates before posting. Learn more
community guidelines
Community Expert ,
Dec 05, 2022 Dec 05, 2022

Copy link to clipboard

Copied

If your time-lapse requires a different color grade for each image, the likelihood that it will flicker terribly is very high. The normal workflow is to lock the exposure and color correction for the most important image in the sequence, then apply that to every image in the sequence. That is pretty easy to do in Lightroom, then export a properly sized TIFF image sequence, and you're done. Trying to individually adjust each frame would be a nightmare. 

Votes

Translate

Translate

Report

Report
Community guidelines
Be kind and respectful, give credit to the original source of content, and search for duplicates before posting. Learn more
community guidelines
LEGEND ,
Dec 06, 2022 Dec 06, 2022

Copy link to clipboard

Copied

You cannot animate any of this stuff and it would be a nightmare to deal with because e.g. a simple exposure adjustment affects the whole color appearance. Even trying this would give terrible results. That being the case the proper way to proceed is to create a sequence with averaged out results as Rick already explained or to use multiple sequences with different settings, but applied to the sequence as a whole and do cross-fades across them as needed. Any attempt to muck around with animated color corrections will be a disaster. You would only apply secondary grading once you have created your initial sequence in a pre-comp and tweaked it to your liking.


Mylenium 

Votes

Translate

Translate

Report

Report
Community guidelines
Be kind and respectful, give credit to the original source of content, and search for duplicates before posting. Learn more
community guidelines
New Here ,
Dec 07, 2022 Dec 07, 2022

Copy link to clipboard

Copied

Hi Mylenium, 

Hi Rick,

Thank you for your responses. I will still need to correct flickering as the sunset is shot with a gradual increase in exposure time. I don't think that linear interpolation between keyframes turns out to be productively terrible. Now I'm doing several sequences with different settings and then combining them into compositions using fades, as suggested by Mylenium. However, this method is long, especially since I have dozens of such footage. I would like to find a simpler solution.


Votes

Translate

Translate

Report

Report
Community guidelines
Be kind and respectful, give credit to the original source of content, and search for duplicates before posting. Learn more
community guidelines
Community Expert ,
Dec 07, 2022 Dec 07, 2022

Copy link to clipboard

Copied

LATEST

I have been shooting timelapse for more than 50 years. The trick is to set the camera's exposure to manual and the exposure for the brightest part of the day you expect. Auto exposure is a deadly sin. Back in the film days I did a project with a moving camera that followed the sun from sunrise to sunset in Glacier Park. The exposure time was 1/10th of a second. There was an ND filter on the lens because I wanted to capture motion blur on any movement in the foreground but eliminate motion blur on the horizon. The brightest part of the day would require F-16. I rigged up a timer and a motor on the iris control so that the exposure would ramp up from F-4 to F-16  starting an hour before sunrise, then holding f-16 for the whole day until sunset, then smoothly opening the iris back up to F-4 over the next hour. The final shot was 28 seconds long, and it looked like there was a half-second fade up to the sunrise and a fade out at sunset. The sky went from about 70% overcast to about 10%, to about 25% at sunset. The shot worked. I don't know of any accessory or camera app that would allow you to repeat the same iris change with digital cameras, but the point is that the exposure settings did not change for about 14 hours, even though the light did. 


I also shot a timelapse of the construction of a 30-story building in the 70s. The camera shot 15 frames a day for 9 months. The exposure time was the same for every day, It was always set to sunny day 1/50 @ F-16. It looked great. 


I found an example from a project I worked on in 1987. A music video for Tangerine Dream. 

No exposure change, just a lighting change.


Next time, set the camera to manual and you should not have any flickering problems.

Votes

Translate

Translate

Report

Report
Community guidelines
Be kind and respectful, give credit to the original source of content, and search for duplicates before posting. Learn more
community guidelines
LEGEND ,
Dec 07, 2022 Dec 07, 2022

Copy link to clipboard

Copied

The solution is to shoot multiuple exposures next time and create sequences from those. Otherwise you can of course try to stabilize variations with effects like Timewarp and "mooshing" up your images with forced temporal interpolation just like you can use dedicated third-party plug-ins like RevisionFX' DE:Flicker, but there will always be limitations. Not to question your photographic skills and methodology, but the golden rule for any timelapse/ hyperlapse is to not mess with such variable parameters and shoot with fixed, predictable values. Depending on what camera you have you may in fact consider their built-in HDR/ multiframe/ short clip functions to that effect or simply use multiple cameras with different settings.


Mylenium

Votes

Translate

Translate

Report

Report
Community guidelines
Be kind and respectful, give credit to the original source of content, and search for duplicates before posting. Learn more
community guidelines