- Home
- After Effects
- Discussions
- Copy and mast Mask Path on a light calc position a...
- Copy and mast Mask Path on a light calc position a...
Copy and mast Mask Path on a light calc position and it offseted and scaled up
Copy link to clipboard
Copied
Hello guys,
I am looking for help on a problem I have since this morning and can't find why.
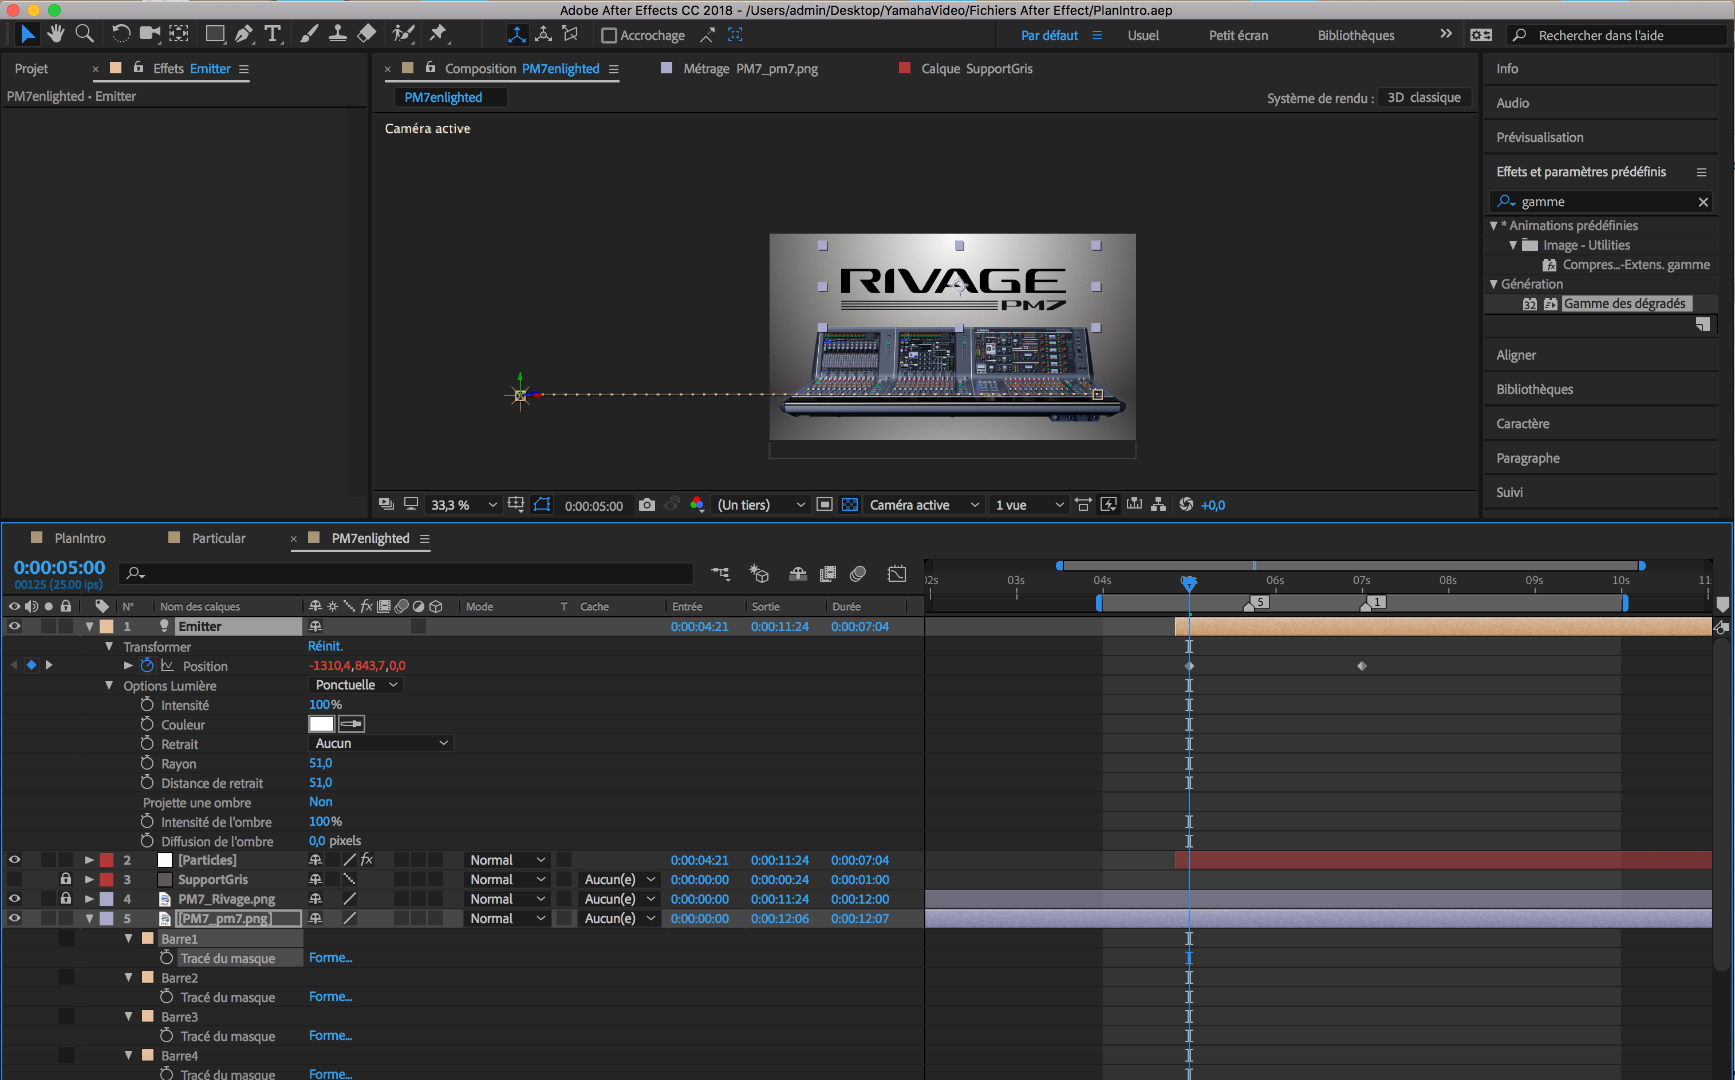
On the screenshot below you can see that the orange line that should be on the first bar below "RIVAGE" is offseted and scaled.

I copied the mask path (tracé du mask) and pasted it on position on the light calc called "Emitter" and it's not matching the bar that I traced with the pen tool.
Does anybody has a clue on what parameters could influence this so that I can fix it or if it comes from something else?
Thanks a lot for your help!!
Cheers!
Copy link to clipboard
Copied
Nothing ominous here. Lights are 3D, masks are 2D. Inevitably there are bound to be discrepancies, even more so since you don't use a real 3D camera layer that would allow to determine how things look through the imaginary lens. You need to brush up on your workflow and understand these differences.
Mylenium
Copy link to clipboard
Copied
Select the Mask Path: Choose the mask path you want to copy in your design or editing software.
Copy the Mask Path: Use the copy command (Ctrl + C or Cmd + C on a Mac) to copy the selected mask path.
Navigate to Light Position: Move to the light position where you want to paste the mask path.
Paste the Mask Path: Paste the mask path using the paste command (Ctrl + V or Cmd + V on a Mac).
Offset the Mask Path: Adjust the mask path's position by dragging it to the desired location.
Scale Up in Increments: Increase the size of the mask like vinyl path in 10-point increments. You can use the transform tool or size attributes to achieve this.
Repeat as Needed: Continue the offset and scaling process as necessary, maintaining the 10-point scaling increments.
Create a Text Layer: Add a new text layer in your software for the vinyl words.
Type Vinyl Words: Enter the desired text in the text layer and adjust the font, size, and color to match the vinyl style.
Position and Review: Position the text layer appropriately within your design, ensuring it complements the mask path and light position. Review the entire design for consistency and make any final adjustments as needed.
