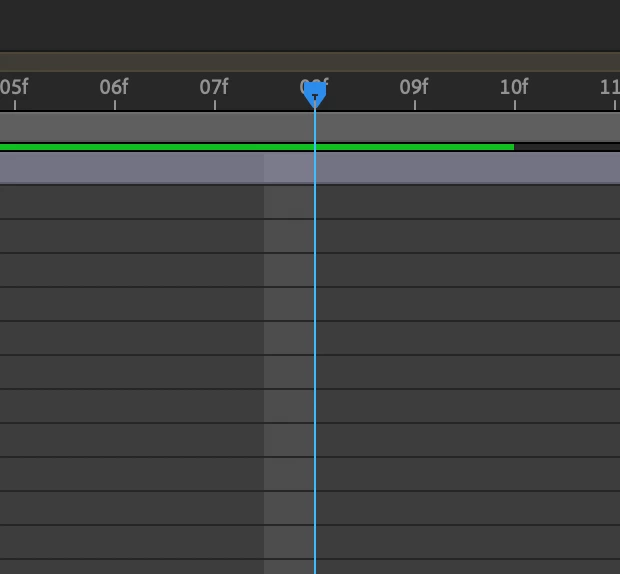
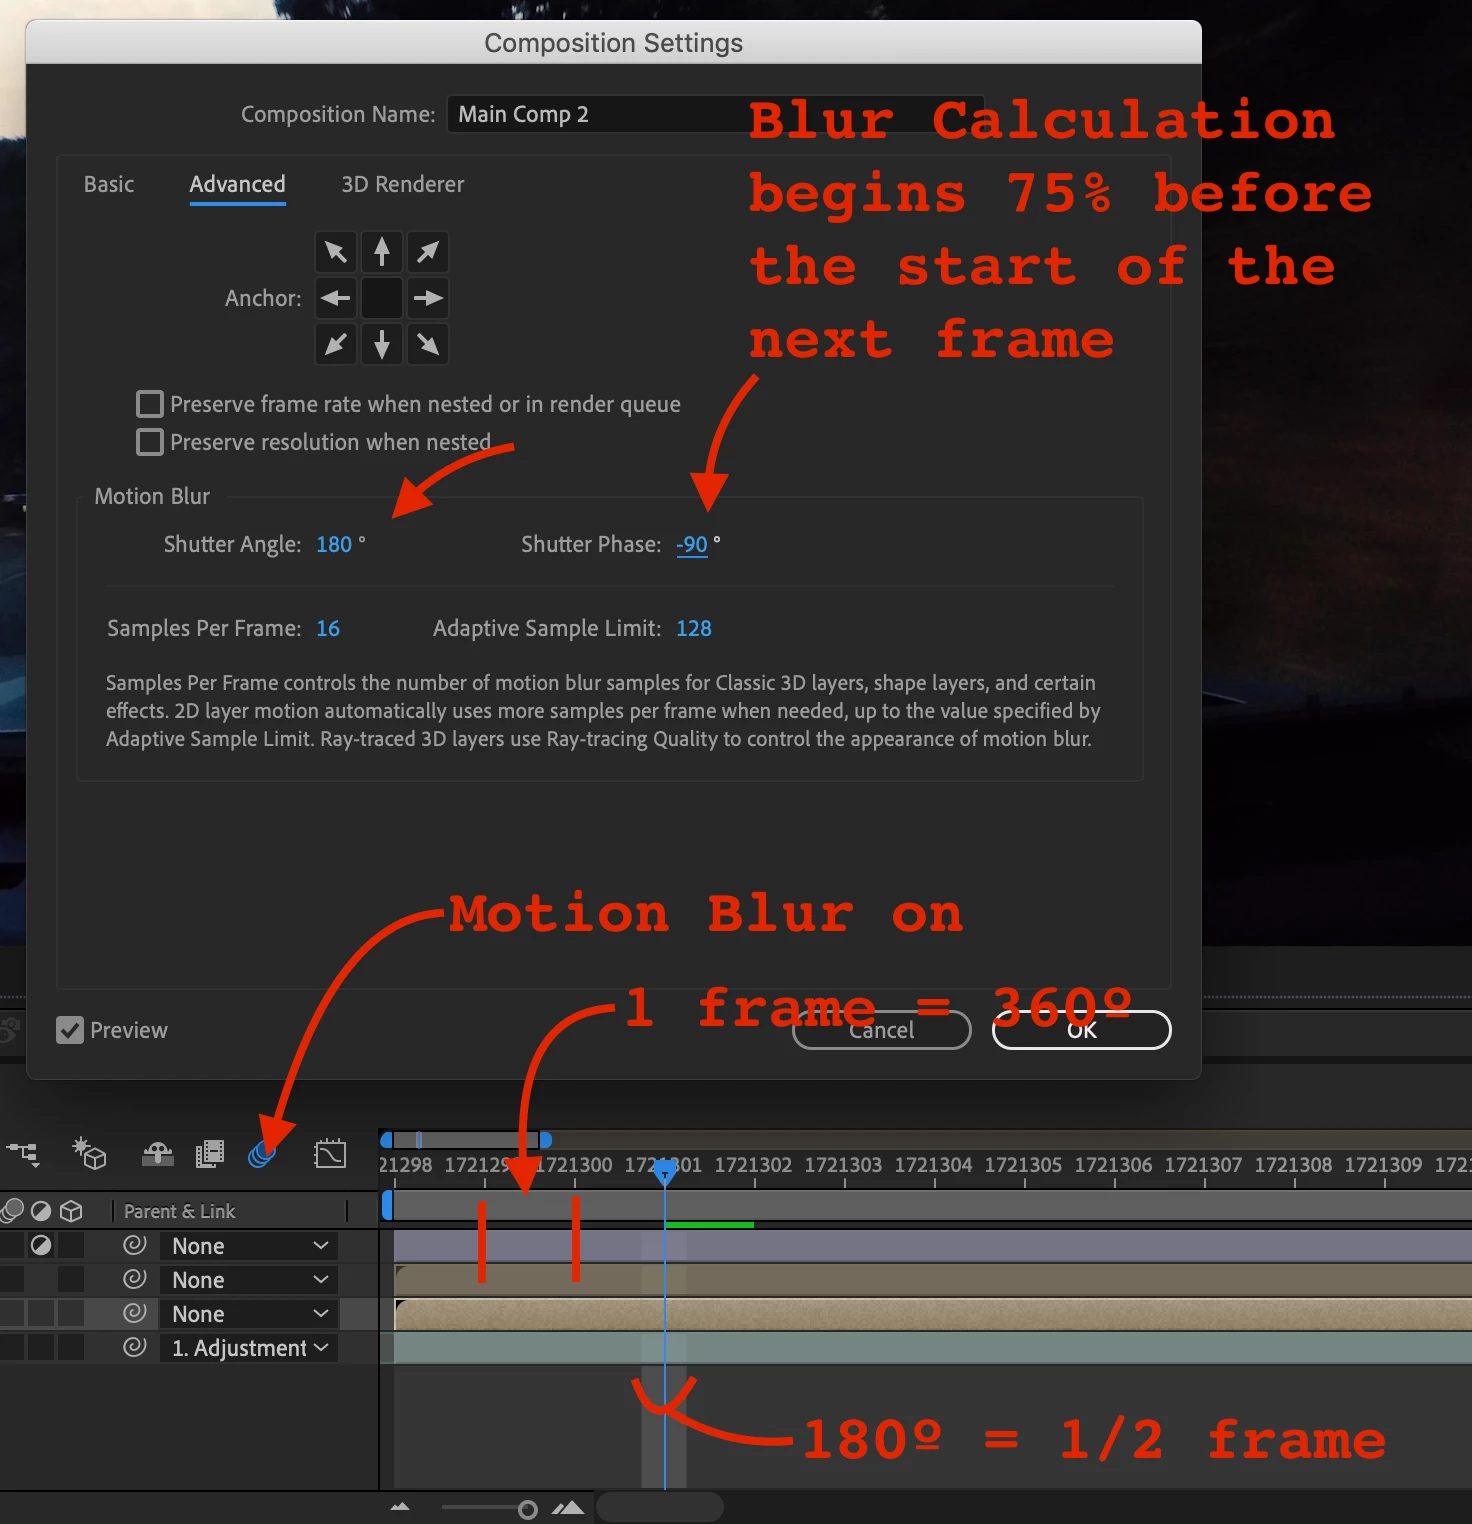
When you turn Motion Blur on in your Timeline the highlighted area shows the parts of each frame that is calculated to create the motion blur. Your Advanced Comp settings look to be a 180º Shutter (normal) but the offset is -180º and the standard is -90. Maybe this screenshot will help:
Open up the Advanced tab in Composition Settings and fiddle with the controls. Turn of motion blur in the timeline and the display will revert to highlighting the entire frame.
The look and appearance of motion blur depend on the shutter angle and phase. A "normal" film camera with a fixed shutter has a shutter angle of 179º to 180º depending on the brand. This is what gives you the "film look" that producers like. The exposure time for a 180º shutter running 24 fps is 1/48 of a second. Increase the shutter angle you get more motion blur, decrease it and you get less. The shutter phase, which is not adjustable on a film camera because the film would be moving, is available in AE to give you the option of combining a little of the movement in the preceding or following frame with the calculations. -90º is closest to what you get with a film camera.
I know this stuff because when I started in this business everything produced for television that was not live or recorded directly to tape was shot on film cameras and we had to understand how the shutter worked. Here's more good info: What is Shutter Speed and Shutter Angle