 Adobe Community
Expression request
Copy link to clipboard
Copied
Hi Guys,
I tried to stay away from After Effects and concentrate on sound - but I have failed! I am hopelessly addicted to AE - there is no turning back!
I have a question about expressions. I have started getting my head around them, but was wondfering if one of you had some advice offhand on the following.
I have a scene set up - very simple, 3 Solids, one camera and a Null object - all 3d.
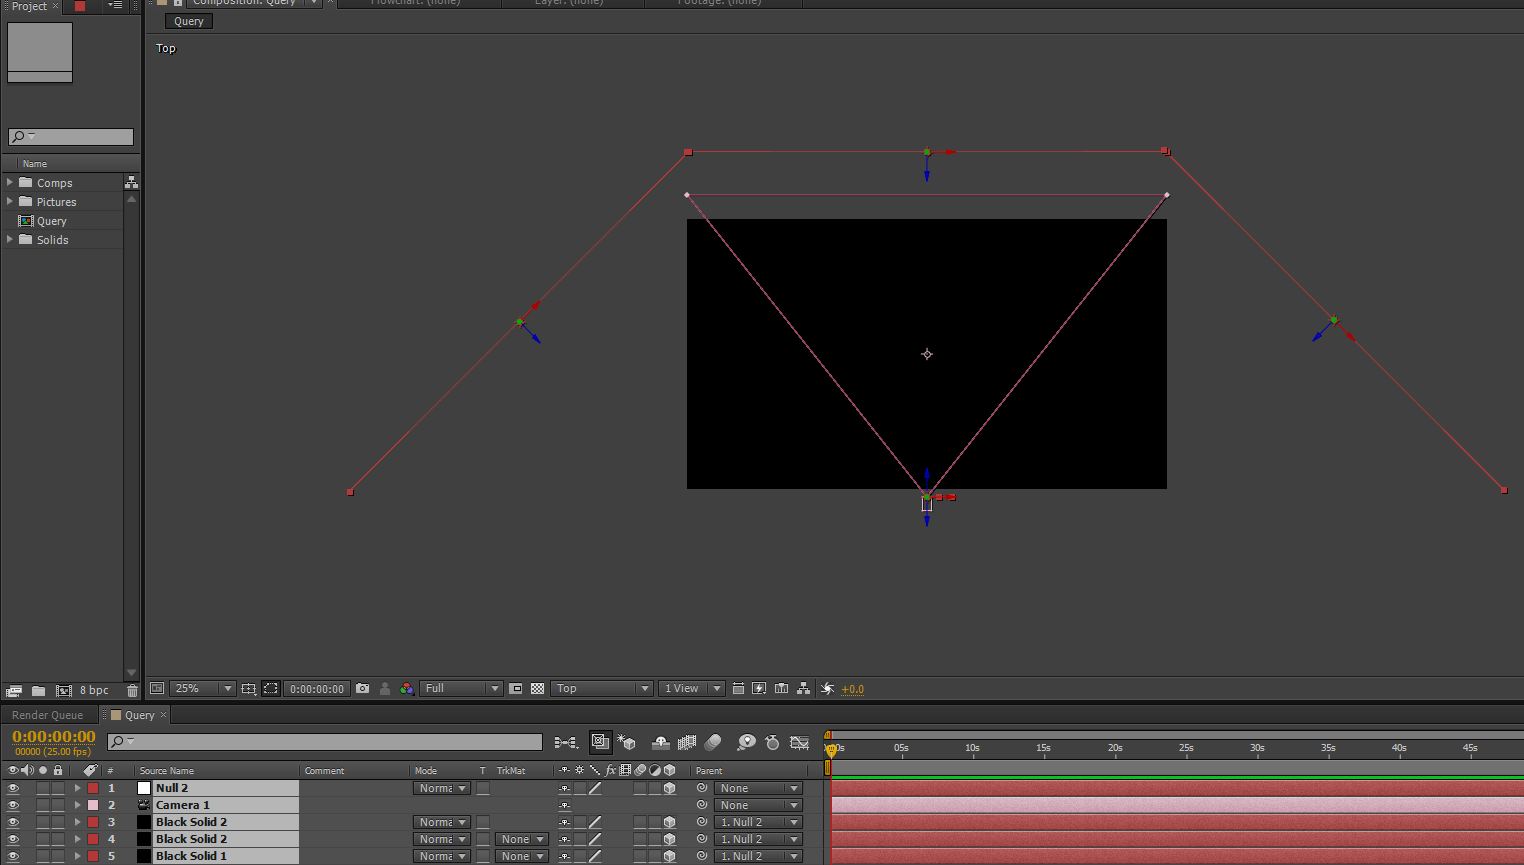
What I want to do now, without having to work out the math and angles (because I am lazy) is have the three solids duplicated, and placed at 45degrees on the "X" axis, in 3d space with the bottom edges touching the top edges of the layers below. I then want to duplicate again, and put a further 45degree on the "X" axis to create a ceiling. To end up with something almost, but not quite, entirely unlike this....

I would like to know if an expression can be used over a script that creates a specific shape, because I might like to add or remove solids depending on what I want to create.
To be honest, This is not something I need for a current project, but I am trying out a few things, and thought this would be an interresting place to start with expressions (having "wiggled" about as much as is alowed for one compositor!)
Thanks guys
Pierre


 12
Replies
12
12
Replies
12

Copy link to clipboard
Copied
Not quite sure what you are getting at. If you're planning to do Platonic primitives, you'll have to get much deeper into the math side of things. There's only so many possible solutions for any n and p (n being the number of sides, p being the number of faces) and some of them involve combinations of multiple n-gon types (there is no determinate solution for just pentagons for instance). If all you want is to create tubes, arcs and other relatively simply geometries, you might wanna check my page's 3D elements section...
Mylenium
Copy link to clipboard
Copied
Hi,
Thank you. I will check out the pages now. To be honest, I dont know yet exactly what I want either! 
I am trying to get out of looking into Adobe Audition, so I am making excuses to find something to do! My plan for Adobe dominance, was to create a complete closed 3D world of solid layers, placing a camera inside it, and being able to do complete 360degree pans with the camera.
If this is even possible, I am not sure, but surprisingly, I have had some degree of success while waiting for replies. It was a very manual process, and it is not 100%, but for someone new to After Effects 3D capabilities, it actually looks really exciting and possibly even usable for ourr project. 
Ill check your links out and see what I can find. Thank you for the reply.
Pierre

Copy link to clipboard
Copied
I'd look at Trapcode Horizon for creating your 3D world. It's a lot easier. Another option is to map an image to a large sphere and put the camera inside the sphere. Conoa Sphere is good for this. Trapcode horizon is an easier solution. One properly sized layer and a couple of adjustments and you're done.
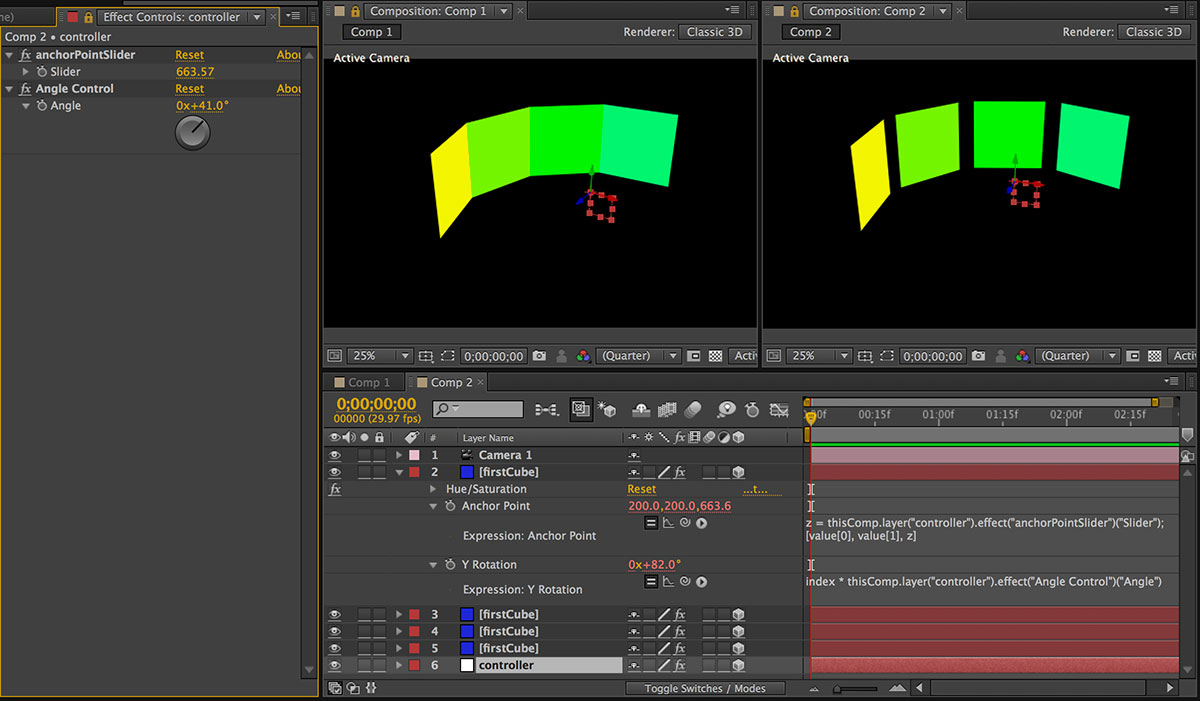
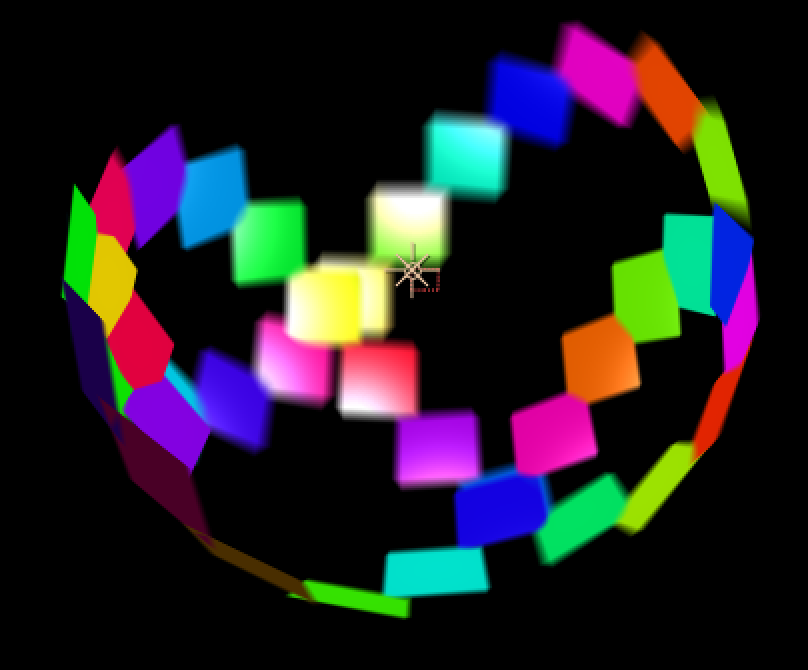
If you want to evenly distribute 3D solids around a composition and you can get away with adjusting the position by hand a simple index * the angle of y rotatioin tied to an expression controller and a slider for Z anchor point added to a null used as the parent for your 3D layers would do the trick. Takes about 2 minutes to set up with the pickwhip. Rather than write it out, here's a screenshot.
Copy link to clipboard
Copied
Hi,
Thanks Rick, this is great. Ill try it out tomorrow. Ill give a run down of what I did today - just for the fun of it. My way was INCREDIBLY manual, but the outcome was not that bad. Now, with the help of your suggestions above, Ill be able to get it done quicker.
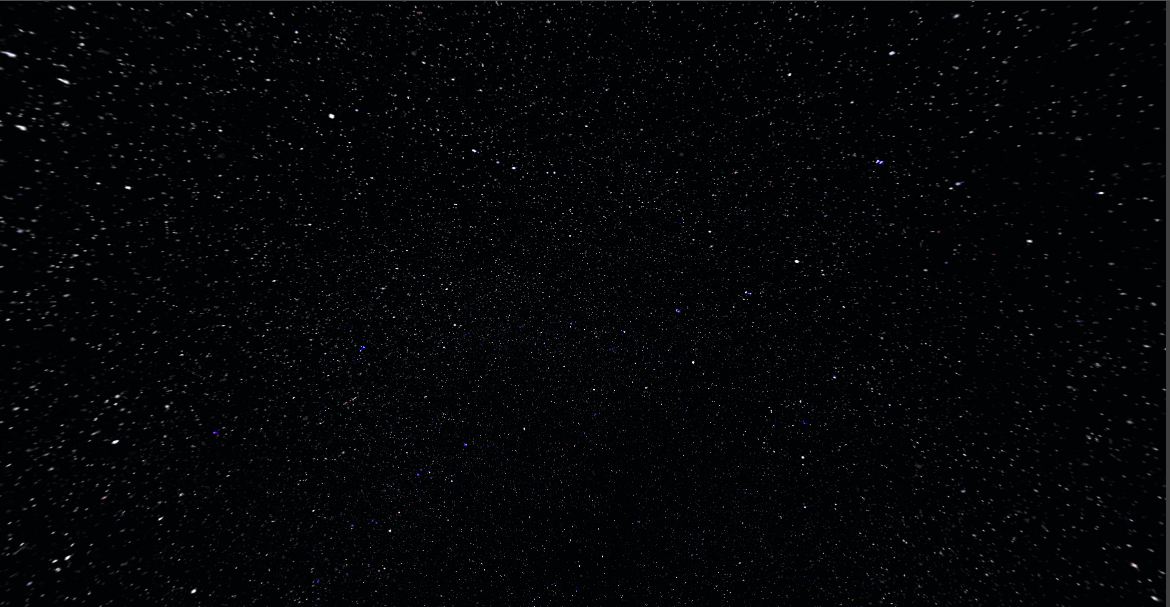
We created a 2000X2000 starfield. It was created in photoshop from a NASA image, heavily altered and set against a "Just-off" black background. I imported the layer into AE. Duplicated the layer and move the anchor point to centre of the bottom edge. I then moved the duplicate up so that the bottom and top edge joind. I then rotated it by 45degrees. I then duplicated this layer, moved it up and rotated by 45 degrees (to 90degrees). I did this all the way around, creating a nice starfield ring. Once this was done, I dupliicated the first layer again, moved the anchor point to the middle of a side edge, moved the layer to the left so that they joined at the edges and repeated the process all round. I was now sitting with a cross of 3d star layers. I then created my old friend (whome I always forget) - the NULL object, and set it to the centre of the world I created. I thebn duplicated an entire set of solides and parented them to the null. I rotated the null, which caused the set of rings to rotate and nicely fill the gap from top left to bottom right. I repeated this to fill in the last holes. All layers that were 100% on top of each other I disabled. I then created a camera and placed it inside the circle. I also created a new precomp of the earth, using nasa images and cc sphere and placed it as a 3d layer intot the project. I focused the camera onto the earth layer, and set the earth layer to "orient to camera". (yes, I know by now all of you are groaning while reading this - but as my first attempt, without the expressions knowledge...hehehe). I created yet another null and labelled it as the camera controll, parenting the camera to it. now, rotating the earth in its precomp on the "Y" axis by 1 full cycle over the comps lenght, and rotating the camera null the same, I get a pretty decent fly-around on the planet.
now, I will go about creating a larger starfield layer, better star layout around it, and in the same comp, push them all further back in Z space.
And there you have it. A slightly crippled, not too shabby 3d star world! 
Thanks for all the input, I will definitely try the easier way next time.
Pierre
Copy link to clipboard
Copied
Try this project file. It might give you some ideas.
Copy link to clipboard
Copied
Hi,
This is great. Thank you. I will download tomorrow at the office and check it out.
Pierre
Copy link to clipboard
Copied
Fun....
Copy link to clipboard
Copied
Hi Rick,
Thank you for the project. It has been my first introduction to using sliders. It took me a while to figure out what the heck was going on, and a few false starts in attempting to re-create it. I took the project apart, and have now been able to recreate it several times. I used the process for the starfield, and it works beautifully. so much faster. I create the first loop with this, then create a few nulls, duplicate the layers and parent to the nulls. Rotate the nulls a few degrees, and by messing around with the size and angles, I can create a very smooth circle to work inside.
I also tried trapcode horizon. I have not used it before, but I do have the trial versions. I did not make many changes, but used the picture I have. My only issue with horizon, is that the picture on the sides of the comp view, seem to stretch in and this destroys the illusion of being in space. Is this the way horizon works, or are there settings to edit that get around this. If it just works this way, no hassles, Ill continue to refine my own comp. However, if horizon can be made to better present a 3D world of stars, Ill look into purchasing it.
Thanks again,
Pierre
Copy link to clipboard
Copied
There's another way to create a very 3D starfield all inside AE that is very convincing. You only need 2 layers and some expressions. The trick is offset, blend modes and scale. If your starfield has an alpha channel you don't need to use blend modes.
Here's the theory. You create a starfield similar to the one you have that is about 4 X the comp size, let's say 4000 X 4000 pixels. If the star field does not contain very many unique features then it doesn't need to be much bigger than the comp. The trick to the star field is that it needs to be setup to be usable as a tile. IOW, if you were to offset the starfield 50% you would not see a seam. You create another star field that's slightly different. There are a bunch of ways to create this kind of star field inside AE with CC Ball Action or with Photoshop using nothing but noise and threshold.
Here's the real trick, the starfield layers are 2D, they just look 3D because of the difference in scale and offset.
Now you tie the scale of both star fields to the distance from the camera using an expression so that they both scale at a ratio of the distance between the camera or the camera dolly (I almost always use a null to move and point the camera. Just as in the real world, a dolly or null, gives you more precice control).
You then tie the angle of the camera's orientation to the value of the offset. As the camera pans and tilts the background is offset. Each starfield layer has a slightly different value so they move at slightly different speeds.This is why you must have a starfield image that's seamless. As the camera moves in any direction you'll get parallax between the stars that makes them look 3D. It's basically the way they made starfields in Star Wars.
I made a starfield in the 70's by simply poking holes in a piece of black paper, putting a light behind it, then dollying into the paper slowly. I rewound the film in the camera, turned the paper upside down, then photographed similar movement a second time double exposing the film. This gave me a 3D effect of moving through space that was very convincing.
I set up this comp in just a few minutes. There's a shape layer representing a plannet. I put in a camera move with a tilt and pan so you can see the 3D effect. There are a couple of sliders to adjust the relative offset for tilt and pan. Rotation even works (rotate in Z). Simple, convincing, and with the right star field layers, beautiful. There's no complex math. Everything came right from AE's built in expression library.
Enjoy.
Copy link to clipboard
Copied
Hi Rick,
This is great. Thank you. I will wait for the star field to be finished and then placi it in this example and take a look. Our initial episode, thankfully, calls for many space scenes, but not a lot of complex movement, so Ill be bale to play around and get to know it better. I spent some time last week on the 3d Distribution template you sent, and really had quite good success with it! so once again, thank you very much.
Lets see what nex challanges this week brings us!
Pierre
Copy link to clipboard
Copied
There's a funny thing in our perception of space travel in the movies. In reality we can only perceive a parallax shift at a distance of about 12 miles. That's about the limit of human perception. When you look at actual footage from the space station or even a deep probe spacecraft the stars are simply fixed points in the background. There's no parallax or perspective effect because they are billions of miles from the camera. We've come to expect to see this parallax shift because they introduced it into our visual memory in the movies. In order to actually see a perceivable parallax shift in a star field like the one that I simulated with those two layers, you would have to be traveling at near the speed of light or faster. Then, who knows what it would really look like?
For most of your space backgrounds you can probably achieve perfectly acceptable results with a single layer and offset controls set to a small multiplier value. It's movement in the foreground and middle ground objects that will make the space travel more believable than movement in the star fields in the background.
Copy link to clipboard
Copied
Hi,
Thanks for the advice. It is actually something we have been chatting about here, and trying to decide on. there are surprisingly few space shots, and they will probably be mostly still shots, whit, as you say, middle ground planets and foreground ships moving through.
My next task (should I wish to take it - no wait.....I have no choice! ) is to figure out 3D camera movements. The example you sent has a very nice camera movement, and for me, completely mind blowing - Yes, I know it is a simple movement, but I have not started on the actual 3D camera controls yet.
I usually do the same as you, but adding a NULL as the control, but I have not done anything other than single axis rotations. I am going to look at the "Andrew Devis" tutorials today - I remember he had a section on 3D camera control that was quite good. I will also look up any other camera material I can find.
What a year this has been! Starting with "What exactly is a 'Solid'" and now ending with 3D camera movement (and evrything else inbetween). 
Pierre

 AdChoices