Copy link to clipboard
Copied
Hey Everyone,
I'm trying to put some pictures on the wall on a video clip using After Effects CC 2018.
I used 3D Camera Tracker to create objects on the wall, then placed the pictures I wanted as the objects to be tracked, and arranged them accordingly.
When I preview the clip, it shows the pictures gradually crowding together until they are completely out of place. I can't figure out where the movement is coming from or what I'm doing wrong. The same thing happens when I try to use Motion Trackers and Null Objects. All I'm trying to do is keep them in place as the camera moves.
Here is the clip for reference: https://youtu.be/P_5t8OUtiwI
You'll notice the crowding starting to happen about halfway through. Any help or suggestions would be greatly appreciated. Thanks so much!
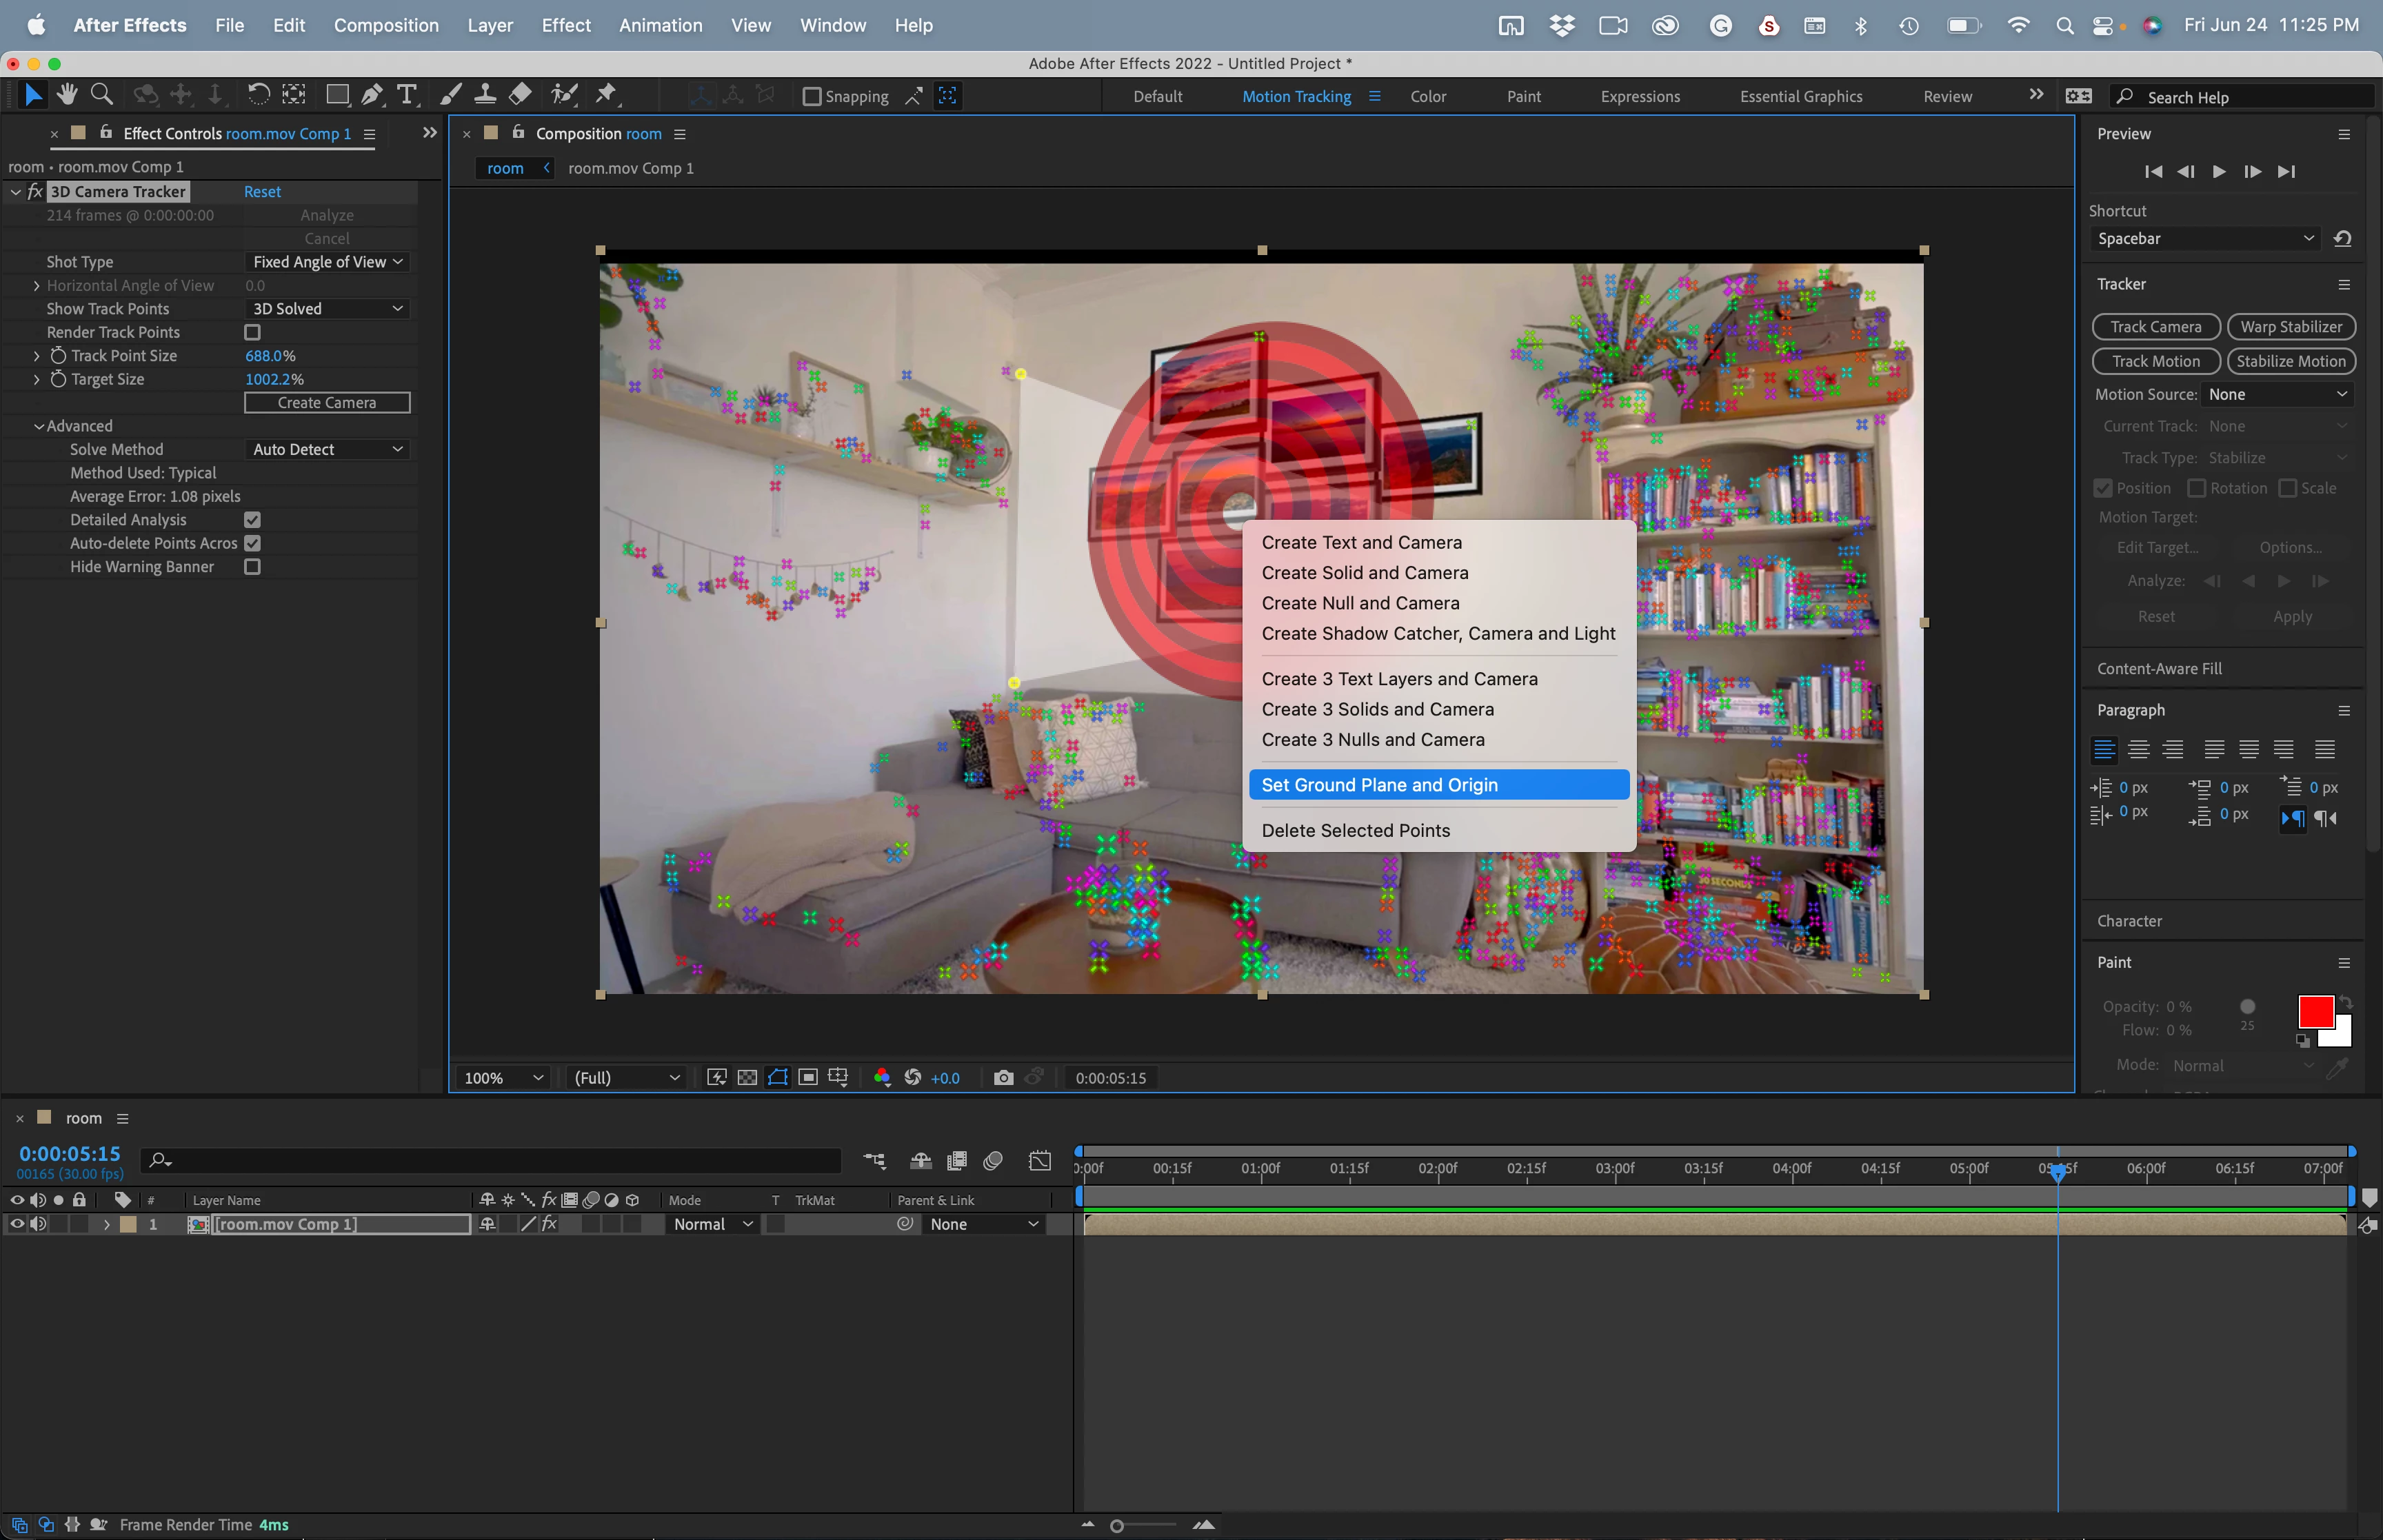
I made a screen recording of your sample video, ran Track Camera, found a frame where I had 3 trackers that looked like they were on the back wall, deleted all camera trackers on your misplaced wall photos, let the camera solve again, Set my origin and ground plane, created the reference sold and camera, added the grid, verified a good solid attachment to the wall, created a shape layer to simulate photos hanging on the wall. Made the Layer 3D, shift + parented it to the Reference layer, scaled
...Copy link to clipboard
Copied
Hi there,
Thanks for writing in.
To me, it looks like the paintings are not aligned well in the Z space. To correct this, you can go to the Top view and adjust the position to align them better with each other.
Hope it helps.
Thanks,
Nishu
Copy link to clipboard
Copied
Camera tracking requires detail on flat surfaces. There is no detail on the back wall. The best you can hope for is that you will get some good track points on the bookcase. It does not share the same plane as the back wall, so your images will appear to move.
To keep them all on the same plane, I suggest you select a bunch of tracking points that appear on the same plane in the bookcase, then set an origin and ground plane using that target, then add a camera and a solid. Rename the Solid that Camera Tracker added "Reference," then adjust the z rotation only. Never use Orientation to align a camera track solid. Add the Grid Effect to the "Reference" layer and check the tracking. It is easier to see drift and perspective errors when looking at a grid. If it floats on the back wall but sticks to the bookcase, you'll have to move it back in Z space a few pixels and rerun the tracking test. When you get the Reference layer to stick to the back wall properly, add your Photo layers and Shift + Parent each one of them to the reference solid. They will snap to the anchor point of the Reference layer and snap to the proper orientation. You can then adjust the X and Y position values to arrange them on the wall.
I almost always keep the Reference layer in my comp set as a Guide layer so it will not accidentally render, but it is always there for me to use to add other elements to the scene.
If you have problems getting the reference solid to stick or the perspective is off, try using Advanced Analysis. If you know the camera's angle of view used to shoot the scene, you might try adding that to Camera Tracker.
I probably would have tried Corner Pin tracking using Mocha AE before using Camera Tracking for that shot. I think the odds of getting your images to stick to the wall would be higher.
If you want to share the original shot, I will try it later this evening. I'm just checking the forum and waiting for Photos to print.
Copy link to clipboard
Copied
You're only showing the results but not the source footage. The source footage will show what was originally on the wall; where the paintings have been inserted as part of the tracking procedure.
So, it'll be good for us to view the source footage and also let us know what was the Average Error from the Camera Tracker - you'll find this property/value in the Advanced Section of the 3D Camera Tracker's Effect Controls Panel - usually a value of under 1.2 is an indication of usable tracking data.
Copy link to clipboard
Copied
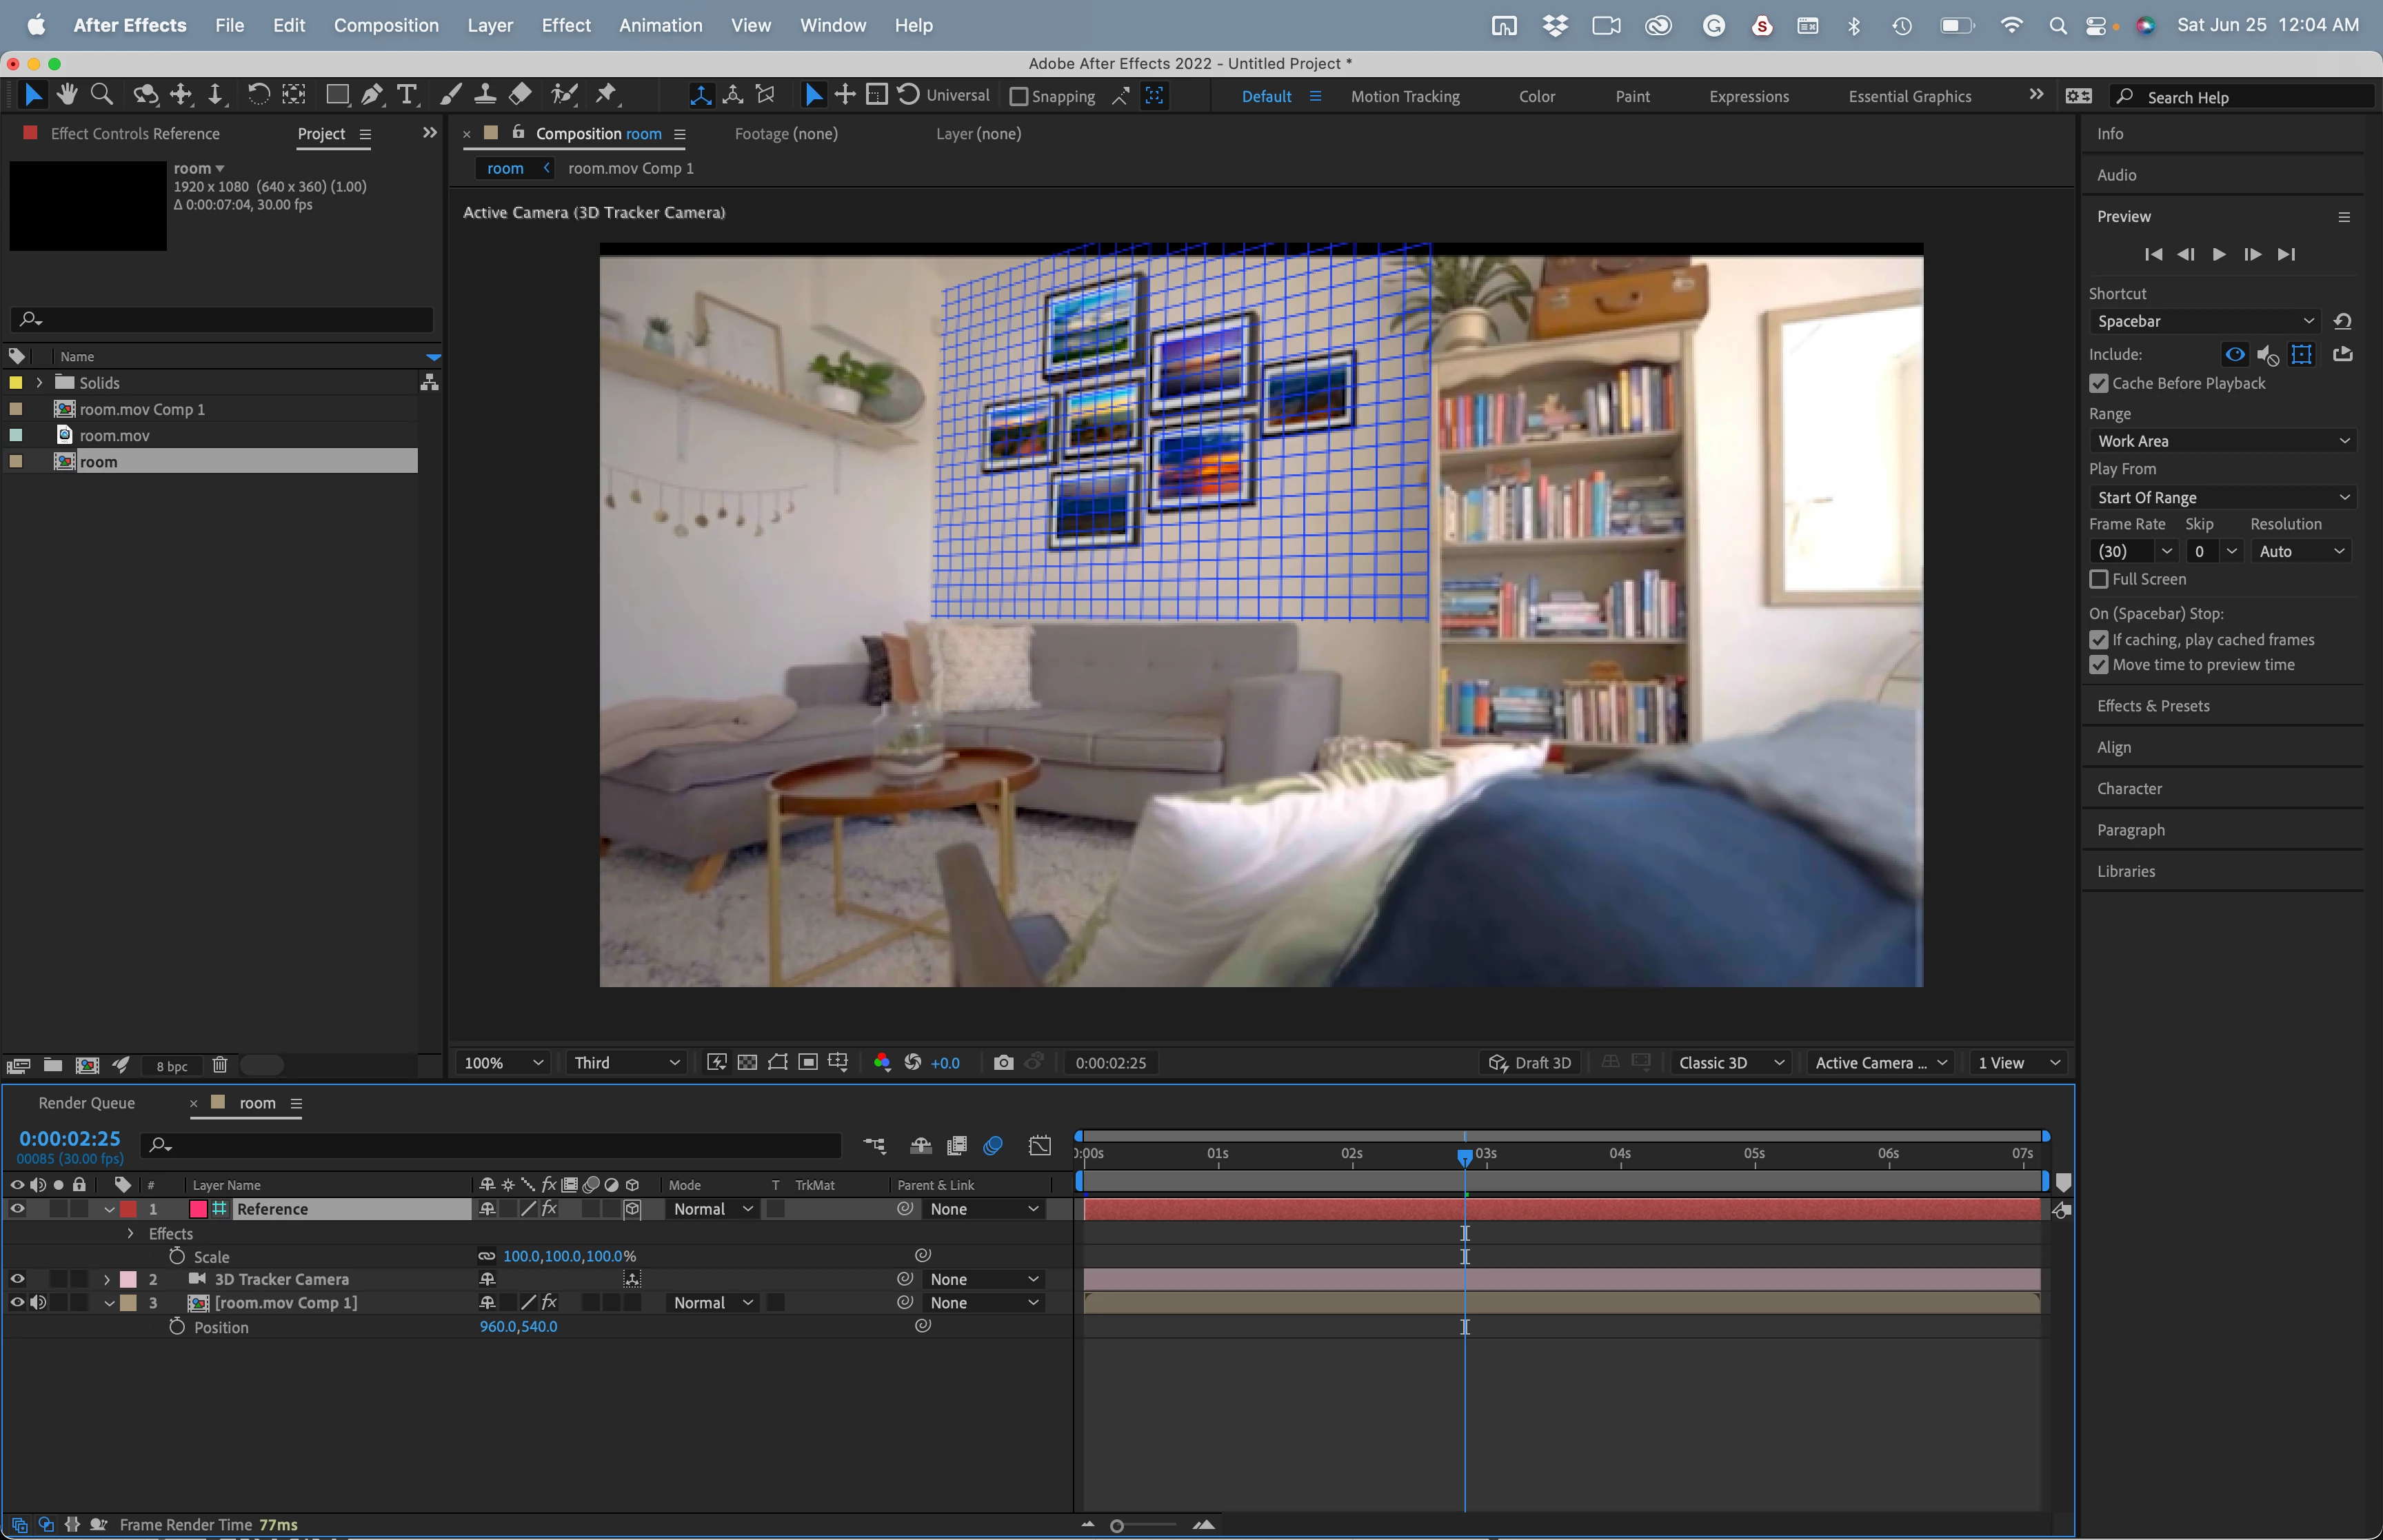
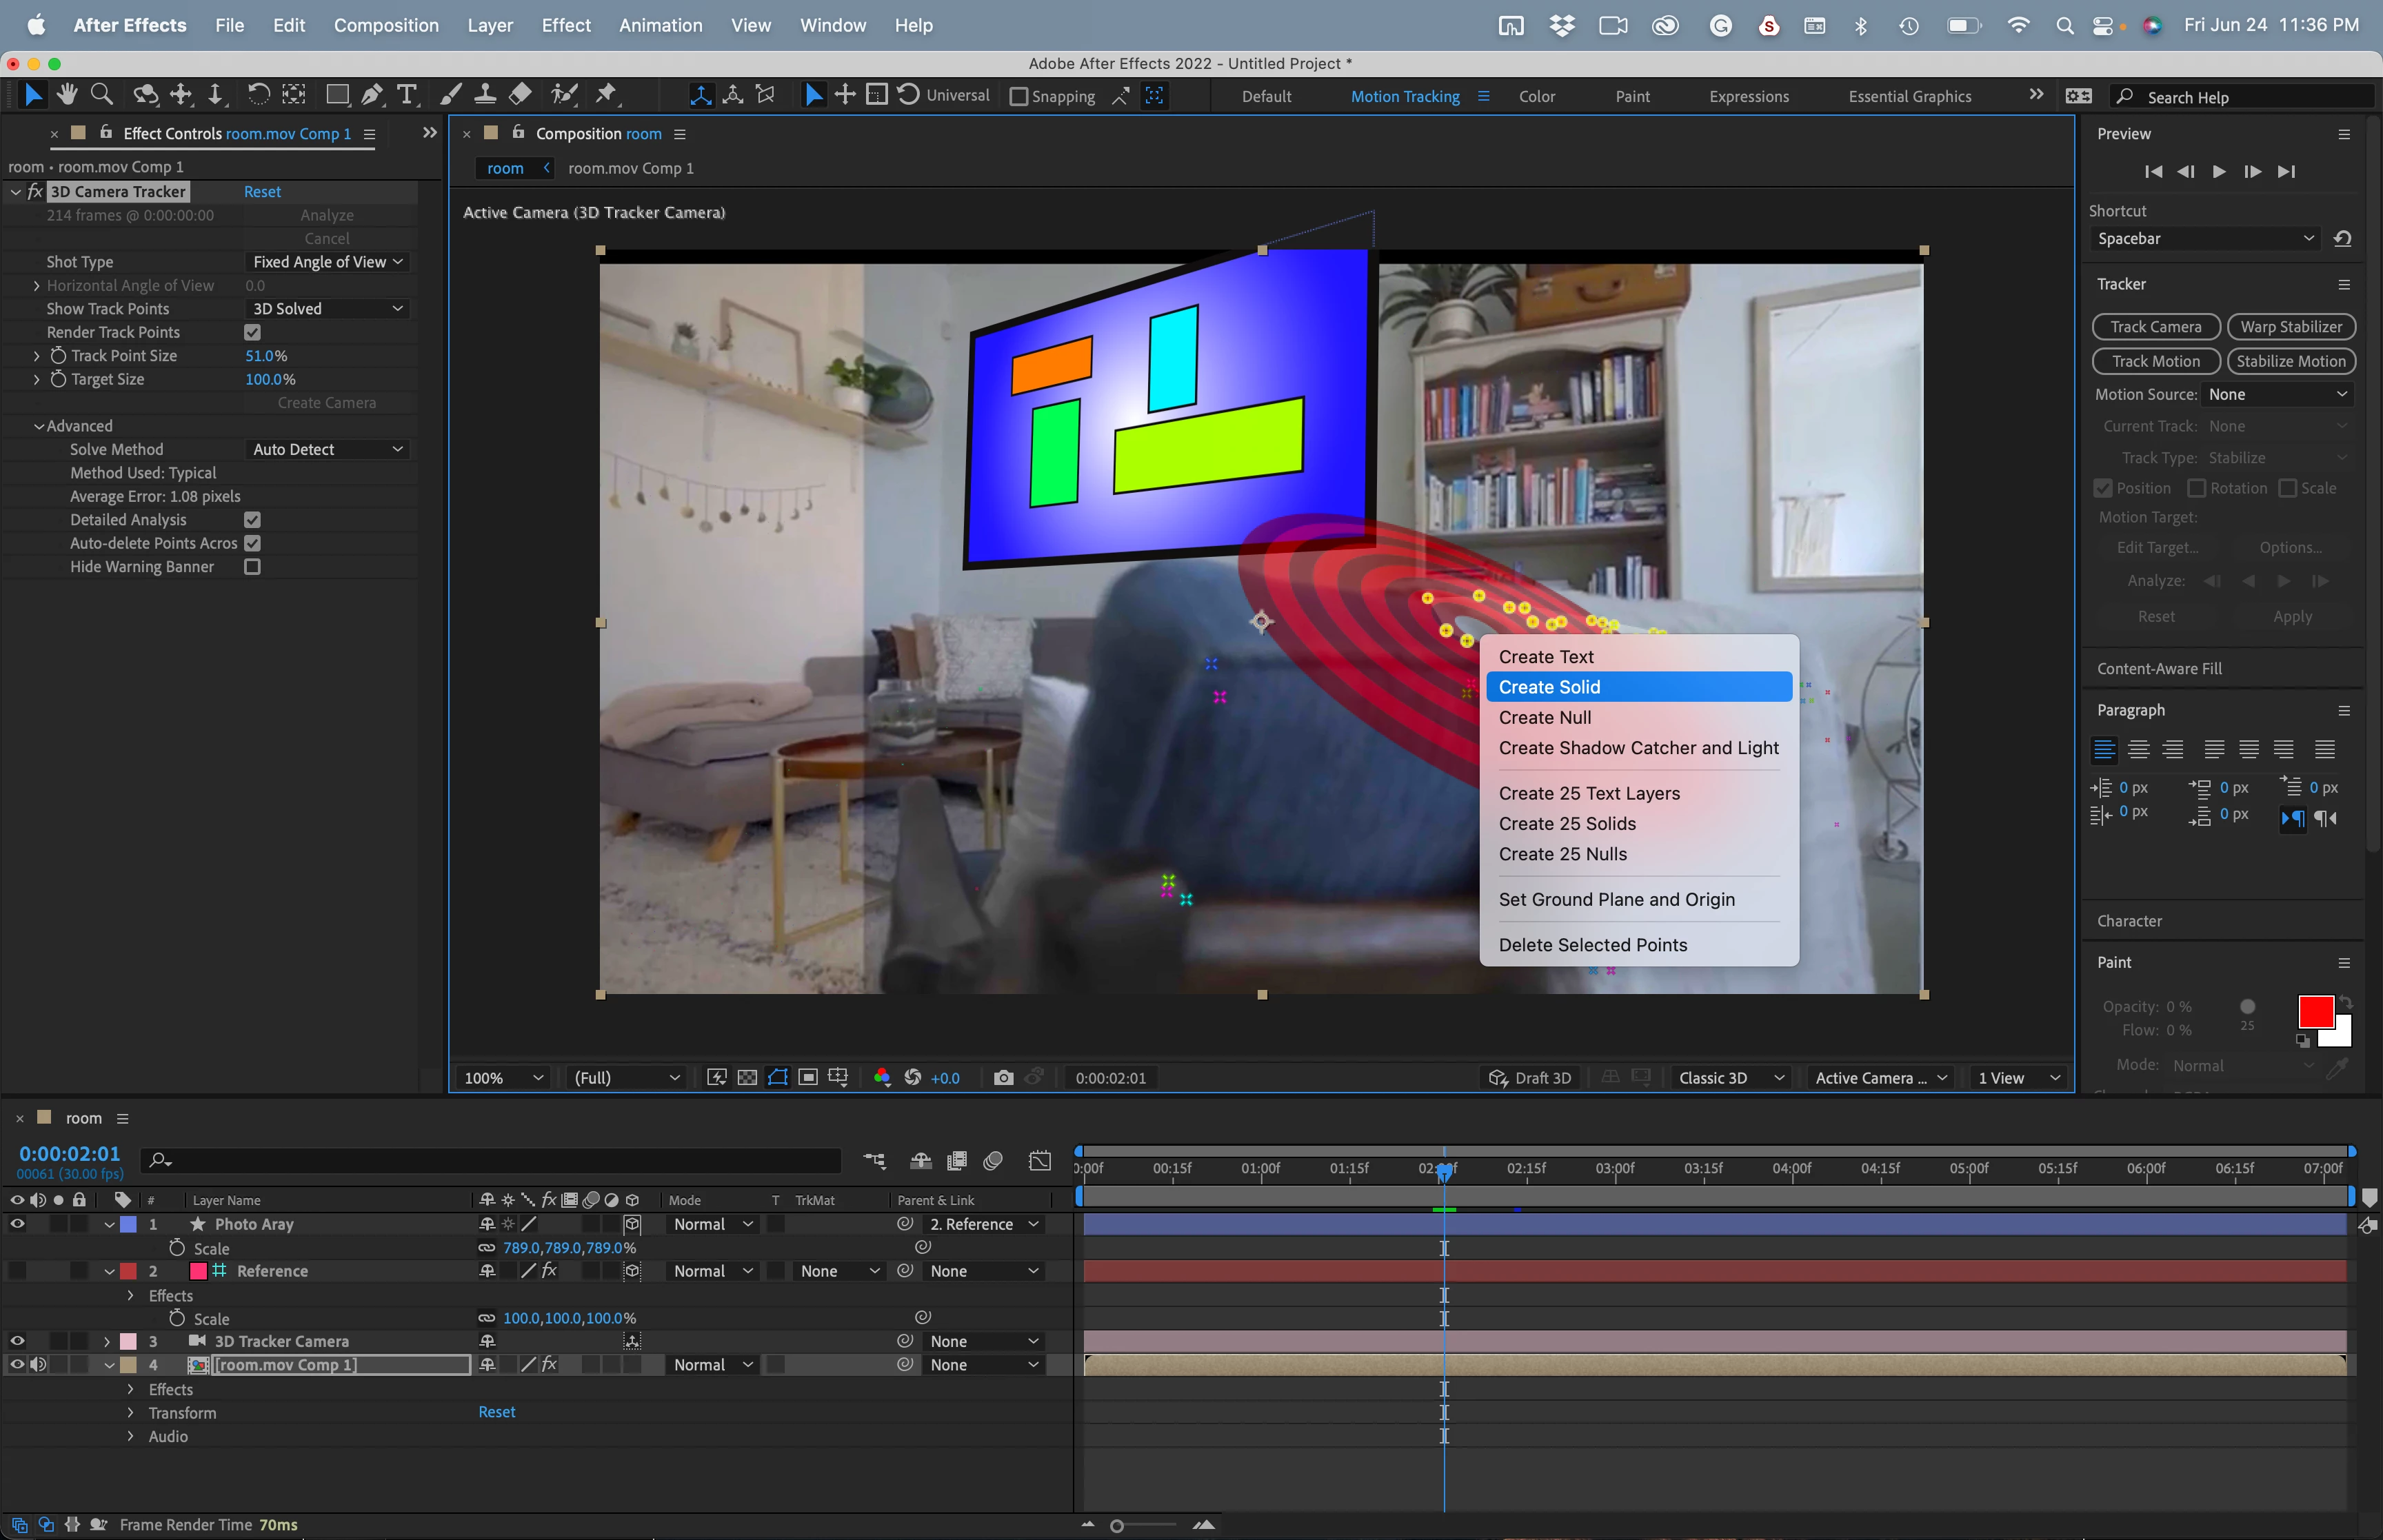
I made a screen recording of your sample video, ran Track Camera, found a frame where I had 3 trackers that looked like they were on the back wall, deleted all camera trackers on your misplaced wall photos, let the camera solve again, Set my origin and ground plane, created the reference sold and camera, added the grid, verified a good solid attachment to the wall, created a shape layer to simulate photos hanging on the wall. Made the Layer 3D, shift + parented it to the Reference layer, scaled the image, moved it in X and Y on the same plane to fit the wall, moved back to the first frame where the chair covers the new image, added a new solid to be used as a Track matte using trackers on the back of the chair, set a few mask keyframes, then set it as a track matte for the new photo array layer, and fine-tuned the mask with a little feathering. This was the workflow and result after just a few minutes. If I had the original footage the track would be a lot better, but I still probably would have used Mocha AE instead of Camera Tracking. The final composite would render a lot faster.
The Reference Solid with a grid.
Setting up the Track Matte solid:
The result:
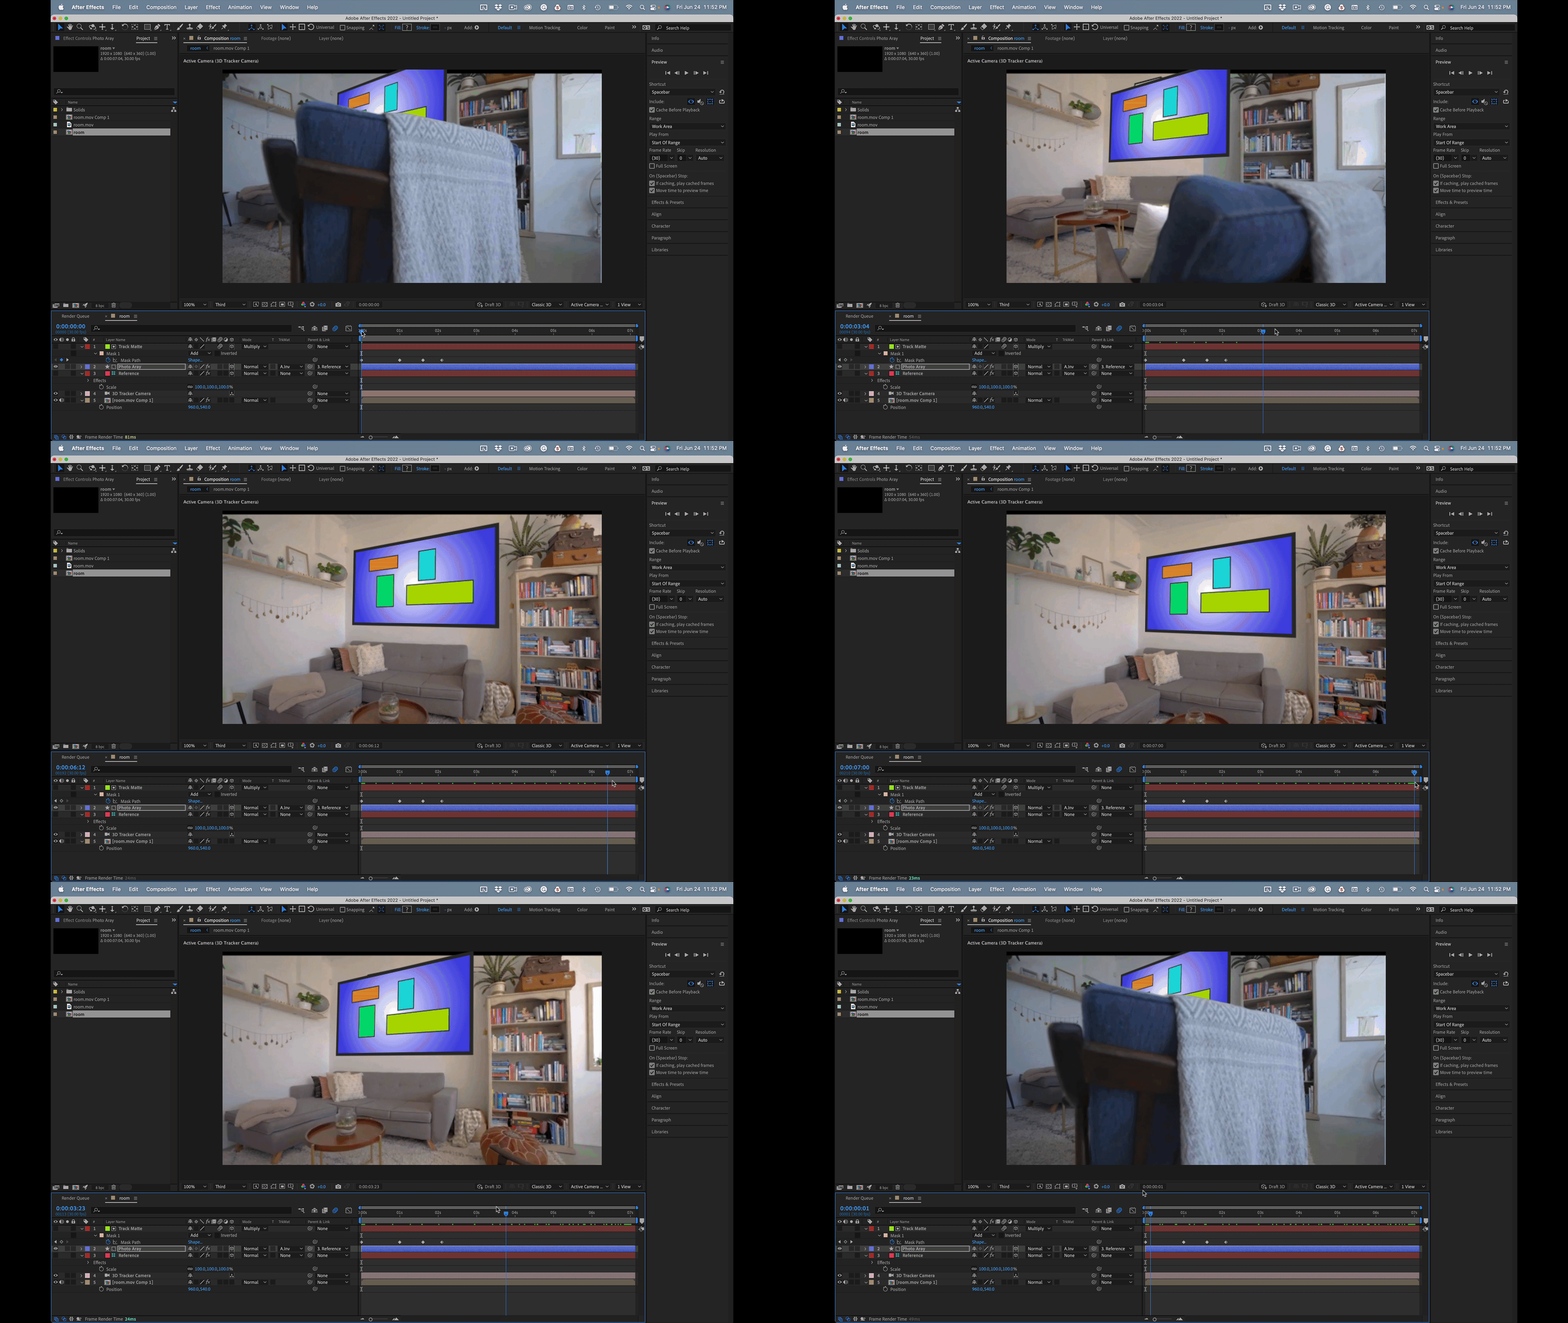
The result is not quite perfect but it is very close. A little more time and full-resolution footage would help a lot.
Camera Tracking will not work reliably unless you find a good origin and ground plane, verify that the camera solve is good, and then base all of the rest of the layer placement is based on the Reference Solid or by verifying the tracking on every surface you need to attach a layer to. I never use Nulls because you can't see how they are tracking. Occasionally I will add Text, but most of the time it's all solids as guide layers before I ever start working on the composite.
Copy link to clipboard
Copied
Hey there,
Sorry for the late reply. Was reviewing the information given and trying to apply it. And it worked!
Some more info about source material:
This is the main composition.
I have the precomp containing the 3D camera tracker at the top. Layer 2 is the blue couch from the source footage masked out via Roto Brush. Layer 3 is the source footage with the main wall masked out because the original footage already had pictures on the wall. Layer 4 is a freeze frame where the pictures on the wall have been erased using Photoshop.
This is the precomp with the 3D camera tracker.
At the top, you'll see I attempted to create the track matte you mentioned, but ended up not using it because of certain complications I didn't know how to get around. Layer 2 is the blue couch from the source footage masked out via Roto Brush. Layer 3 is the precomp containing the new images for the wall. Layer 4 is a 3D camera created with the track matte at the top (I was not able to create only a solid, it kept prompting me to create a solid and a camera. I didn't know how to fix that). Layer 5 is the reference grid you mentioned and Layer 6 is the 3D camera created with it. Layer 7 is a null object I created in order to track Layer 9 to the mask in Layer 8 via Motion Trackers (this is how I kept the wall blank as the footage moved.
As you can see, Layer 3 is parented to Layer 5 as you suggested. The grid was very helpful in detecting any movment.
Lastly, this is the precomp containing the images. Similar to your 'Photo Array' I think. I had arranged the photos in their place in the precomp with the 3D camera, and then precomped the photos together into this composition where they retained their positions from before. The reason why you see each image as a precomp is because I needed to extrude each image, and in order to do so, I had to use a trick that involved using the Separate X,Y, Z effect, adding an index-1 expression to the Z-axis, and then duplicating the image multiple times. I do not have Ray-Tracing as a 3D renderer, so this was a trick I needed to do.
I think that's everything. I'm sure there are things in this project that could have been done in a much easier fashion, some of these methods are the only ones I'm familiar with so far as I'm still learning AE as best I can. I may have overcomplicated certain things at certain points.
In any case, your solution worked! Thank you very, very much for your support. I greatly appreciate your help.
Here is the final result:
Copy link to clipboard
Copied
Good Job! And thanks for reporting back and bonus marks for the videos and explanation.