

- Home
- After Effects
- Discussions
- Re: How can I divide my composition into exactly t...
- Re: How can I divide my composition into exactly t...
How can I divide my composition into exactly three parts to the pixel?

Copy link to clipboard
Copied
I am looking to divide a 5760 x 1080 comp three ways, vertically, in order to play a single video across three full HD projectors. As such, I want to design the video so that each projection has a different image--but it would need to be exact, to the pixel. I want to have the divisions be visible to me while I am working, so that I know where each section ends and another begins. Can anyone help me out with how to do this?
Thanks!


 10
Replies
10
10
Replies
10

Copy link to clipboard
Copied
Do your work in a 5760 x 1080 comp. Then make double-dog sure about how this animation will be played back -- as one huge file, or three 1920x1080 file.
Do you have delivery specs for this project? What are they?
Copy link to clipboard
Copied
There will be a series of videos, played on cue (one at a time) through Isadora software, using a Matrox triplehead2go splitter connected to 3 projectors. All of the clips are played across three projectors. Not all the videos are being designed to have different imagery per screen, but the But to be sure, the video is going to be played as a huge file--but the splitter divides the video into three 1920 by 1080 portions, one for each projector.
Copy link to clipboard
Copied
I am looking to divide a 5760 x 1080 comp three ways,
create a composition call it Part 1 and make it 1920x1080. put the main composition 5760x1080 inside it.
drag it to the left hold shift and Ctrl to snap it to the left edge of the composition.
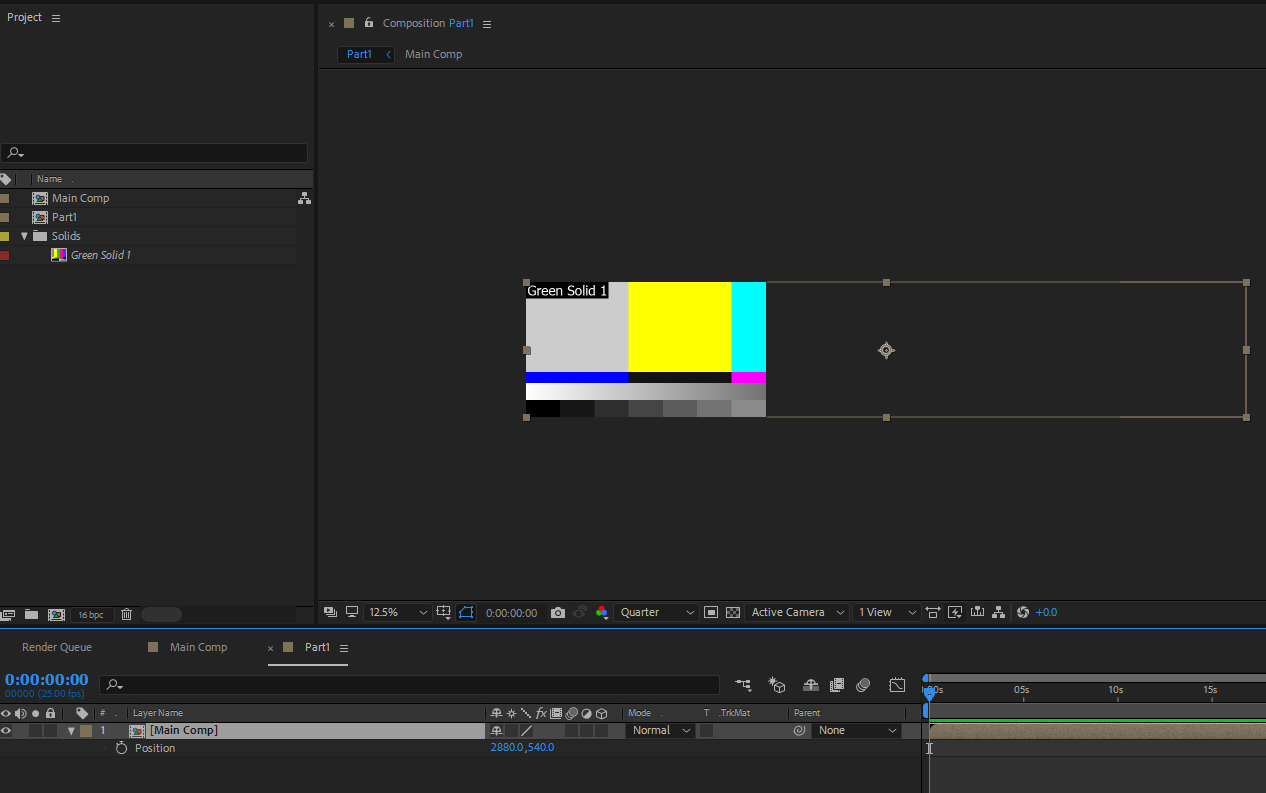
note the X position parameter. it is 2880. you need to move it 1920 each time.
duplicate part 1, open part 2. on the x parameter add after 2880 " -1920"
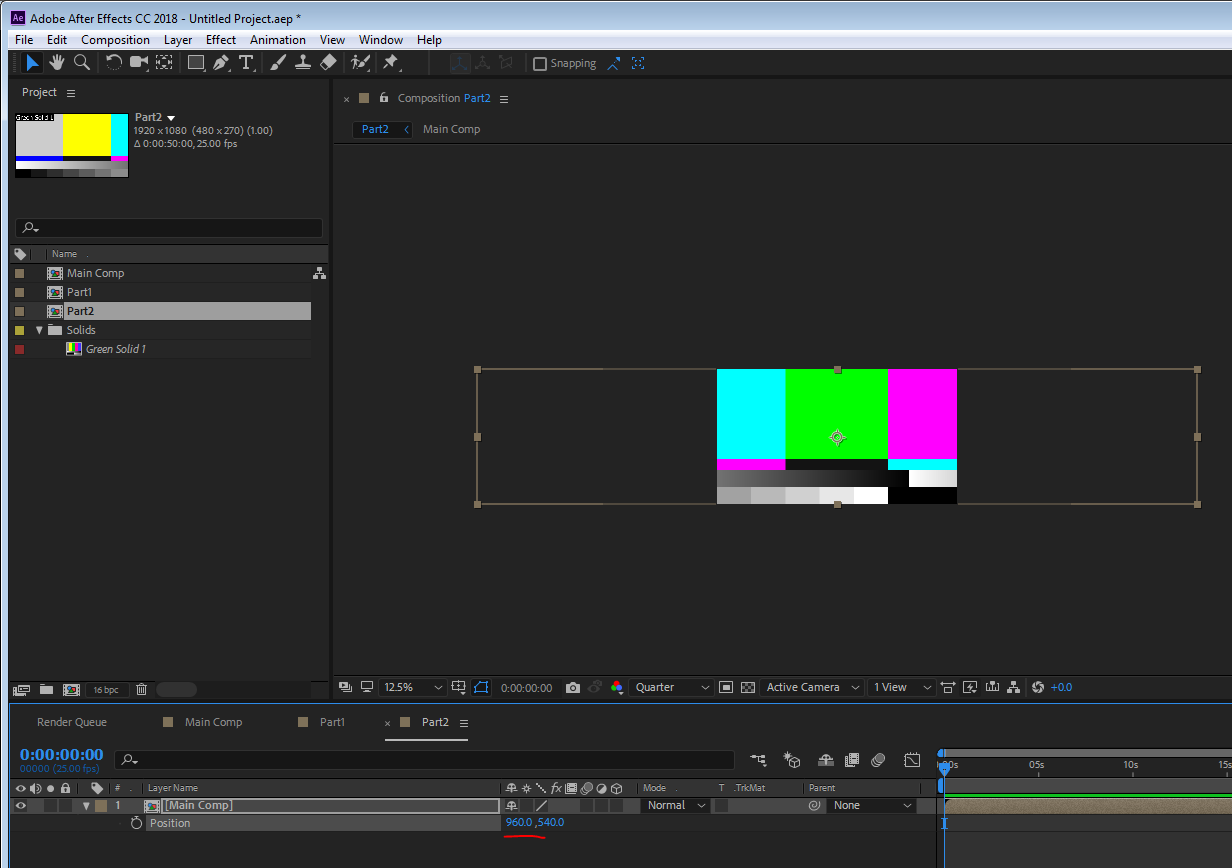
duplicate part 2, open part 3. repeat the process.

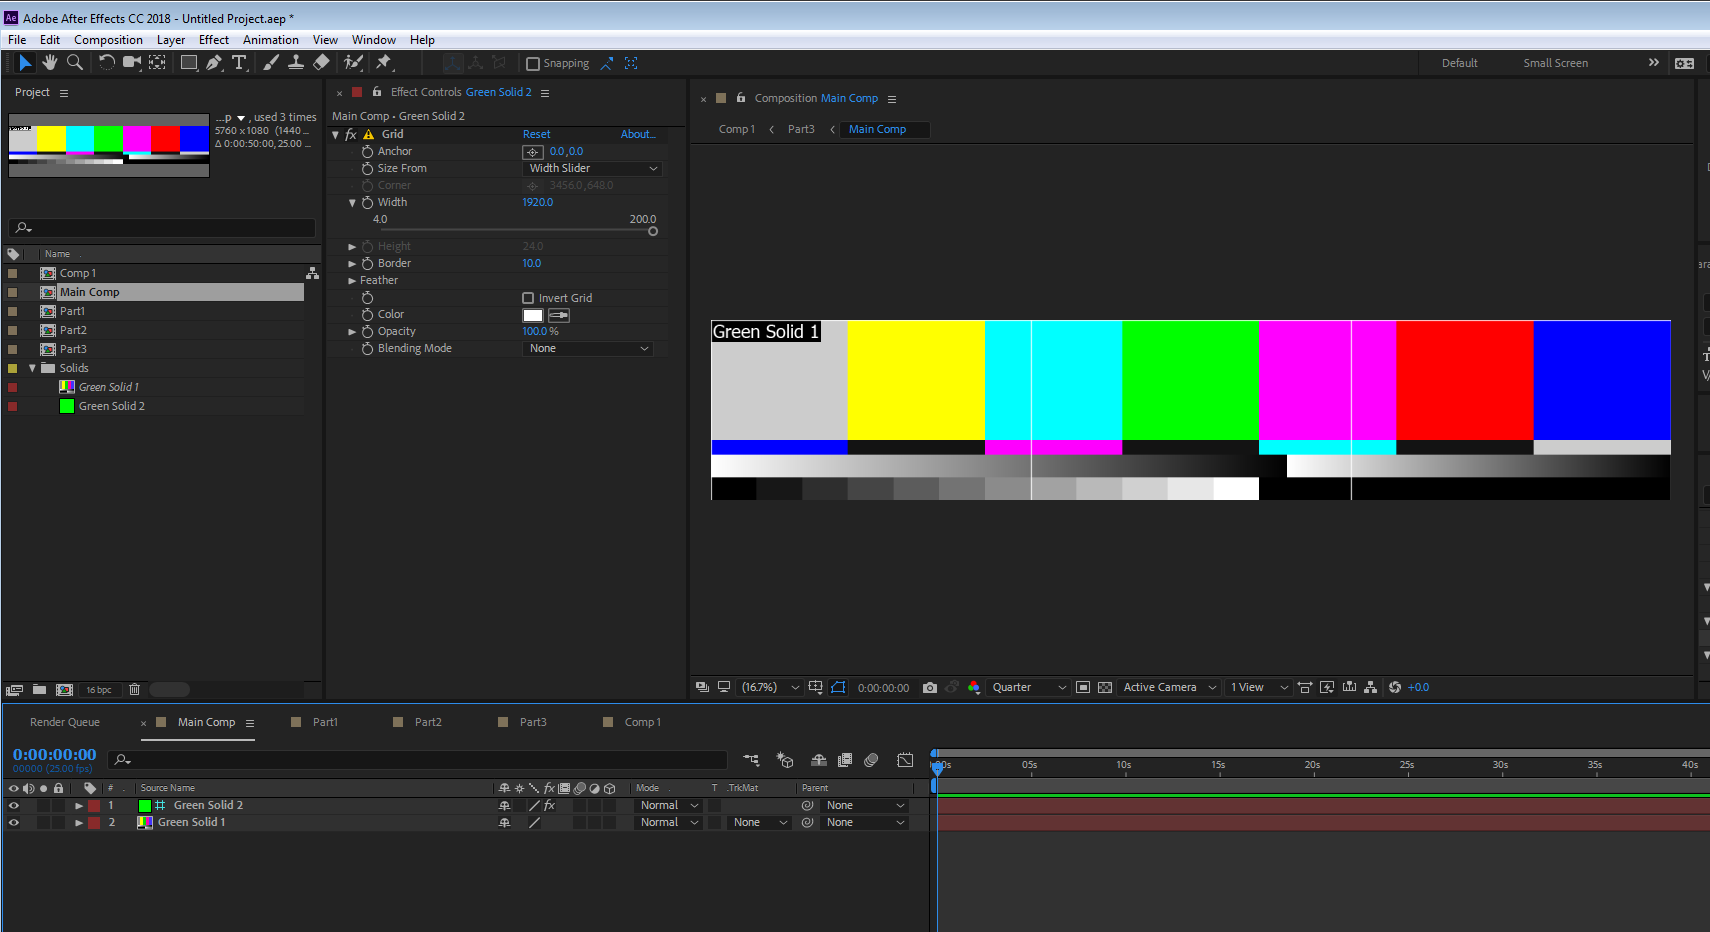
if you want a visual reference to your splits, then in the master composition add a solid layer, set is as a guide layer so it won't render (right click->guide layer) and add the grid effect. set its anchor point to 0,0, size from: width slide, set it to 1920 and set the border to something you could see like this:
Copy link to clipboard
Copied
Thank you Roei, this definitely seems like a good solution. I'm wondering though, is there a way to place some sort of marker at each division point rather than having three separate comps within a larger comp? I really appreciate your advice and want to try this method.

Copy link to clipboard
Copied
Roei has some good ideas. For me, I'd prefer if the design takes place in a single comp but the previews take place in a master comp set to 1920x1080; one for each of the three screens that make up the 5760 width.
With a single screen for design, or even for the initial stage of design, you will have a better idea of what you're working with/towards. Use Guides to set demarcation points and use label colors in the Main Design Comp (5760x1080) to designate which of the three screens layers to into and of course use layer hierarchy as well to designate layers for their respective screens.

Copy link to clipboard
Copied
There will be some pixel cropping in your projector setup, but most of the time it is not enough to worry about. Make sure you check the specs. I have had as many as 150 lines cut off so it can be a problem if you don't know what the crop and safe areas are.
If this was my project I would create a master comp that is 5760 x 1080, then set up my layers and animation as well as I could. If you know there is going to be a 150 line crop with each projector then you have to figure that in to your Master comp size. If the project is longer than 10 seconds I would make a separate comp for each sentence of narration or phrase of music. Trying to work on a 20-minute presentation in a single comp is, well frankly, NUTS. Personally, I would not worry about where the three render comps are, but if you are really concerned you can always quickly drop in a couple of guides and then lock them.
Now just design and animate you big wide comp. Once you have your pencil tests (animation and motion previews) working the way you want them to work, apply the rest of the effects, check a few frames to make sure everything looks good and then duplicate the master comp 3 times in the Project Panel. Name each comp properly so you can figure out which is which. Something like Shot1 Right, Shot 1 Middle, Shot 1 Left. Consider yourself lucky. Creating your 3 render comps is easy.
Open up the composition settings for the Shot 1 Right comp and change the comp frame size to the standard HD 1920 X 1080 size, then, before you click OK, make sure you go to the Advanced settings select the Right Side of the Anchor option icon to crop the comp.
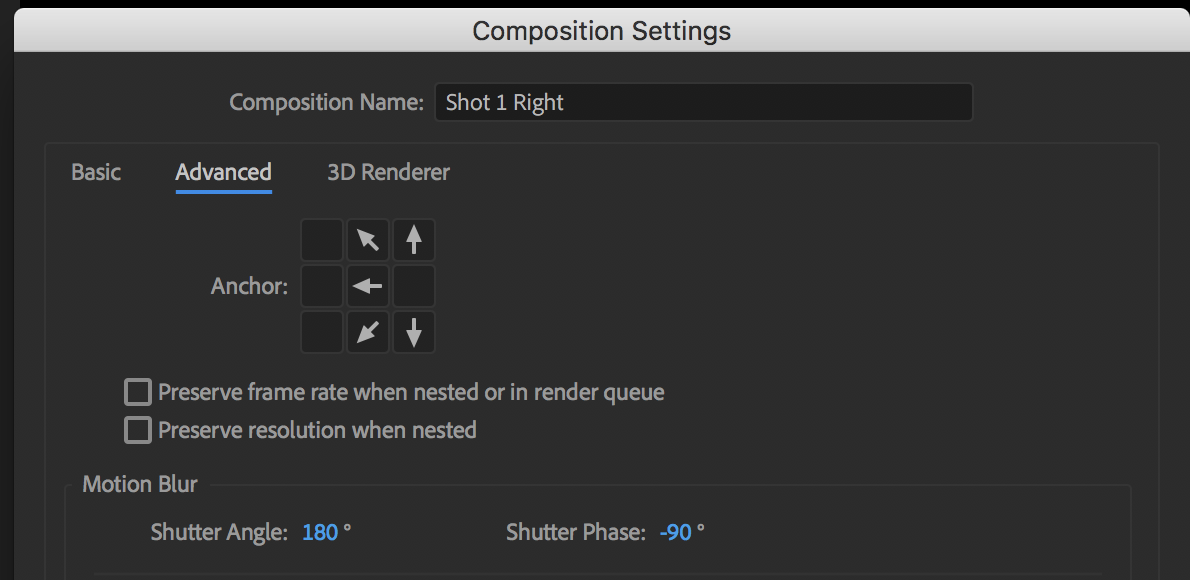
This will force the right side of the comp to stay put. Do the same for the left side, then make sure the middle comp has the center selected as the anchor. That's all there is to creating three new pixel perfect comps from a single wide comp. If you have more than 3 you have to do some math and set up guidelines to help you crop the comps. It can get a lot more complicated and usually involves parenting and a placeholder HD sized guide layer that you can use to reposition all of the layers.
When you have rendered all of your comps if the project is longer than a few seconds and you have created more than one master comp, just drop all of the rendered Left comps in a PPro sequence or create a new AE comp for them, render that file and repeat for the middle and right side comps. I've done this many many times and it is a lot easier to do using this kind of workflow than any other way. You'll spend a lot of time previewing at 1/4 or 1/8 resolution, and you will quickly get used to the pencil test and then polish workflow so you won't be wasting a lot of time with previews. Expect this project to take 2 to 3 times as long to do as the same kind of animation in a single HD comp because the previews can take longer. The only real way you'll be able to see how the project is going to work without sending it to 3 projectors is to take the Master comps for each shot, Drop them in a standard HD comp and scale them down 33.333% so they fit the horizontal width, and render a preview that will playback on an average system. You'll just have to trust that the final renders will work. I've never had this workflow let me down.
One more suggestion. Make absolutely sure you have the exact format specifications for the playback setup. Running 3 projectors in perfect sync requires special software and special hardware. This multi-stream playback equipment can be very picky about codecs, frame rates, audio and color space.
Copy link to clipboard
Copied
Rick, this has been extremely helpful. I am not worried about pixel flow as long as it is very minimal, as you mentioned. This is everything I need to get started, and the workflow you suggest sounds very smart. Thank you so much for this valuable advice!!
Copy link to clipboard
Copied
Thank you Roland!! I am keeping all this in mind as I work.

Copy link to clipboard
Copied
What did you end up doing, gomerpyle?
Thanks,
Kevin
Copy link to clipboard
Copied
All good advice above, but just an additional option to consider.
You can design everything in a 5760x1080 comp as discussed. Create Guides to visually define the vertical join lines in your comp.
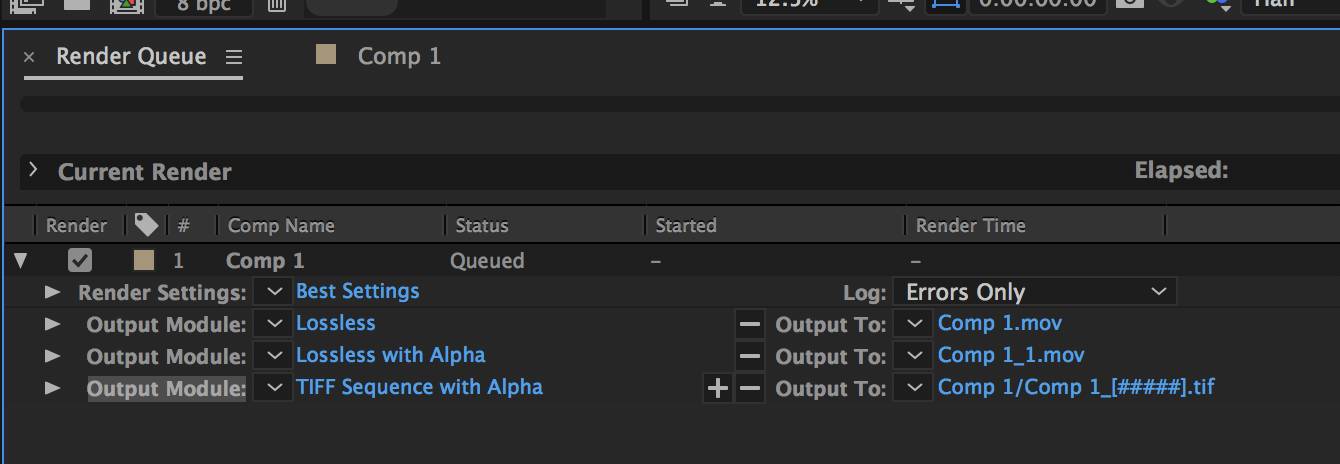
But, if you're not doing any additional processing to the images before you render, you don't have to create additional comps for output. You can do it straight from the Render Queue.
Send your main comp to the Render Queue as normal. In the Output Module section, click the checkbox to enable Crop. Then define the dimensions you wish to render in a pass. In your case, you will need to have 3 output modules, ones for each video frame. So the dimensions will be:
Output Module 1 (Left) : Top-0, Left-0, Bottom-0, Right 3840
Output Module 2 (Centre) : Top-0, Left-1920, Bottom-0, Right 1920
Output Module 3 (Right) : Top-0, Left-3840, Bottom-0, Right 0

You can save these Output Modules as templates so that you don't need to rewrite the numbers every time. Plus, you can stack multiple Output Modules in one Render Queue item, meaning it only renders the main comp once, then distributes the data to each individual Output Module in one pass.

Find more inspiration, events, and resources on the new Adobe Community
Explore Now
 AdChoices