How to draw 3D path passing by some points
Copy link to clipboard
Copied
Hello,
I'm facing a big issue with my after effects project. I recorded a mountain scene from Google earth, and I would like to animate a path in the mountain.
For that I used the camera tracker to set up some points of the mountains (works perfectly), and now I would like to draw an animated path passing by these points (like a typical animation travel path). And I'm unable to do that.
Here are two screenshots of my video to make myself clear. The camera is moving around the mountains, and the track points are working fine)
Any help/ tips to achieve this will be highly appreciate.
Thanks.
François
Copy link to clipboard
Copied
I think you don't have a clear understanding of how camera tracking works. Your points don't move, the Comp Camera Does. Here's how I would approach the problem.
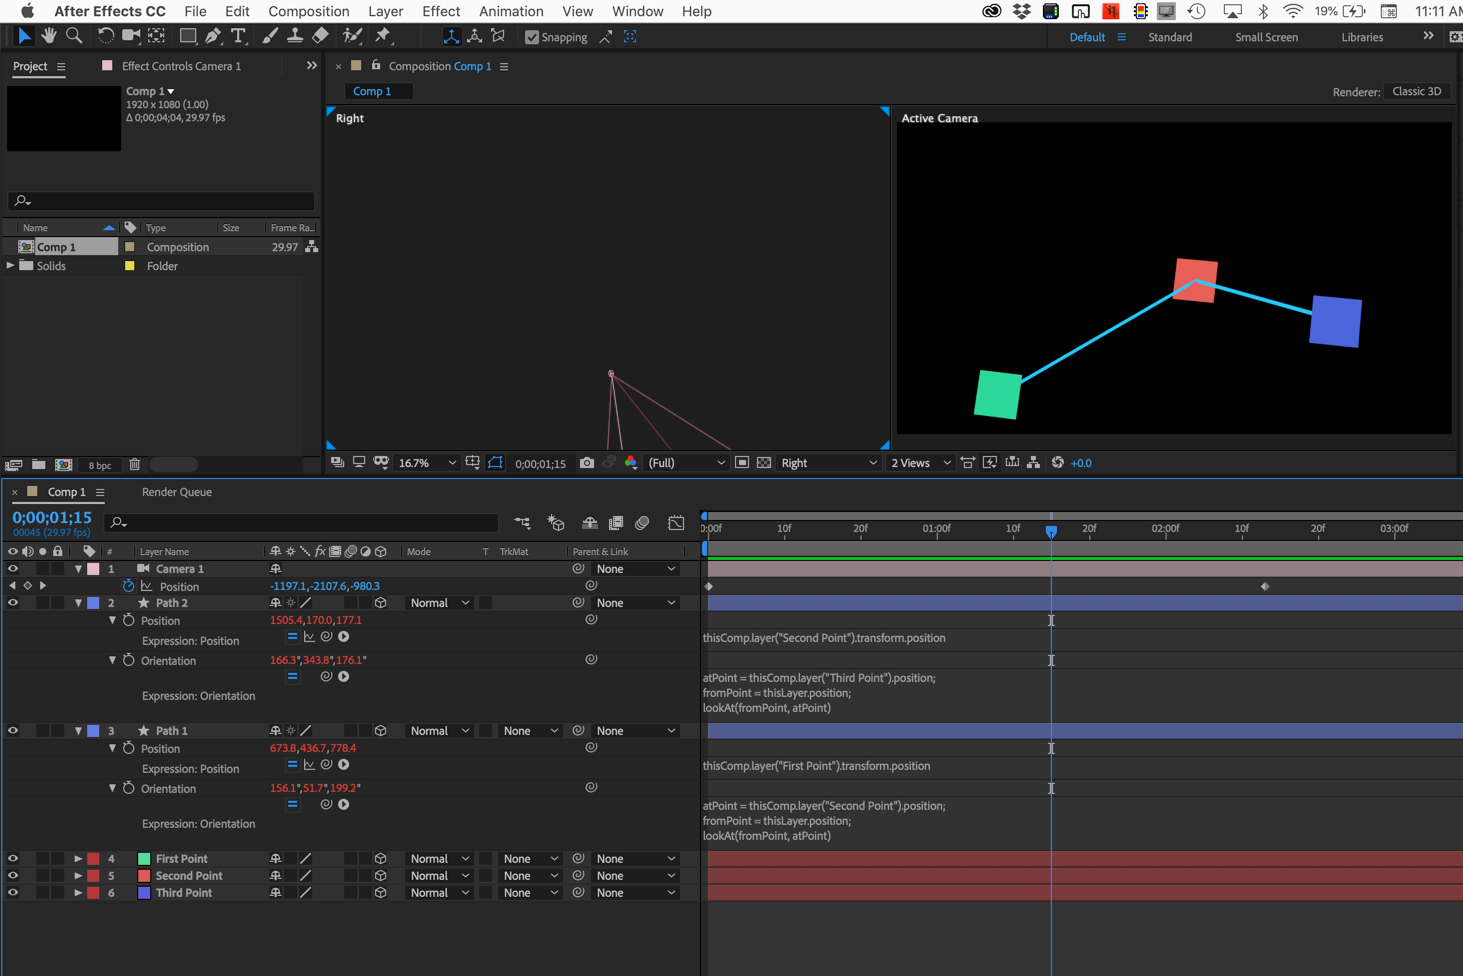
Open up 2 comp views and dig around in the second view to figure out exactly where in 3D space all of your tracking points are. If they are sticking to the surfaces well then each of the anchor points and position of the layers will be in a different 3D space. You should also be able to see this in the timeline by just looking at the transform properties of each layer. I suggested the 2 views because it is a little easier to visualize in a custom view where you can move the Custom View camera around using the Camera tool.
When you use a shape layer or draw a mask path they only exist on the X Y plane on a 3D layer. This means you'll need a new layer to go from one point to the next and you'll need to orient the layer to look at the next layer in the timeline. Did you follow that?
Here's what I would do.
- Turn on Snapping.
- Grab the pen tool (g) and create a 2 point horizontal line starting at the anchor point and extending to the right to the edge of the composition
- Use the Anchor Point tool (y) to attach the anchor point of the shape layer to the first point on the path
- Make the shape layer 3D
- Snap the shape layer to the same position and orientation as the first point on the mountain by holding down the Shift Key and parenting the Shape layer to the First Point
- You now have the line starting from the center (Anchor Point) of the first point on the mountain so to keep things simple remove the parenting.
- Add this expression to the Shape layer's orientation property to get the shape layer to point at the second point.
atPoint = thisComp.layer("Second Point").position;
fromPoint = thisLayer.position;
lookAt(fromPoint, atPoint) - The shape layer will not point directly to the Second Point but the rotation will be off. Most likely it will be the Y rotation that you will have to adjust 90º
- Using the pen tool (g) hold down the Ctrl/Cmnd key so the tool changes to the small selection tool and select the line segment. The shape layer boundary should disappear and only the path should remain. Continue holding down the Ctrl/Cmnd key until the selection pointer turns white and drag a box around the second vertex on the path, then drag it until it lines up with the center of the second point on the path
- Repeat for the other points making sure that you change the lootAt expression so that the atPoint matches the layer name
If I had a little more time I would give you an expression that would tie the x scale of the layer to the distance between the points or get really fancy and tie the size of a rectangle with trim paths applied to the distance between the points. It would probably take me an hour to figure that one out.
Maybe that will get you started. This screenshot may help:

There are other options including this idea: Flying A Kite, a tutorial and example I put up a million years ago on a dead website. The technique is a little different but the expressions will still work. Those expressions would adjust the scale so the line always pointed at the anchor point of the next point on the map.
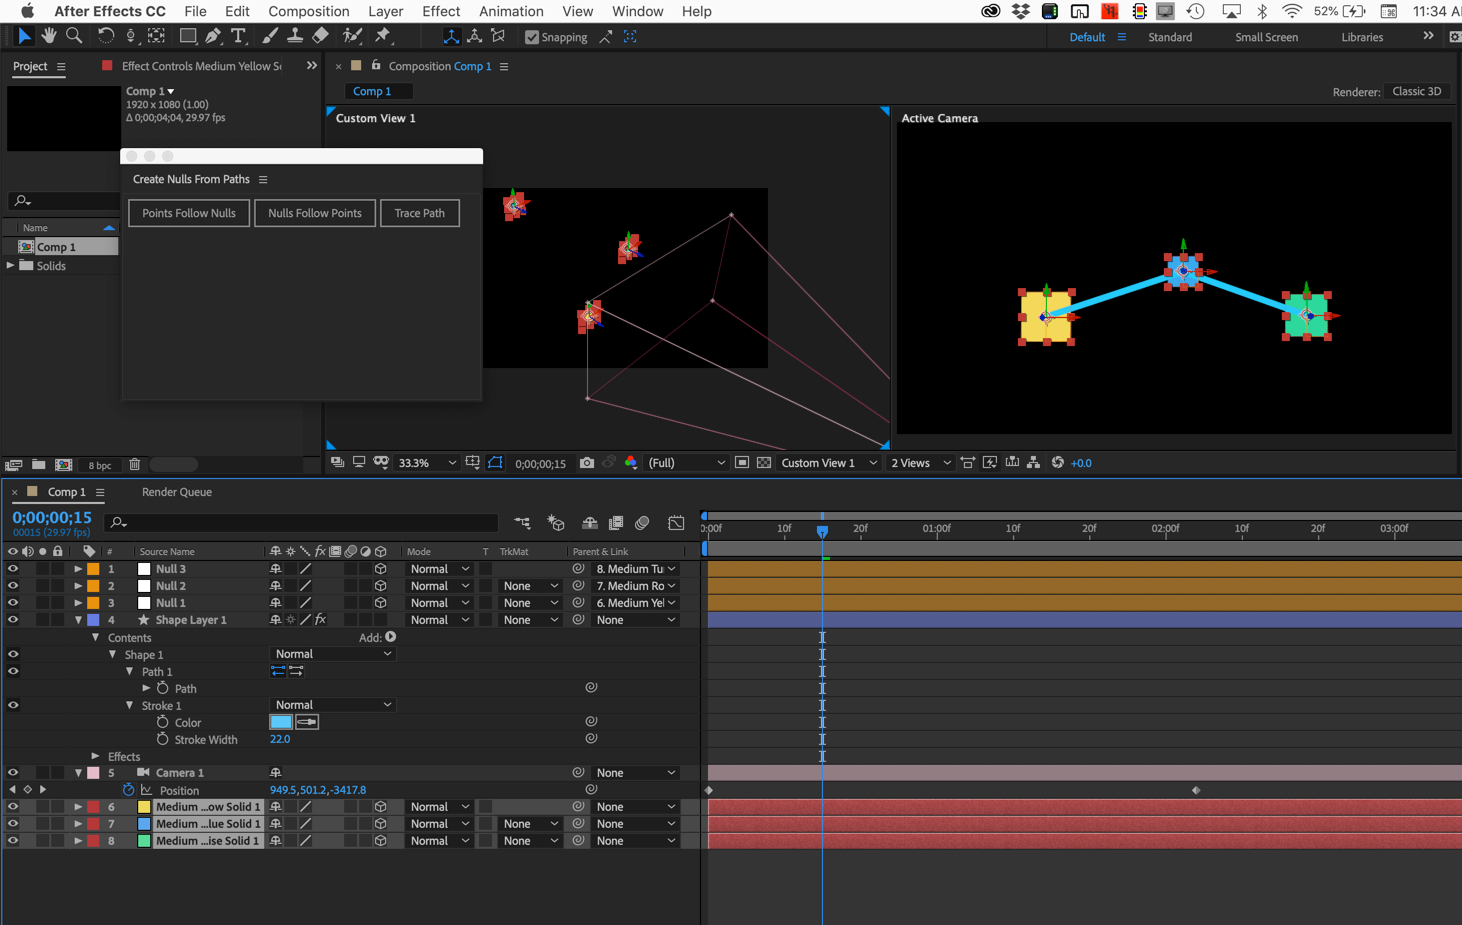
There is another option using the Create Nulls from Paths in CC 2018. It doesn't give you a true 3D line but it might be quicker.
- Create a 2D shape layer and use the pen tool to draw a stroked path and put as many vertices in the path as there are points on your map
- Open up the script from the menu by going to Window>Create Nulls from Path JSX
- Select the path in the shape layer and apply the first option Nulls Follow points
- Change all of the nulls to 3D layers
- Hold down the shift key and parent each null to the appropriate point layer
- Adjust the stroke
As I said the line isn't 3D but it will tie the line to the anchor point of each of the markers on the map and it will only take a couple of minutes. The comp looks like this:

Copy link to clipboard
Copied
Thanks a lot for your help, it's very kind.
i'll try to follow your instructions and make it work !
![]()