- Home
- After Effects
- Discussions
- How to make 2D text look like traced 3D text
- How to make 2D text look like traced 3D text
Copy link to clipboard
Copied
Hello everybody,
I'm working on a project and just I got stuck when I had to do a modifiable text that looks identical to the one in the video. My PC specs are 2670v3, GTX 650 Ti, 32GB DDR4 ECC, so ray-traced can't be used, and even if I tried, the track matte or mask options are disable in case I wanted to do a comp, pre comp combination. The idea is to make the "backed by" text and the messi one modifiable so that I can write my name and put my logo. I do have some ideas to make it like, a one time only...but how can I make it so that I can modify it? Maybe with repeater efect, or using traced shape layers? But the tracing would always have to be redone right? I'm completely puzzled and would be very grateful for any help.
 1 Correct answer
Nice challenge!
The Extruded Shatter Approach
you can use an old time technique to extrude text using the Shatter effect: CreativeCOW
1. use the shatter effect for the text set the text itself to be the custom pattern and set the forces to zero. set the front and side textures to "color" instead of "layer", add a light that makes the edges clear and you got this. here are the settings

2. use find edges, threshold and tint on the text
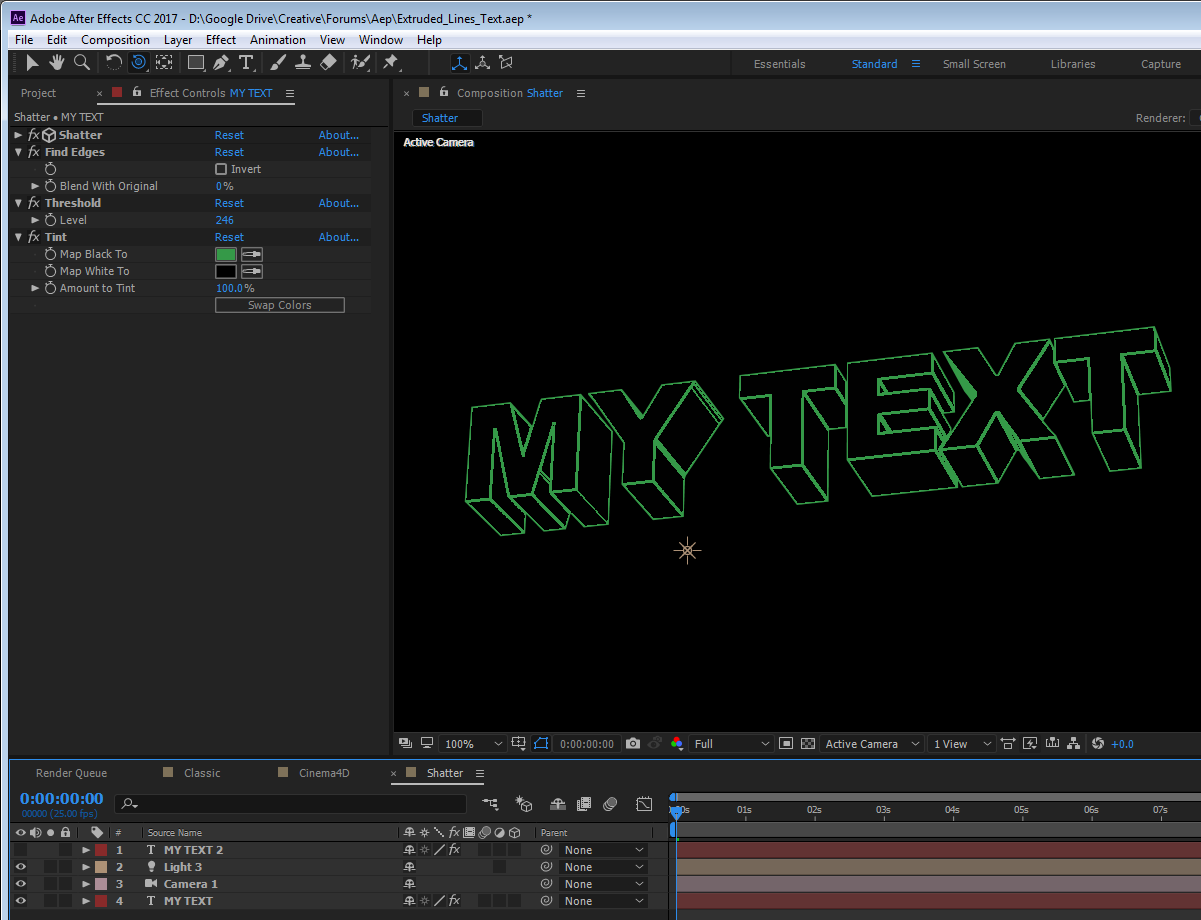
3. for the gradient, duplicate the text with the shatter and place
...Copy link to clipboard
Copied
Nice challenge!
The Extruded Shatter Approach
you can use an old time technique to extrude text using the Shatter effect: CreativeCOW
1. use the shatter effect for the text set the text itself to be the custom pattern and set the forces to zero. set the front and side textures to "color" instead of "layer", add a light that makes the edges clear and you got this. here are the settings

2. use find edges, threshold and tint on the text

3. for the gradient, duplicate the text with the shatter and place it on top of the previous. reduce the extrusion, delete all other effects. now you got this

4. we will create a gradient texture with a shape layer using these settings

5. in the shatter effect of the duplicate we will set this texture as the layer for the front
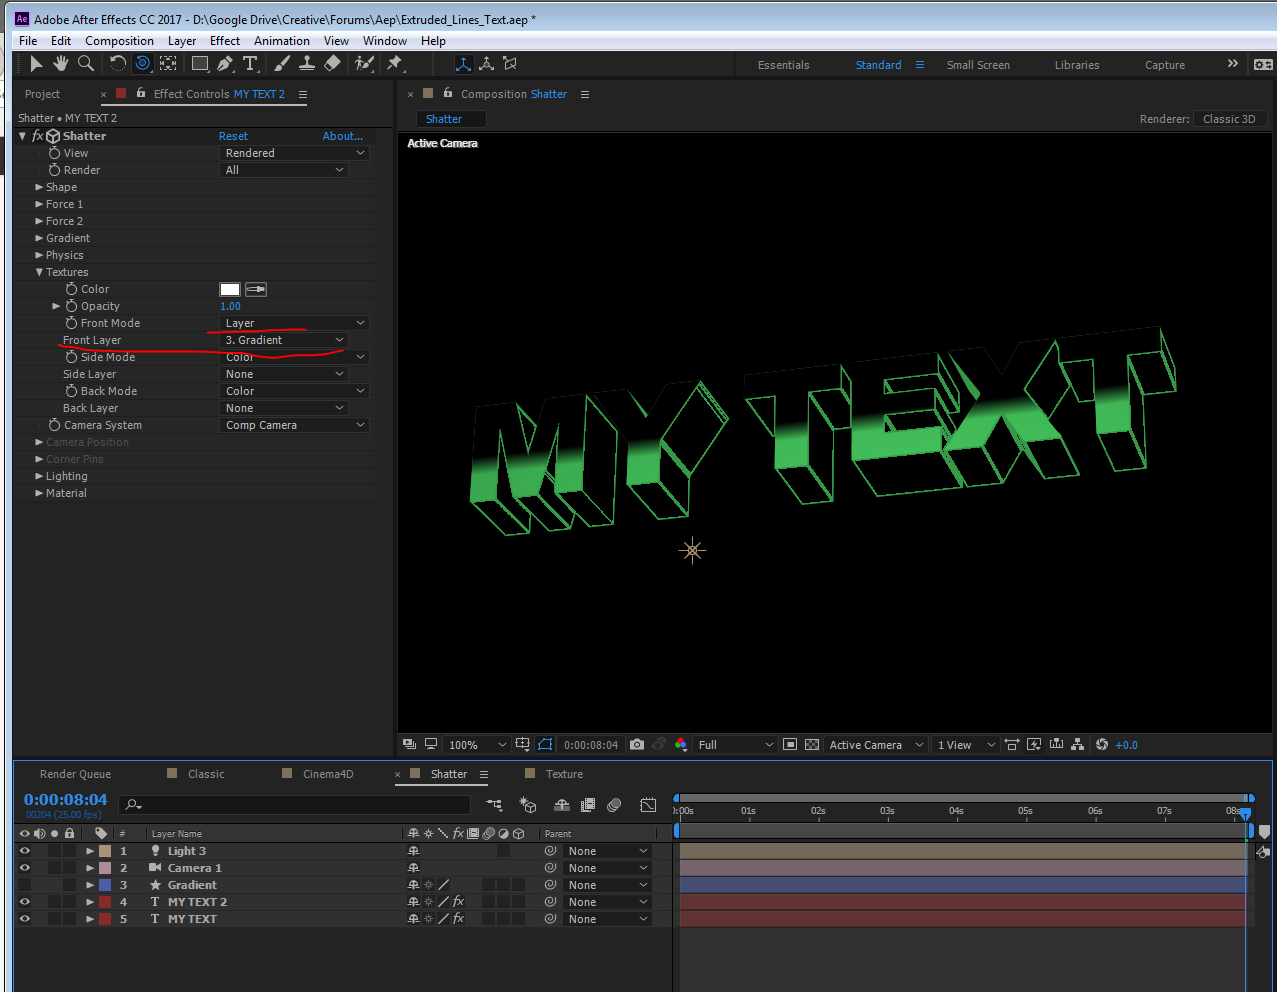
6.set a stroke layer style for a more appealing look:
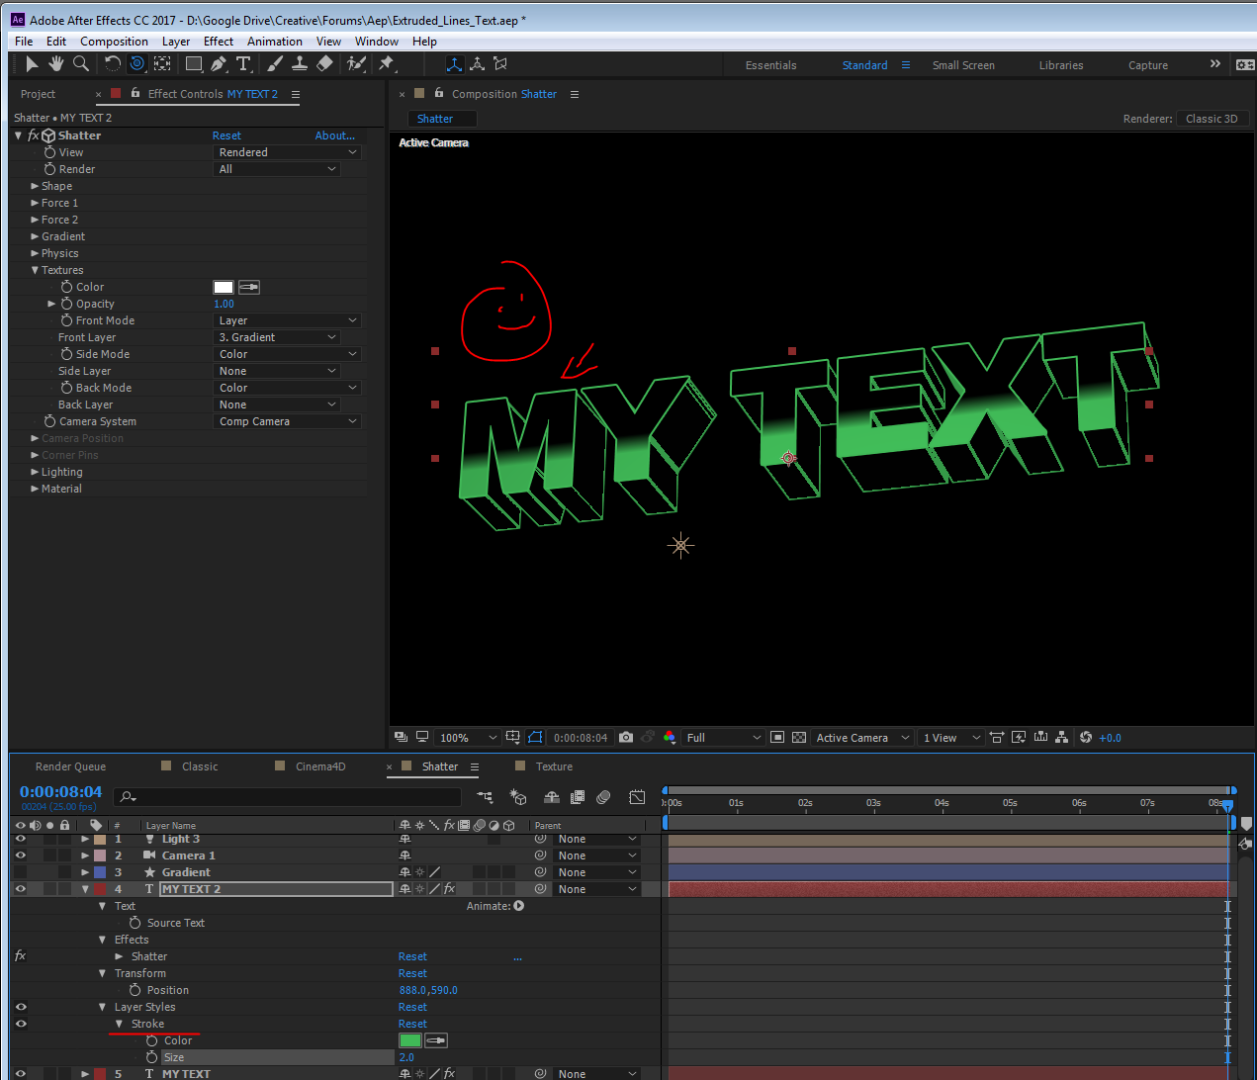
7. you would have to change both text layers of course. you can link the source text via expression if you want, and parent also. whatever
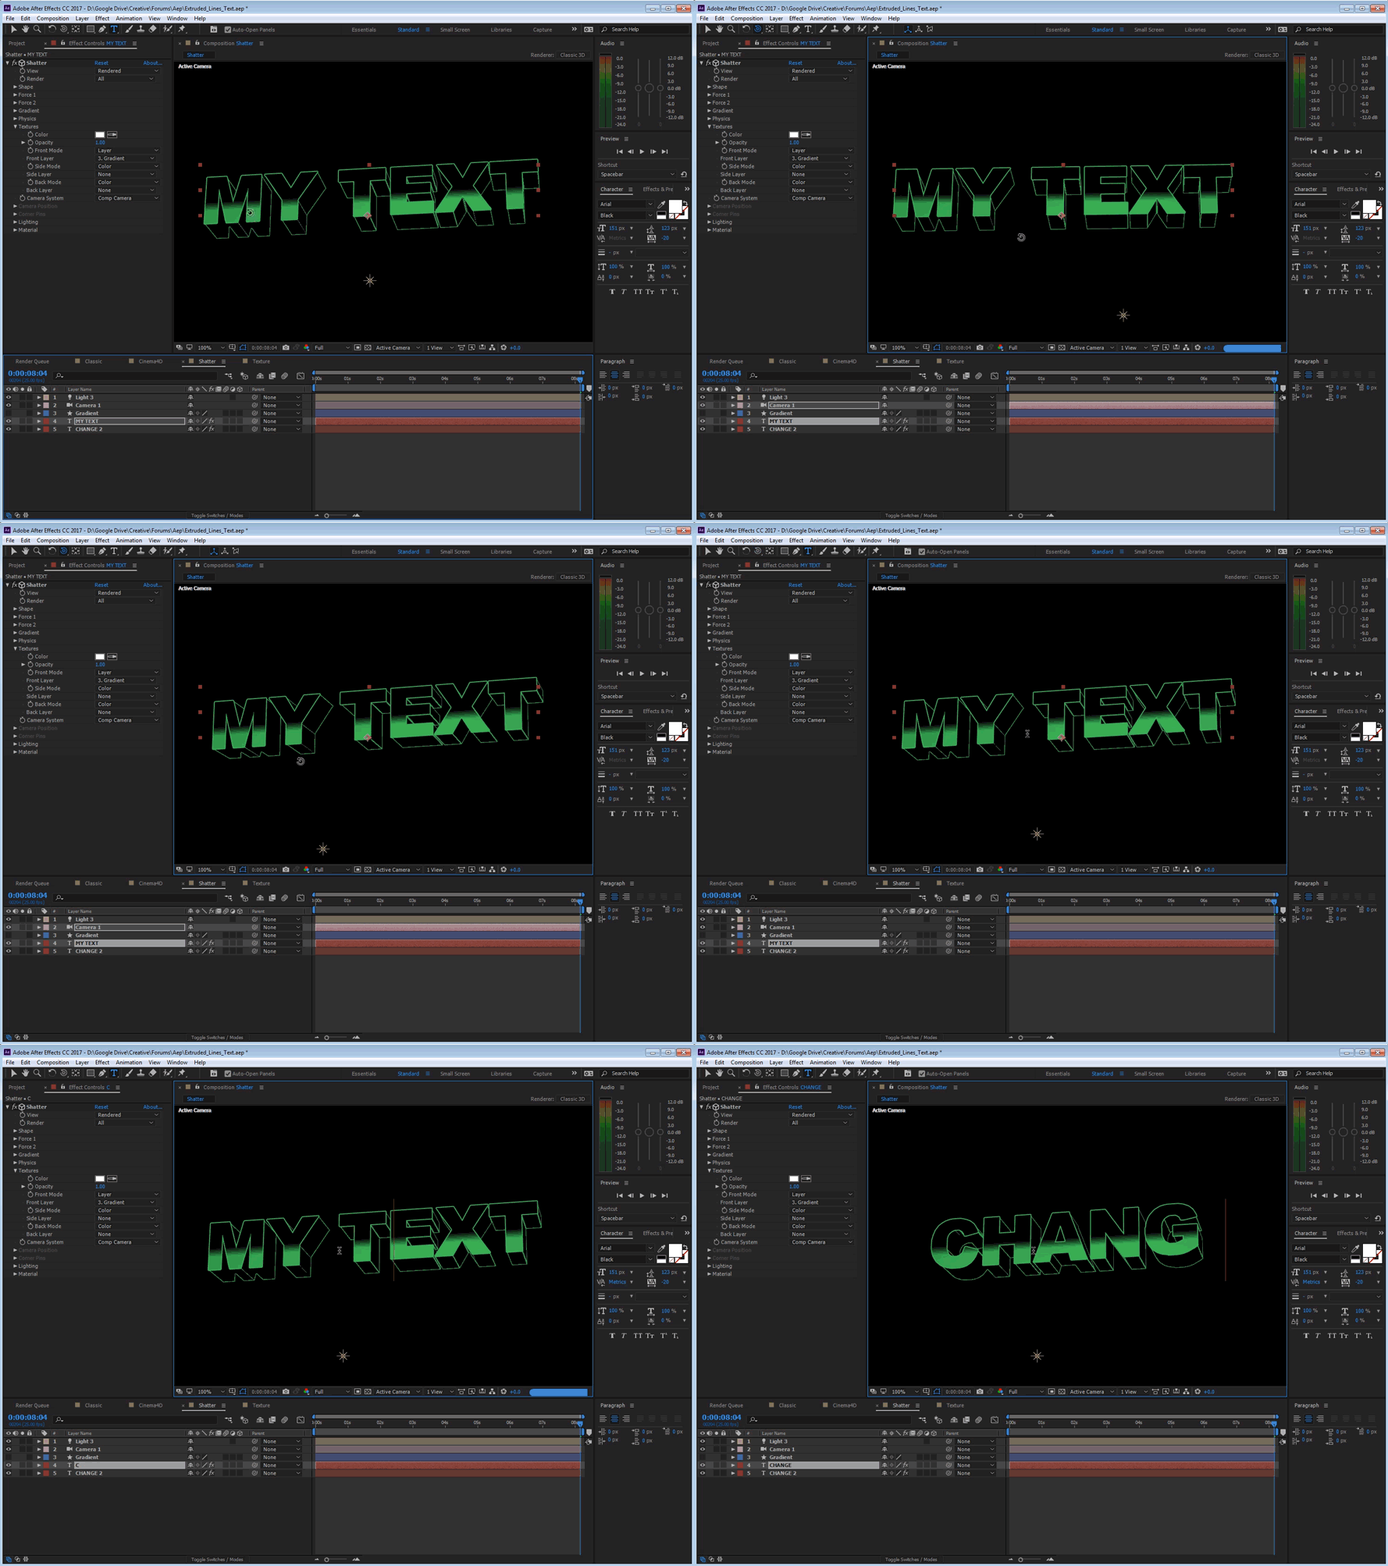
The Cinema4D Renderer Approach
this is more of a test to see if it worked, I think it did.
you can use CC2017 that has the Cinema4D renderer which is almost the same as the Raytraced renderer in terms of features, but it runs on CPU and not GPU so performance is great.
1. I would set up my extruded text this way with a light that make the edges clear

2. use an adjustment layer with find edges, threshold, and tint.
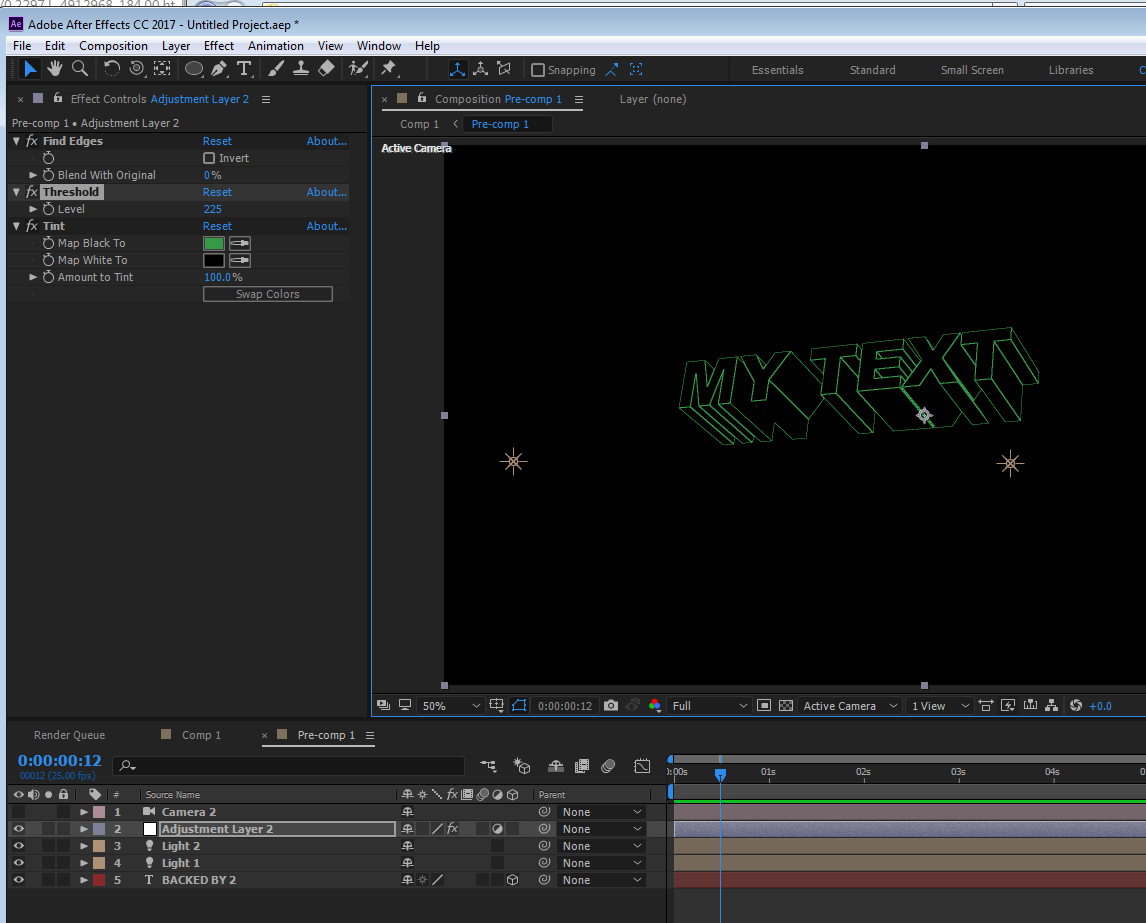
this might be good enough for you, but for making the gradient overlay it requires some more compositing because I can't see how to achieve this with a live text with no effects, masks, mattes or layer styles, so we have to change the renderer:
3. I would precomp the raytraced comp. in my master comp I would work with classic 3d renderer and link the Camera and the text by "edit->copy with property links" for both camera and text outside, and paste inside the raytraced comp (replace the original text and extrude it again if needed)
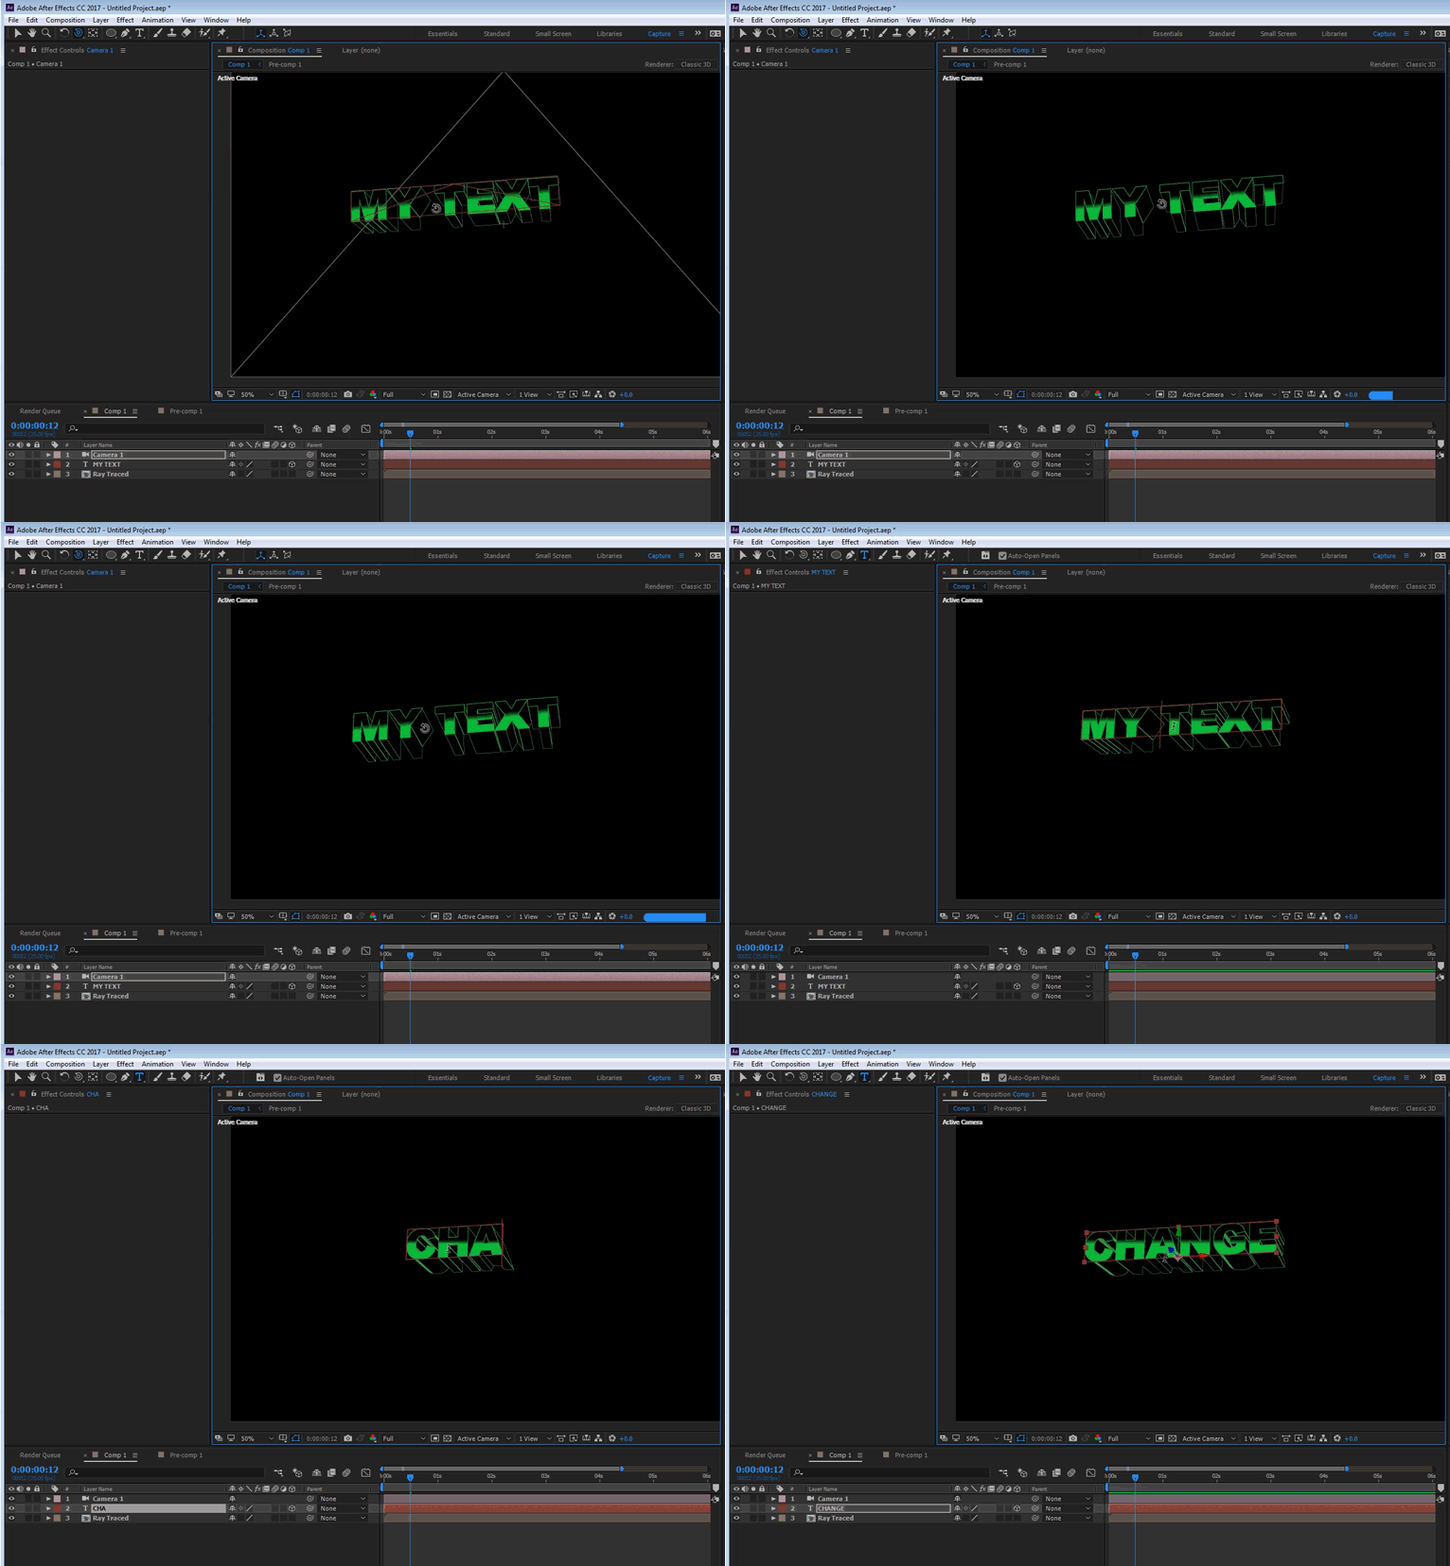
The gradient won't stick because text's render order is causing this but this has solutions too.
here's the project file: Extruded_Lines_Text.aep - Google Drive
Copy link to clipboard
Copied
I cannot thank you enough Roei, your suggestion worked like a charm. I've extended the extrusion so that the lines appear just like in the video, and made the effect on each letter individually so that I can make the appearing effect better(I've tried with a mask, but the long lines made it look cheap). Also the big title(MESSI) worked using a shape animation on top of a similar font. Didn't download the project, but maybe you can leave it up to download in case there's someone interested in the effect.
Again, many thanks you were very very helpful!!!
Copy link to clipboard
Copied
Great! glad it worked out. I learned a few things in the process as well ![]()
Find more inspiration, events, and resources on the new Adobe Community
Explore Now