- Home
- After Effects
- Discussions
- How to solve this animation issue?
- How to solve this animation issue?
Copy link to clipboard
Copied
I'm a beginner with After Effects. I've searched for a solution and couldn't find it elsewhere so I ended up here asking it.
Below you see a cute kawaii like creature that should be animated. The body or head rotation is done with a plugin called Joystic 'n' sliders
Now the question is : How can I move his right horn to the front layer when he turns his face to left and back to it's original layer order when he returns to his default pose? Changing layer order at that keyframe works but then the horn remains at that layer order. So this is not a solution.
Here are the layers and they order in the project.
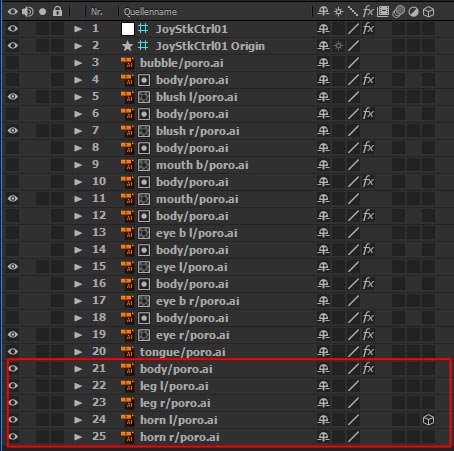
Is there a way to keyframe layer orders? I tried with a 3D Layer and manipulated the z-index but unfortunately it didn't help either. (Did I apply it wrong ? As I was actually sure this would do the trick)
Here another example of the problem if it wasn't clear enough.
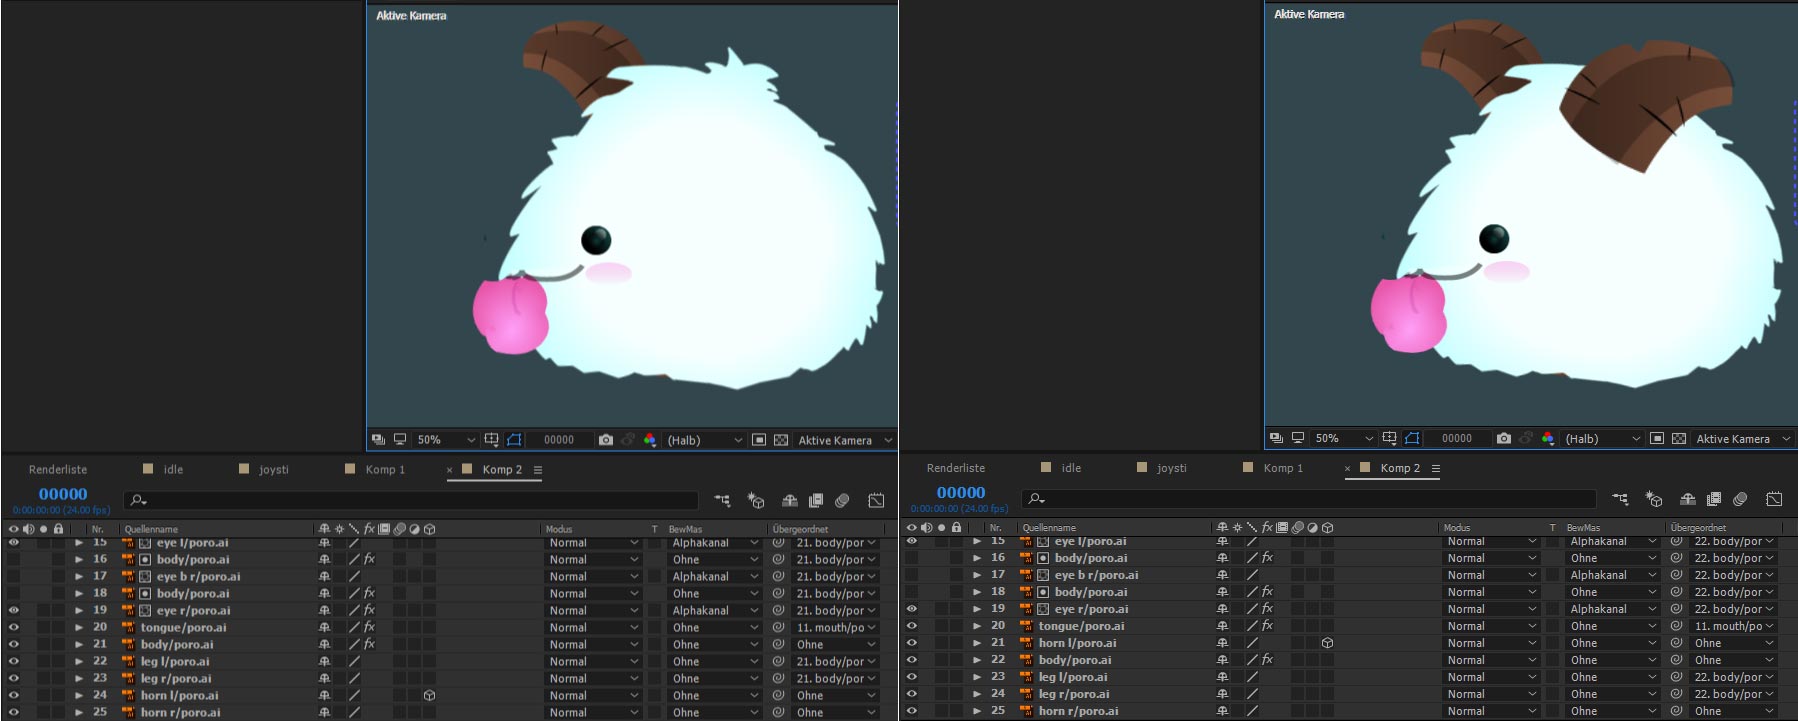
Left how it is, Right how it should be
Please help me to solve it. Thanks.
 1 Correct answer
Duplicate the layers and animate the visibility (Opacity t) or use a copy as a track matte for the head so it has a hole in it for the horn. You can't magically change the layer order.
Since I can't see any details about your animation I do not know what the most efficient solution may be but I'd probably go with a duplicate of the horn layer and control the visibility of the top layer using an expression that ties the horn layers visibility to the left and right pose. A simple if joystick is le
...Copy link to clipboard
Copied
Duplicate the layers and animate the visibility (Opacity t) or use a copy as a track matte for the head so it has a hole in it for the horn. You can't magically change the layer order.
Since I can't see any details about your animation I do not know what the most efficient solution may be but I'd probably go with a duplicate of the horn layer and control the visibility of the top layer using an expression that ties the horn layers visibility to the left and right pose. A simple if joystick is left of center then visibility off else visibility on approach may do it. It all depends on how you have set up the left, right up and down poses.
If you are not familiar with expressions let me know. I have the script but have not used it in a while so I can't give you a solution right off the top of my head. If I saw all of your poses I would have a fairly good idea how to make things work.
Copy link to clipboard
Copied
Thank you for your helpful answer.
I took my time to test and understand your solutions.
Animating opacity works. However it is really time consuming to find the exact positon and then set it to 0 or 100 everytime.
Track matte I couldn't figure out how it works properly. I would need to duplicate both the main body and horn layers, drag the main body under the horn and then apply the track matte inverted. That makes a whole into the main body(main body is the white area). The point I didn't understand here is I still need to use opacity to hide the horn when it should be behind the main body or am I missing something?
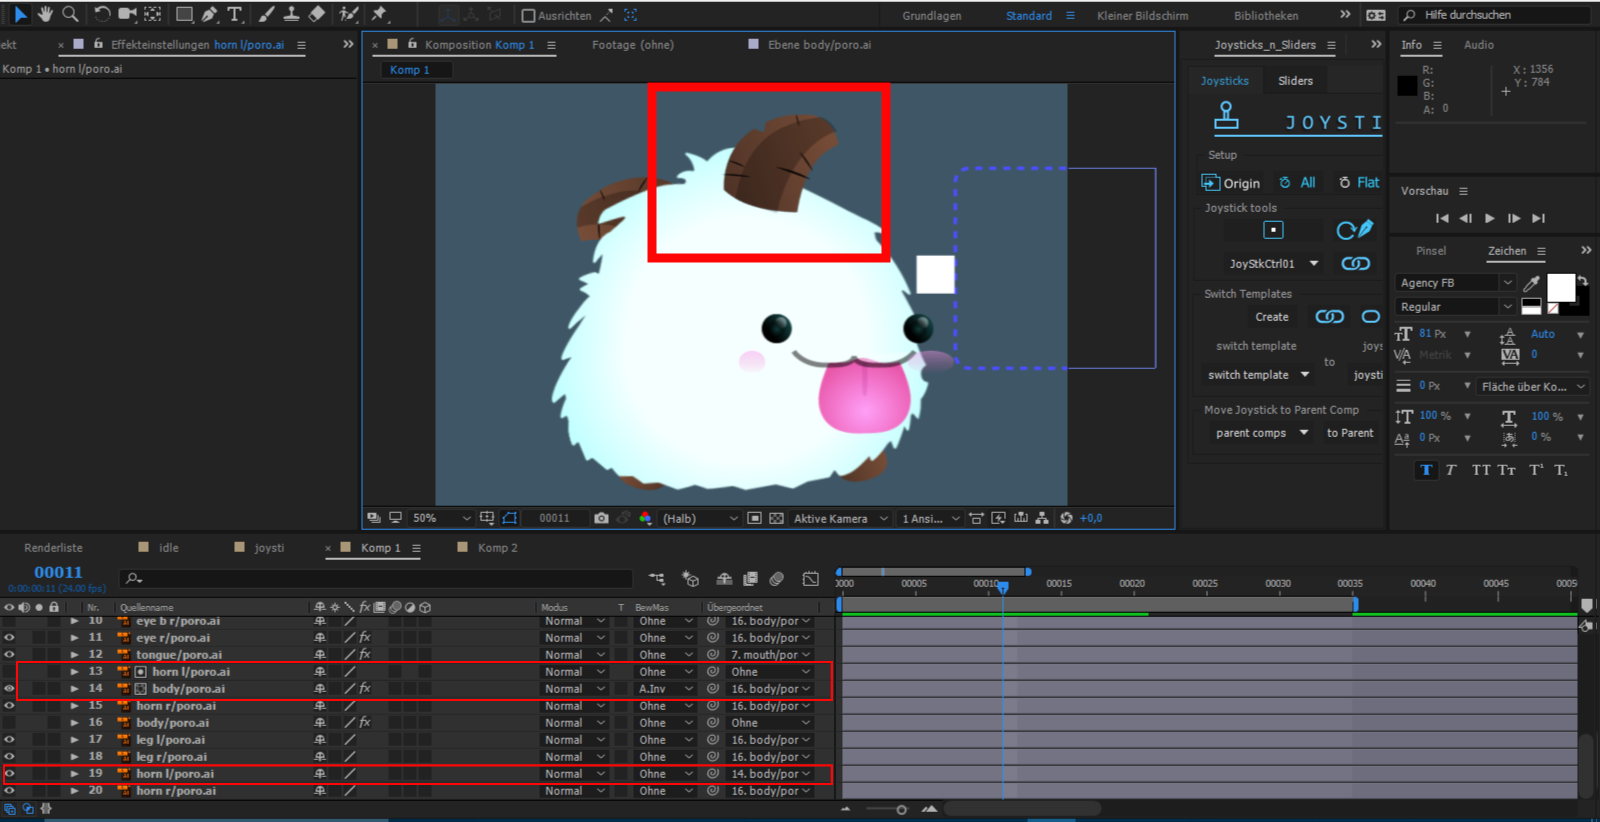
There are 2 left horn layers in this position the horn should be at back.
And your 3rd solution
I duplicated both horn layers and dragged on top of the body. Then I added the following expression
if(thisComp.layer("JoyStkCtrl01").transform.position[0]<0) 100 else 0;
The result works too and I think this is the best way to go from the 3 solutions without the need for intense masking and duplicating layers.
Is this a "clean" way to do it? Or is there a better way to express it?
You said if you could see all the poses you could give a better solution.
Here all poses
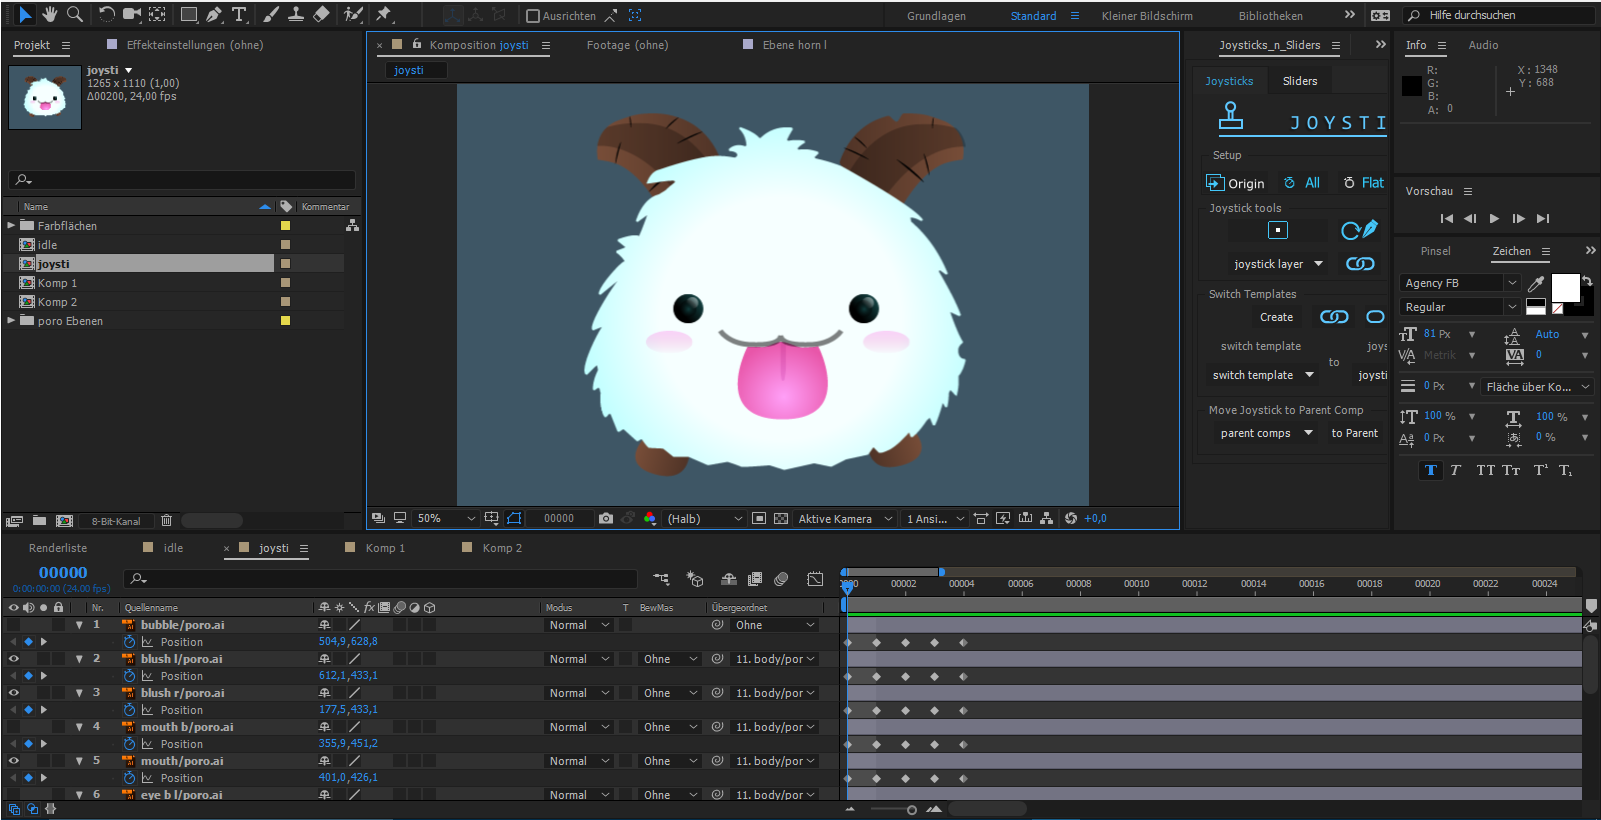
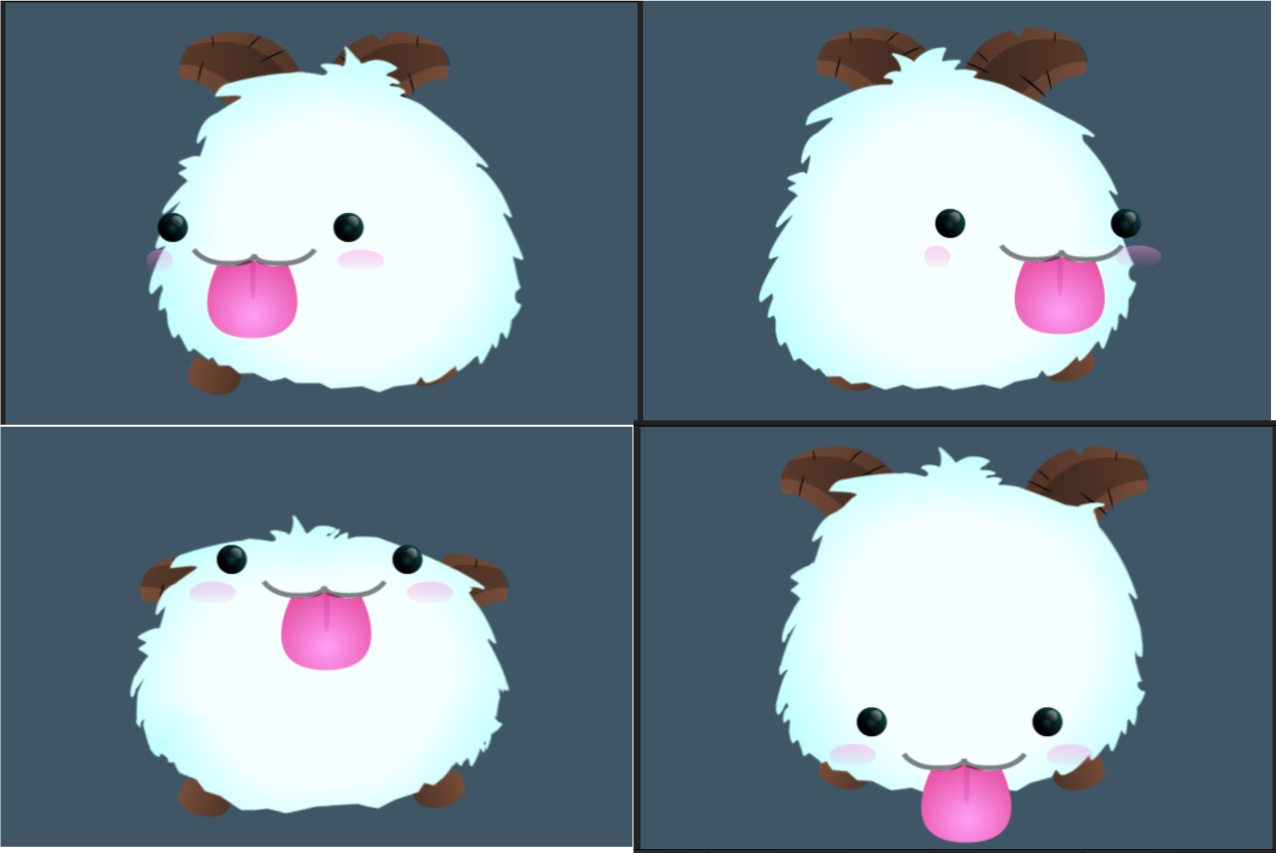
Each pose represents an extreme then the rest is done with the plugin. The keyframes disappear after.
Copy link to clipboard
Copied
An easy way to solve your issue is to split the layer where you want the layer order to change. To do this, move to the place where you want this to happens and choose Edit > Split layer. Then move the appropriate section above the other layers to move it in front.
However the issue you'll have is that layers will jump from in front to behind. So to achieve what you want I'd use a completely different technique. Check out the HeadRig script from AEScripts it includes instructions for this kind of work:
