Copy link to clipboard
Copied
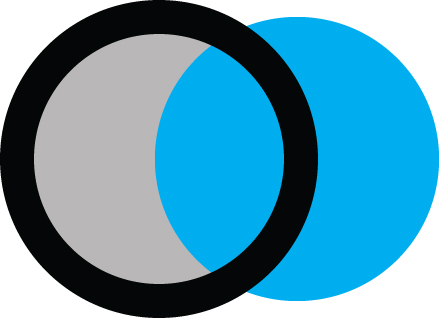
I'm trying to create a reusable element for my animations. It's of an eye. I want the pupil to move around but be masked by a circular black outline. First screenshot below shows that the blue is NOT being masked. I've tried several things in AE & don't understand why nothing is working. I imported a layered .ai file - but couldn't make the mask work using a track matte.
I created the art/circles with shapes in AE - but couldn't get the black outline to remain static while the blue circle moved left & right. they both only moved in tandem. Can anyone help me figure this out? Many thanks!
Below are the 3 elements I'm working with & trying to get teh black outline to mask the blue circle. (And I want the black outline to remain visible.
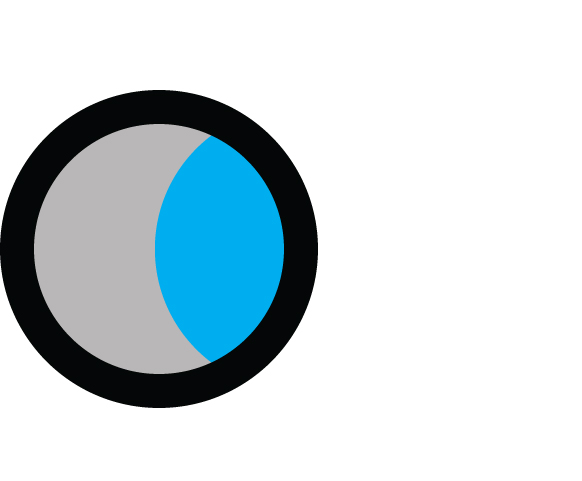
Below is what I'm hoping to achieve - I want to move the blue pupil around but never have it extend past the black outline.:
 1 Correct answer
Here is the link to the CS6 version: http://f1.creativecow.net/11034/shapelayermerge
Copy link to clipboard
Copied
You need to use the Merge Shapes command (set to intersect) with a copy of your eyeball ellipse together with the pupil ellipse. Here's a demo file I uploaded to Creative COW for you: http://f1.creativecow.net/11031/shape-layer-eye
Copy link to clipboard
Copied
I was just about to shut down when I saw this. I will download - and can't wait to try this in the morning! Thank you so much!!!!
Copy link to clipboard
Copied
I tried opening the file but I'm in CS6 - so the file wouldn't open for me. I will try to use the Merge command - and see if i can get it to work.
Copy link to clipboard
Copied
Hey Karen! hopefully you are still a Lynda subscriber. this episode cover this topic: Creating compound paths
BTW you can also add a mask to a shape layer by pressing the "tools creates mask" feature

I usually leave that when there is too much complexity in my shape that using merge path will create too much work for me instead of a simple mask.
Copy link to clipboard
Copied
I'll go and watch this movie. Thanks for the link! I actually was able to make the simpler TrkMatte / mask work. It confused me because it's sort of the opposite of masking in Illustrator. In illustrator you put the masking shape over the masked shape and then: Comm +7 - but in AE - it's lke the shape to be masked has to "reach upwards" and grab the matte. Ha, Ha! Kind of like the masked object gets caught in the shower and has to grab the towel to hide itself.
I will go watch the movie though, as I'm a vector person & was confused by how and when masking made the lower/masked shape glued/connected (it almost seemed parented) to the upper/mask.
As always, thank you!
Copy link to clipboard
Copied
TrkMatte / mask work. It confused me because it's sort of the opposite of masking in Illustrator.
isn't track matte almost exactly the same as clipping mask in illustrator? the bottom layer's transparency is defined by the upper layer's shape.
Copy link to clipboard
Copied
It's the same effect but in AI - you put the mask (object or shape) on top & hit comm +7 to mask the object below. In AE - the object below is masked but the Trk matte needs to be on the lower/Masked layer. That's why it was so confusing to me.
BTW - is there a benefit to using the Merge Shapes over the Trk Matte?
Copy link to clipboard
Copied
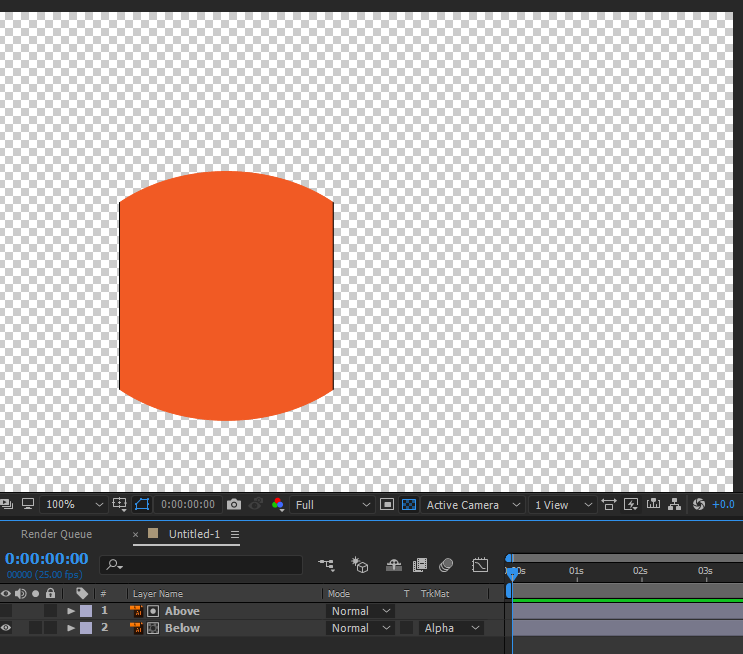
in Illustrator you need to select both layers, in Ae you set the bottom to use the top but the setup is the same.
Here's illustrator's setup for Clipping Masks
Before
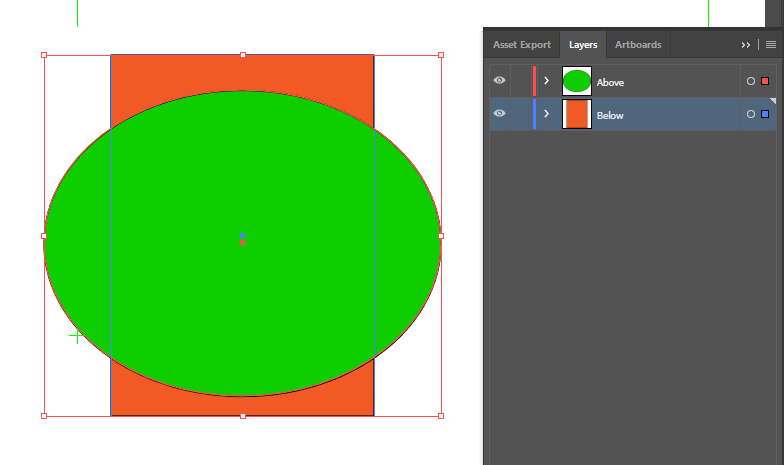
After
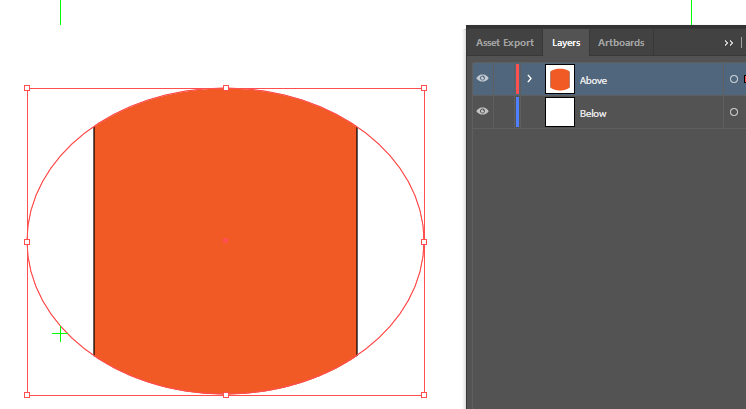
Here's Ae's setup for Track Mattes
Before

After
karenf1 wrote:
It's the same effect but in AI - you put the mask (object or shape) on top & hit comm +7 to mask the object below. In AE - the object below is masked but the Trk matte needs to be on the lower/Masked layer. That's why it was so confusing to me.
BTW - is there a benefit to using the Merge Shapes over the Trk Matte?
very close.
BTW - is there a benefit to using the Merge Shapes over the Trk Matte?
use what you feel most comfortable with. some like to make as few layers as possible, others like it different.
but when I did this - the two shapes moved together - I couldn't just grap the bottom/masked shape and move it without the mask moving in tandem.
if you move a layer, the mask move with it. but if you move the actual shape (through the shape's group properties or path properties) then the mask will stay still.
Copy link to clipboard
Copied
Thanks for making this so clear! And I watched the video - had a laugh in that I've watched it before - but as much as I really love their videos they're so chock-full & complicated that they never sunk into my brain until I started doing these simple lessons at Udemy with smaller project based videos that make you feel like you sucessfully tackled something. Now I'm getting" stuff & the balance between the shorter & easier lessons combined with going to lynda for more complex explanations seems to be working for me. As always, really, really, thanks for your help!
Copy link to clipboard
Copied
I want to start building a library of elements for my animations like eyes, mouths, etc. Can you recommend a video or a way to begin learning how to do that?
Copy link to clipboard
Copied
specify a bit more. but hold on, maybe this deserve another thread. specify exactly what you are set out to do so that others can contribute and users that have similar question could get a chance to get the answer.
Copy link to clipboard
Copied
Will do! New thread!
Copy link to clipboard
Copied
Maybe I was doing it wrong - but when I did this - the two shapes moved together - I couldn't just grap the bottom/masked shape and move it without the mask moving in tandem. So, yes, it worked, but not the way I needed it to - as a dynamic mask effect. Hope I was clear!
Copy link to clipboard
Copied
Here is the link to the CS6 version: http://f1.creativecow.net/11034/shapelayermerge
Copy link to clipboard
Copied
Thanks so much! It worked perfectly! It wil take me a few minutes to deconstruct it but clearly this works!
