Exit
  • Global community
    • Language:
      • Deutsch
      • English
      • Español
      • Français
      • Português
  • 日本語コミュニティ
  • 한국 커뮤니티
2

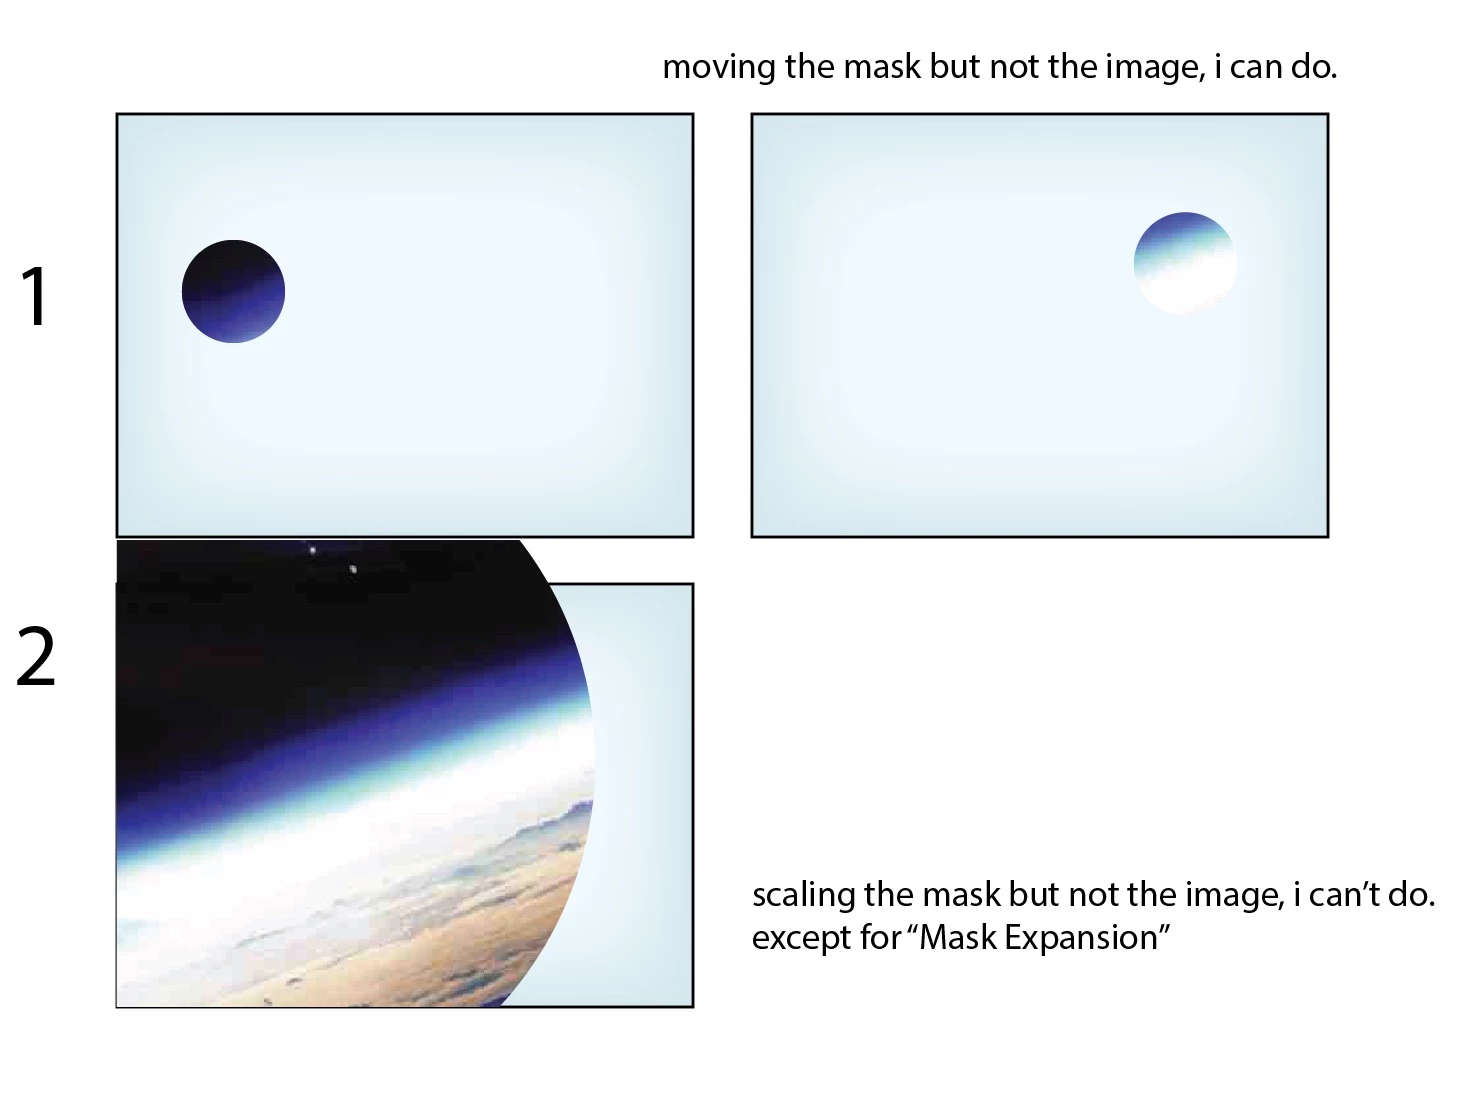
scaling a mask, but not the image the mask is masking

Participant ,
Jul 03, 2018 Jul 03, 2018

hi, title clumsily says it all. i want to scale a circle vector mask, but not scale the image the circle vector mask is masking. i do see how to animate / move the mask Path, that's easy. a work-around (or maybe this is the bast way), is to and animate the Mask Expansion. what i'm needing to do looks like the image below. i tried editing Mask Shape, but figuring out what to enter for top, right, bottom, and left is more work than i want to learn how to do. thanks in advance for any help in this matter!

mask.jpg

36.6K
Translate
Report
Community guidelines
Be kind and respectful, give credit to the original source of content, and search for duplicates before posting. Learn more
community guidelines

correct answers 1 Correct answer

LEGEND , Jul 03, 2018 Jul 03, 2018

you can click twice on the mask or use the shortcut Ctrl+T - each will give you the transform box for the mask.

if you want more control, you might consider using a track matte (clipping mask) instead of a mask on the layer. simply create a shape layer or a masked solid above your source image and set the source to track matte the layer above like this:

now you can animate the matte freely from the shape instead of animating the path of the mask.

Translate
LEGEND ,
Jul 03, 2018 Jul 03, 2018

you can click twice on the mask or use the shortcut Ctrl+T - each will give you the transform box for the mask.

if you want more control, you might consider using a track matte (clipping mask) instead of a mask on the layer. simply create a shape layer or a masked solid above your source image and set the source to track matte the layer above like this:

now you can animate the matte freely from the shape instead of animating the path of the mask.

Translate
Report
Community guidelines
Be kind and respectful, give credit to the original source of content, and search for duplicates before posting. Learn more
community guidelines
Participant ,
Jul 03, 2018 Jul 03, 2018

thank you! this is so easy, now i'm not sure what i was doing before. sometimes, when i double click, i get another window with that layer isolated. i need to click exactly on the mask path...

reading your second method (i remembered how to Toggle Switches, yea me), i think i can see what this is better, but i'll need to experiment more. i'm an old, long-time AI, PS and IND user, and i think in terms of the way these apps work. i love AE, but it often has its own way of doing things and it is a deep, dense app (which makes it so awesome).

Translate
Report
Community guidelines
Be kind and respectful, give credit to the original source of content, and search for duplicates before posting. Learn more
community guidelines
LEGEND ,
Jul 03, 2018 Jul 03, 2018

Yeah double clicking will get you sometimes so try Ctrl T instead. Also in the layer window is also a good and even superior way to manipulate your mask because you are in the layer context and not the composition. You even have quickmask mode

as for Ae's alpha matte - it's very similar to Ai's Clipping mask. The above layer is the matte (Mask) for the layer below.

Translate
Report
Community guidelines
Be kind and respectful, give credit to the original source of content, and search for duplicates before posting. Learn more
community guidelines
Community Expert ,
Jul 03, 2018 Jul 03, 2018
LATEST

The best way to edit mask or shape layer paths is to use the pen tool (g) and the Alt/Option and Ctrl/Cmnd modifier keys to cycle through the selection and modify tools. I rarely use the selection tool (v) to edit mask or even position paths. Here's what I mean:

Translate
Report
Community guidelines
Be kind and respectful, give credit to the original source of content, and search for duplicates before posting. Learn more
community guidelines