• Global community
    • Language:
      • Deutsch
      • English
      • Español
      • Français
      • Português
  • 日本語コミュニティ
    Dedicated community for Japanese speakers
  • 한국 커뮤니티
    Dedicated community for Korean speakers
Exit
0

Use grayscale image as mask?

New Here ,
Aug 19, 2020 Aug 19, 2020

Copy link to clipboard

Copied

I've been googling this simple task for the 15 minutes, but it came up empty. How do you use an imported grayscale image as layer mask? I've tried many google search results, none works like the way it works in Photoshop. Thanks.
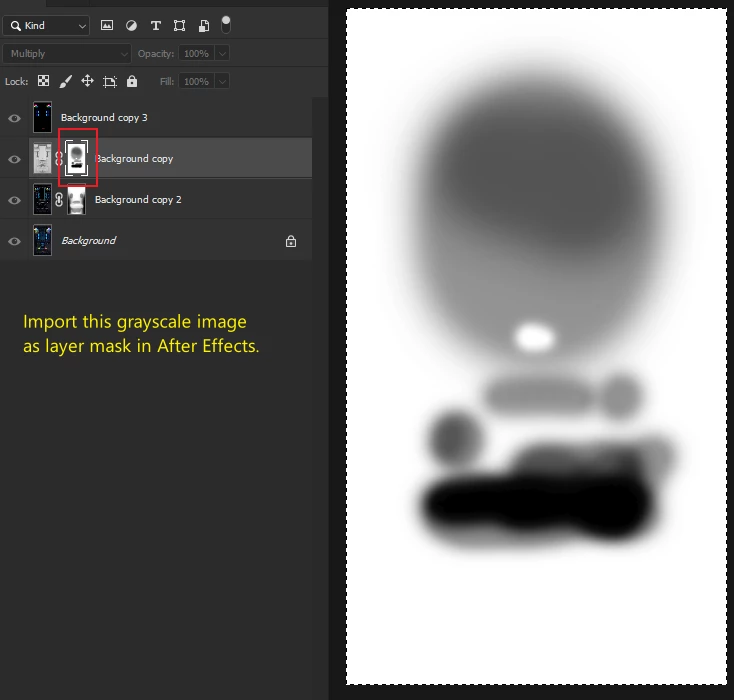
 

Snipaste_2020-08-19_10-41-21.png


TOPICS
FAQ

Views

2.9K

Translate

Translate

Report

Report
Community guidelines
Be kind and respectful, give credit to the original source of content, and search for duplicates before posting. Learn more
community guidelines
Community Expert ,
Aug 19, 2020 Aug 19, 2020

Copy link to clipboard

Copied

You have created a Photoshop file with a layer mask. When that layer is imported into After Effects it will have transparency, or more accurately, color values in the alpha channel.


When you Import the PSD file into After Effects make sure you have Import as a Composition and Retain Layer Size selected. This will create Composition with the same file name and dimensions as the Photoshop file and it will also create a folder in the Project Panel that contains each layer in the PSD as a separate file. 


Open the composition. Pick the layer with the layer mask (Background Copy 2) and place it above the layer you want to mask. 


Make sure both the Switches and Modes columns are open in the timeline by selecting the first two icons at the bottom left corner of the Timeline. Select Alpha Matte on the layer you placed below Background Copy 2 to have the darkest part of the original layer reveal the layer or select Inverted Alpha Matte to have the darkest parts of the original layer mask poke a hole in the layer. 


The other option would be to copy the original layer mask in Photoshop by selecting the layer mask, pressing Ctrl/Cmnd + A to select everything, Ctrl/Cmnd + c to copy everything, Ctrl/Cmnd + N and choose clipboard, and then Ctrl/Cmnd + V to paste the layer mask as a new layer in a new PSD file. You can then select all layers and press Ctrl/Cmnd + e to merge the new file into a separate layer and save it as a PNG or a PSD file that you can import for use as a Luma Matte.

Votes

Translate

Translate

Report

Report
Community guidelines
Be kind and respectful, give credit to the original source of content, and search for duplicates before posting. Learn more
community guidelines
New Here ,
Aug 24, 2020 Aug 24, 2020

Copy link to clipboard

Copied

LATEST

Thank you. I've tried the suggested methods, but they sort of work...the result/effect is not exactly the same as in Photoshop. Google search came up with this tip from creativecow, which worked for what I needed.


"

Although you can use the Luma Matte technique a much easier way is simply to use the paint directly on the layer that you want to make transparent using the Alpha setting for your Brush tool in the Channel menu. To do this;


1. select the Brush tool.

2. Go into the Paint Panel and change the Channel menu to Alpha.

3. Double click the layer that you wish to make transparent to open it up in the Layer panel.

4. In the layer panel, paint with black to make areas transparent, paint with white to make areas opaque. If you paint with varying degrees of grey you'll create varying degrees of semi-transparency.

5. Be aware that the paint will be applied from the frame you begin painting on but paintstrokes can be "stretched" to fill the full duration of the layer. Hit the P key twice in quick succession to open them up in the timeline where you can adjust their duration and other properties.

"

Votes

Translate

Translate

Report

Report
Community guidelines
Be kind and respectful, give credit to the original source of content, and search for duplicates before posting. Learn more
community guidelines