

- Home
- After Effects
- Discussions
- Create a path from the sound waves of an audio fil...
- Create a path from the sound waves of an audio fil...
Create a path from the sound waves of an audio file

Copy link to clipboard
Copied
Hello everyone,
I'm opening a new discussion following this one : Create a path (audio wave) from audio file
Indeed, the problem is quite different now.
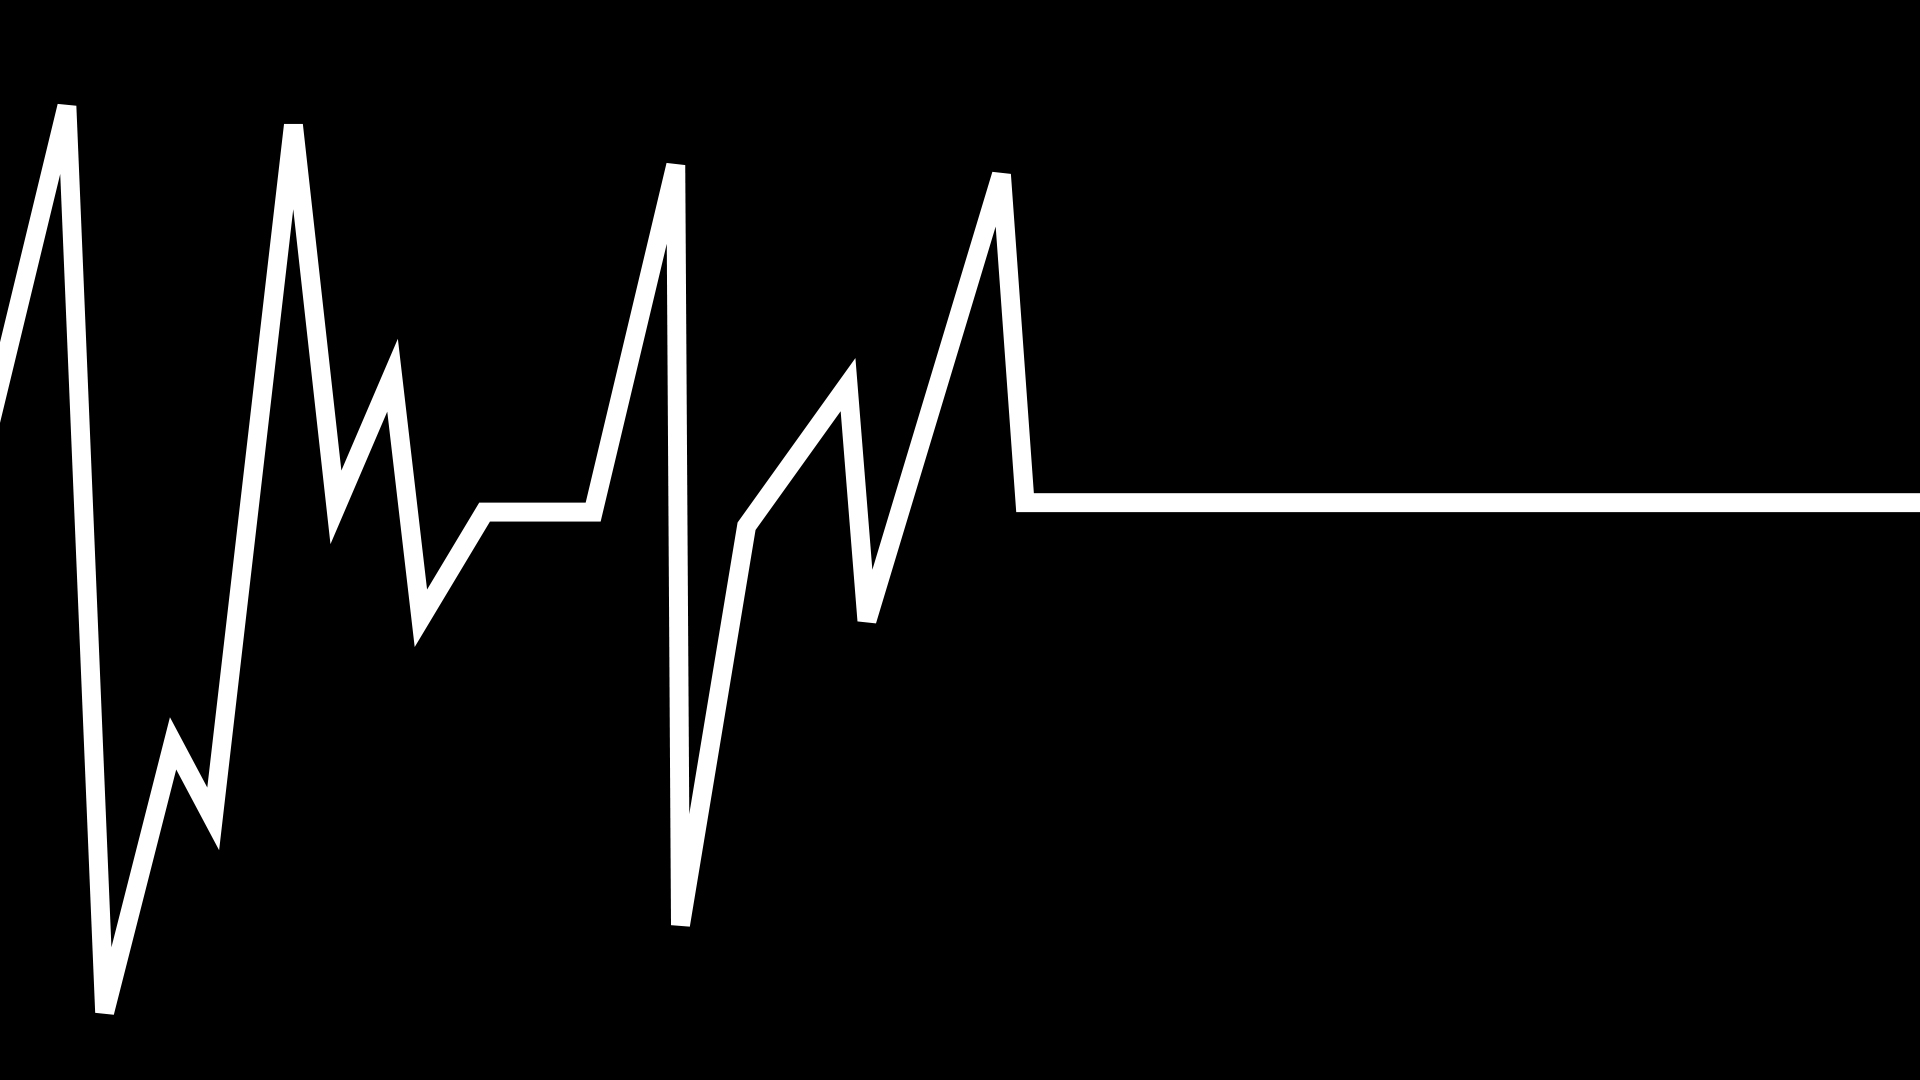
To make it very simple, I want to create an EKC/seismograph effect from an audio file: so not an audio spectrum nor some audiowaves (these will move up and down along the line every second), but a line at the center of which some audio waves would be drawn according to the sound that's being played.
I'd like the waves to be drawn at the center of the video / on the left side we'd see the waves that were just drawn / and on the right there'd be nothing.
All of this would be moving to the left, following the sound, just like a recorder.
Here's a very ugly handmade draft.
What's more complicated is that I want the waves to be drawn according to the sound that's being played.
Hence, I can't just draw a random sound wave and use the Trim Paths effect.
So my question is: do you know how can we copy the sound wave shape that we can see in the graph editor after clicking on "convert audio to keyframes", and make a shape path out of it?
Of course this solution is what I have my mind, but maybe there's better and easier.
Thank you very much for your precious help!


 3
Replies
3
3
Replies
3

Copy link to clipboard
Copied
The Audio Waveform Effect from the Generate section of AE's effects list will generate a frequency sampled line that is something like what you want. The graph editor that displays a line similar to your example image is displaying levels over time. It has nothing to do with frequency.
It is very easy to change a path like the one you show above into a motion path. You just copy the path and paste the values to any position array like Position or Flair Center or Emitter, because there are a lot of effects that have X, Y coordinates that you can animate. When you do that you effectively generate a single keyframe for motion using the X and Y values from the path and stretching that motion out with rove over keyframes between the start and end of the path.
The values generated by Convert Audio to Keyframes are not an array, they have no relationship to a position value, so you can't just copy and paste them to an array. The basic format doesn't match.
We already went over the procedure of tying a null to the values in the Both Channels Slider you get when you use the Convert Audio to Keyframes keyframe assistant.
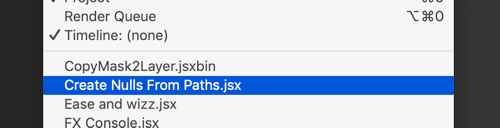
In the latest version of After Effects, there is a script in the bottom of the Windows Menu called Create Nulls from Paths.jsx
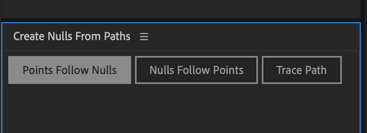
Open that panel and dock it somewhere so you have access to it.
Add your audio track to a new comp, select the audio layer and use the Keyframe assistant to Convert Audio To Keyframes. Select the newly created Audio Amplitude layer and press the U key to reveal all keyframed properties for the layer. You'll see Left, Right, and Both Channels sliders. Delete the left and right channels to lean things up, you won't need them.
Add a null to the comp and name it Audio Value or something like that. Add the expression that I showed you in the last thread to the Null layer's position property like this:
t = thisComp.layer("Audio Amplitude").effect("Both Channels")("Slider");
y = linear(t, .1, 3, 0, 800);
[value[0], value[1] - y]
Adjust the values in the linear array to get the null to move up and down like you want it to move. For my audio file, these values resulted in the null moving up 800 pixels, which works well for a line that starts at the bottom and moves to the top. That's not exactly your design but we'll fix that later. Let's say you are working with a standard HD comp so let's change the last value in the array to 500 so we can start building the top part of the line.
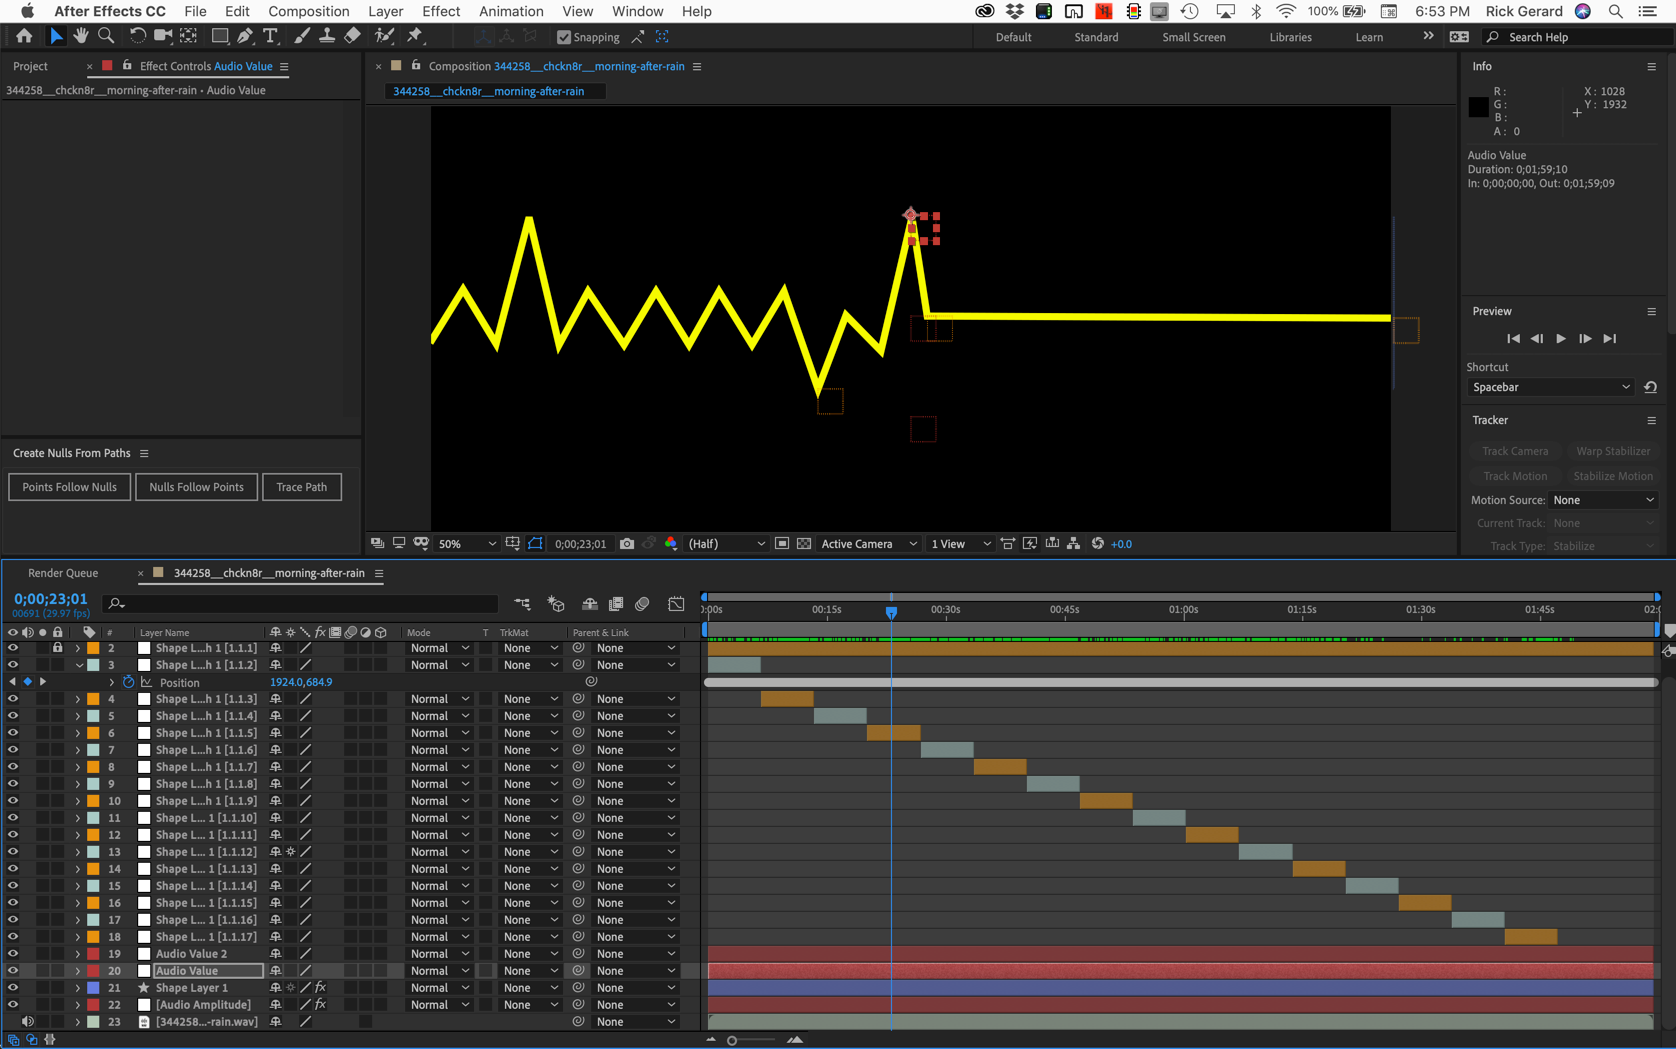
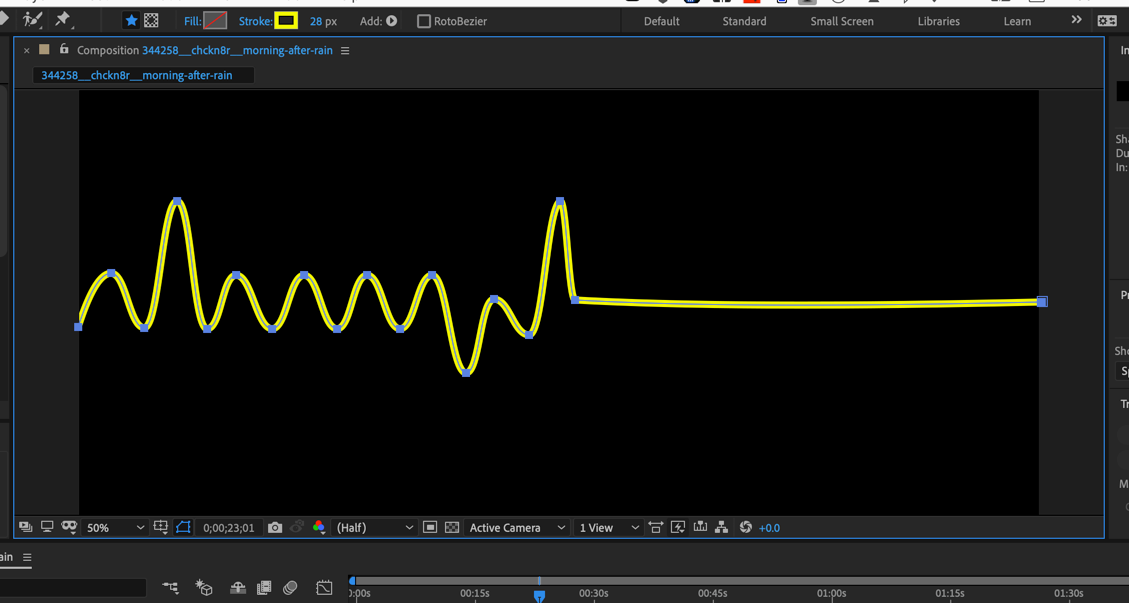
We're getting close. Now comes the planning part. Decide how many segments you want to divide the line into. You have 18 valleys an peaks in your sample so draw. To replicate your design draw a path like this using the grid so you can evenly space the points on the path. I set the stroke to zero so you can clearly see the path:

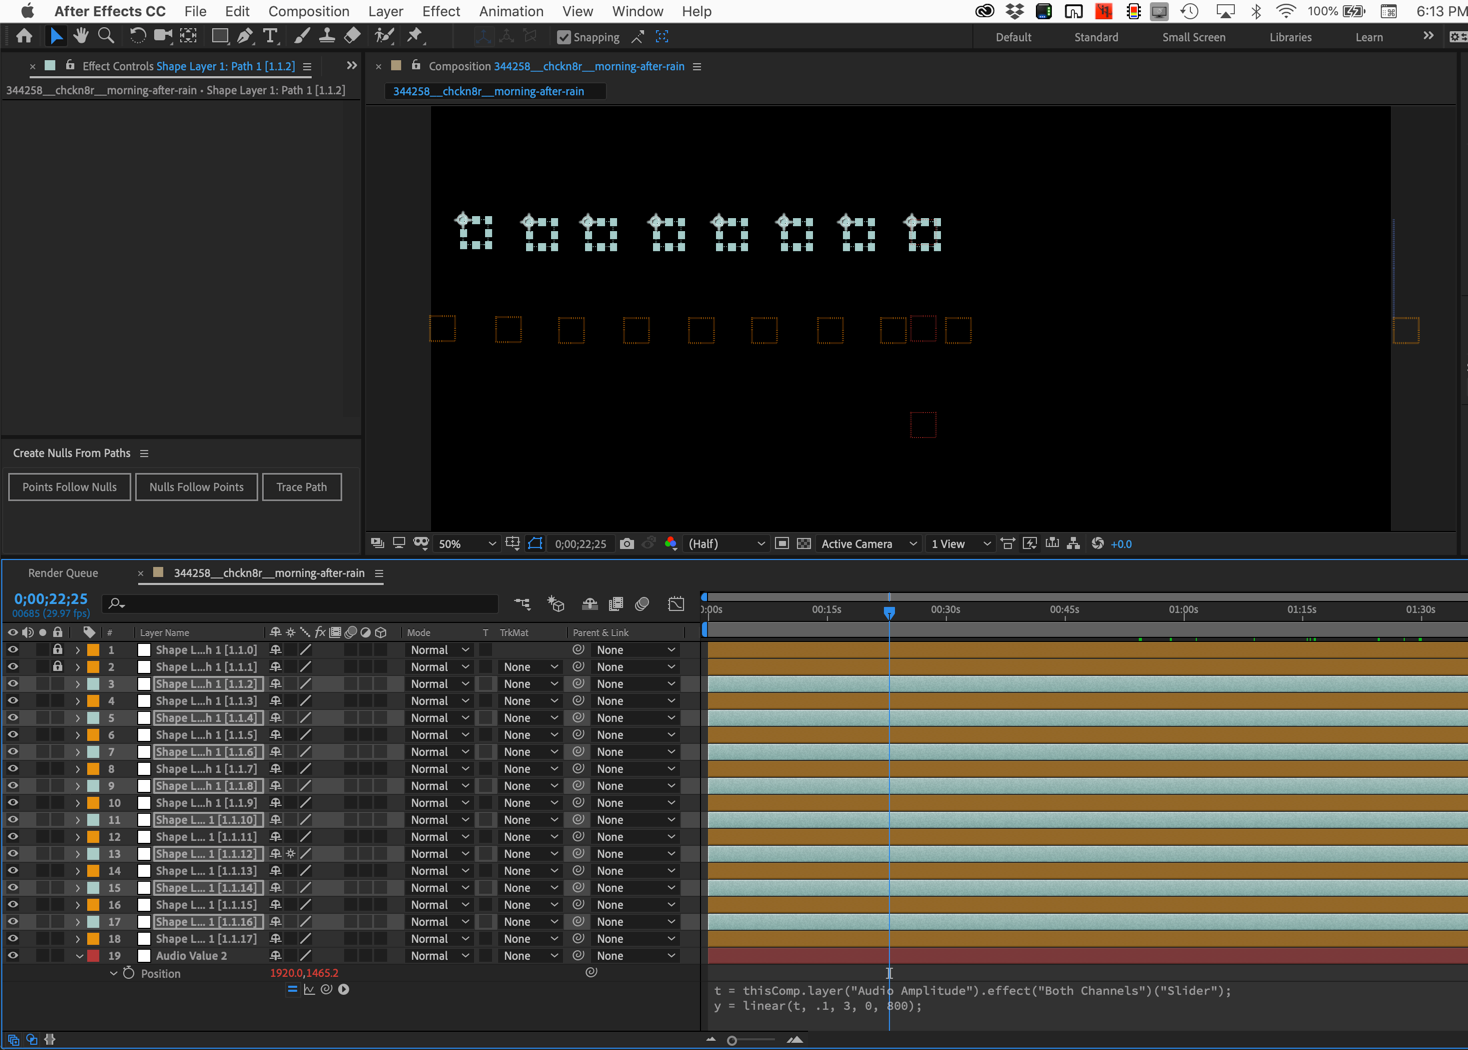
Now it's time to run the Create Nulls from Path script. Select the path in the timeline and choose Points Follow Nulls.
This is what you get:
Remember that null we created called Audio Value? It's time to work on that. The first thing you want to do is duplicate that null, then open up the top copy expression and change the last part in the last line so it reads + y instead of minus y. You now have one null that moves up and one that moves down in time with the audio.
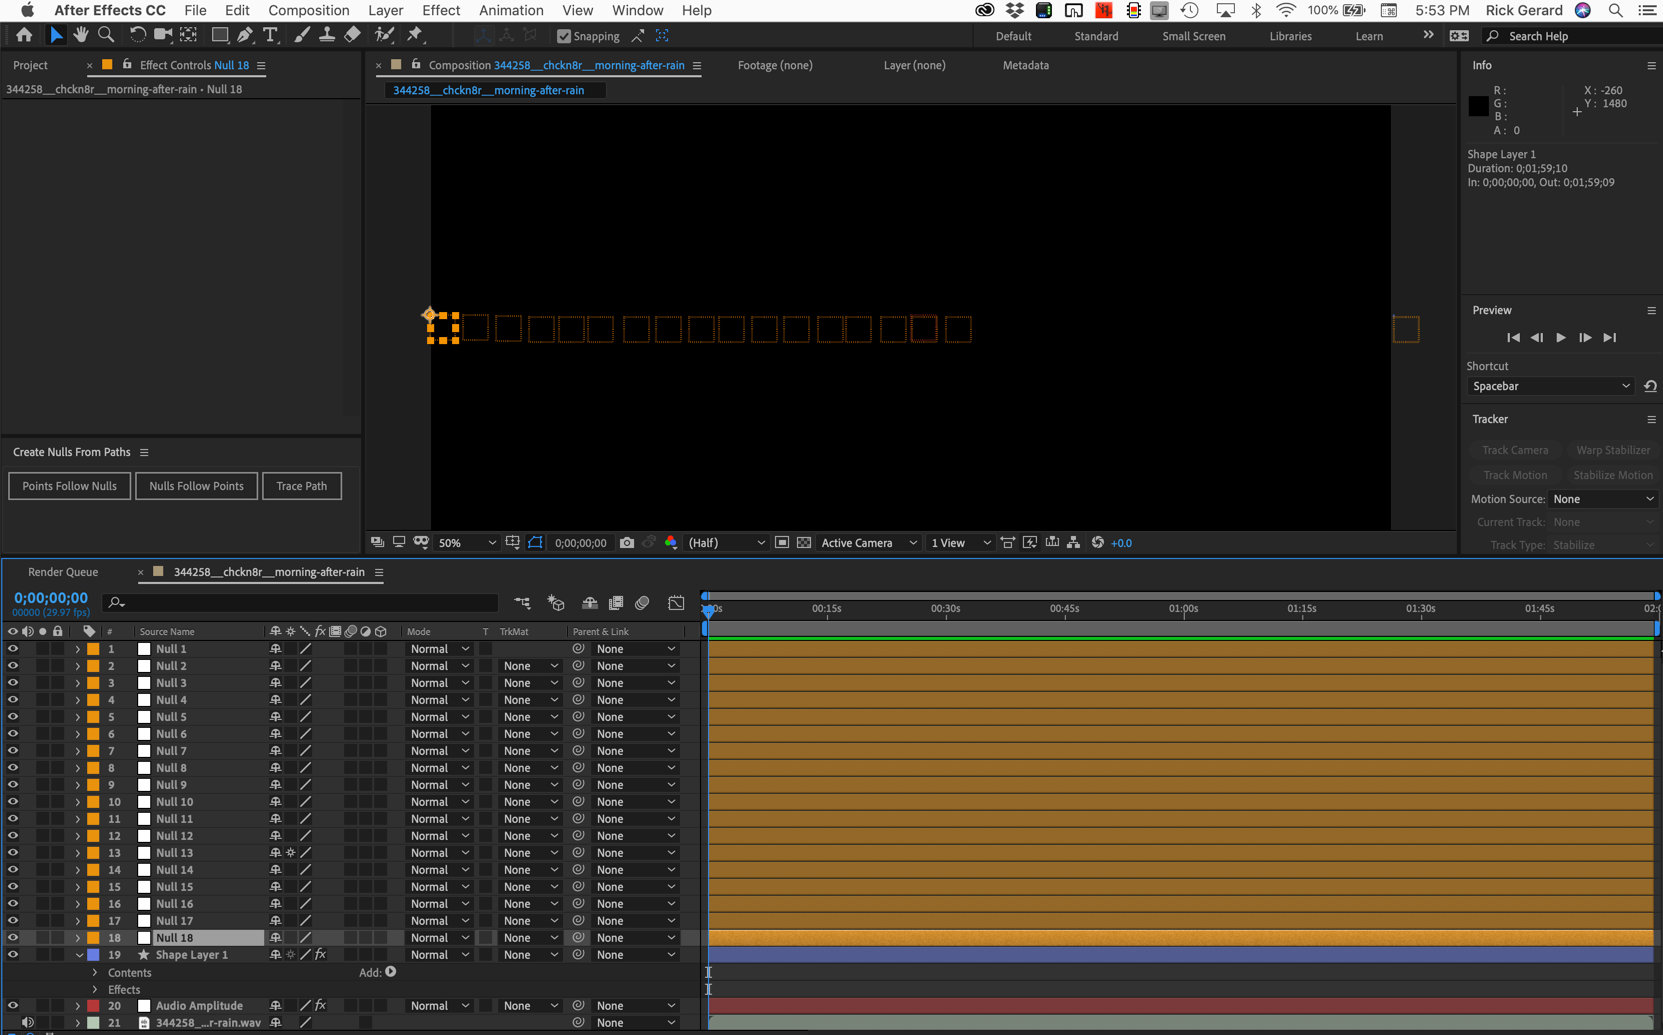
Here comes the tricky part. In this example, the first null attached to a path point is on the far right. You want to make sure that null is centered and on the right edge of the comp. When the position is perfect lock the null. The second null is going to define the middle of the straight line. It should be exactly at the Y center, we'll line it up with X center later. Lock the second null. Now select the original Audio Value null, select the position property and right click or use the Edit menu to Copy Expression Only. Now hold down the Ctrl/Cmnd key and select all odd-numbered nulls generated by the script and Paste. All of these nulls will now move up and down from the center of the comp dragging the path points with them. The comp will look something like this:
I made the odd-numbered moving null layers are now a different color to make them easier to see by clicking on the color icon for the layer and changed the color like this:
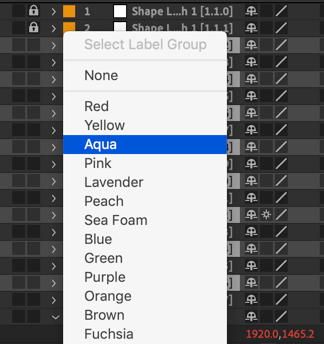
This creates a label group making selecting the all the same colored rows a two-click operation.
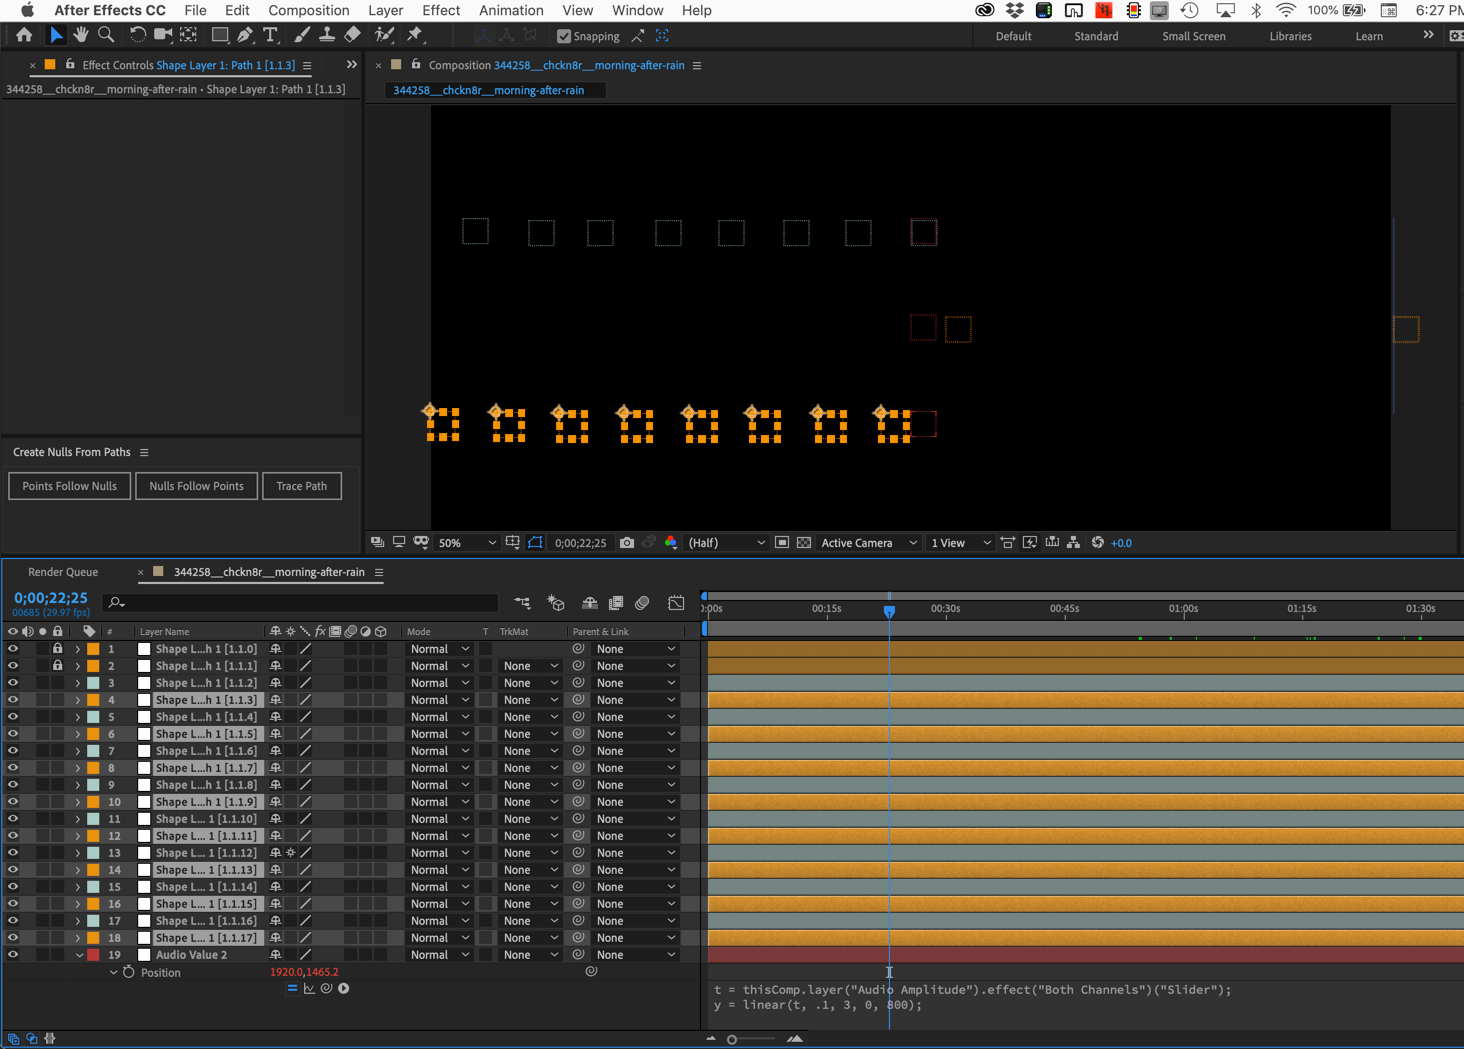
Now repeat the process but this time Copy Expression Only for the Audio Value 2 layer and Click yellow label color and select Select Label Group and paste. Your comp will look like this:
Just three more steps and we're done.
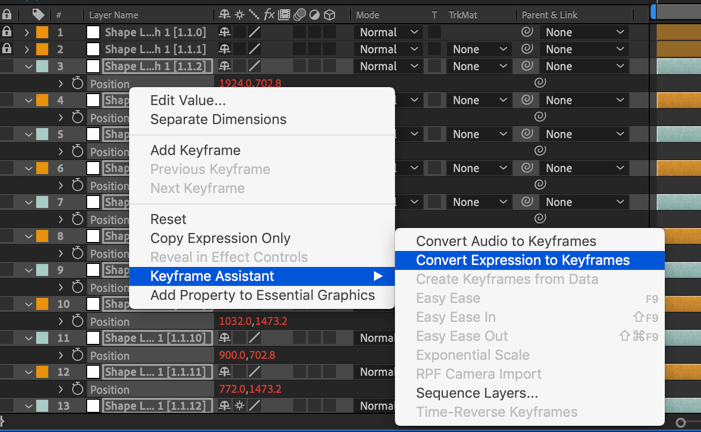
The first is to Shift-select all of the nulls created by the script for path 1, press the P key and make sure that all of the Position properties are selected, then use the Keyframe Assistant to Convert Expression to Keyframes for all these layers.
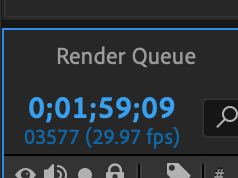
The next step involves a little math. My comp is just about two minutes long or precisely 3577 frames.
I have 16 nulls that are going to be moving. I want the first null to start moving when the comp starts but I want the last null the one on the far left to not start moving sometime after the first null starts to move but no later than the end of the comp. Did you follow that? The first moving null is in time with the audio but the last one has to start moving later to make the line look like it's moving.
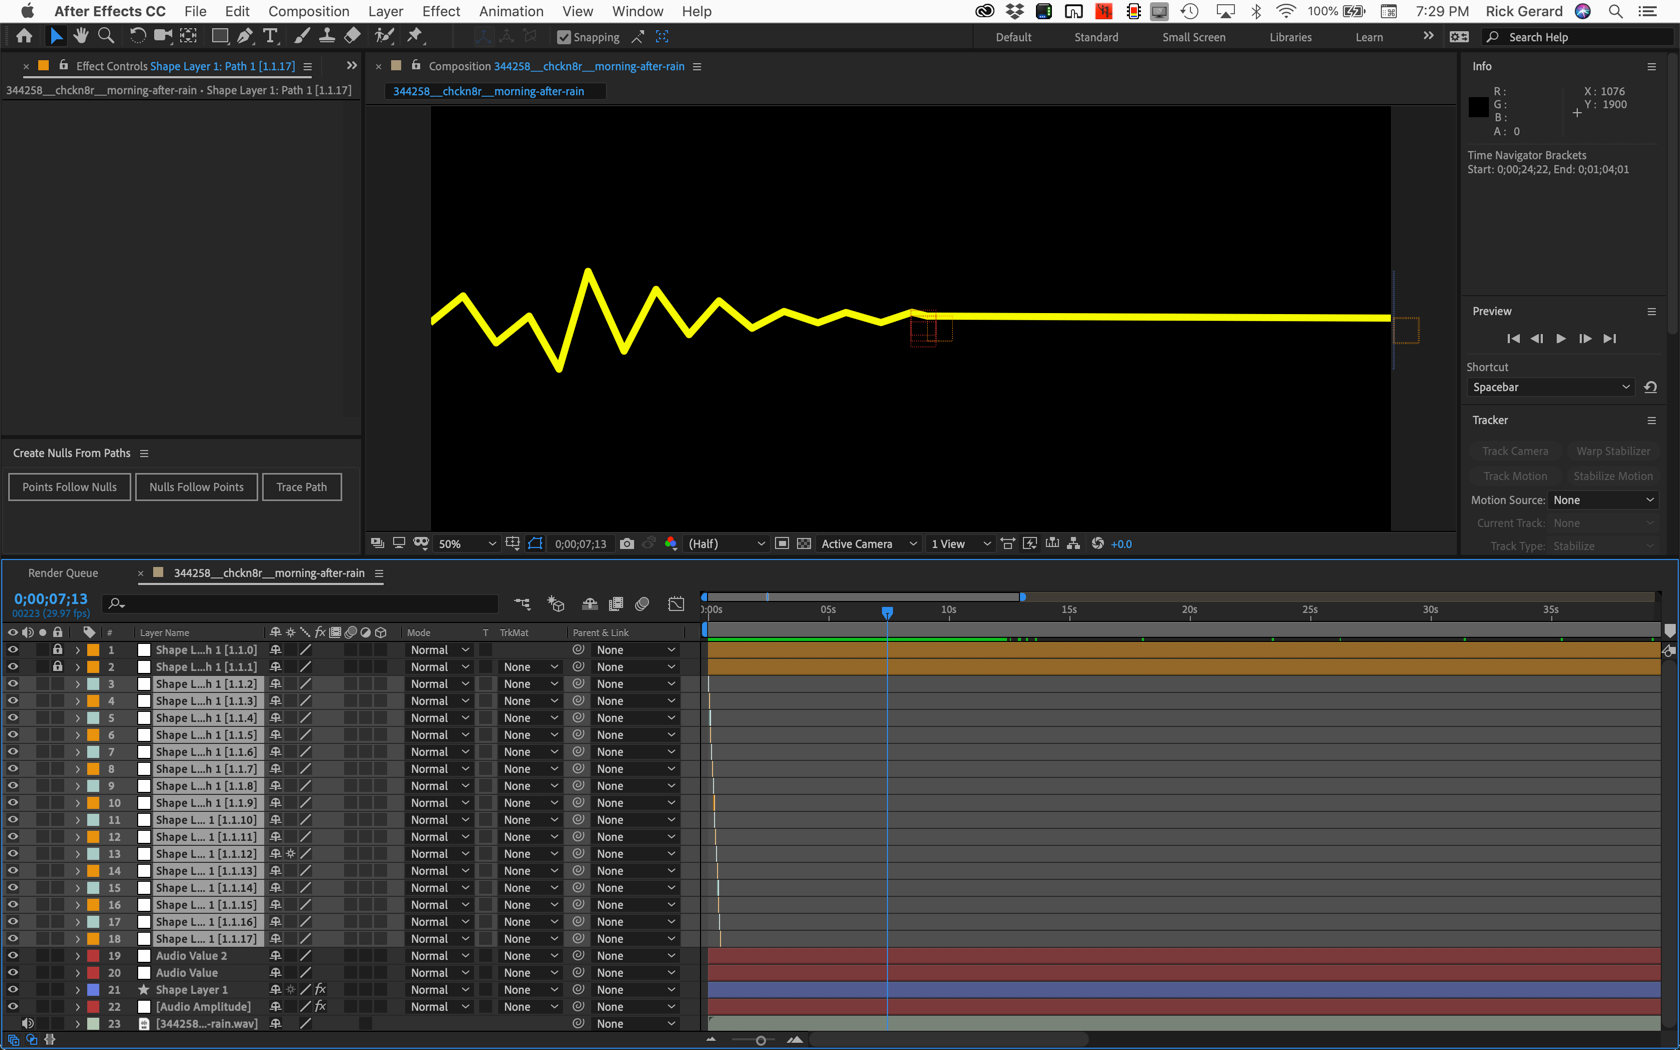
I can divide the total number of frames by 16 or I can pick any number of frames less than that. Just for fun I'll have each null start moving 20 frames after the first null. There's a really easy way to make that happen using the keyframe assistant. Here's how that works. Set the CTI to 29 seconds, select all of the null layers starting at the top and press Alt/Option + ] to set an out point. The comp looks like this:
With all layers still selected Right click or use the Animation Menu to find Sequence Layers in the Keyframe Assistant. Make sure there is no overlap and press go. If you adjust the stroke of the Shape Layer Path you should see something like this:
You can change the corners of the stroke to round them or you can select the path in the timeline and change the path type to RotoBezier and then back to bezier to get different looks like this:
A couple of notes in closing. I kept the null layers trimmed to 20 frames because this leaves you the option of re-aligning them all easily, setting new out points, and then sequencing the layers again to change the timing. If you want to edit the path after the nulls have been created the easiest thing to do is copy the path in the shape layer, start a new shape layer, then edit paste the path in the new shape layer, edit the path by adding bezier handles, then copy the edited path, select the original one and paste. You have to do this workaround because the expressions that are added to the path by the script make it impossible to edit the path manually. Copy and paste is a much easier workflow than turning off all of those expressions.
One last note. If the audio level is zero at the start of the comp then the line will be flat before the audio starts. If there is some level before the timeline starts you'll get uniform jaggie lines because all audio values will be equal and the keyframing has not started yet.
I hope this makes sense to you. It should take you about 20 minutes. It took me about that to write this post. When I get the chance I'll turn it into a video tutorial.
EDIT: I just checked playback and it turns out that the project looks a lot better if you just offset the layers by one frame. Do that by setting the CTI to the first frame, setting an out point using Alt/Option + ], then sequencing the layers. You get a lot moe pleasing waveform looking line.
Here's a sample comp for you to look at. I'm not including the audio but you can see all of the steps:
If your browser adds a TXT extension to the AEP file just delete it. The project Requires AE CC 2019, but you can create it in CC 2018.
Copy link to clipboard
Copied
Rick, I cannot thank you enough for your help, I kind of feel embarrassed that you took this much time working on my problem.
Everything works great except for the last part, the one about curving the edges.
I can't get the same result as yours on the second to last screenshot.
When I click on the path, I do have the RotoBezier option in the toolbar (which by the way sometimes disappear, or sometimes switch to Bezier Path), but clicking on it doesn't change anything.
Since we cannot curve the handles manually in the original path because of the expressions, I tried to create a new shape layer and copy the original path in it, just like you said, and removing the expression. But since it becomes a flat line, I can't figure out how to curve the edges... As you can see I'm a bit confused.
Could you please explain a bit more how can we get the result on your second to last screenshot? Because this is exactly what I want 
Thanks again Rick for your help!
Copy link to clipboard
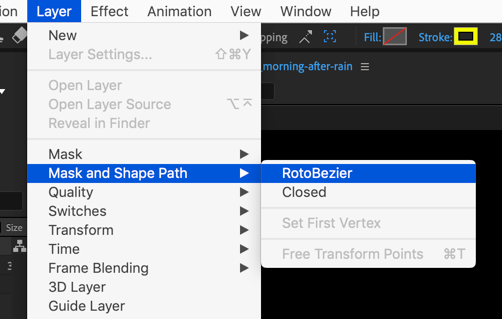
Copied
All I did was select the path in the Timeline, then use the menu to select Layer>Mask and Shape Path>Rotobezier and select it and then do it again and deselect it.
Did you try downloading the project file? Here's a link to a version that will work in CC 2018: Dropbox - Audio To Path copy CC (15.x).aep
By the way, I don't know what I was thinking but you can select the path in the shape layer, press the e key twice to reveal the expression applied to the path, turn off the expression, select the pen tool (g), make sure only the path is selected in the timeline so all the points are selected, then hold down the Alt/Option key to change the pen tool to the convert vertex tool (looks like a < at about a 45º angle) and click on any vertex. This will extend the bezier handles on every point to the 1/3 of the way to the next vertex on both sides. Then all you have to do is turn the expression back on. You won't see the handles because all of the points are selected but if you hold down the Ctrl/Cmnd key to change to the open selection tool and drag around any vertex you can see how the points have been changed.


 AdChoices