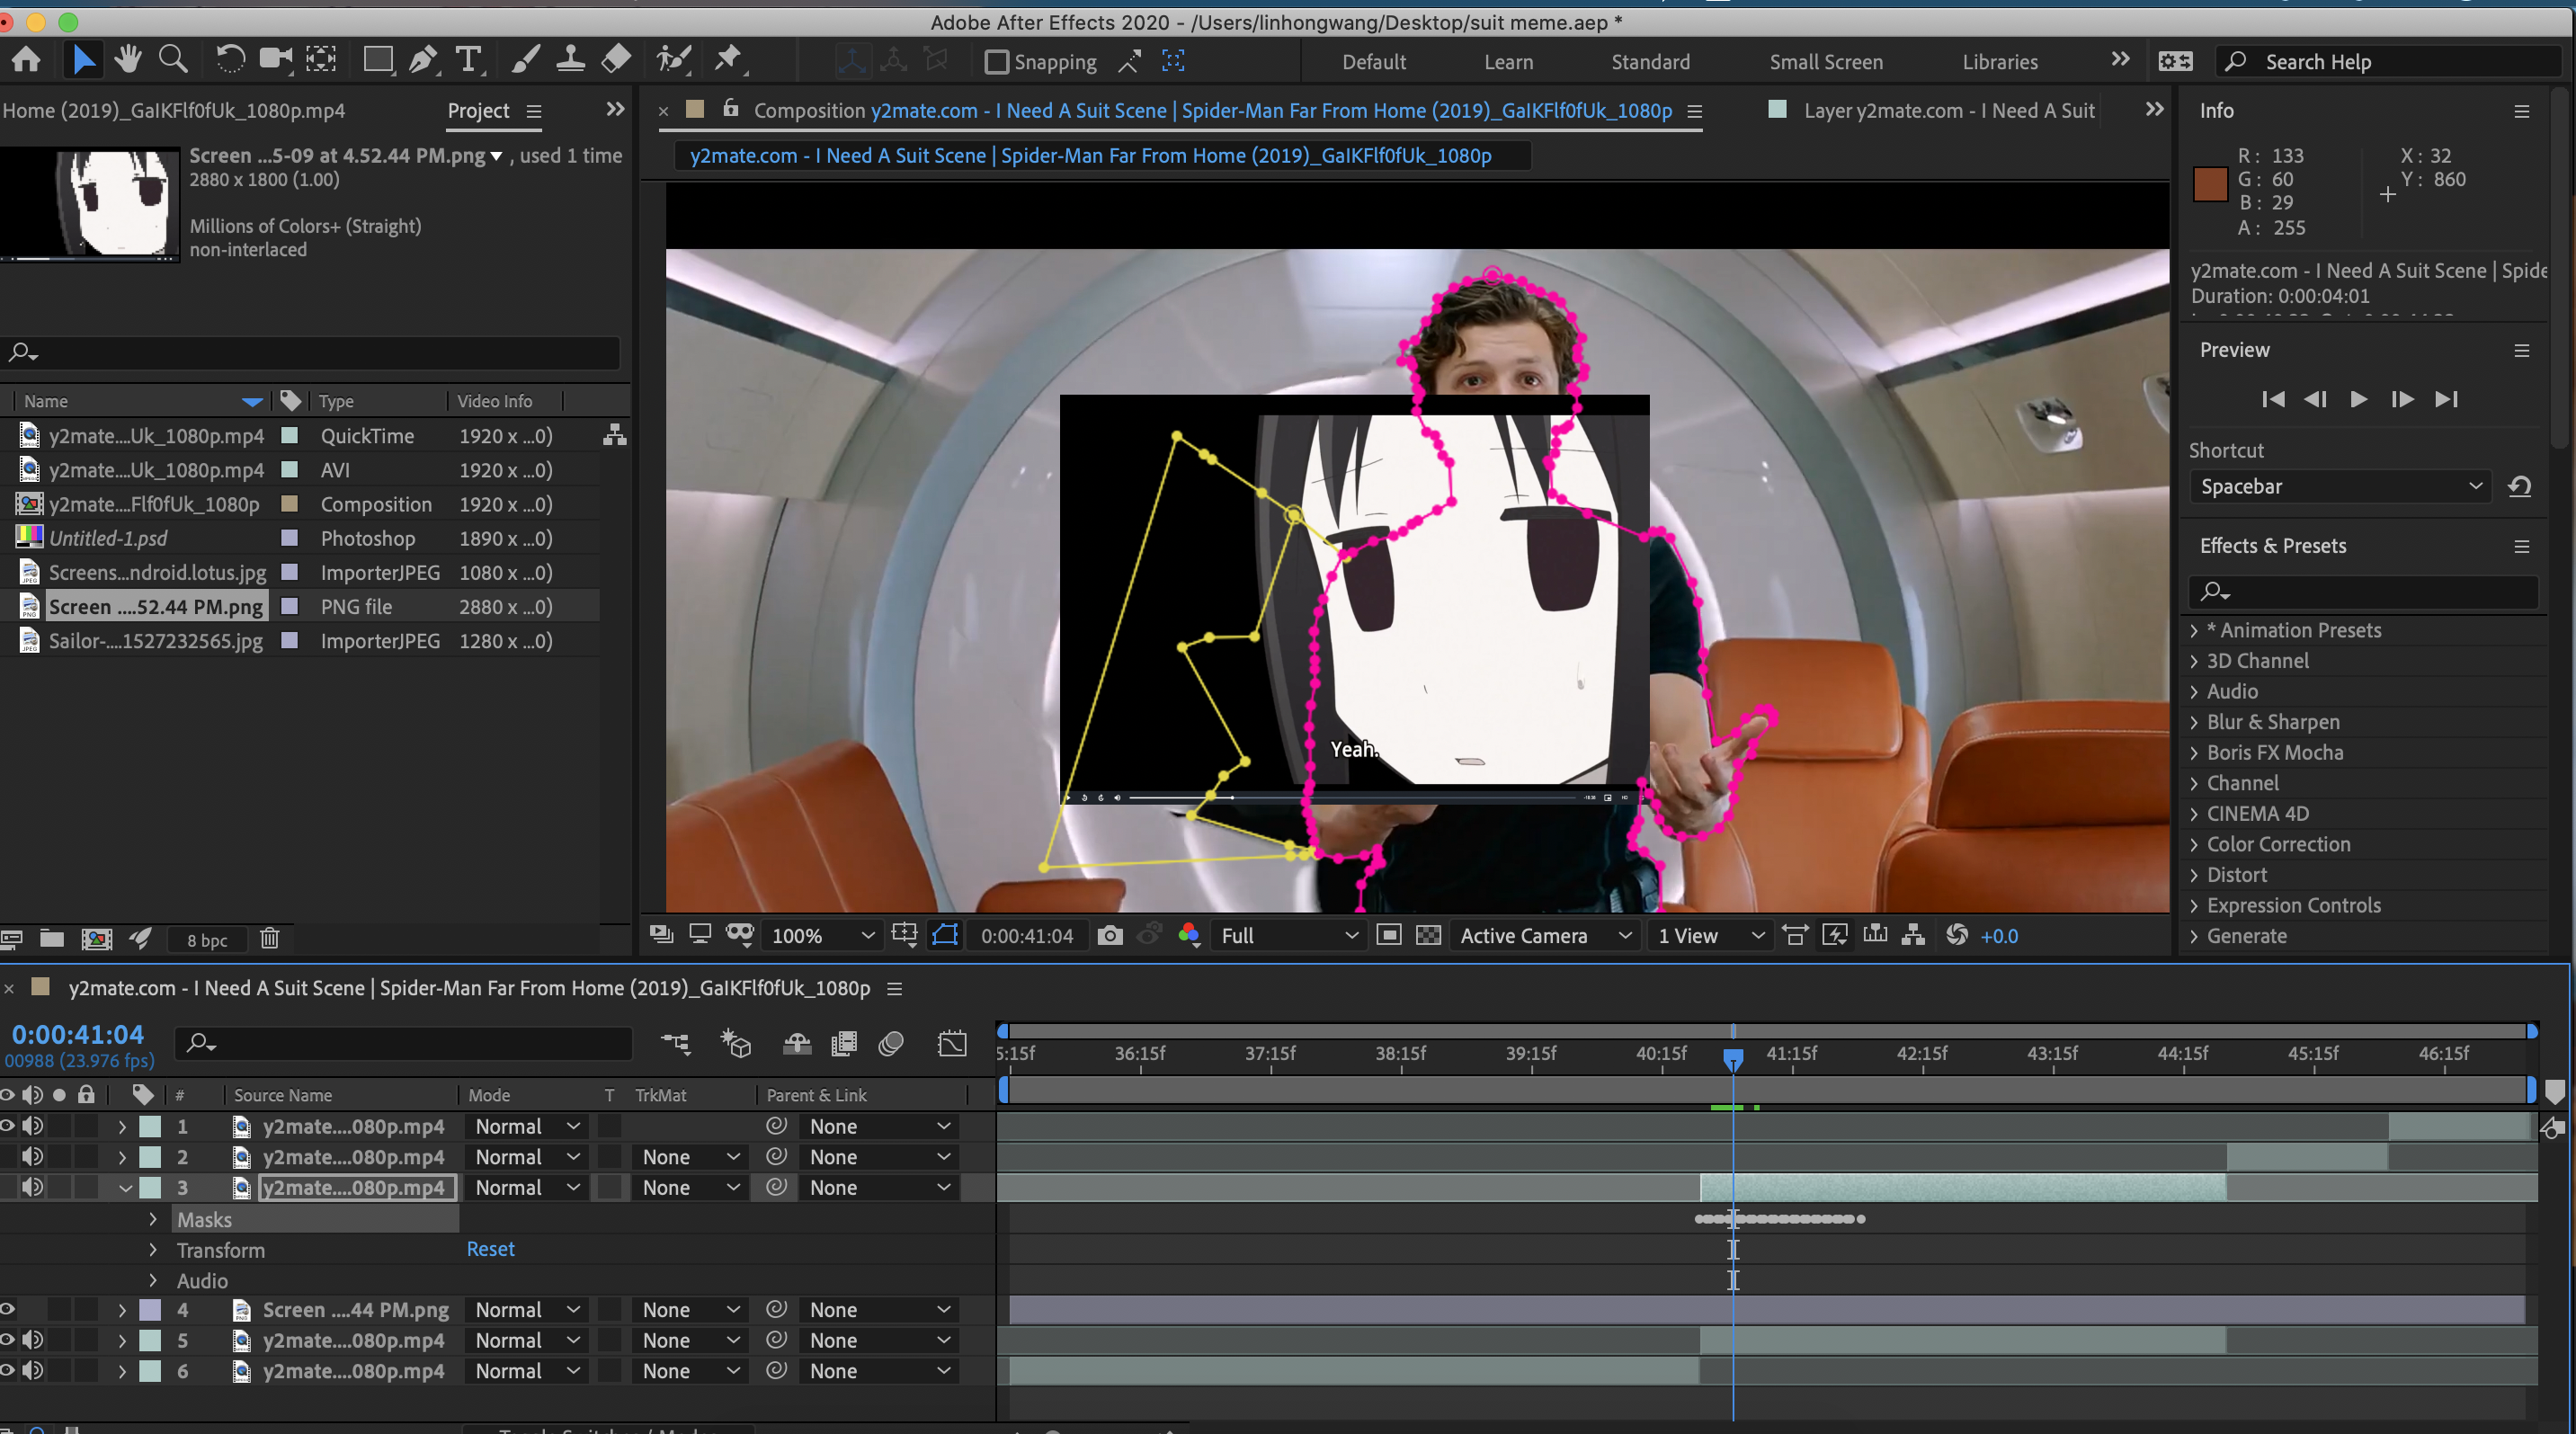
So here's your screenshot and I'm a little confused about what I am looking at. It is a lot easier to diagnose problems when you embed your screenshots.

Layer 3, a copy of the video is turned off and there does not appear to be any track matte applied to another layer, I can't see the switches column so I don't know if an effect has been applied to any layer. It looks like at least one of the masks on Layer 3 has keyframes on nearly every frame but I do not know what the mask modes are or what they are trying to uncover or hide. It would help if you revealed all properties of layer 3 by selecting it and pressing the U key twice.
From what I see in the screenshot Layer 3 is not doing anything because it is turned off.
It also looks like you are trying to roto the actor manually but I have no idea what the yellow mask is supposed to be doing. I am guessing you are trying to put the actor and some other object in the shot in front of Layer 4.
A better approach would be to keep the footage all on one layer and use a solid layer as a track matte where you need it to poke a hole in the footage or put something in front of it. You will also find that it is much simpler to hand roto your actor if you use a combination of masks, one for the torso, one for that arms, one for the head, and so on and you try and limit the number of keyframes as much as possible. If the background in the original shot is what I see then Rotobrush combined with some masks is going to be by far the most efficient way to separate the actor from the background.
One other thing that is confusing, the yellow mask has a straight line that goes from the upper right corner to the eye of the character in Layer 4. There does not seem to be a return path that includes any pixels going back to the first vertex. This tells me that the path may be open. A mask will not isolate any part of a layer unless the path is closed.
If this were my project the y1mate...80p.mp4 would just be on one layer and I would either mask directly on the Screen...44.png or use a solid as a track matte for the PNG. If I used Rotobrush + masks a copy of the footage to only the parts where I needed the mask would be moved into a pre-comp that I could use to generate the matte. If you are just trying to poke a hole in the PNG layer so it looks like it is behind the actor you do not need to mask to extend beyond the boundaries of the PNG so almost every vertex point above and below the image are not wasted.
Here's a quick tutorial on how to do hand roto that I did using a solid and multiple masks. It should simplify that part of the workflow for you.
Please let us know exactly what you are trying to accomplish and which layers are doing what.


 2
Replies
2
Replies


 AdChoices