

refine edge workflow

Copy link to clipboard
Copied
I've watched a few tutorials on this, but I'm still not 100% sure what the correct workflow is..
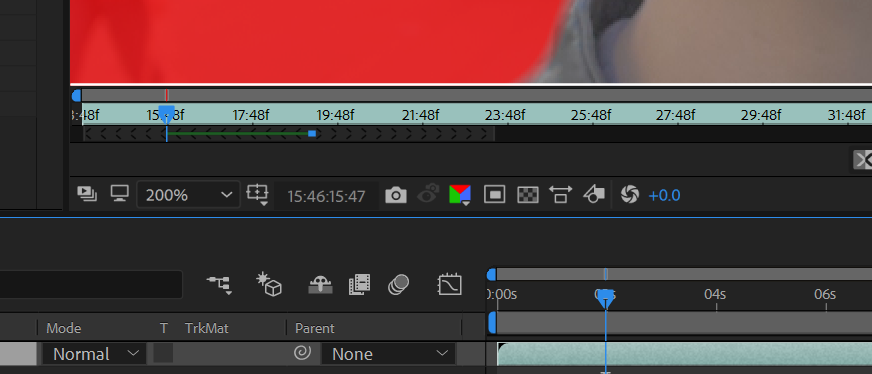
The green line represents where the 'tracking' is already applied and rendered ?
Scrubbing through the timeline is extremely slow, just displaying one frame takes like 10 seconds and it's all freezing up.
At one frame I actually got the mask the way I want it.. how do I now apply it to the whole sequence ?


 6
Replies
6
6
Replies
6

Copy link to clipboard
Copied
This looks like the RotoBrush tool. What actually are you doing? Which tool/effects have you applied?
Provide screen grabs of your Effects Control Panel (ECP) and Layer Panel, if it's the Rotobrush Tool that you've used.
More info on the RotoBrush Tool. Roto Brush and Refine Matte in After Effects
If you've watched youtube videos and aim to use them as references, for technical information then you've wasted your time. More than 90% of youtube tutorializers not only know very little, they have a harder time explaining the tools they use. In short, they're just showing you procedures but not how to think or why you're performing each step, of the procedure. These folks are great for the creative ways that they use AE and that is what you should look for when watching 'their' tutorials. Don't confuse yourself between creative brilliance and technical excellence - they are quite different. To be good in AE, you first need to have a good foundation. Books and paid lessons, either in a classroom or via LinkedIn Learning/Lynda are your best bets to get a solid foundation in AE.
Copy link to clipboard
Copied
yes, exactly as you say..
I've got two separate videos.. A and B let's say.
Trying to isolate the guy on video B from the background and place him onto video A.
I managed to get one frame perfect already and then pressed on the Freeze button, thinking it would analyze all the frames and apply the same settings.. but it just froze up and now I can't find the frame where the roto brush was correct..
What are the fundamental steps on getting the roto brush (i.e. mask) drawn and actually applied to the whole sequence ?
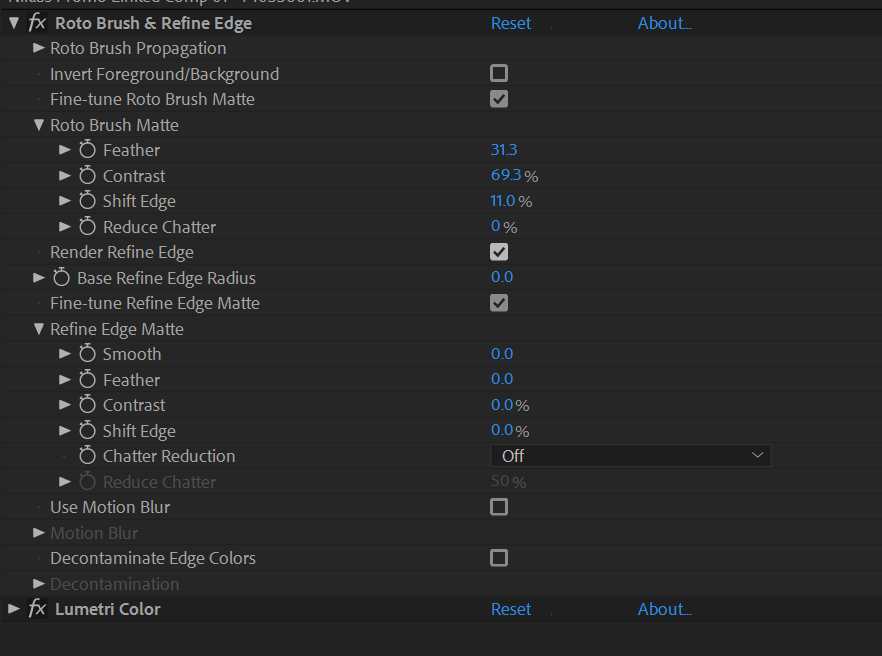
Here's the effect control panel.. but I don't think it's any beneficial in this case..
Copy link to clipboard
Copied
Disable Lumetri Color effect — re-enable it only after you are convinced RotoBrush has done its job and you have applied the Freeze option for the RotoBrush Tool. Lumetri Color or any other effect will just slow down RotoBrush and it isn't required at this stage.
I've given you the link to the documentation for the RotoBrush Tool - use it. It's nothing too difficult to understand.
Here are a few QuickTips -
1) RotoBrush does not work well on all footage types. The edges you want to work on must have sufficient color/luma differentiation. The RotoBrush automates the creation of a matte BUT you have to go through each frame to make adjustments, manually. These manual adjustments you make are supposed to help the tool make automated guesses in later/earlier frames.
2) RotoBrush creates a Base Frame and Span each time you click in the Layer Panel's Timeline. Each Span defaults to 20 frames. You can shorten or lengthen a Span by dragging its in/out edge. You should think of a BaseFrame as a keyframe for RotoBrush. Hence, create a new BaseFrame only if the edge/object you are RotoBrushing has a distinct change due to color or movement.
3) After applying a Base Frame, you are to move forward (or backward; depending on when in time you created the Base Frame) and clean up the edges — you are to clean up each frame. Each frame you traverse will marked with a green bar; much like the main Timeline's cached area.
4) Once you have completed RotoBrushing the entire clip, double check the edges. To finalize the RotoBrush edges, click on the Freeze button.
Copy link to clipboard
Copied
ok, thanks. Now I understand it fully..
It's still incredibly slow though.. I have to wait for several seconds to even see the next frame move / get updated.
And the freezing took good 2 hours.

Copy link to clipboard
Copied
Slow is why you need to pre-edit your clips to just the frames you actually will be using in the final edit and make sure that you are not spending time rotoscoping parts of the scene that do not need roto. I recently reviewed some work by a fairly experienced AE artist. He had spent about two days cutting out an actor that moved in front of a sign. The shot was nearly seven seconds, the entire actor had been separated from the background but there were only about 160 frames where the actor's head and shoulder were in front of the sign and there were only about 40 frames where the actors left hand and arm passed in front of the sign. All of the other roto work was a waste of time. All of his roto needed some work on the edges and some smoothing. Following my advice, he cut the shot into 3 pieces, one for the hand problem and one for the head and body problem and limited his roto work to just those features for just those frames. He threw out all of his previous work and had a satisfactorily prepared comp in just over 2 hours.
Copy link to clipboard
Copied
ok, I understand.
Still, not sure if this is just in my case, it is incredibly slow... I was waiting 10 seconds for each frame, then in case I needed to change something, another 10-15.
Then I run the freeze.. just 1700 frames. Two hours in and it's stuck at 208..
/edit: I've also read working with more smaller areas is faster than just one.. which kind of makes sense.
But what if I am happy with just one roto mask ? I only got a person's face that doesn't move much.. I don't need to redraw the whole thing over and over..

Find more inspiration, events, and resources on the new Adobe Community
Explore Now
 AdChoices