

3D camera tracker

Copy link to clipboard
Copied
Hi
i've been trying to edit one of my first video's in after affects. I came to a point that my 3d camera tracker wasn't working, after some research i've noticed that a part in the clip makes it fail, i've finnaly found that part and my 3d camera tracker works now. But not on a green screen, there he can't mark anything. How can i fix this? I need a clip projected and the green screen, but the video itself is moving. So i need it to stick to the wall 
se image below.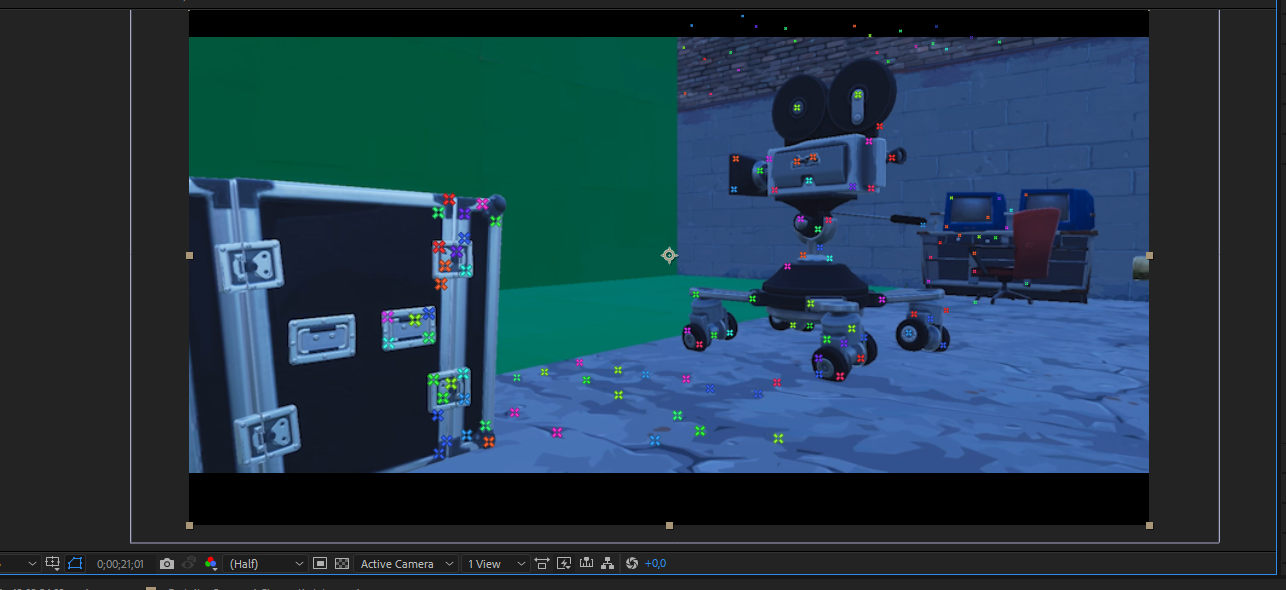
on this link you can see what i want to do, but the movie is moving all the time.


 17
Replies
17
17
Replies
17

Copy link to clipboard
Copied
By definition if the green screen is blank, there is nothing to track, so that area of the shot cannot ever have track points. However you seem to have a track on the floor, so the only option you have is to use that as the handle, with some judicious parenting, a 90° rotation and offsets in position. Or just keyframe the position of your projected layer in 3D space by hand, like we did before trackers were invented.
The correct way to track against chroma is to include markers on the screen in a slightly different color - just enough contrast that the tracker can see them, but close enough to the base color that they can be keyed out. If you watch any "behind the scenes" videos of chroma studios you'll see X or + markers plastered all over the place.

Copy link to clipboard
Copied
Camera tracker software will not always track the exact spot where you want to insert other elements. Your green screen is a perfect example of that. You are getting what looks like good tracking information from the floor, the ceiling and other elements in the scene. The procedure you would follow is to first determine what the ground plane and the origin of your scene should be. That is the normal first step when using any camera tracker. Once you have picked that spot you add your camera and a reference solid. It is a good idea to add a grid to that solid so you can check the accuracy of the choice. Without an accurate ground plane and origin selected and a reference grid added it's almost impossible to place the other elements in your scene.
Once you have the ground plane established and aligned you start adding reference solids to other elements in the scene like the ceiling and the back wall. Then, using these other reference solids as guides you can start manually placing the other 3D elements in your scene. The only reason you would want to replace the green screen walls in the scene would be to stick something to the wall. In most cases, you could place your 3D objects in the scene by using the reference floor grid as a guide.
I hope this helps. Camera tracking, no matter how much money you spend on the software, requires you to do a lot of manual positioning, and that requires reference grids and a thorough understanding of 3D space. The only time that it is easy to stick a 3D element accurately in a scene is when there is an existing fixed object in the scene that you want to replace.
I hope this helps. I suggest you spend a bunch of time researching camera tracking and 3D space. To get fairly good at it you'll probably need to spend 20 or 30 hours practicing with different shots. Make sure you vet your trainers. There are a lot of amateurs on YouTube presenting tutorials that do not teach good or effective workflows. Make sure the folks teaching you actually know what they are doing.
Copy link to clipboard
Copied
I know it doesn't track the exact spot, but in my case its maybe better to edit every different frame to place the video played on the green screen on the right position? It will be alot of work but i think that will be the best case to do right? I had 1 tracking spot on a certain moment where i can select the bottom right corner of my green screen. But i think i need to learn more about the tracking software, its my first day using adobe after effects can't expect to much i guess?
Copy link to clipboard
Copied
Before you get a handle on camera tracking you need to learn about the timeline UI, the render options, how AE's camera works, now the camera compares to a real camera, how perspective and parallax are related to camera position and how framing is related to focal length. That is not all AE stuff, it's basic camera work, physics, and the principals of visual effects. I would start at the beginning: Basic AE, then I suggest that you get very familiar with the Search Help field in the top right corner of AE. It's probably the most underutilized tool in the AE toolbox, especially for new users. I'm not talking about help in the menu, but Search Help at the top right corner of the app.

Copy link to clipboard
Copied
Rick,
I'm trying to do some tracking with a scene myself and there isn't green screen in the shot but there is very little contrast in some areas. Would applying something like cross hairs on a surface help that the tracker applies points. Apparently a user cannot add point at any place in the scene independently it has to came from the process. Is this a correct assumption?
Copy link to clipboard
Copied
Sometimes you can improve camera tracking by doing some fairly extreme color correction to add contrast and detail to the shot, then pre-compose, then camera track the Pre-comp. All you need to do is generate the camera. Other times, you have to cut up the shot. You might want to check out this thread: motion tracking help
Copy link to clipboard
Copied
Rick,
The grid texture helped but one thing we seem to have issues with is the "Shape" layer I've added doesn't seem to stick like a "Text" layer does. What could be the issue?
Lloyd Slapar
Copy link to clipboard
Copied
Rick,
Is there a way for me to send you a AE file to show you my issues. It's really strange that the Shape file seems to have the issues more than say a Text. Why is it when you select points from the analyzed file you cannot add a shape similar to the Text or Solid? To me that points to issues with shapes files.
Thanks,
Lloyd Slapar
Copy link to clipboard
Copied
Google drive or Dropbox. If source files are critical you can use the collect files feature and zip everything up. Then just post a link.
If I get time I'll take a look. No guarantees. I'm on a deadline today and am just answering posts when I need to clear my head. It's a 2:45 film edited in Premiere Pro from nearly an hour and a half of footage from 9 locations shot over 3 Days with a crew of 10. Every shot was from a MoVI pro in constant motion. There are about 75 cuts and at least 20 composites. We still have to do the Foley, finalize the sound mix, do the final recording of the music track with the composer and musicians. There are only 2 days left in the 8-day production schedule. Welcome to my world...
sorry folks, had to complain to someone and my dog just doesn't care.
Copy link to clipboard
Copied
Rick,
Sorry, I'm not seeing any other contact info other than the forum reply.
Lloyd
Copy link to clipboard
Copied
Just post a link on the forum.
Copy link to clipboard
Copied
Copy link to clipboard
Copied
I took a look at the project. My first thought is that you created this shot of the house in a 3D app and added the grid there so why didn't you export the camera from the 3D app. Blender, C4D and Maya will all export cameras to AE. You would have a better match. I also wondered why the comp was longer than the shot.
Then I checked your camera track. The first thing I noticed was that Advanced Analysis was not turned on. The first thing you do when you have problems with a track is to turn this on and track again. The second thing I noticed right away was that the tracker points are very large and there are a bunch of them.
I then checked the layer on the solar panel and saw that the Anchor Point had been adjusted and the layer was nowhere near the surface of the solar panel. I also checked the other layers. Again, the position was off. This told me that you are using the wrong technique to attach the layers to the surfaces you track. Even if you picked perfect targets, you moved things and did not line things up incorrectly. You should only manipulate x, y, and z rotation, never orientation, and you should only move a layer into position using the x, y and z coordinates in the Comp Panel by hovering over them with the move tool selected until the axis you want to adjust is shows, then click and drag along that axis. Any other way of moving the layer into position will just foul up the position and you'll have to start over by adding a reference solid.
I tried using your original track and checked the right side of the house just selecting 3 points that gave me a target that looked like it fit, then I added a solid, set the blend mode to Multiply so I could see the grid inside, carefully adjusted the rotation, not the orientation, so that the solid looked like it aligned to the grid on the side of the house, then opened the solid layer properties and adjusted the height and width so that I could accurately position the solid on the grid. When I checked the track the solid very quickly slid off the surface of the house. This told me I needed to run Camera Track again.
I reset all of the transform properties on the layers you were using, deleted the camera and reference solids, and ran a detailed analysis again. After the camera was solved I deleted a bunch of track points and started with the right side of the house, added a solid and camera, changed the blend mode, adjusted z rotation, and position, then opened up the Solid settings and adjusted the size so it lined up with the grid. I checked the track and it was much better. I then added a solid to the front of the house only using about 6 of the track points, then moved down the timeline and added a reference solid to the solar panel, again only using about five or six points. Adjustments were made, in and out points were set for the layers as needed, and I checked verified that the reference solids were sticking to the surfaces they were supposed to be attached to.
It turns out there was a pretty consistent drift on all of the reference solids. This tells me the track is not accurate. It's probably because the camera used to render in the 3D app was not an optical camera but a perspective camera so AE couldn't get a good camera solve. It is close, but not perfect. The wide grid may also have thrown off the camera track.
It turns out the errors are pretty linear so just a few keyframes for the position, x, y, and z rotation, and sale let me get the solids stuck pretty well to their surfaces. Once that was done I parented the appropriate layers to the reference solids snapping them into position by holding down the shift key. I ended up with a comp that looks like this:

The solar panel took the most keyframes, but I got an acceptable composite on all surfaces. I thought about sending you the comp but decided that the best way for you to learn would be to carefully read this post, then try the same techniques yourself. The biggest problem I saw in your workflow was trying to adjust the position of the reference layers incorrectly and not doing a detailed analysis of the shot.
If you want to try starting over add a much finer grid with a lot thinner lines or something like a siding or brick texture to the house in the 3D app, add a texture to the ground plane and double check the camera and make sure that it is a normal camera, then render and track again. Trackable detail on more surfaces will give you a much better chance of getting a good camera solve.
You also might want to see if your 3D app can export a camera track to AE.
If your 3D file can be saved as a C4D file you could also import the file into AE and either extract the camera or use AE's comp camera to do the camera move there and add your elements. There are a lot more efficient ways to add elements to a shot like this than trying to run a camera track.
Copy link to clipboard
Copied
Rick,
Thanks for the detail in your analysis. Appreciate you not sending the corrected comp as I really do want to work through this for the understanding of the process.
As far as importing 3D data from the 3D software we have done the same with that process and again were having the same issues and then people are referring to having something with "film back" difference from the 3D vs After Effects. That's why we chose to remove that variable in trying to utilize a clip so it would be similar to a video that someone would bring into AE.
So perspective camera's not good. We can try rendering using a "normal" camera. Do you mean Orthographic Camera? . In the 3D software they define the perspective camera as being more similar to what a real world camera might capture.
I want to be sure that when you wrote "You should only manipulate x, y, and z rotation, never orientation, and you should only move a layer into position using the x, y and z coordinates in the Comp Panel by hovering over them with the move tool selected until the axis you want to adjust is shows, then click and drag along that axis." that when you are referring to the Move Tool it is the Red, Green and Blue arrows that appear over the item in the layer?
I know you're pretty busy. But when you get some time could you address the following: Other than performing this type of operation in the 3D software can you give me some more information on the more efficient ways to add elements to a shot like this than trying to run a camera track.
Thanks,
Lloyd Slapar
Copy link to clipboard
Copied
Here are a few 2D options for making composites look like they are 3D:
- Corner Pin Track in AE good for some shots
- Corner Pin Track using Mocha AE - better for more shots, more versatile
- Advanced Corner Pin Tracking using Mocha AE and adding CC Power pin as in this tutorial - even more powerful and it can be extremely effective for almost any shot where you have a planar surface you can track
- Mocha Pro Corner Pin Tracking
3D Options:
- Camera Tracking - great for some shots, won't work for others
- Camera Tracking combined with Mocha AE corner pin tracking to overlay a fine grid on the surface you need to track (that really needs about 200 words to explain)
- Syntheyes, the best considering price point, capabilities, performance, and integration with AE
- Camera Tracking + Reference solids exported to C4D, then C4D Lite + Cineware to composite 3D elements into a moving camera scene (again, about 200 words to explain how to do that)
- Camera Tracking + C4D the full version for more capabilities
- Camera Tracking + Element 3D - A very powerful alternative to C4D
Hybrid options:
- Export Camera data from 3D apps like C4D, Maya, Blender and use that in AE
- Import AE camera data and use that in 3D apps like C4D, Maya, Blender
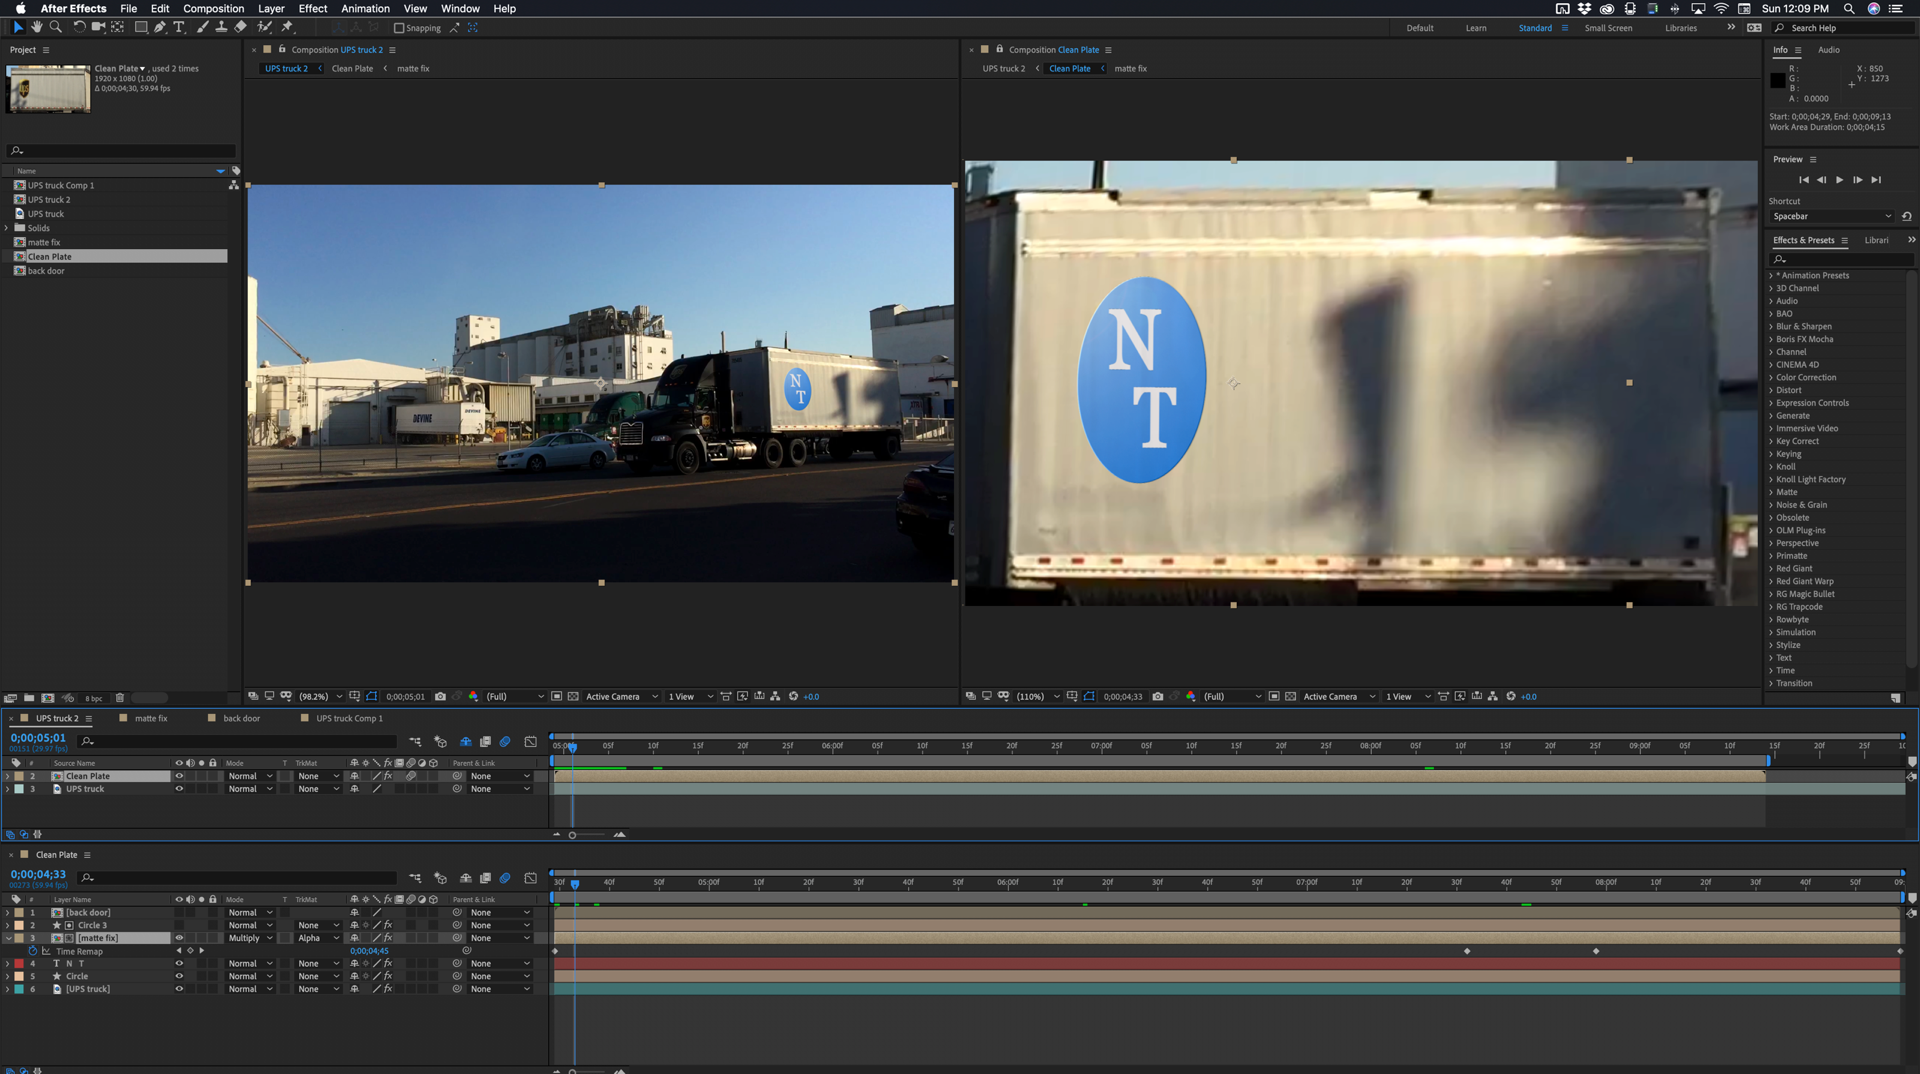
The most efficient solution depends on the shot and the kind of composite you want to make. For example, I used Advanced Corner Pin tracking in this effects shot requiring replacement of the screen on a TV. I chose this technique because it was quick and gave me a very easy way to combine the reflections on the screen and the weather into the final composite.
The technique was also used on this shot which was part of a live demo I did.
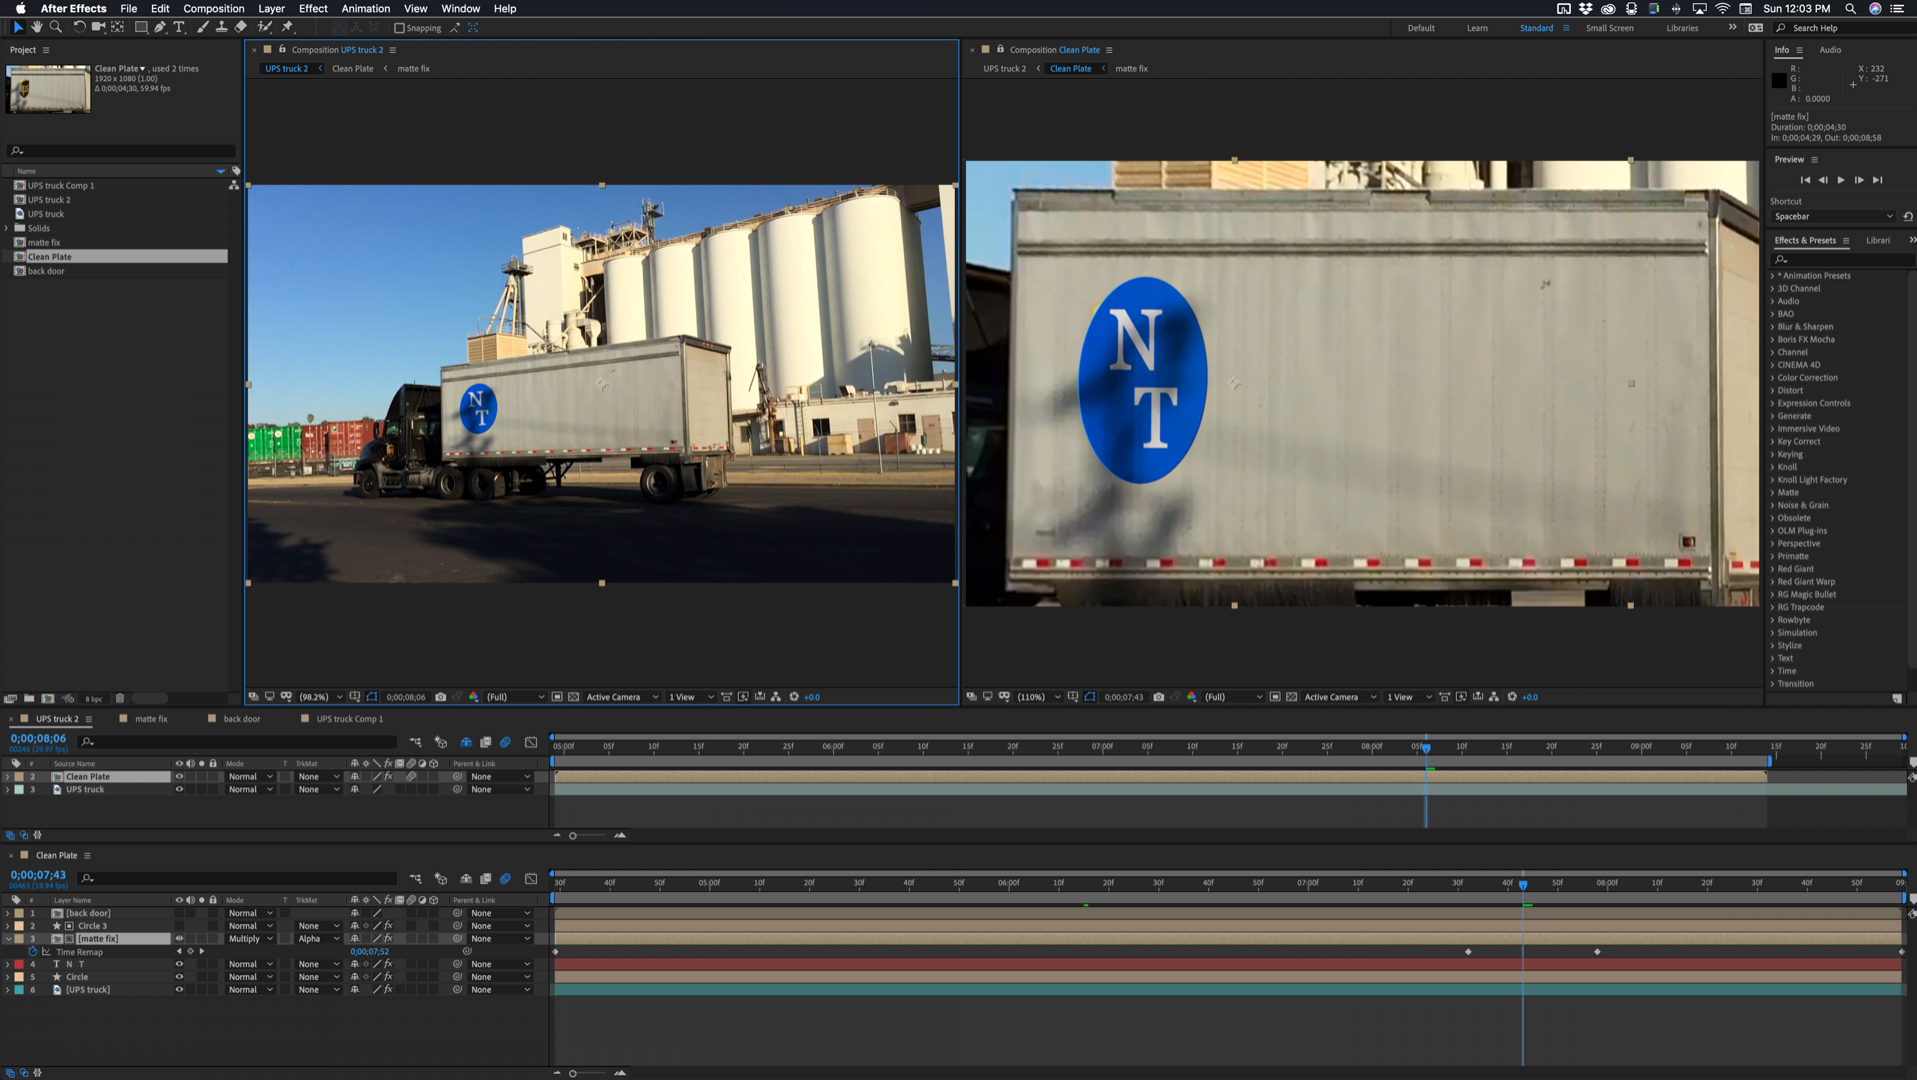
The workflow allowed me to Time Remap a copy of the stabilized side of the truck and shift it's position so that it matched the shadow passing over the logo. You can't see it clearly in this screenshot but that simple blue logo covers up a UPS logo and the composite also has a reflection in the first part of the shot:
I hope some of this helps.
On the camera question, a perspective camera in some 3D apps is one that has an artificial vanishing point instead of a real one. This means that the perspective and parallax changes are not the same as you would get if you were actually standing in the scene. Some folks like to work with this kind of camera. A normal camera would have a normal vanishing point so the perspective and parallax are the same as you would get if you were actually standing in the scene. Perspective is controlled by the camera position, framing is controlled by the focal length. An Orthographic camera or view has no perspective or parallax. Rotate a cube and the nearest edge is the same length as the far edge. Put a normal camera close to a cube and rotate it and the nearest edge is much longer than the farthest edge because of the perspective and parallax. AE's camera tracker can only work with Normal cameras and it really helps if there are multiple planes, like the ground and the walls of the building, so the calculations will be accurate. Just calculating the perspective change on one surface is not going to give you a very accurate result and may be interpreted as a camera pan instead of a camera move.
Good luck with your project.
Copy link to clipboard
Copied
Rick,
Thanks for this in depth info.
Getting back to this. When you refer to a normal camera are you thinking a camera that is on a tripod and doesn't move except for pans and tilts? I mean in our instance we're moving a camera through the scene and so it's more difficult to track.
Lloyd Slapar
Copy link to clipboard
Copied
No, a normal camera is a software camera that follows the laws of optics. Perspective is controlled by camera position, and framing is controlled by focal length, just like a real camera.
3D software often has a "perspective" camera that has artificial vanishing points. 3D software also almost always has orthographic cameras which have no perspective. Neither of those cameras represent anything that you can see in the real world and you can't Camera track footage from either of those types of cameras.

Find more inspiration, events, and resources on the new Adobe Community
Explore Now
 AdChoices