• Global community
    • Language:
      • Deutsch
      • English
      • Español
      • Français
      • Português
  • 日本語コミュニティ
    Dedicated community for Japanese speakers
  • 한국 커뮤니티
    Dedicated community for Korean speakers
Exit
0

Can't get trim paths to work on AI drawn Path

Community Beginner ,
Feb 18, 2019 Feb 18, 2019

Copy link to clipboard

Copied

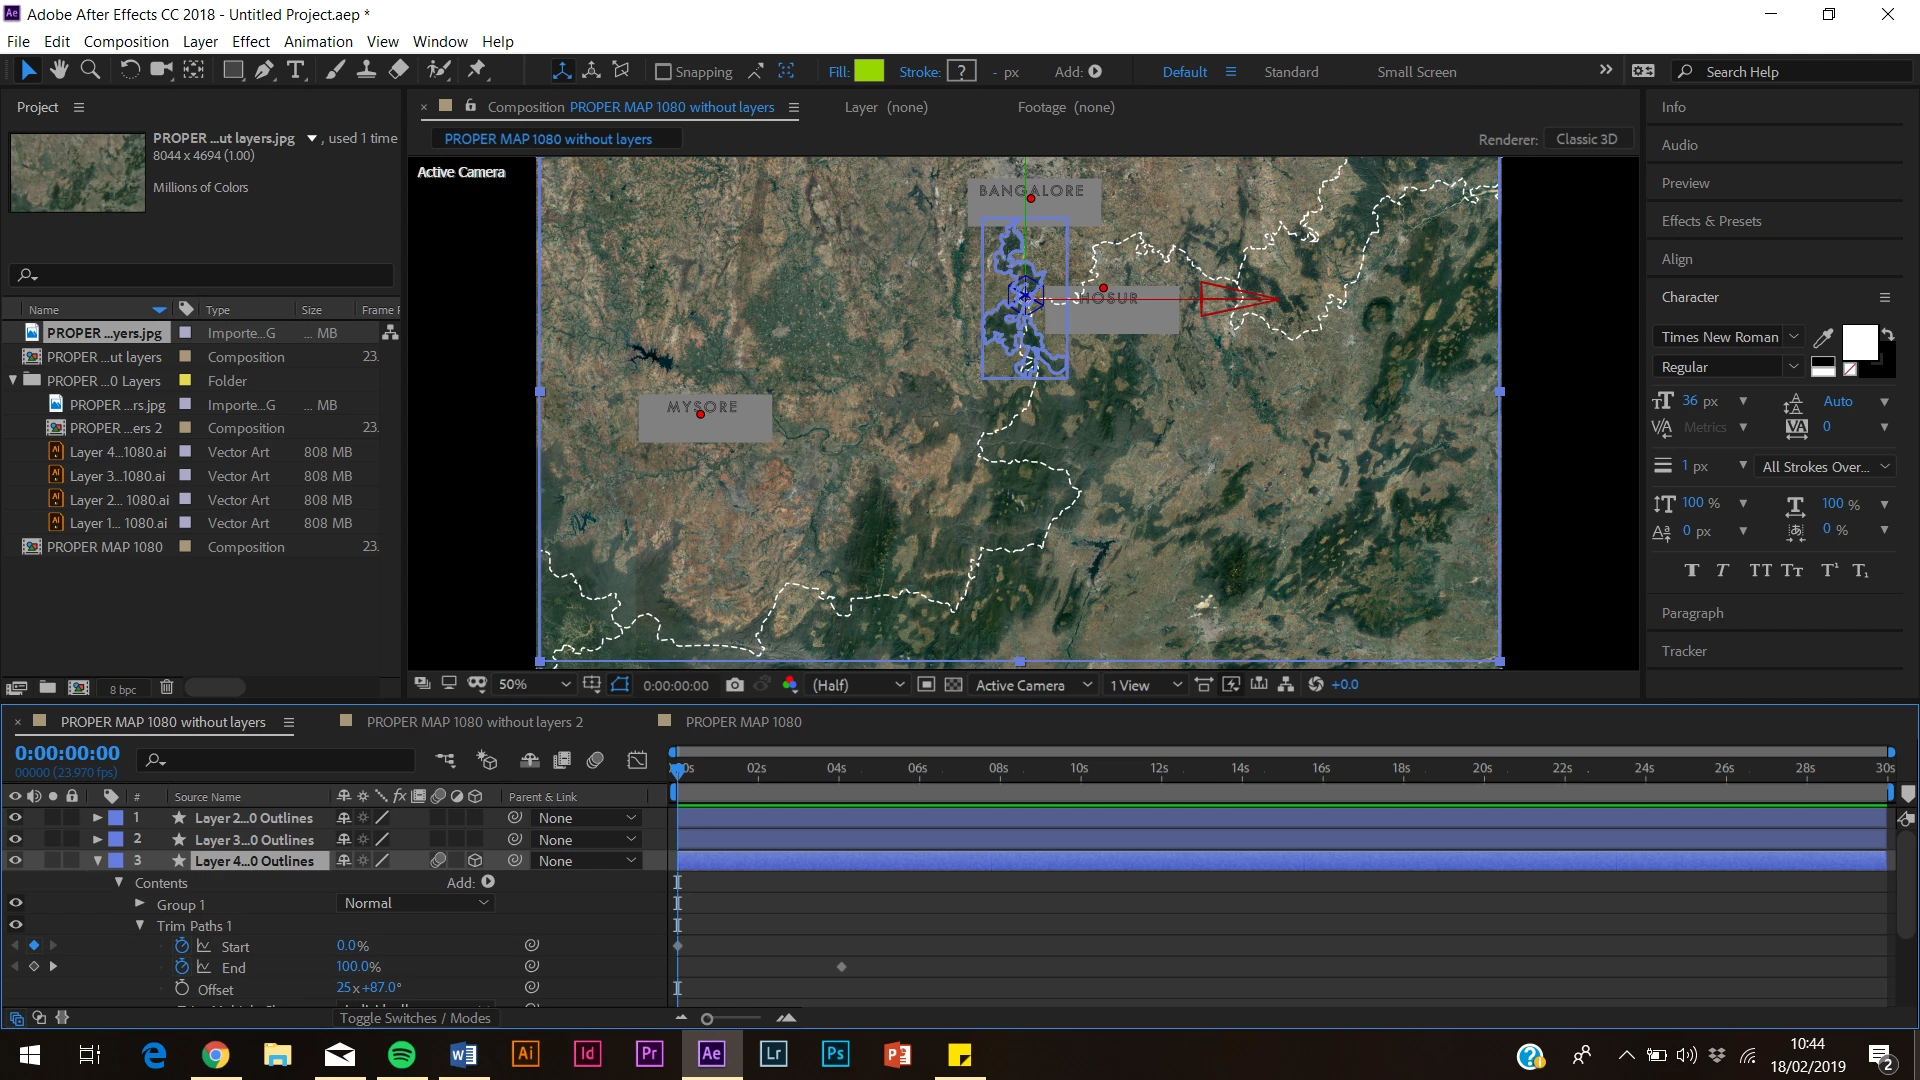
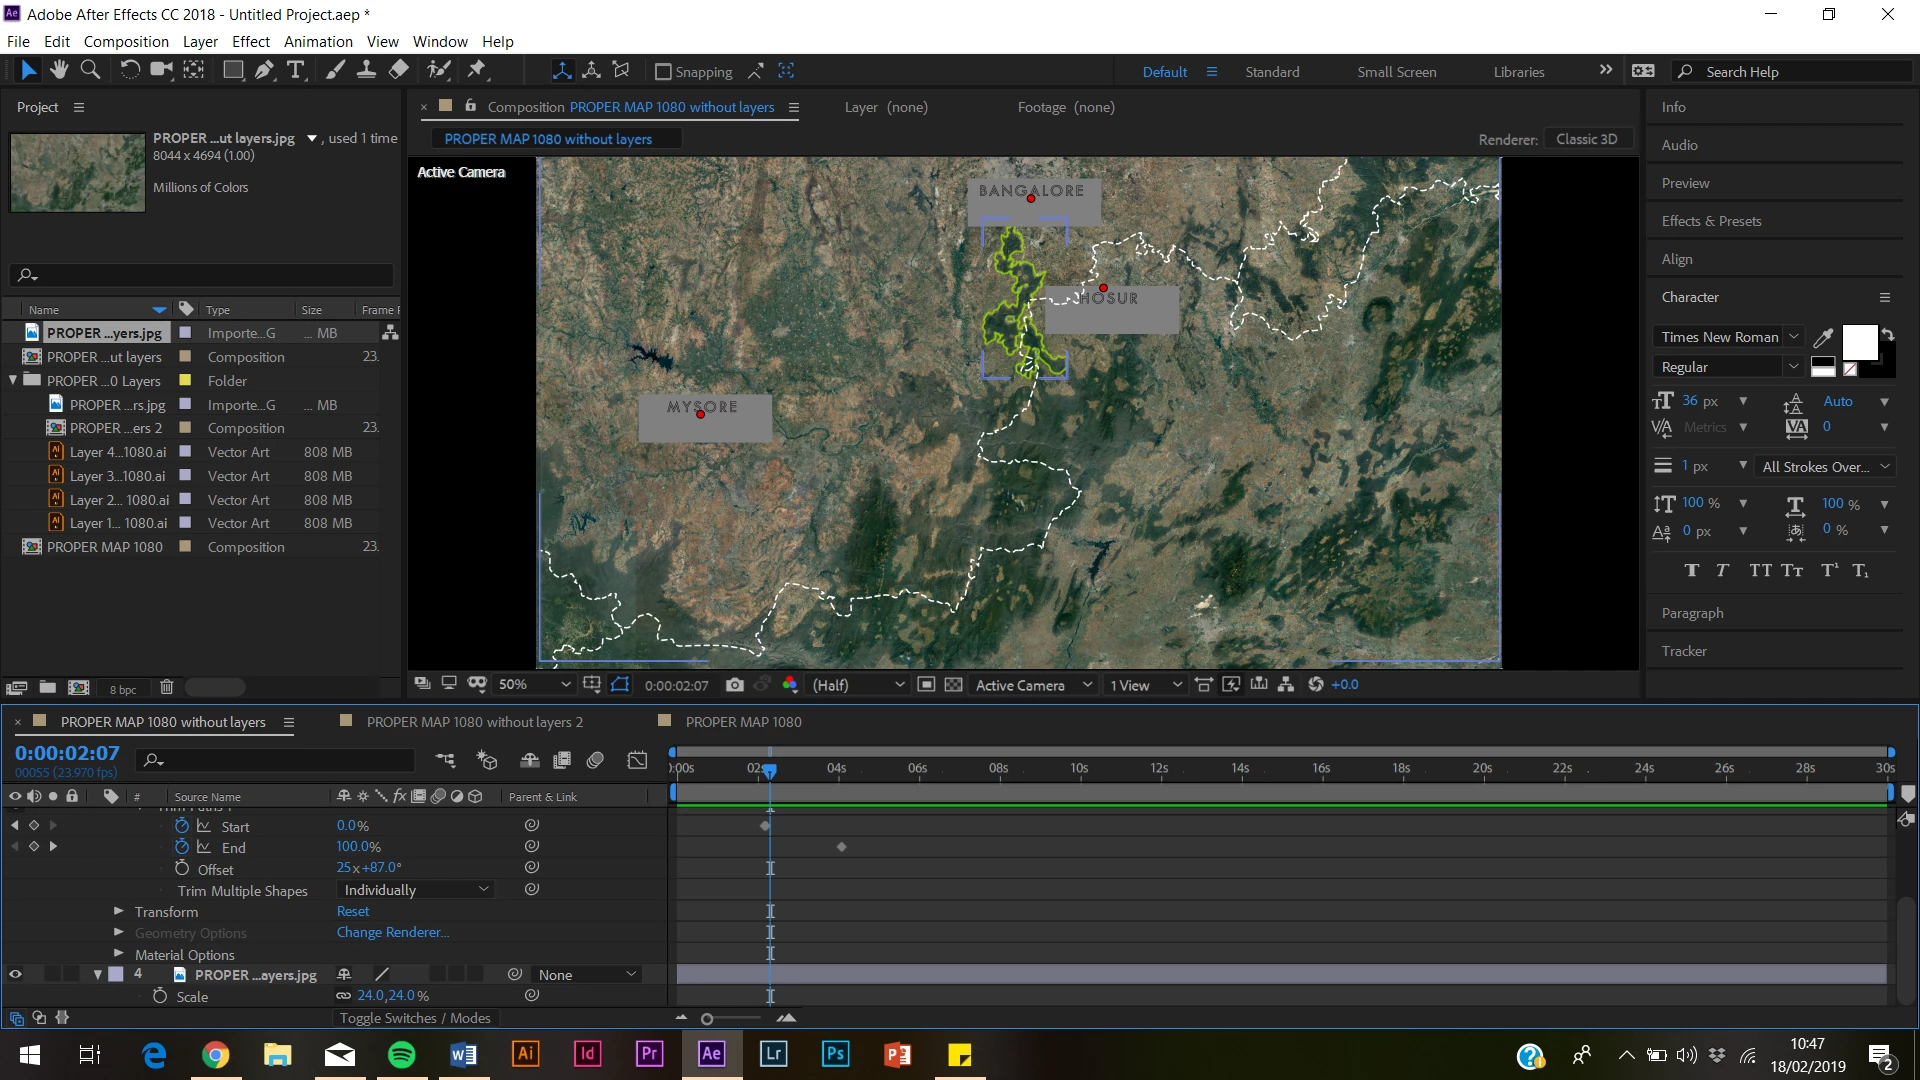
I am trying to animate the outline of this national park for a documentary I am producing. The path was drawn in AI as its own layer and I have converted to vector shape in AE but when I set trim path to 0% nothing happens. HELP!!!
Views

3.1K

Translate

Translate

Report

Report
Community guidelines
Be kind and respectful, give credit to the original source of content, and search for duplicates before posting. Learn more
community guidelines
Community Beginner ,
Feb 18, 2019 Feb 18, 2019

Copy link to clipboard

Copied

I have just realised the trim path is trying to add fill to the interior of the shape rather than animating the stroke of the path. When I imported the layer it was just a stroke with no fill but AE wont let me add stroke colour now? I have turned off fill and tried changing the width/colour/opacity of stroke but it keeps just reverting to a question mark and not changing anything!

Votes

Translate

Translate

Report

Report
Community guidelines
Be kind and respectful, give credit to the original source of content, and search for duplicates before posting. Learn more
community guidelines
Advisor ,
Feb 18, 2019 Feb 18, 2019

Copy link to clipboard

Copied

I can't be certain from your screen shots - but my guess is that you have multiple fills and stokes in your shape layer hierarchy - and some of those are overriding others.

The basic principle here is that stroke and fills apply to the paths above them in the same group. You've goth 'Path X', 'Group X' and 'Contents' levels - which are all groups. That's fine - but just examine those groups to see if they contain strokes or paths - as these will be overriding strokes and fills in lower level groups.

Votes

Translate

Translate

Report

Report
Community guidelines
Be kind and respectful, give credit to the original source of content, and search for duplicates before posting. Learn more
community guidelines
Community Beginner ,
Feb 18, 2019 Feb 18, 2019

Copy link to clipboard

Copied

Thanks for your response Mike. Apologies if these are stupid questions but I am new to After Effects! In the composition panel I have gone through all the individual paths under Contents for that layer. Path 1 had fill which I have removed and now it says they should all only have stroke but still nothing is coming up at all in the programme panel, so no stroke is appearing at all

Votes

Translate

Translate

Report

Report
Community guidelines
Be kind and respectful, give credit to the original source of content, and search for duplicates before posting. Learn more
community guidelines
Advisor ,
Feb 18, 2019 Feb 18, 2019

Copy link to clipboard

Copied

Looking at your screenshots again I think I can see what's going on:

Trim paths:

Start should be : 0 (static)

End should be animated from 0 to 100

Offset should be 0 - you have a crazy value in there ; )

Votes

Translate

Translate

Report

Report
Community guidelines
Be kind and respectful, give credit to the original source of content, and search for duplicates before posting. Learn more
community guidelines
Community Beginner ,
Feb 18, 2019 Feb 18, 2019

Copy link to clipboard

Copied

Think the offset got changed while i was meddling with things. The Start is 0 and I have set keyframes for End at 0 and 100 but the path is just not showing up at all. You can't see the path stroke ever now??

Votes

Translate

Translate

Report

Report
Community guidelines
Be kind and respectful, give credit to the original source of content, and search for duplicates before posting. Learn more
community guidelines
Advisor ,
Feb 18, 2019 Feb 18, 2019

Copy link to clipboard

Copied

OK. With your 'contents' group selected, look for the 'add' menu to the right.

Select 'add stroke'

Make sure the stacking order is:

Your paths

Your stroke

Your trim path operator

Votes

Translate

Translate

Report

Report
Community guidelines
Be kind and respectful, give credit to the original source of content, and search for duplicates before posting. Learn more
community guidelines
Community Beginner ,
Feb 18, 2019 Feb 18, 2019

Copy link to clipboard

Copied

HALLELUJAH!! Thanks very much. Sorry to be a pain though there is just one more issue. Since adding the stroke the trim paths animation is working perfectly BUT there is 2 strokes around the shape now rather than one. This isnt the end of the world because I quite like the effect but any idea how to make it just a single outline? I have tried turning off stroke in the path/group/contents as i assumed there was the stroke on the original drawing and the one added in AE, but having done that, both strokes are removed? Many thanks for your help so far though!!!

Votes

Translate

Translate

Report

Report
Community guidelines
Be kind and respectful, give credit to the original source of content, and search for duplicates before posting. Learn more
community guidelines
Advisor ,
Feb 18, 2019 Feb 18, 2019

Copy link to clipboard

Copied

Try and isolate the group that contains the part of the outline with a double stroke by switch the visibility eyeballs on and off. The likelyhood is that group has strokes in it - delete those, or switch their visibility off.

Votes

Translate

Translate

Report

Report
Community guidelines
Be kind and respectful, give credit to the original source of content, and search for duplicates before posting. Learn more
community guidelines
Community Expert ,
Feb 18, 2019 Feb 18, 2019

Copy link to clipboard

Copied

This is a suggestion that will save you time and simplify your workflow.

If I am going to apply trim paths to a path originally created in Illustrator I always put it on a separate layer, import as a comp, then convert only that layer to a shape layer. Sometimes this involves just duplicating the path (Ctrl/Cmnd + c), creating a new layer, then Ctrl/Cmnd + f to paste to the path in position in the new layer. This keeps your composition cleaner, always works because you can eliminate any brush or effect applied to that path in AI that will foul up converting a path to a shape layer, and save a significant amount of time. This completely prevents the stack of groups that make it difficult to navigate the shape layer and control shape layer animators.

The only reason to convert a path to a shape layer is to use path animators, animate the path, or if you really love trouble and long render times, use the C4D rendering engine to extrude the shape layer. There are even more efficient ways to do that if you need extrusions.

Votes

Translate

Translate

Report

Report
Community guidelines
Be kind and respectful, give credit to the original source of content, and search for duplicates before posting. Learn more
community guidelines
Community Beginner ,
Feb 18, 2019 Feb 18, 2019

Copy link to clipboard

Copied

LATEST

Thanks for your help fixed all the problems!

Votes

Translate

Translate

Report

Report
Community guidelines
Be kind and respectful, give credit to the original source of content, and search for duplicates before posting. Learn more
community guidelines