

- Home
- After Effects
- Discussions
- Re: Copy and move multiple masks on the same layer...
- Re: Copy and move multiple masks on the same layer...
Copy and move multiple masks on the same layer to a new position

Copy link to clipboard
Copied
I have a text layer on which I have used masks to animate the text. I have multiple masks for every single letter, and since I have more of the same letter in the word I am animating, I would like to copy and move the animation from one letter to another, but I have no idea how to do this in an easy way.
When I select all the keyframes of my masks and start to move the mask, only the first keyframes (which are all on the same frame) place my mask at the new position, the rest stay at the original letter.
This means that I can only move the keyframes that are aligned on the same frame at once, to the new position, and would have to do so manually for every single point in my timeline, where I have one or multiple keyframes.
Is there a way to copy and move multiple masks to a new position, on the same layer, where all of the keyframes of the masks are affected by this move?


 13
Replies
13
13
Replies
13

Copy link to clipboard
Copied
What you do is select the mask path

And paste it onto the new layer.
The layer you paste it to has to be exactly the same.
I'm not sure if it will work for multiple masks at once.
I imagine if you have multiple masks on a letter and you shift select all the paths & copy them to a layer that is the same letter it will work but I could be wrong.
Copy link to clipboard
Copied
I appreciate the answer, but it does not help me unfortunately. (Or maybe I just do not understand exactly what you mean)
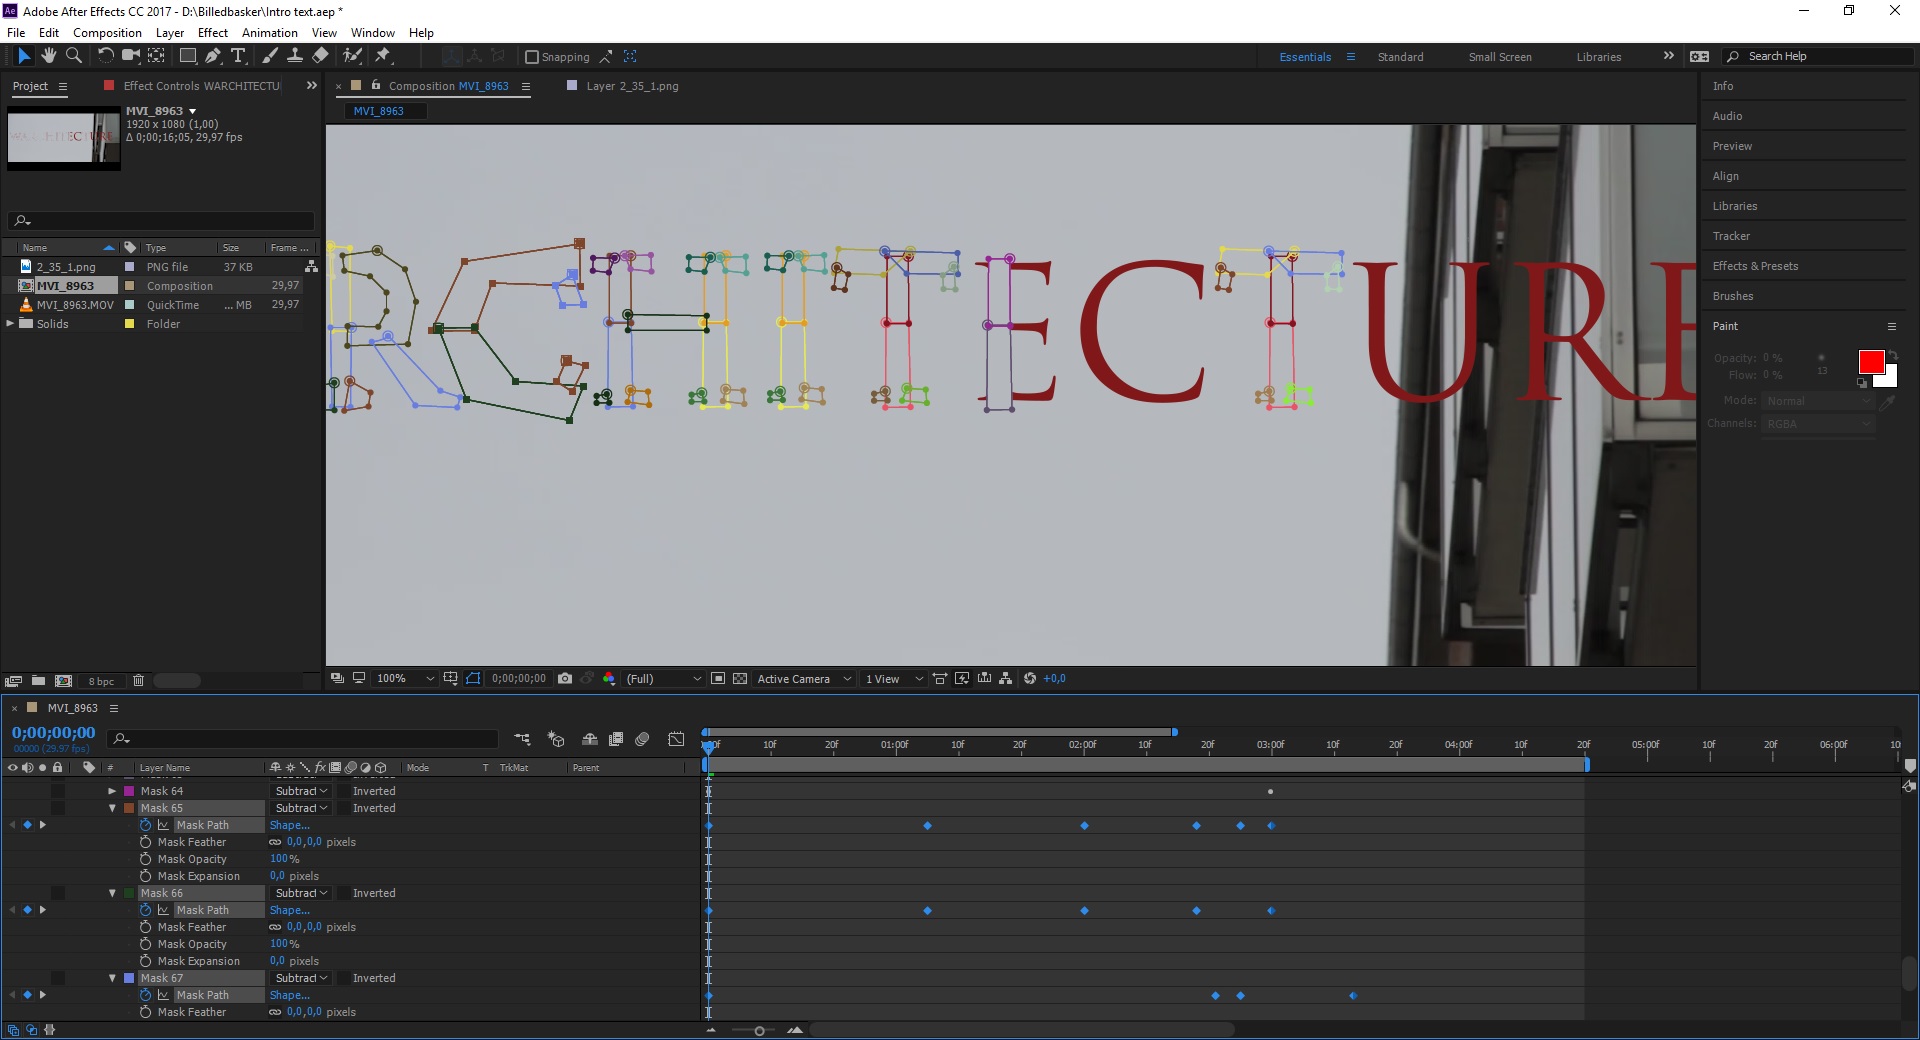
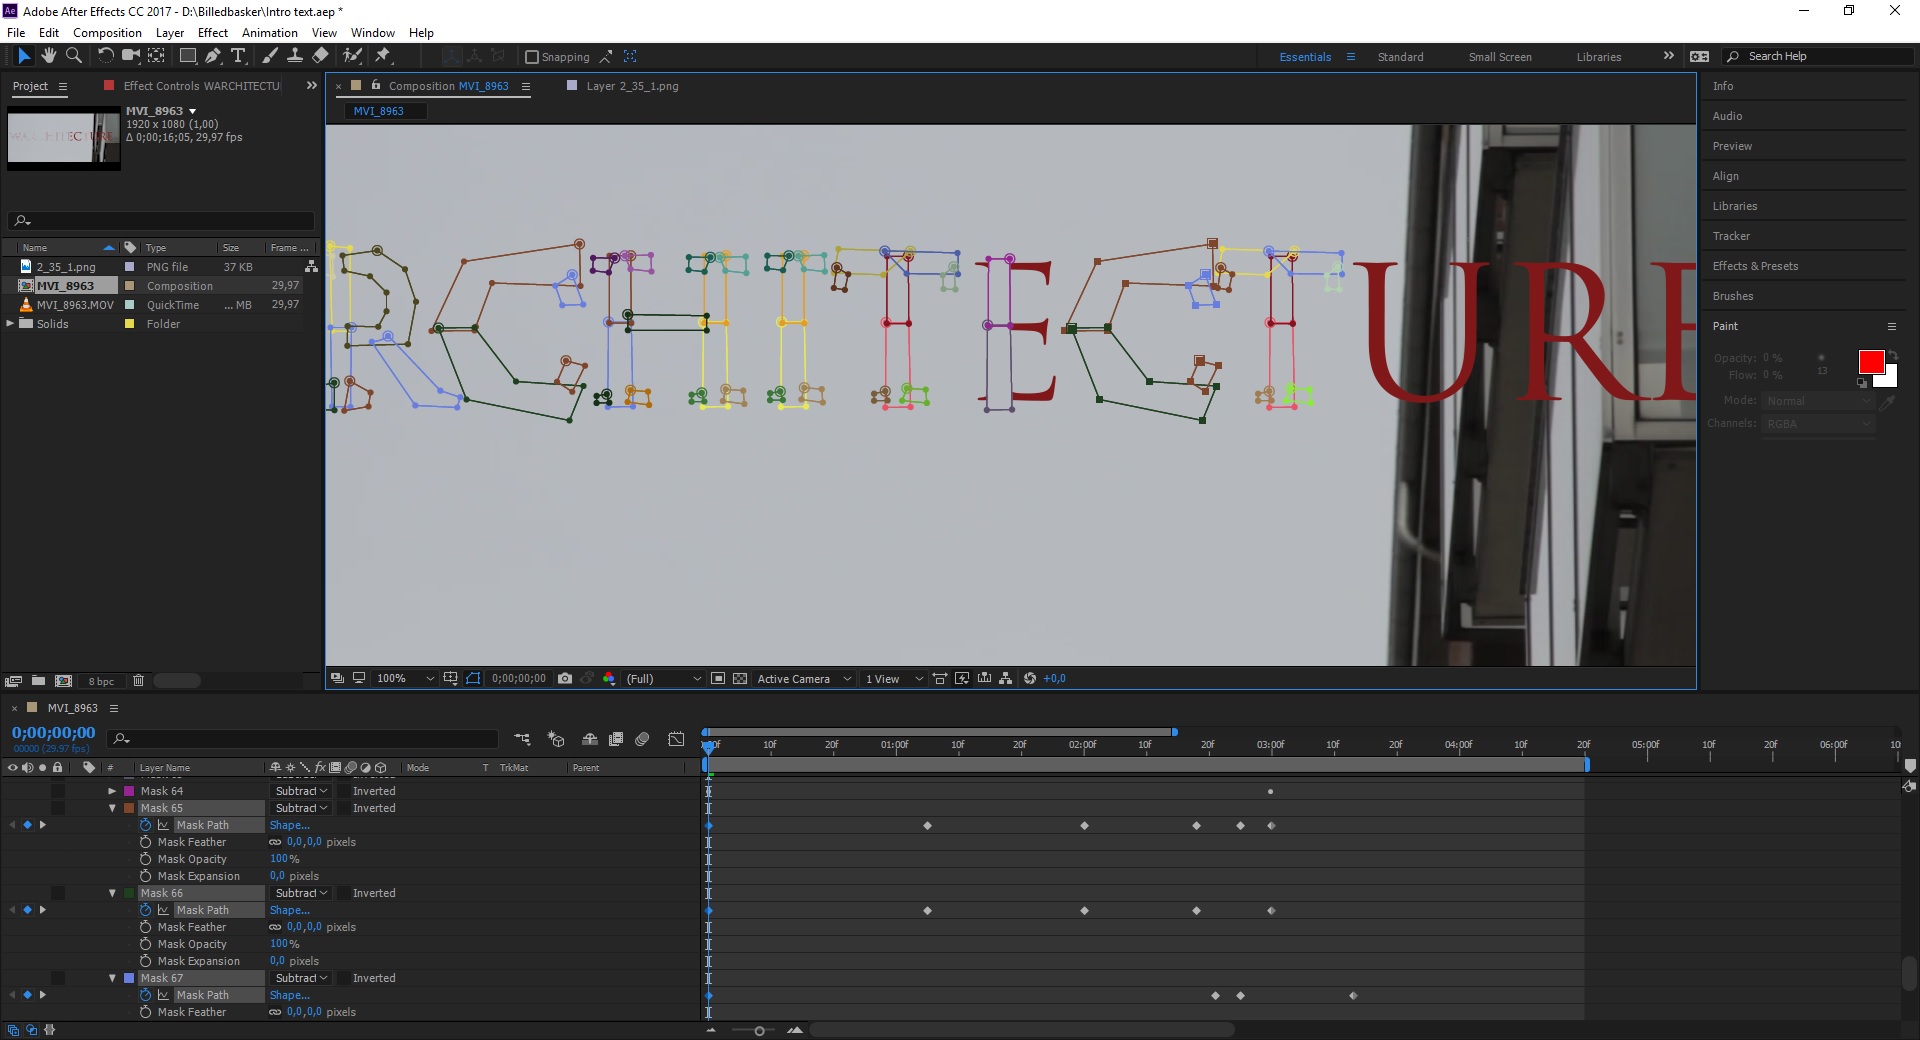
Here is what happens. I copy my masks and select all keyframes (picture 1), then move my masks to the new position. However this only affects the keyframes which the Current Time Indicator is placed over (as you can see these are the only ones selected) (picture 2). As a result, the rest of the keyframes still have their position at the original letter (picture 3).
Is there an easy way to make the 2 C's play the same animation?
(I moved all of the T's mask manually, so ignore that one)

Copy link to clipboard
Copied
Unfortunately I cannot follow your description. It's not making sense to me.
I'll try to explain again how to do it.
1) You should NOT be selecting or moving any key frames.
You have keyframes on a mask
Select the mask path property that I highlighted in the image I posted (not keyframes), for example, on the "C"
Copy the path by hitting CTRL C
Select the layer "C" you want to paste to in the layer panel (not in the comp window)
Move the CTI to where you want the keyframes to start and CTRL V.
The keyframes from the animated path (i.e. mask) will be pasted at the position of the CTI.
You never have to have to select or move any keyframes...as you've found...that wont work the way you think it should.
Copy link to clipboard
Copied
OK...so are you letters all text or are they shapes?
How did you create your letters?
Copy link to clipboard
Copied
I think I know how to fix my problem. The thing is I have the entire word on one text layer. I am gonna make a new text layer for every single letter and then paste the coresponding masks. This would allow me to copy and move each letter easily. I did not do this to begin with as I did not know that copying and moving multiple mask animations on the same layer would not be something you could do (without doing it all manually).
Copy link to clipboard
Copied
I apologize profusely as i did not even register, even though you clearly said it in your first post, that you had all your text on a single layer. That's why we were struggling to understand each other. When you said you separate masks on every letter I, because I can be extremely dense at times, took that to mean your text was on separate layers.
Copy link to clipboard
Copied
Happens to the best of us.
I made another small problem for my self, with an easy solution:
I could not just make a layer with the letter on it and paste the masks and make it allign, as moving the position of the letter also did it for the mask. It has, as you said, to be an exact copy of the origianl layer. So what I did was duplicating the text layer for every letter, keeping the mask for a single letter on each of those and masking the rest of the word out. Then for the duplicate letters I just moved it with transform and aligned it to where it should be.

Copy link to clipboard
Copied
If you are trying to reveal those letters one at a time or draw them on there is a lot easier way to go about it. You can use shape layers or gradients or even other text layers as track mattes.
To use a shape layer as a track matte simply set up a stroked path and start drawing a path with a medium sized stroke and no fill down the center of your layer, then use the pen tool to draw down the center of each letter. Step 1 looks like this:
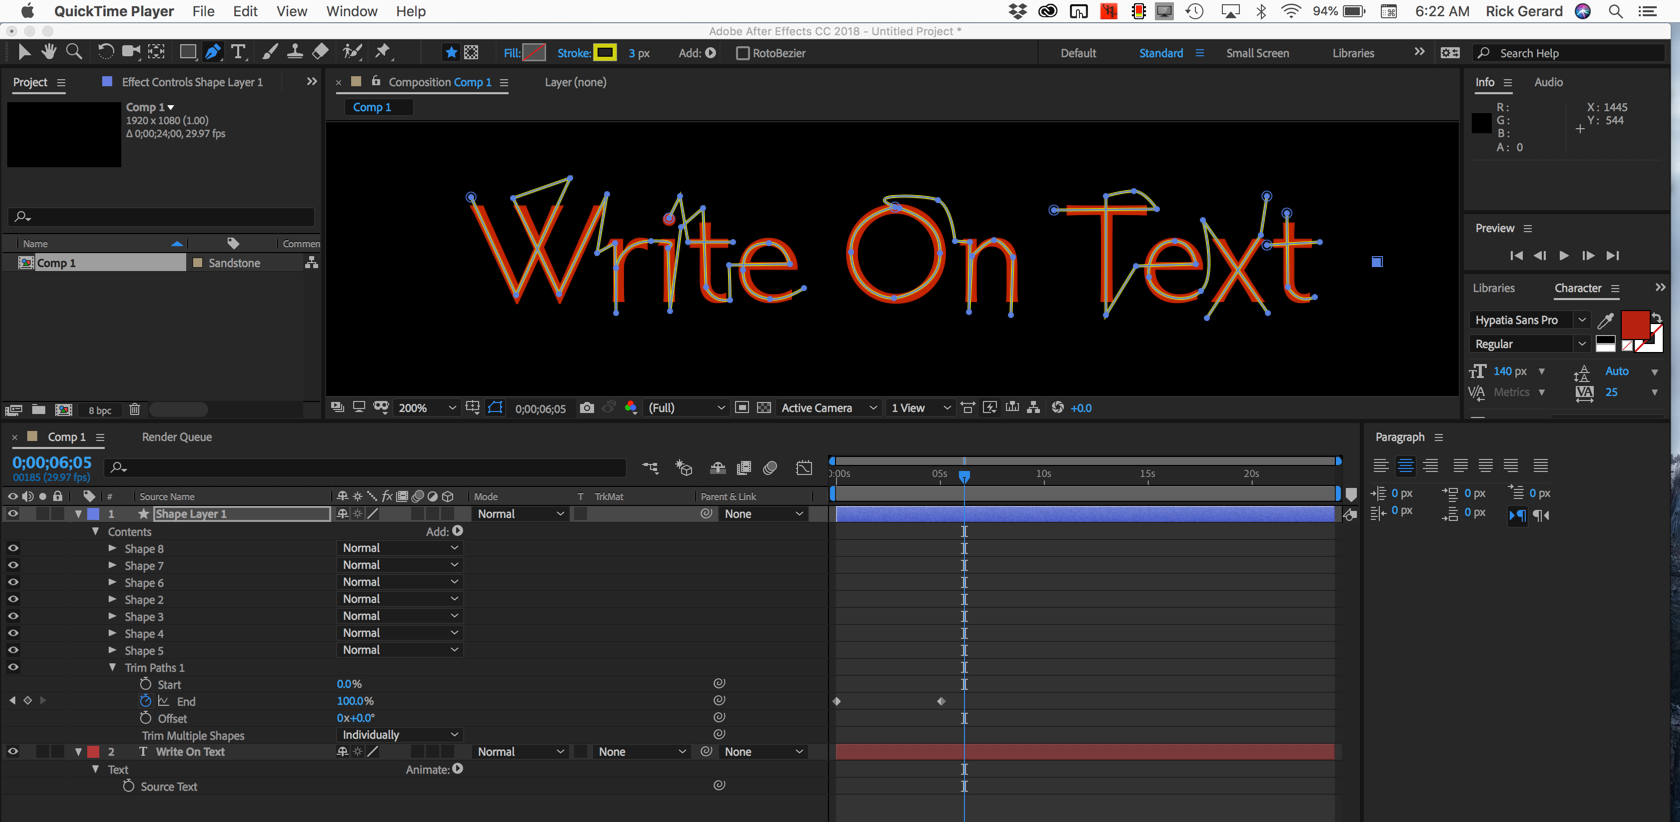
You just draw a path through the center of each letter. I continued the lines on a path that I figured a pen would take to help with the timing. Then, making sure that the path order is correct you add the Trim Paths shape animator and set just 2 keyframes for "End.:"
The next step is to increase the with of the stroke until it just covers the width of the text layer. You can scrub through the timeline and observe the stroke and make any adjustments needed to clean up edges or overlapping lines. In some cases, you'll need to do a little masking directly on the text layer later if you want to reveal the text slowly.
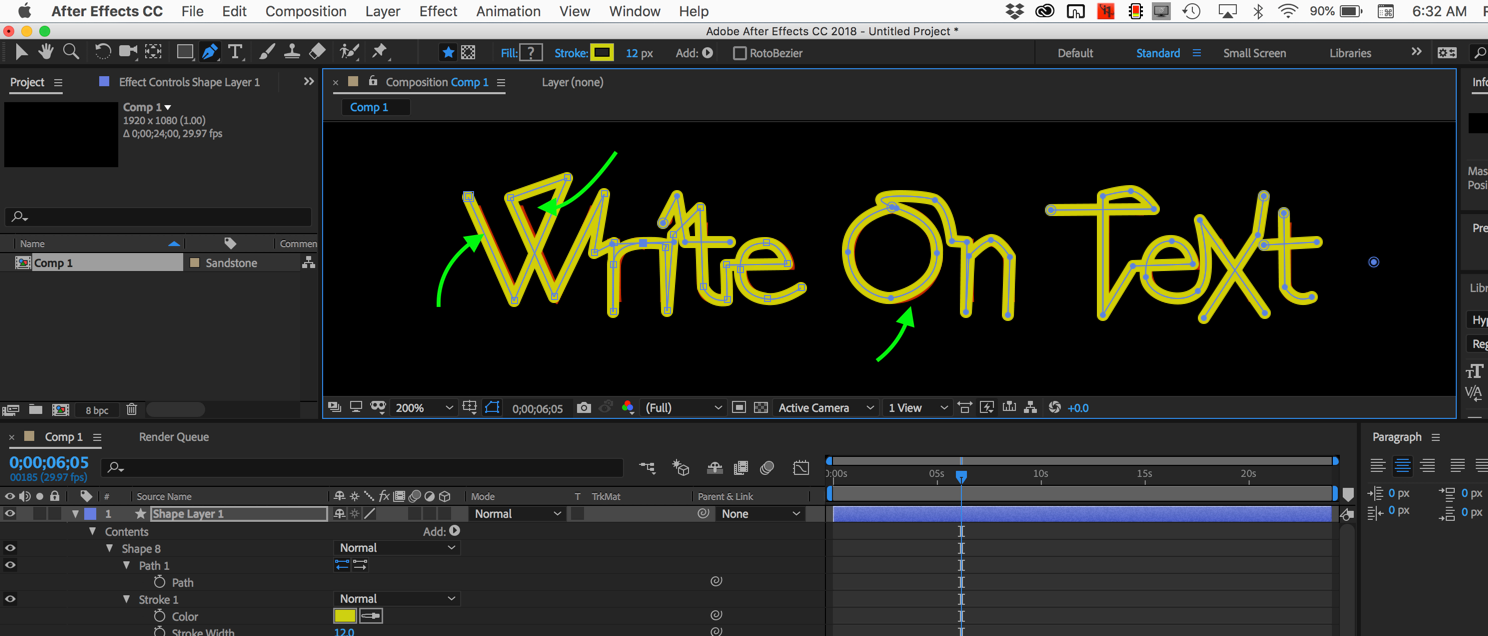
As you can see the W and the O need a little adjusting. After making the adjustments you simply set the shape layer as a track matte for the text.

The entire animation can be done with 2 keyframes, the timing easily adjusted, and it will take you a lot less time.
With some fonts, you will have to set up some masking on the text layer to clean up overlapping lines but that only takes a moment and a couple of keyframes to clean up the overlaps. In most cases, unless the font is revealed very slowly, this is a very quick process.
There are also a lot of other techniques for revealing text but I think that this one is one of the easiest and quickest.
Copy link to clipboard
Copied
Thanks for the suggestion. I did know about this one, but the animation I am making is a bit more complicated than what this method allows for (or at least I believe it is).
I am making all of the letters appear at the same time, spreading from their middle to their edges. Doing this with masks was the only way I knew for getting it to look how I wanted.

Copy link to clipboard
Copied
Same issue exists if you want to copy multiple keyframes from more than one property, from multiple layers, and paste these keyframes onto their respective layers.
You can copy more than one keyframe from one or more properties and paste this/these onto the same layer or another layer.
To copy more than one keyframe, from multiple layers; even from the same property type, and paste these keyframes onto their own source layers, you will require an external helper - Paste Multiple Keyframes 2 - aescripts + aeplugins - aescripts.com https://aescripts.com/paste-multiple-keyframes/
Copy link to clipboard
Copied
I'm not following you.
https://forums.adobe.com/people/Rasmus+BB wrote
I am making all of the letters appear at the same time, spreading from their middle to their edges. Doing this with masks was the only way I knew for getting it to look how I wanted.
If the letters are just revealed and are not moving you could apply a gradient to a shape layer right over the part you wanted to reveal and use Gradient Wipe. to wipe them all on at the same time. Pretty easy to do if you convert the text to shape layers and monkey with the fill. This took me less than 6 minutes to set up:
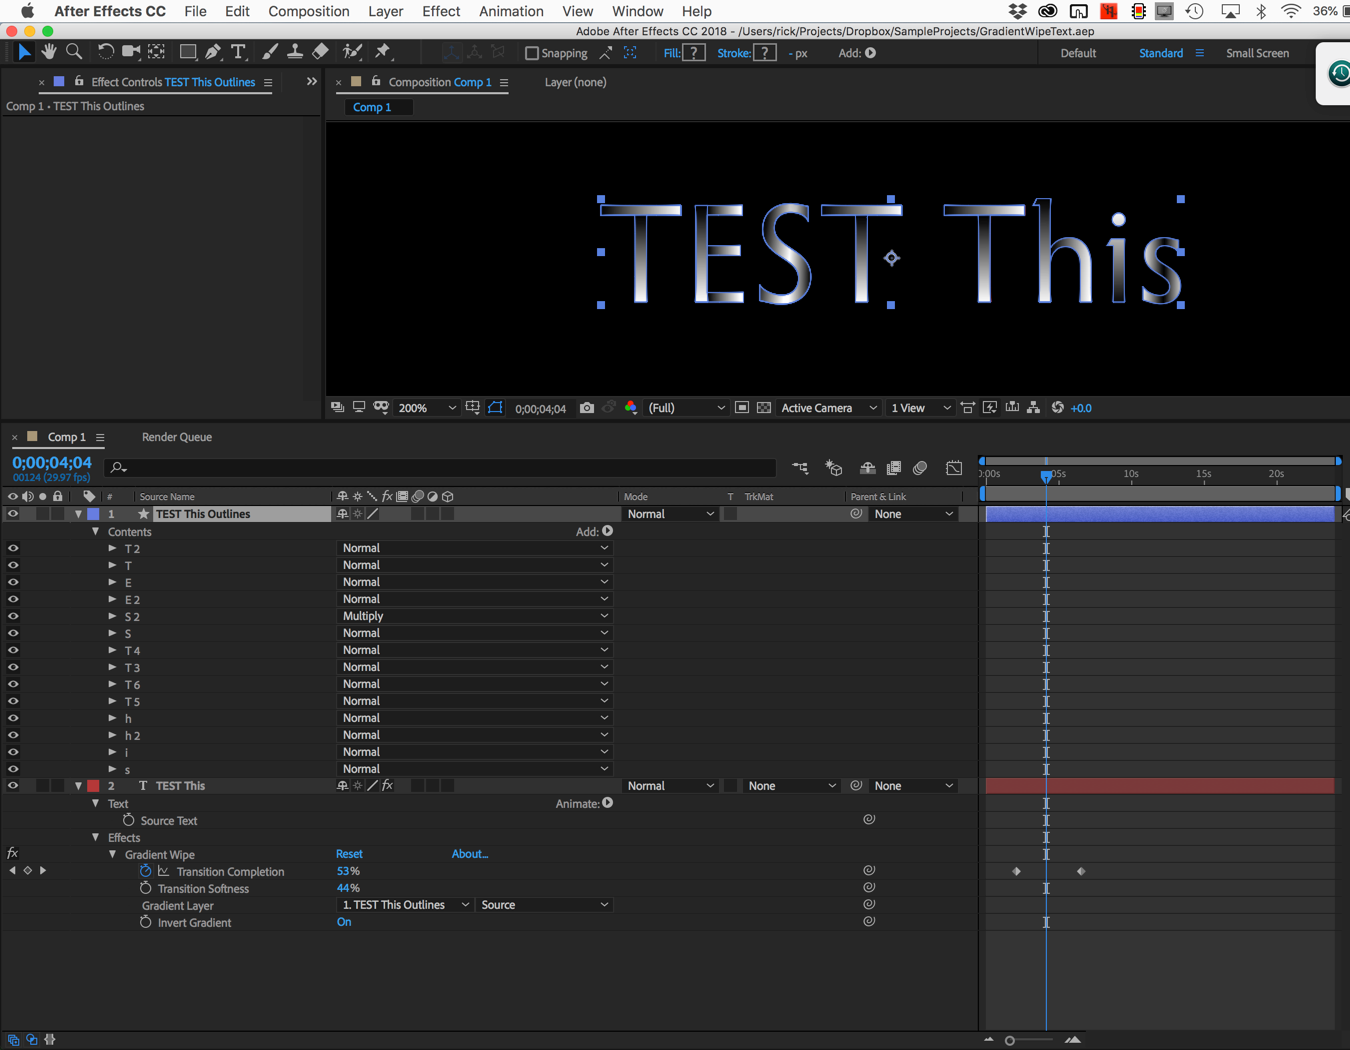
Converted the text to shape layers with a gradient, duplicated where necessary, removed some points, edited the black to white gradient by dragging with each shape selected, then applied Gradient Wipe to the original text layer and got this funky transition.

In case you're interested here's the project file. Dropbox - GradientWipeText.aep
If your browser adds a .txt extension to the AEP just delete it.
I'm still not following you but copying and pasting keyframes, then trying to move them all on the same text layer seems like a pain to me. If you really need to use animated masks to get the effect you want and you want to move the whole thing then just select all of the masks on your text layer, copy them and paste them to a comp-sized solid. If you have not scaled your text layer then they will all line up perfectly and the animations will be intact. Then you can remove the masks on the text layer or turn them off then use the solid with the animated masks as a track matte. Parent them together and move all you want.
Copy link to clipboard
Copied
I developed a product called PathSlicer which makes animating very complex type animations relatively painless. See if these styles interest you. Otherwise, it'll be a good idea for you to show us samples/references.

Copy link to clipboard
Copied
I agree with Gutterfish. You may also want to check that the mask pat stop watch is on when pasting.

Find more inspiration, events, and resources on the new Adobe Community
Explore Now
 AdChoices