

Help mask edges

Copy link to clipboard
Copied
Hi all, I have the following problem. When the masks to create angles arise these stairs Image 92f2a54aa1 | Share-your-photo.com edges-like (you can see it 200% resolution even at 100%).
The effect of the mask is the saber tool, even without it's so. Now I wanted to ask how do I to get it that the edges disappear and she is straight.
So the draft is a line.
After effect 2019
PC: Windows 10 Professional (x 64)
Intel Core i7-4790 K
MSI GTX 970 gaming
2 x G skill F3-2400C 10-8GTX RAM
Motherboard
MSI Z97 GAMING 7


 8
Replies
8
8
Replies
8
Copy link to clipboard
Copied
Go to View > Resolution > Full. Also make sure to turn off Adaptive Resolution and change to Final Quality by pressing Control + Alt + 1
Copy link to clipboard
Copied
Thank you for your answer, the result remains the same. With straight masks lines it's just not like that.

Copy link to clipboard
Copied
Is the comp set to DVPAL with odd fields? Or is there a pixel aspect ratio in the comp, (none square pixels)?
Copy link to clipboard
Copied
Hi at default is HDTV 1080 and at pixel aspect ratio is square pixels.

Copy link to clipboard
Copied
Please just drag your screenshots directly to the forum. It takes less time than it does to upload them to another site and create a link.
Here's your screenshot.

I have no idea what this screenshot is supposed to show me. The only thing I can guess is that the Magnification ratio of the Composition Panel is at 400% or more.
We need a screenshot of the entire comp with the modified properties of the layer giving you problems revealed so we have some idea what is going on. Just select the layer with the mask, press the U key twice, PrintScreen and Paste or if you are on a Mac Shift + Ctrl/Cmnd + 3 then drag the screenshot to the forum. We also need a decent description of your workflow and your design goals.

Copy link to clipboard
Copied
It seems to me, that you're referring to Quality and Sampling.
If you want a straight line, without the 'feather' you can click the 'Quality and Sampling'-button in your timeline.
You might have to click the button 'Toggle Switches / Modes' first.
As you can see on my screenshot, from left to right;
'Shy', 'Rasterize', 'Quality and Sampling' and last 'Effects'.

On your layer, click the straight line under 'Quality and Sampling' until it has the line from top left, to top right with 4 little squares.
(The bottom on on my screenshot)
I hope this helps.
Copy link to clipboard
Copied
Thanks for the tips, but unfortunately it does not bring the desired success. As you can see on the screenshot, the margins in the mask are still present in both approaches.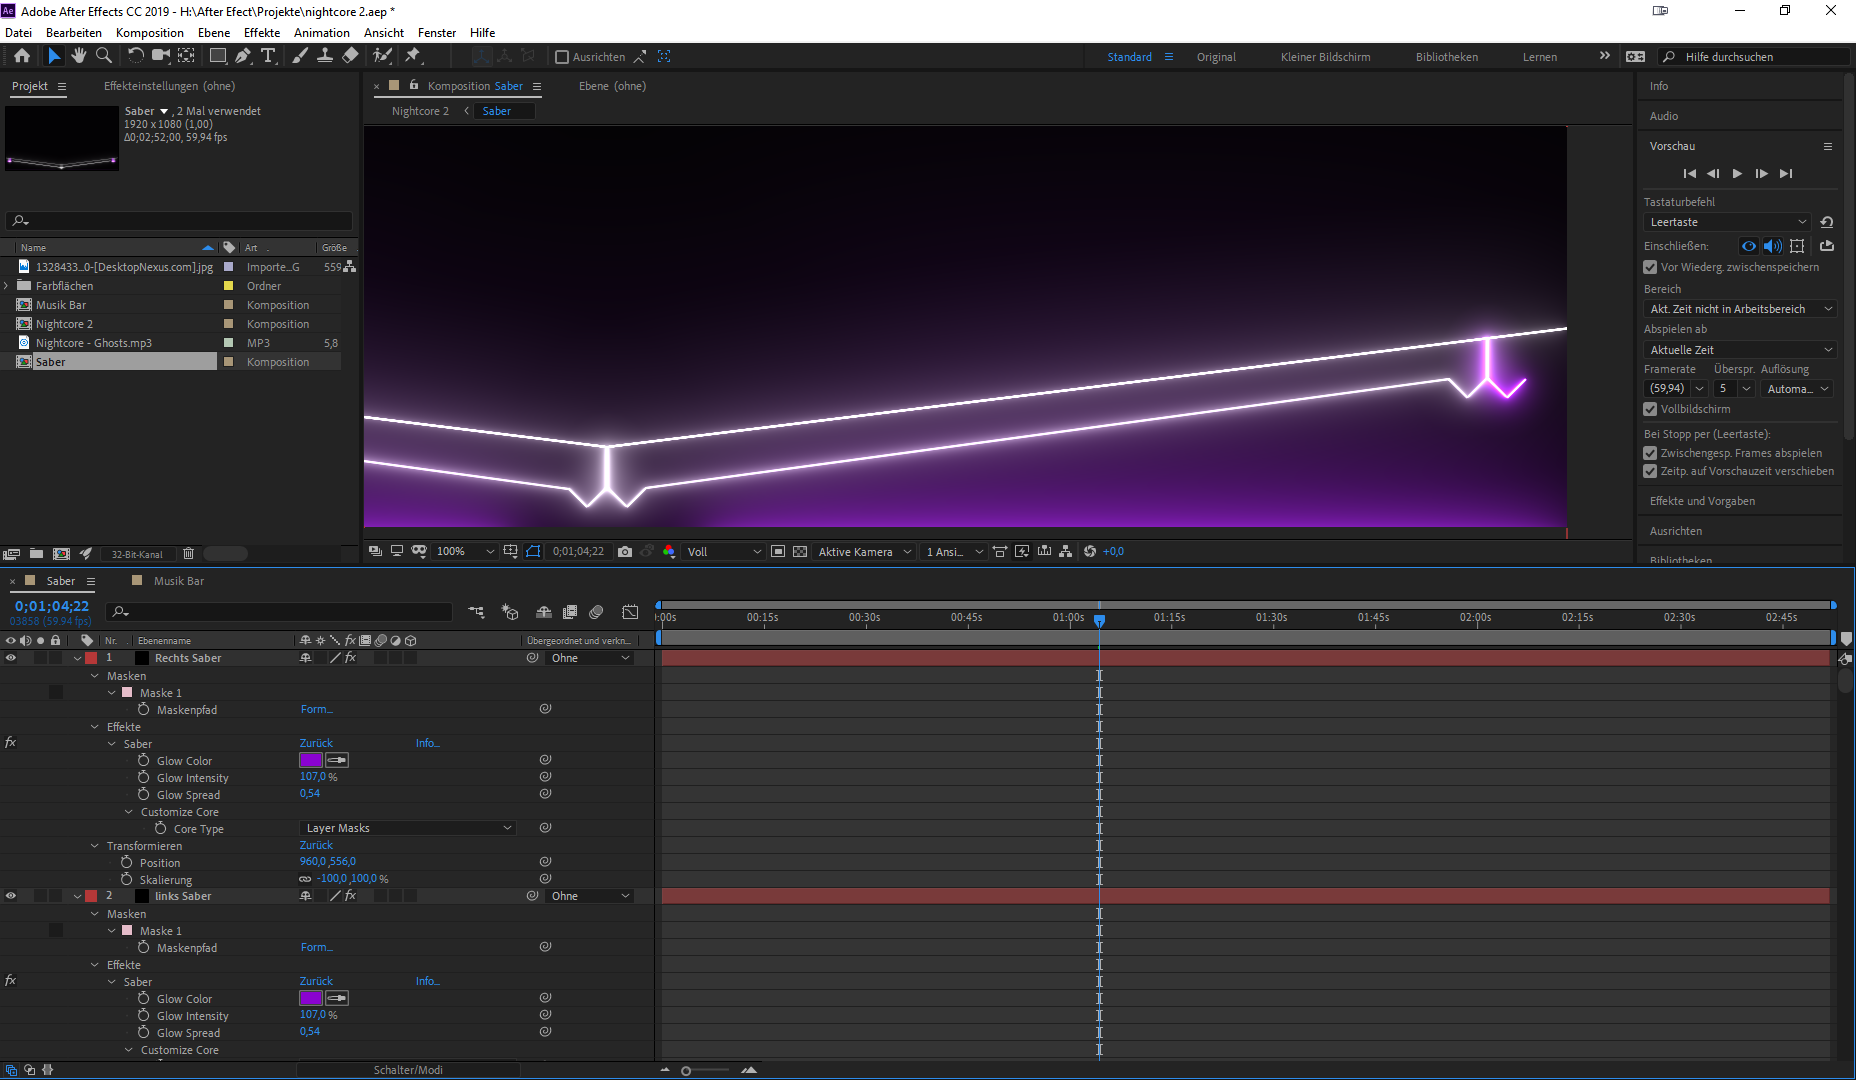
Copy link to clipboard
Copied
What do you mean by margins in the mask?
What happens if you add a new solid, draw an open mask path and a closed mask path, add Saber and only change the core type to layer masks? I end up with no unexpected results. I cannot duplicate the aliasing and I don't know whether the extra purple glow on the far right backward J is from another layer or is an artifact.
The first thing I always do when I have a problem is solo the layer, press the U key twice to reveal all modified properties, then start resetting the properties that show up in the timeline.

Find more inspiration, events, and resources on the new Adobe Community
Explore Now
 AdChoices