- Home
- After Effects
- Discussions
- Re: JPEG is Meshing with Shape Layer in a Weird Gl...
- Re: JPEG is Meshing with Shape Layer in a Weird Gl...
Copy link to clipboard
Copied
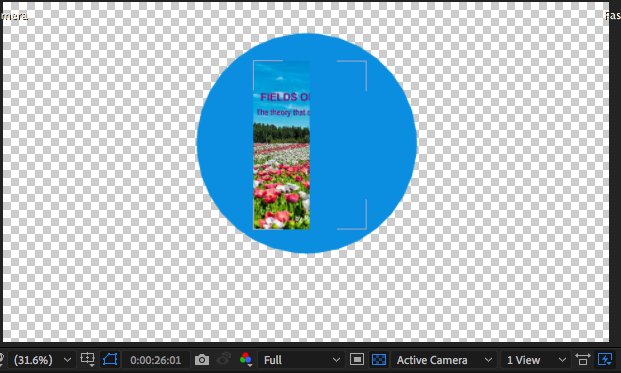
I've run into this weird issue where my 3D shape layer is influencing my 3D jpeg layer.
They're arranged like this...
1. JPEG
2. Shape Layer
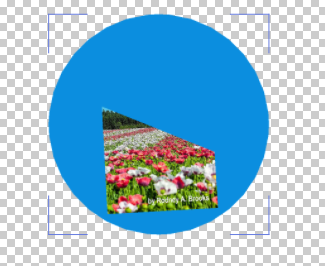
And yet somehow the shape layer is obstructing half of the image at all times, no matter how I adjust it on the X Y or Z axis.

Any suggestions?
Here are a few more stills of what it looks like in motion. The above image shows how it looks when it's reaches the final keys.


 1 Correct answer
Separate the layers by 1 pixel in Z space. This is a common technique that will work perfectly. Then Parent one to the other and only animate one layer. Make sure you are always using the Classic 3D rendering engine for this kind of work.
Copy link to clipboard
Copied
My guess would be that the two objects are sharing the same position, but you say youve tried adjusting the coordinates, do you mean both objects at the same time or have you tried moving just the jpg away from the shape?
Copy link to clipboard
Copied
Yes, they don't share the exact same position coordinates but they reside in the same area.
When I move the jpg away from the shape the full image becomes visible, so I know the image isn't damaged or something.
I'm trying to understand why the image starts to partially disappear when I position it over the shape.
Copy link to clipboard
Copied
Are they rotating? If so, that may easily cause them to intersect if they are close in position.
One way to check is to find a spot in your timeline where they clearly visually intersect, then at the bottom of the composition window use the menu that says 'Active Camera' and select 'Custom View 1'. You'll then be able to see your scene from a different angle. Find the 'Unified Camera tool' in the toolbox and you'll be able to drag around in your scene to see it from different viewpoints. Return to 'Active Camera' and the standard selection tool when finished.
Copy link to clipboard
Copied
Separate the layers by 1 pixel in Z space. This is a common technique that will work perfectly. Then Parent one to the other and only animate one layer. Make sure you are always using the Classic 3D rendering engine for this kind of work.
Copy link to clipboard
Copied
This is helpful, thank you for responding! Because I was on a deadline I ended up exporting the project twice, keying in one layer at a time, but I didn't like the quality loss that I got and I knew that there just had to be a better way.
I thought I had already tried placing the two elements in different locations, but I'll try to follow your specific instructions next time.
Copy link to clipboard
Copied
For future reference, you can also drop a 2D adjustment layer between 3D layers to break their 3D interactions. You're essentially brute-forcing the render order, but it can be helpful if you can't otherwise make things look right in 3D space.