- Home
- After Effects
- Discussions
- Re: Making 3D Text Transparent (while maintaining ...
- Re: Making 3D Text Transparent (while maintaining ...
Copy link to clipboard
Copied

I am a beginner to After Effects, and am dealing with a transparency issue. I want to make the brown, square picture on the left into the transparent background of the title. However, I only want to make the blue in the text transparent, I want the white edges to stay the way they are.
I have already tried alpha matte, and the text became transparent, but the white edges became transparent as well. I believe it's a whole lot better to keep the white edges, so the title will be easier to read.
Any help to making the blue text, but not the edges, transparent would be great! Thank you!
 1 Correct answer
What you are doing wrong is not reading the warning when you select the C4D renderer or the, and please do not use it if C4D rendering is available, the Ray-traced rendering engine. Effects are disabled on 3D layers along with a bunch of other things.
It took me a while to figure out what you were trying to do. I think I've got it but but I will offer two solutions. In the future please just use Print screen to capture a screenshot (Shift + Ctrl/Cmnd + 3 on Mac) to capture a screenshot of the who
...Copy link to clipboard
Copied
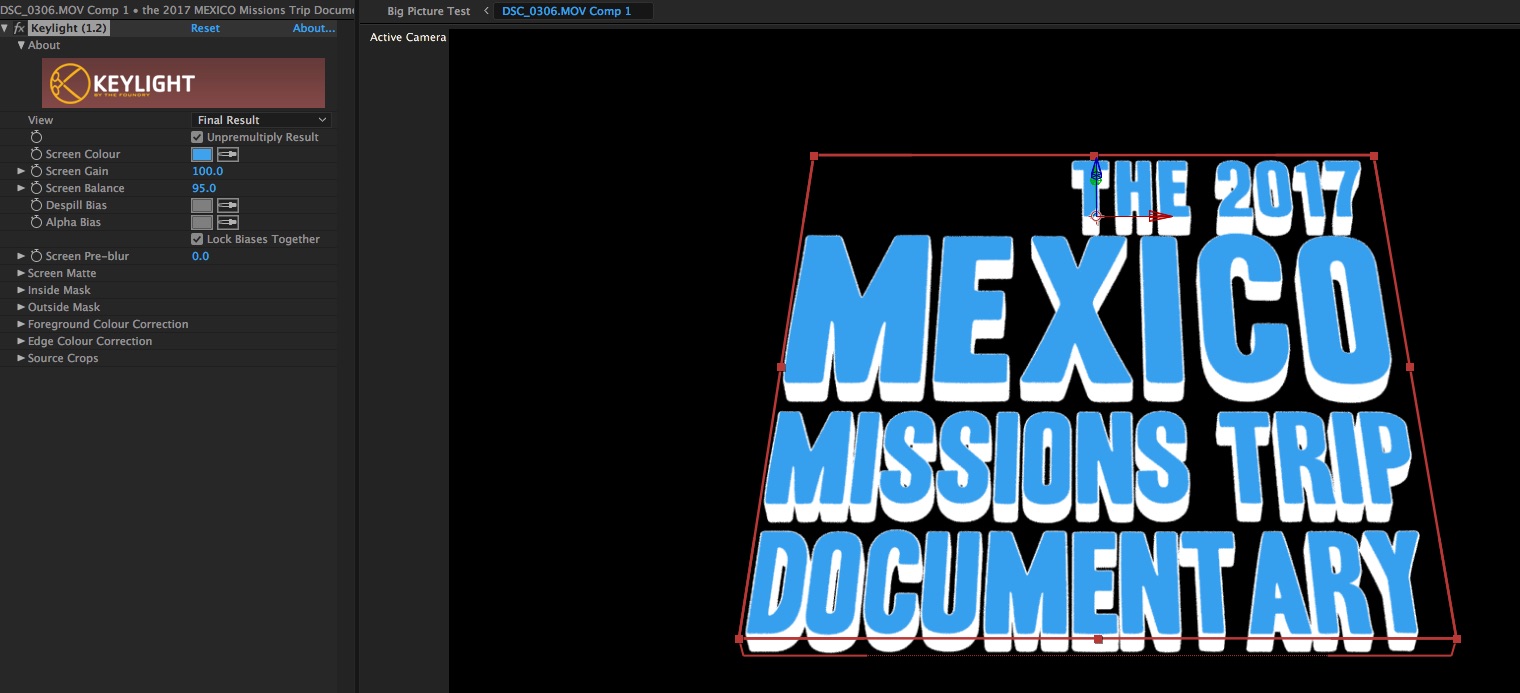
You could try a chroma key. Keylight ought to do the trick for you. But it won't get rid of that image on the left you want to use as a text fill.
Once you're happy with the key, precompose the layer you want to use as a text fill. Add the 3D text to the precomp and use it as a track matte. Animate your text fill layer as necessary.
Copy link to clipboard
Copied
Thank you for the suggestion! However, I tried using key light on the text, and used eyedropper tool to grab the color blue. However, the blue did not become transparent. What am I doing wrong?

Copy link to clipboard
Copied
What you are doing wrong is not reading the warning when you select the C4D renderer or the, and please do not use it if C4D rendering is available, the Ray-traced rendering engine. Effects are disabled on 3D layers along with a bunch of other things.
It took me a while to figure out what you were trying to do. I think I've got it but but I will offer two solutions. In the future please just use Print screen to capture a screenshot (Shift + Ctrl/Cmnd + 3 on Mac) to capture a screenshot of the whole AE app with the modified properties of the layers that are giving you problems selected and revealed (press the u key twice) so we can get a better idea of what you are doing. Screenshots of just the comp panel are pretty useless.
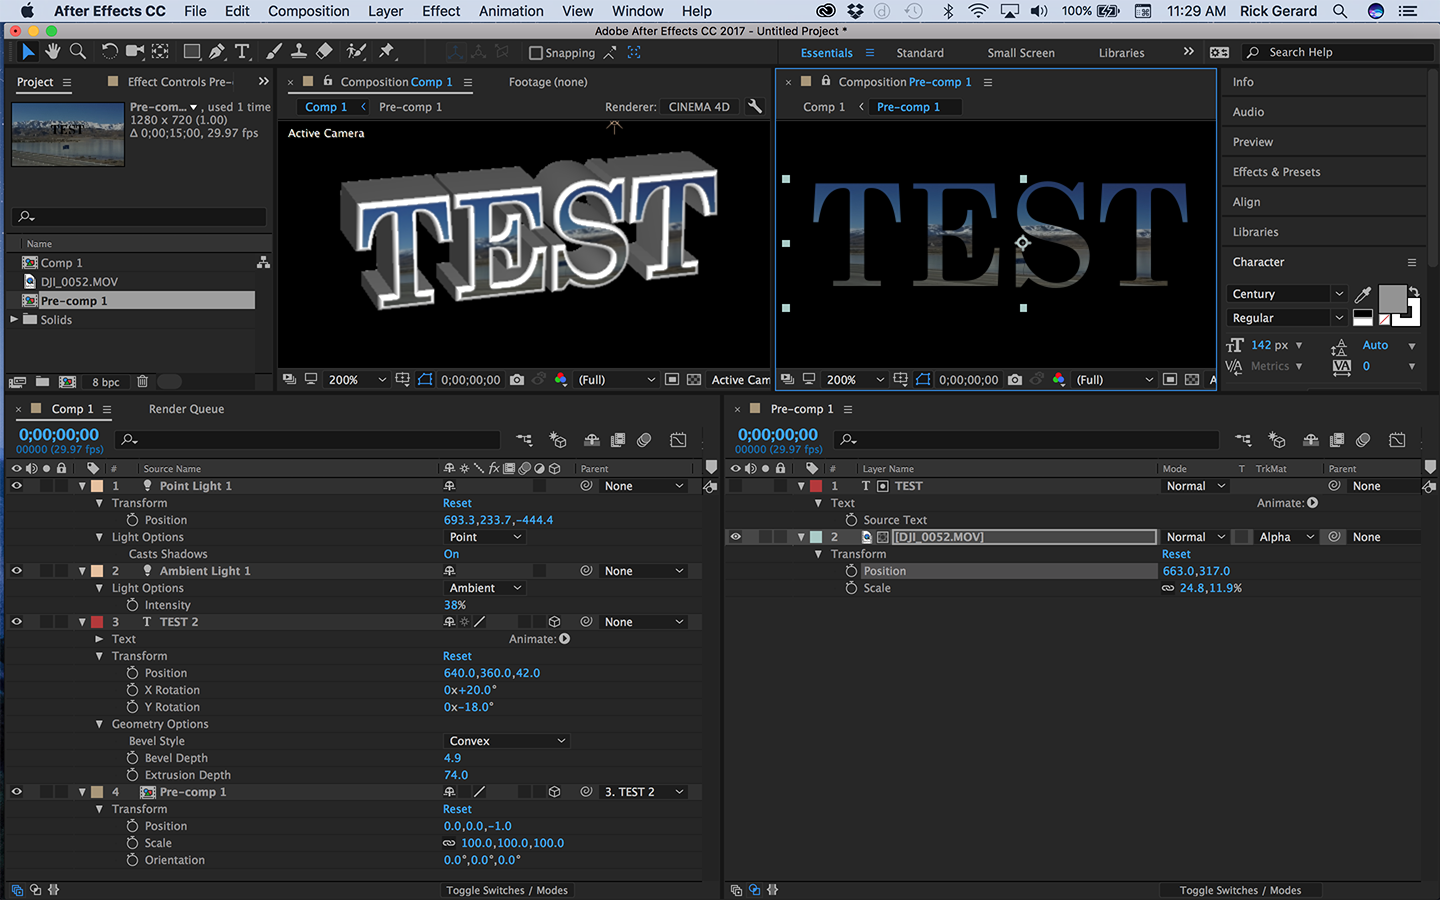
Here's the first stab at an answer. Filling the extruded text layer with the image on the left.
- Duplicate your text layer and make it 2D and turn off the stroke
- Place the image you want to fill with the text layer below the text layer
- Set the 2D text layer as an Alpha Track matte for the image
- Pre-compose the text and track matte layer and DO NOT turn on collapse transformations
- Make the pre-comp a 3D layer
- Hold down the Shift key and parent the text layer to the extruded 3D text layer to snap them into the same position angle and rotation
- Adjust the bevel depth and style to give you the kind of edge you want. Only bevel adjustments will render a stroke applied to a text layer.
- If necessary move the pre-composed layer 1 pixel in z space to separate it from the face of the text layer.

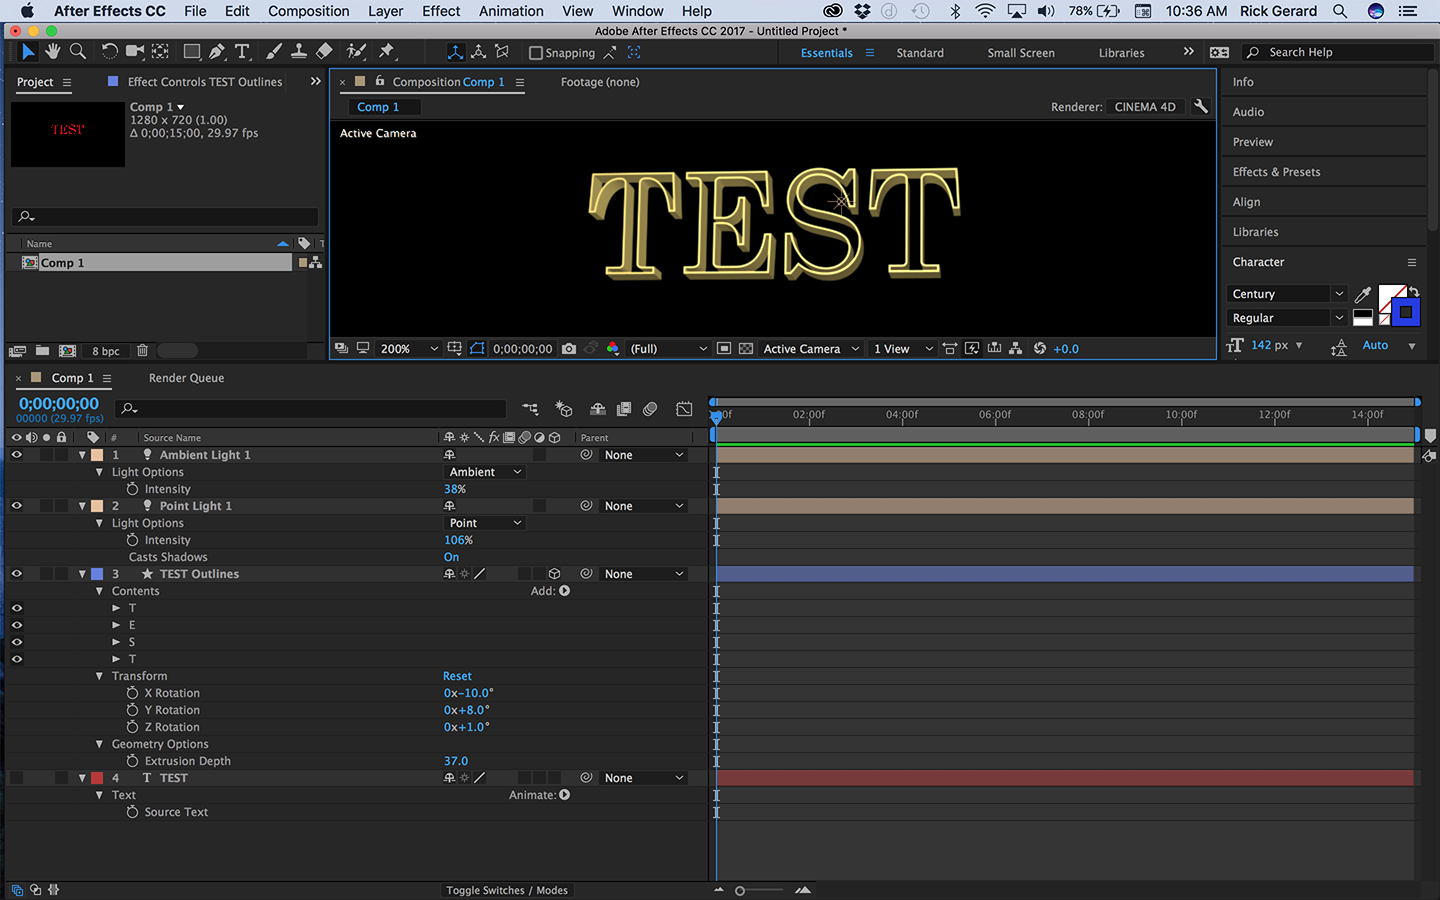
The second option is not going to look very good but it will let you extrude only the stroke on a text layer.
- Go to the Character Panel available in the Text Workspace, or the Essentials Workspace or by going to the menu and choosing Window>Character or by using the keyboard shortcut Ctrl/Cmnd + 6.
- Select your text layer and make it 2D and then turn off the fill in the Character Panel by clicking the small white icon with the diagonal red line just below the fill color This should leave you with stroke only.
- With the text layer still selected select Layer>Shapes from Text from the Menu
- The text layer will turn off and a new shape layer will be created. Convert this layer to 3D and with the Cinema 4D rendering engine selected in the Composition Settings press the A key twice and set the extrusion depth as desired.
You will probably need to add some ambient light and at least a point or parallel light to get any definition on the text layer. It's going to be pretty hard to read if there is a lot of extrusion. Do not use Ray-traced rendering unless that is the only option for extruding text layers. That rendering engine is no longer supported or being developed and it never worked very well anyway.

Let us know if this solved your issue.
Copy link to clipboard
Copied
Thank you very much! Option 1 solved my issue, it looks great!
Get ready! An upgraded Adobe Community experience is coming in January.
Learn more