- Home
- After Effects
- Discussions
- Re: making a bunch of dots into a shape
- Re: making a bunch of dots into a shape
making a bunch of dots into a shape
Copy link to clipboard
Copied
okay so,
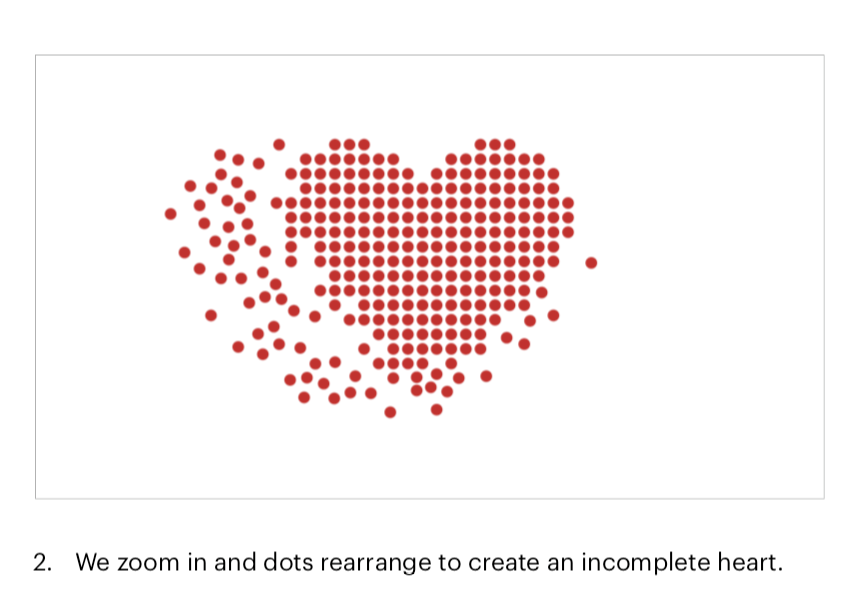
i have an AI file with about 400-500 red dots, the dots are already in the shape of a heart, however i need them to start off as just random dots and then they slowly starting forming into the heart, but not a solid heart, it still has to look like dots made a heart.instead of doing this by hand, what can i do?
see attached for the storyboard.
instead of doing this by hand, what can i do?
Copy link to clipboard
Copied
If you set a keyframe for the position of each layer at the point you want the heart to be completely formed, then move back in time a bit and then start just randomly dragging dots around, it won't take too long and would be a good start. Then, tweak the animation curves using something like Flow ($30 from AE scripts) or just messing with AE's graph editor on all of them at once and offset the timing with something like Rift (pay what you want from AE scripts) or by hand you would get there.
Alternatively, you could apply a really big, really slow wiggle expression to all of them, but control the amplitude of the wiggle with a slider on a control layer. Easy to do. Test the expression on one layer and then use the handy dandy Copy Expression Only command and paste it to the others.
Copy link to clipboard
Copied
This plugin may help: https://aescripts.com/randomizer/ I used it when I was dealing with 400 small layers as well and it saved SO MUCH time
Copy link to clipboard
Copied
I've had great results with Pastiche from Motion Boutique, which was developed for exactly this sort of sequences.
https://www.motionboutique.com/pastiche/
Copy link to clipboard
Copied
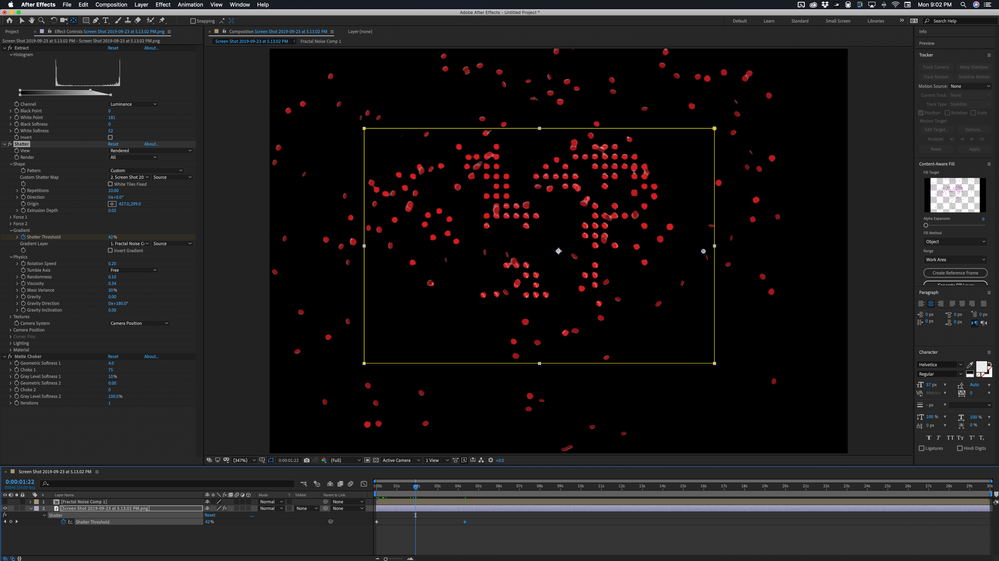
I would import all the layers as a single graphic. If there is transparency, and there should be, all you have to do is add a gradient, easily created with Fractal Noise, to the layer stack, turn the gradient layer off, then apply Shatter. Set shatter to use the source layer as the custom shape and use the Gradient layer as the source for the shatter. You can add rotation and depth if you want to the pieces or keep them all flat with Physics and gravity. Animating the Shatter Threshold will break apart the layer. When you are done Pre-compose everything then apply Time Remapping and use the keyframe assistant to reverse the keyframes so the layer is assembled. This took me less than 2 minutes. I just applied Extract to your sample image to give it transparency, added shatter, applied the default Fractal Noise to a layer and pre-composed it for the gradient, then fiddled with the settings. Nothing to it, quick to animate, and if you want to have some real fun add a Camera to the comp and animate the camera.
There is another option that is a little more complicated. It will work because the dots on your heart shape are in a perfect square grid pattern so my second choice would be Card Dance. If you match the spacing of the rows and columns on a pre-comp with all of the layers in place you can use a gradient map or just the card dance controls to make those dots fly all over the place in 2D or 3D. Either one of these solutions would be easier, more interesting, and take less time to produce than the methods that have been suggested so far.
Copy link to clipboard
Copied
Hi!
Rick's suggestion is great.
I'm trying to achieve this exact effect but insted of coming from the outside to build the dotted shappe, I need to come from the inside to build the shape. So it's an explosion from one point where the dots stop on the desired shape/image.
Anyone as any idea how to achieve this effect?
I have 1800 dots so moving each dot manually is not an option.
Thank you!
Copy link to clipboard
Copied
If you have Red Giant tools, Trapcode Particular might be perfect for this. Depending on how exact you have to be on your dot placement, it could be fairly simple to make your dots be particles on a mask and then use flocking with target attraction powered up and other flocking behaviors turned down. I'd use the velocity over life curve to tweak the acceleration and deceleration. This would essentially suck all of your particles into the center and then you could just reverse it!
Alternatively, you could use flocking to go the other way with predator/prey behavior to make the particles come out of the center and head towards the correct dot positions.
If you don't have Red Giant tools, I think my initial suggestion in this thread is a pretty good one, but it'll be even easier. Just set a keyframe at their resting place, move back in time and reset all of their positions to default (or whatever the starting position is. With all the layers selected, this would only be a couple of clicks! If you want to have control over the keyframe easing, you could use Flow from aescripts to get a custom easing across 1800 keyframe pairs very quickly.
If you like Rick's suggestion for Shatter, just use the gravity and other settings to make the pieces fall away from you and then reverse that - it'll look like they're coming from the middle.
Copy link to clipboard
Copied
Thank you Szalam.
I don't actually have Particular and manualy keyframing 1800 layers doesn't seem doable and I'm pretty sure AE wont handle well so many layers (talking with experience on that).
With Shatter I couldn't figure out a way to send the particles to the back but that seems to be a good trick if that's actually possible.
Find more inspiration, events, and resources on the new Adobe Community
Explore Now


