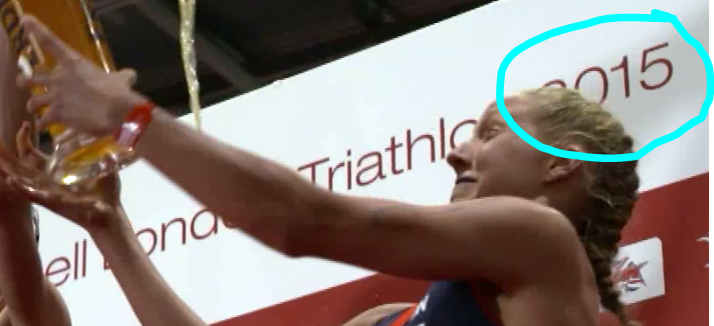
Hi I have a dilemma here, i'm relatively new to using premiere pro and after effects and I've been given what seems to be complex and fiddly task of getting rid of text from a banner. The camera is moving and also the text gets blocked by a women's head so it's a case of the head overlapping the text.
The best way to achieve this is probably using masks for rotoscoping, even if your camera is moving. AE includes a software that can assist you in a task like this. You have an option in the Animation Menu to send the clip to Mocha AE where you can do a complex roto work quickly. I recommend you to check the tutorials for Mocha on the Borisfx.com website where you have a lot of basic and intermediate tutorials to get a good result.
A simple approach would be to stabilise the footage with the Warp Stabilizer in AE. Remove the text on the stabilised footage using masks or the clone tool. Then reverse the stabilisation to reintroduce the camera movement if required. Here’s a tutorial to show you how:
I would Motion Stabilize the shot, not Warp Stabilize because WS will just smooth our jerky camera movement. The tutorial my friend Angie suggested is a decent option for stabilizing shaky footage but I find the following technique a little easier to use and with many shots and it can be quite a bit more efficient. The tutorial also requires an active Lynda.com membership. That's a good thing for a beginner to investing in. The most efficient technique depends entirely on the shot and since we only have seen a few portions of a few frames I'm guessing this is will be a more efficient approach.
Find something that is not moving within the shot, or better yet, two points that are consistent, Motion Stabilize position, rotation and Scale and then hit
Apply. Hopefully, you can find two parts of the banner that don't move. Even if one of your tracking points gets covered up you can hold down the Alt/Option key and move the detail area but keep the original attach point and end up with a decent track.
Now you have a banner that does not move. If you rename the shot "stabilized" you can use an animation preset that I will share later to put the motion back in the shot and line up keep the repairs and the roto lined up.
The next step is to find the frames where the part of the banner that you need to repair are covered up and add a colored solid. You trim the solid so it just covers the part you need to roto. Change the blend mode to something like Overlay or Screen so you can see through the layer and start animating a mask that will cover the woman's head. You should be able to do that with just a few keyframes. Repeat the process with as many solids as you need to roto everything that moves in front of the area on the banner you need to repair.
Now pre-compose all of your roto layers.
The next step is to do the repair on the banner. You can export a frame as a Photoshop file and paint it out, then bring back in just the repaired area or you can create a replacement layer using any of a dozen other techniques. The pre-composed roto layers will be above the, the next layer will be the repair, the bottom layer will be the original footage renamed stabilized. All you have to do now is set the roto pre-comp as an Alpha Track Matte for the repair layer, check the footage and make sure you don't need to make further adjustments and move to the last step.
The final step is to move the CTI (current time indicator) to the first frame, add a null to the composition, apply this animation preset to the null. Save this file to your desktop: Dropbox - destabilize Rotation Scale.ffx and make sure you rename the original footage stabilized.
Now parent the original footage, the repair, and the roto pre-comp to the null. The Anchor Point, Scale and Rotation keyframes that were applied to the footage to Motion Stabilize the shot are being applied to the Position, Scale and Rotation properties of the null. Parenting the other layers to the null removes the Motion Stabilization from the original footage and puts the camera movement into the repair and track matte layers. Make sure everything is OK by checking a ram preview and render the fix. It sounds complicated but it is not really. The Animation preset is my gift to you. I probably use this technique two or three times a month. The hardest part of the project is the roto work. With a shot like this Rotobrush is going to get so confused you'll actually save time doing the roto by hand.
Here's a short easy tutorial on the Roto Technique I use. It will give you the idea. The example only stabilzed motion and does not use the null/animation preset trick. Enjoy.


 3
Replies
3
Replies


 AdChoices