- Home
- After Effects
- Discussions
- Re: Placing an image on the back of another image ...
- Re: Placing an image on the back of another image ...
Copy link to clipboard
Copied
Hello! I'm fairly new to after effects and have followed a few tutorials, but I am now trying to work on a few small projects on my own for fun. One that I am trying to do is to recreate the old Transformers cartoon with the spinning logos of the Autobots and Decepticons. I have both logos overlapping, and I put one 1 degree forward in the z space (I believe I need to do this, but could be wrong). But I can't seem to figure out how I can make them spin together so that every 180 degrees it will show the other logo. So it should start on the Autobot logo, at 180 degrees it will show the Decepticon logo, another 180 and it will be back at Autobots, etc. I know I eventually need too precompose them, but I feel like there is something else that should be done first.
 1 Correct answer
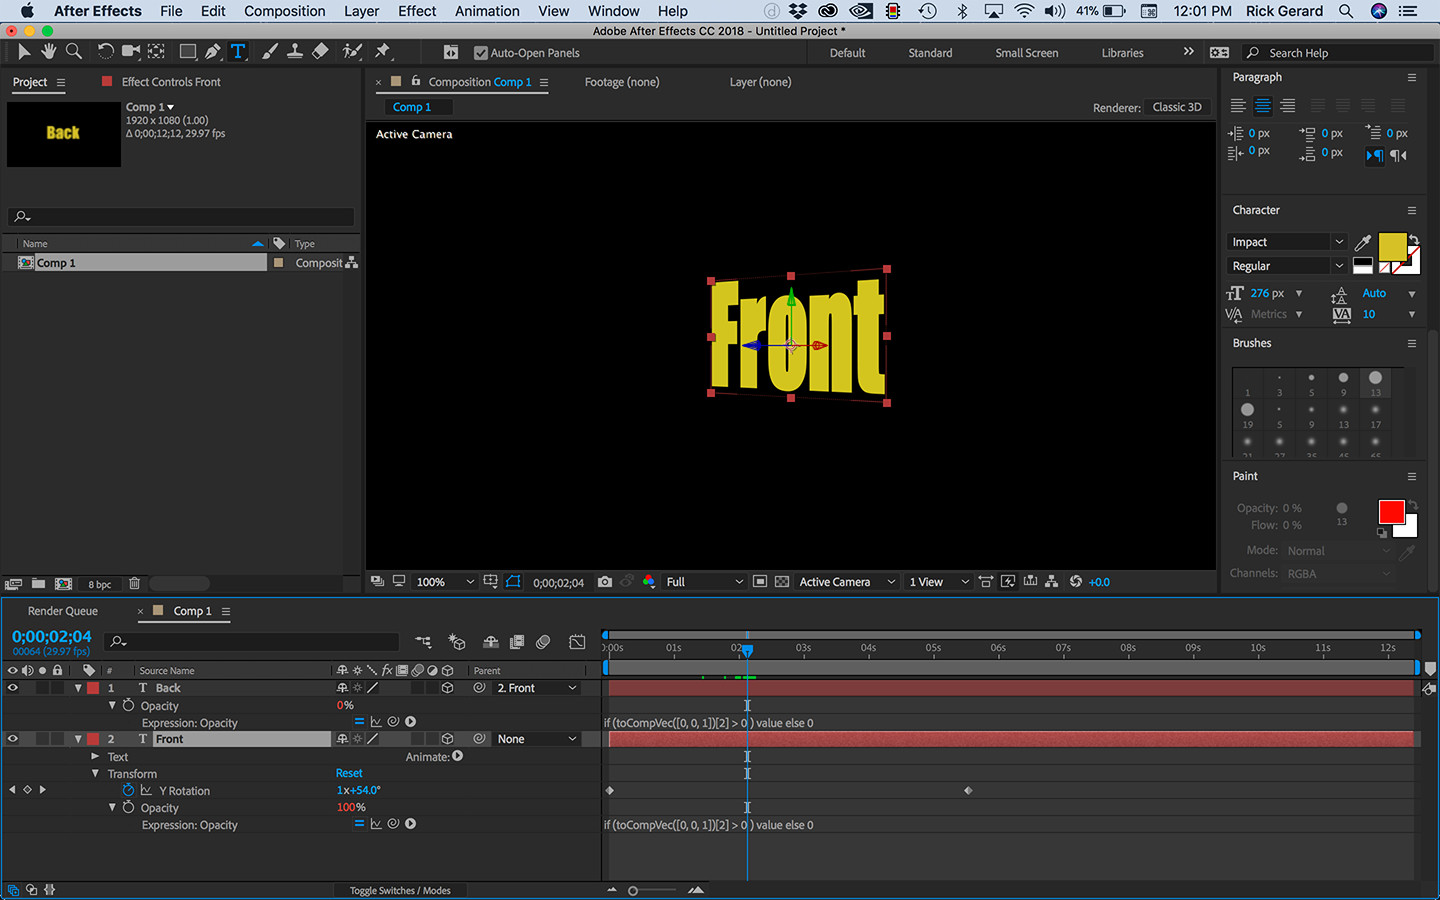
Parent one logo to the other. Separate them by one pixel in Z space and then parent, then rotate the parent.
If the logo's overhang then you'll need to control the opacity of the layer that is facing the camera. This can be done with a simple expression. You'll find the expression on Dan Ebbert's Motion Script website. You will find a full explanation and the expression there. I suggest you take the time to read the page.
Here's the expression for opacity:
if (toCompVec([0, 0, 1])[2] > 0 ) value
Copy link to clipboard
Copied
Parent one logo to the other. Separate them by one pixel in Z space and then parent, then rotate the parent.
If the logo's overhang then you'll need to control the opacity of the layer that is facing the camera. This can be done with a simple expression. You'll find the expression on Dan Ebbert's Motion Script website. You will find a full explanation and the expression there. I suggest you take the time to read the page.
Here's the expression for opacity:
if (toCompVec([0, 0, 1])[2] > 0 ) value else 0
Copy link to clipboard
Copied
So there is no such thing as like "backface not visible" in after effects?
Copy link to clipboard
Copied
Do I add the script to both pieces or just the parent? I added it to both first and depending on how I tweak it I can get one to go away and the other to show up, or I can get both to be hidden, however I can't seem to get them to alternate.
Copy link to clipboard
Copied
Apply the expression to the front face layer, rotate the layer 180º and it should disappear.
Apply the expression to the back face layer then make the parent the front face layer.
You now have a rig with the front face facing away from the Active Camera and the back face facing the camera. Rotate the parent (front face) and the back face should disappear as soon as it starts facing away from the camera and the front face should appear.
It's all in the explanation on Dan's site.

Copy link to clipboard
Copied
While the 'toCompVec' method is a perfectly good one, another option for a simple spin animation as you describe is: Effect > Simulation > Card Dance.
Add both layers to your comp.
Turn off visibility (eyeball) for the back layer.
Apply card Dance to your front layer, with the following settings:
Back layer: [your back layer]
Camera position > Y rotation : [animate as required for your spin]
Lighting:
Light intensity: 0
Ambient light: 1.0
Just note that this is a 3D effect on a 2D layer - as opposed to using standard 3D layers as in Rick's answer.
Find more inspiration, events, and resources on the new Adobe Community
Explore Now