- Home
- After Effects
- Discussions
- Remove black flickering in After Effects
- Remove black flickering in After Effects
Copy link to clipboard
Copied
Hello!
Can you tell me how to remove the black flickering from this video, after the shattering:
https://www.youtube.com/watch?v=X7PQSkncdWA
Can you please help me? Just to clip it somehow?
Thanks!
Denes
[Moved from the non-technical LOUNGE Forum to a Program forum... Mod]
[Here is the list of all Adobe forums... https://forums.adobe.com/welcome]
 1 Correct answer
There is no one click solution. The best you can hope for is to create a procedural matte, a matte created using a bunch of effects, and then use that matte to limit color correction to the areas you want to change. It's the only solution that I know of that doesn't require a bunch of roto which would be extremely time consuming on this shot.
To give this a try I took a screenshot of a frame of the video, created a comp from the screenshot and then used curves to generate a high contrast matte la
...Copy link to clipboard
Copied
is this a video you made? do you have the project files? we need more information.
Copy link to clipboard
Copied
Hey, thanks for writing! Yes its a video, there are those black jittering thing when the body breaks becaues of polygon overlaps I was just wondering if After Effects has any tools that can make them gone.
Copy link to clipboard
Copied
not really. it's in the video and well composited in there. you would have to reconstruct the whole thing if you want to get rid of it. looks like a bad render that need's to fixed in the software that made it/composited it in the first place. do you have any access to the source materials?
Copy link to clipboard
Copied
No sorry, Well they have a really different colour, much darker, I am sure there is a way to remove it.
Copy link to clipboard
Copied
In wich Program did you render the film?
If its in C4D you should probably turn on "Gauss Animation" in the "Anti Aliasing" Tab.
Or in any 3D Programm in the render settings. have a look at the Anti Aliasing options.
If you would do this in AE with the standard functions it will be a bit tricky.
The is a third-party plugin from RE:Vision. Its name is what its does: DeFlicker.
Pretty efficient but also pretty costy.
maybe this could help.
best,
Simon
Copy link to clipboard
Copied
Hello! Thanks for writing! Unfortunately I only have the footage, and the client asked me to remove the black flickering. Cant I just clip the colout somehow? Its a much darker area.
Copy link to clipboard
Copied
So i don't know if this works with a Black flicker.
with a electric flicker (white) it works.
- Duplicate the footage that has flicker.
- Stack this duplicate on a new layer above your original clip.
- Offset the top layer by one frame.
- Reduce the opacity
best,
simon
Copy link to clipboard
Copied
Thank you all!
Copy link to clipboard
Copied
I suspect the flicker is so abrupt that a high contrast matte won't cut it. you can try to isolate the black areas using the extract effect, then soften the edges and apply a color correction of some sort. maybe that's good enough, but I suspect not. it's very apparent that something went very wrong in the render pass that composite work can probably only mildly improve. with enough retouching you could come close but it appears the change is very dramatic in the image once the fractals brake that you actually have to isolate many different pieces.
Copy link to clipboard
Copied
There is no one click solution. The best you can hope for is to create a procedural matte, a matte created using a bunch of effects, and then use that matte to limit color correction to the areas you want to change. It's the only solution that I know of that doesn't require a bunch of roto which would be extremely time consuming on this shot.
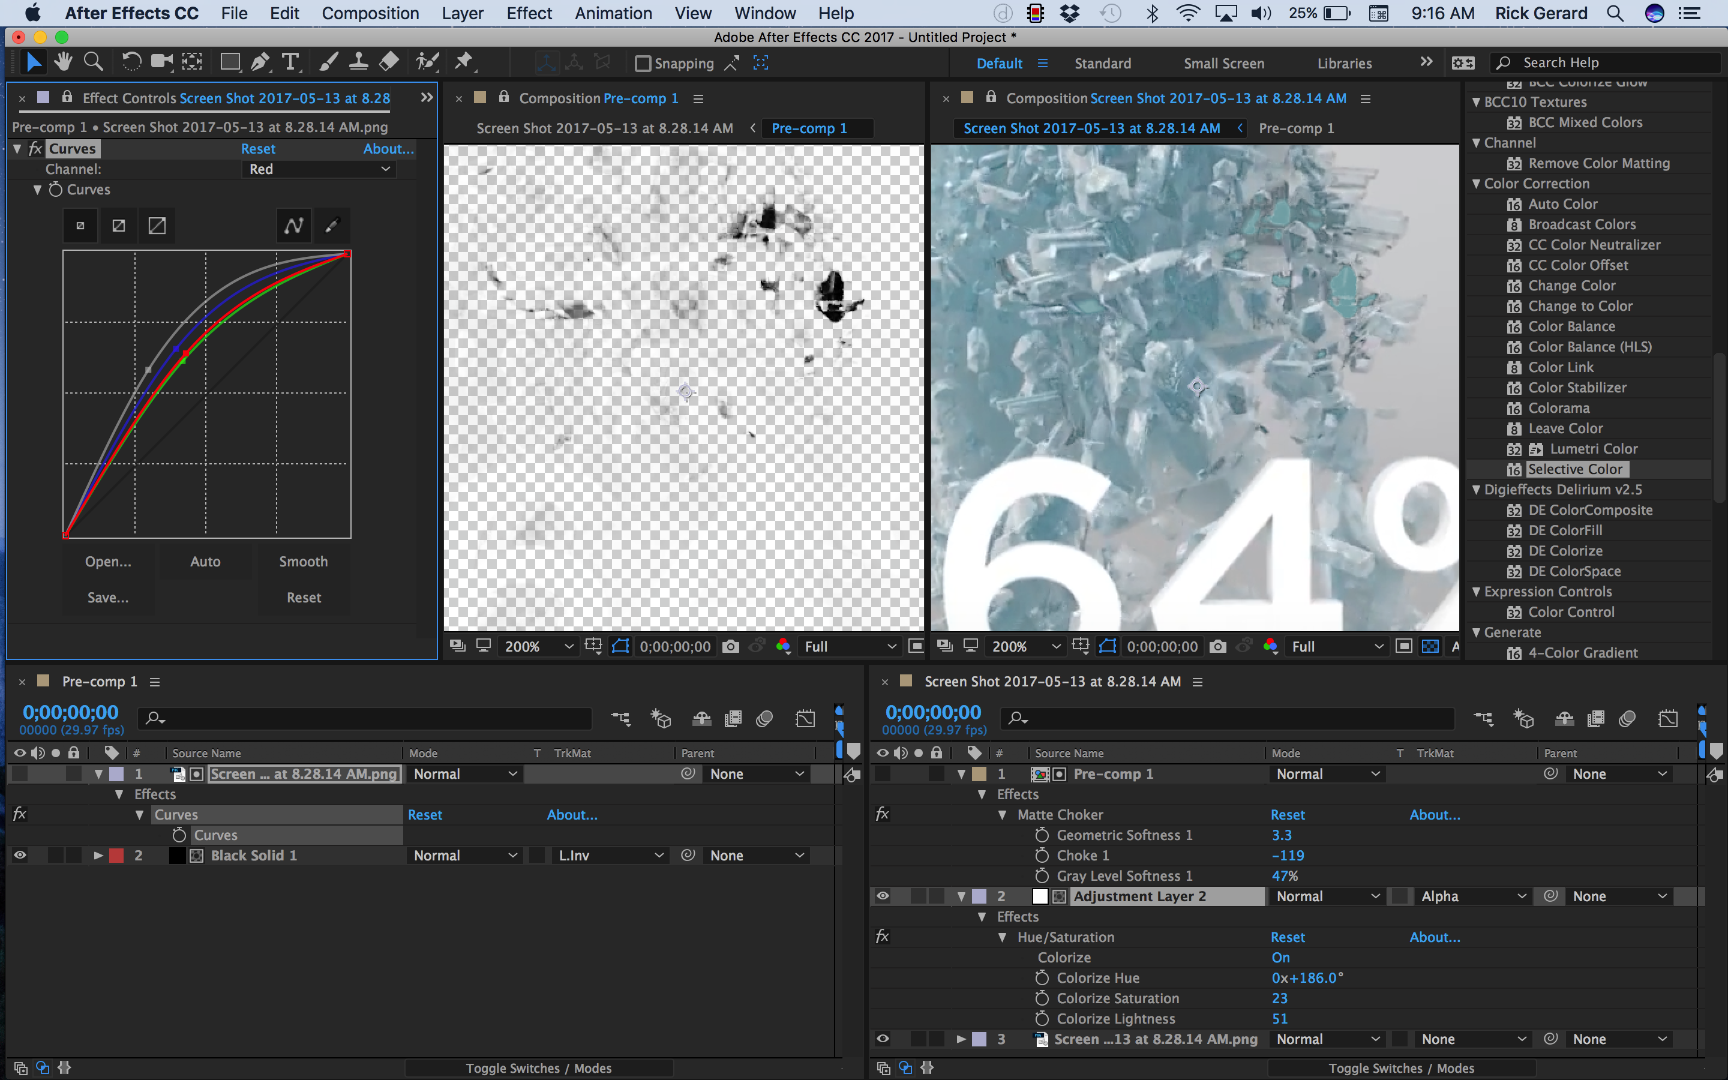
To give this a try I took a screenshot of a frame of the video, created a comp from the screenshot and then used curves to generate a high contrast matte layer to be used as a track matte for a black solid. These layers were pre-composed so I could use some matte tools to refine the matte and an adjustment layer with nothing more than Hue/Saturation - Colorize added above the original footage.
The Pre-comp was used as an alpha track matte and Matte Choker was used to adjust the edges of the matte and clean them up a bit. A little tweaking and less than 5 minutes and you have some selective color correction applied to your footage. This is far from perfect and can be refined by additional techniques but it should give you a place to start. Because of the fine edges you are working with I'd convert the project to 32 bit to give you more control over the matte edges. The quality of the procedural matte is going to determine the quality of the color correction. That's the most important part. There are a bunch of ways to achieve this, curves was just the first tool I tried to see if it were possible.
Here's a screenshot showing the modified properties of the layers in the pre-comp and the main comp to get you started:

I hope this helps.
Copy link to clipboard
Copied
Thank you so much! Thanks for the time, I will do this.
Thank you all!
Copy link to clipboard
Copied
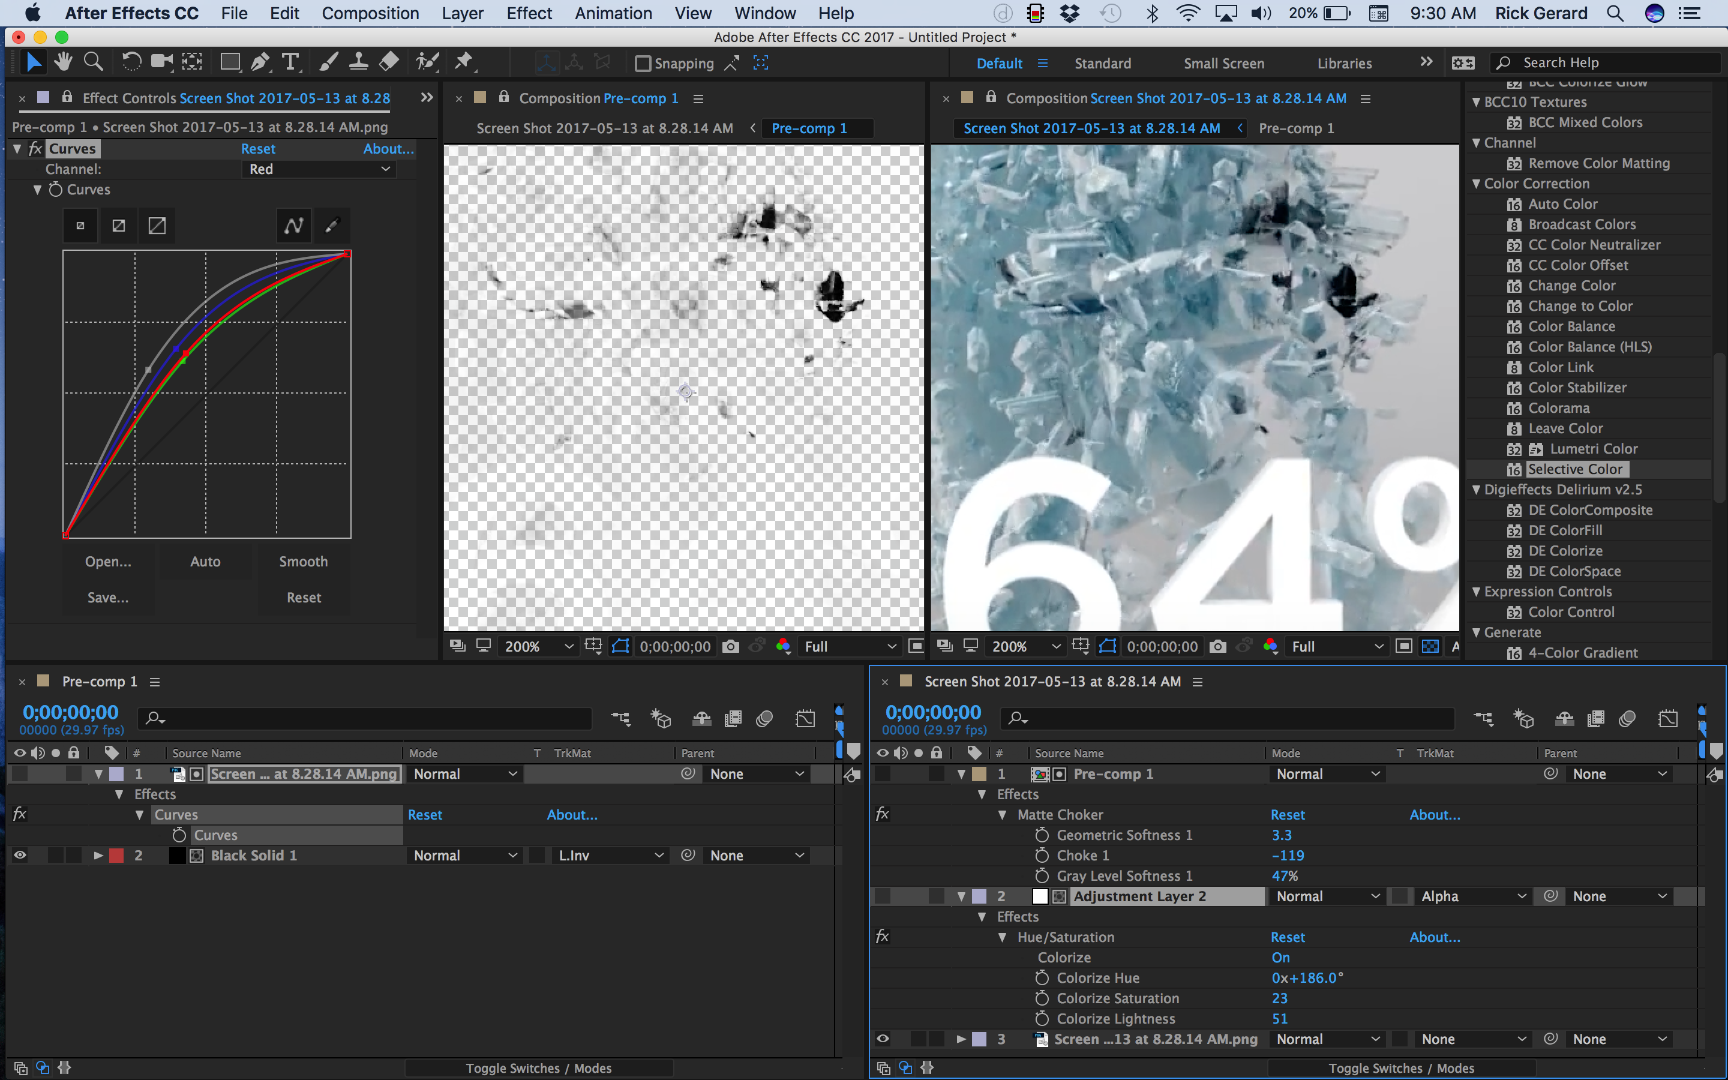
For a quick comparison this is the original before the adjustment layer is turned on:

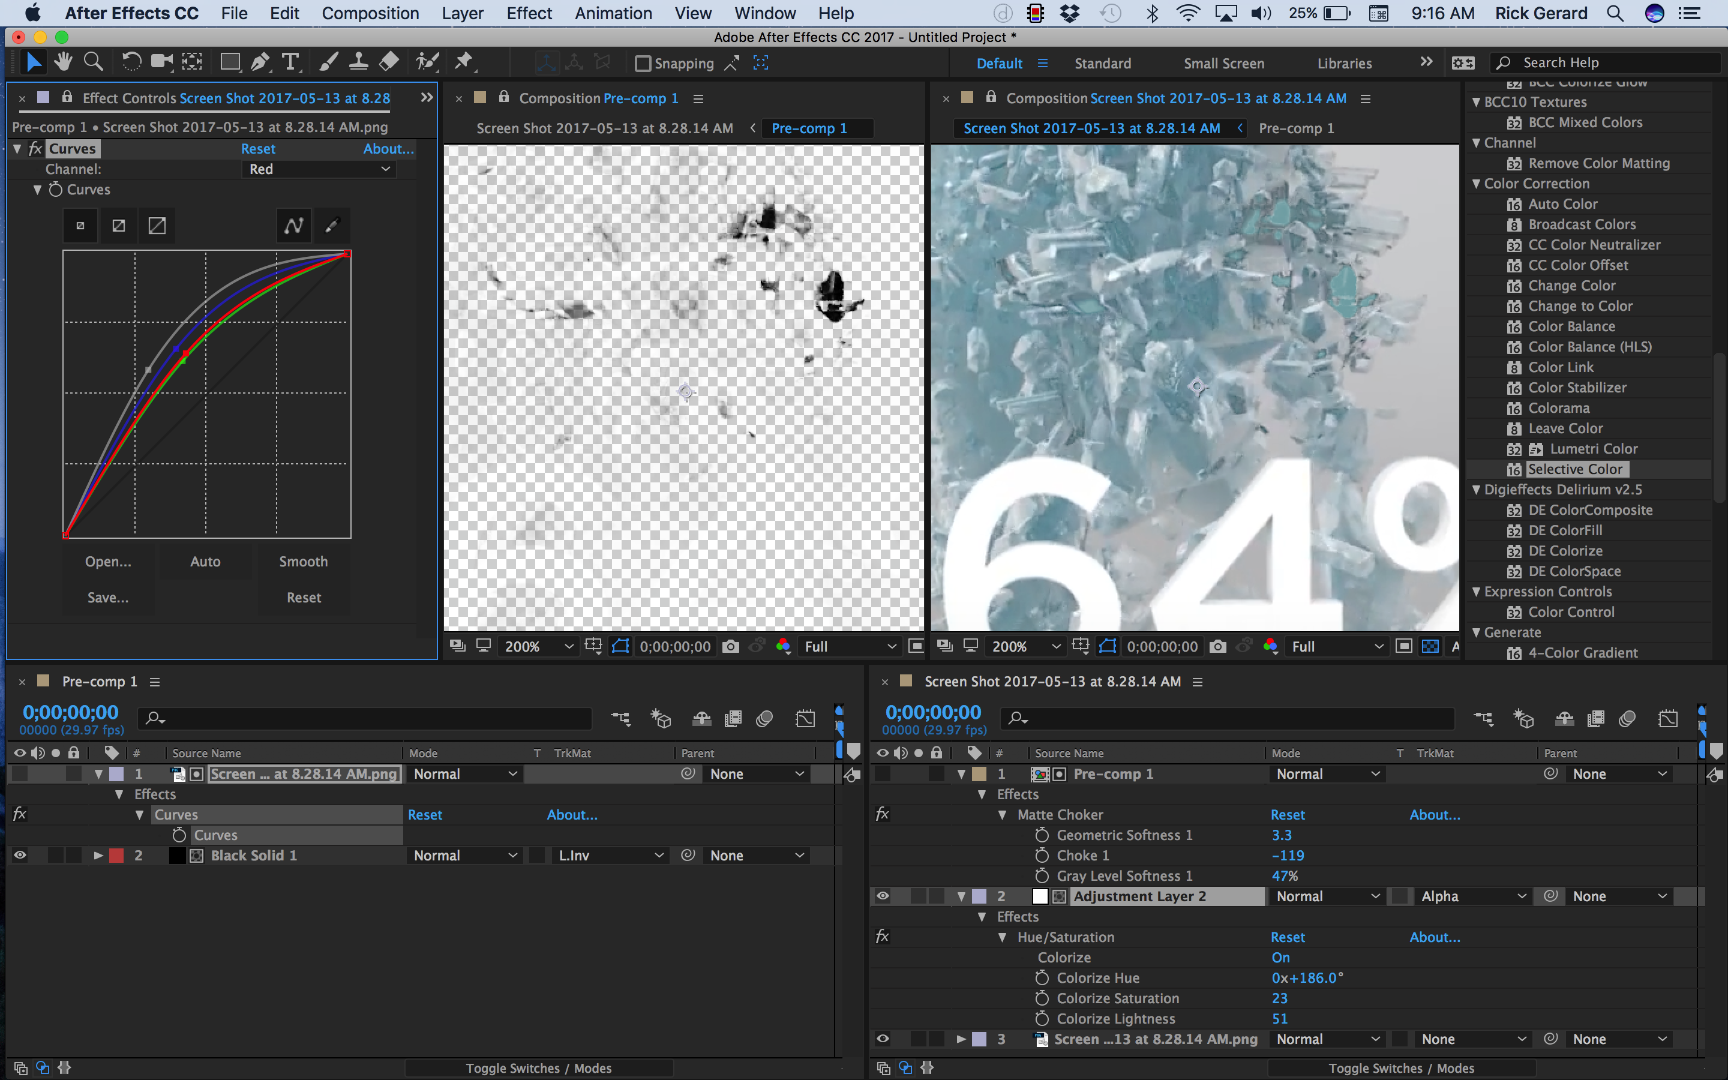
This is after / not perfect but pretty good for a five minute attempt at color correction:

Copy link to clipboard
Copied
Thanks Rick so much! I really appreciate it!
