- Home
- After Effects
- Discussions
- Shape (stroke) morph causes weird flip? Set First ...
- Shape (stroke) morph causes weird flip? Set First ...
Copy link to clipboard
Copied
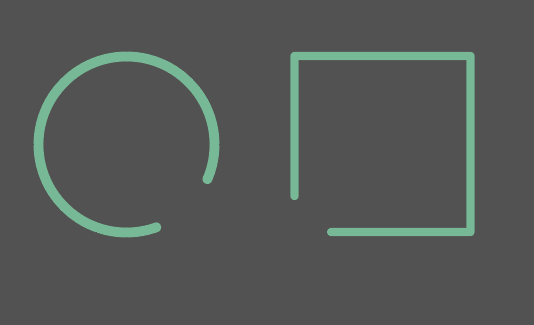
I have 2 icons made in Illustrator.
I then made a Solid in After Effects and copied the paths from Illustrator to these paths so they appear as Masks. Then I've applied a STROKE.
Now, at a certain point I want the Mask Path to turn from 1 icon to another. However, it "mirrors" while making this transformation. You see this weird flip.
As soon as I try to set the "First Vertex" it screws up my path as it's not closed.
I've been Googling a lot but can't really find an answer on how to AVOID this flip and how to AVOID the First Vertex to randomly close my paths which I don't want.
Any help would be fantastic!

 1 Correct answer
Reverse Path Direction was greyed out
make a compound path (right click->make compound path) and then it will not be grayed out and you can reverse the path as you should.
Copy link to clipboard
Copied
the animation will move from one order of vetices to the other and match it accordingly. make sure your first vertex is in the same place. you may need to use mask interpolation to make it easier. here read this: http://www.provideocoalition.com/managing_moving_masks/
if you are still struggling with this please produce your aep file with that layer so we can guide you step by step. you can upload the file to any cloud service and post the link here.
Copy link to clipboard
Copied
Thanks Roei.
I tried that "copy" to AI and back to AE trick but no luck. Reverse Path Direction was greyed out and in AE I can only find the Mask Interpolation panel which is not as enhanced as the "Smart" panel shown in the article.
In the link below is the AE project of the morph. If anybody could look at it that would be highly appreciated.
As I will have similar morphs it would help me more if I know what to do instead of fixing the actual file. Thanks in advance!
Download:
Copy link to clipboard
Copied
Reverse Path Direction was greyed out
make a compound path (right click->make compound path) and then it will not be grayed out and you can reverse the path as you should.
Copy link to clipboard
Copied
Amazing.
Changing the first icon to a compound path and reversing the Path Direction of just that one in Illustrator did the trick, it didn't flip any more.
Still looked a little messy so adding an extra keyframe between situation A and B in After Effects, where I manually repositioned some of the vector points, made it look much smoother.
Thanks again Roei!
Copy link to clipboard
Copied
Great!
Still looked a little messy so adding an extra keyframe between situation A and B in After Effects, where I manually repositioned some of the vector points, made it look much smoother.
that's where mask interpolation panel comes in handy. it automatically creates spatial and temporal keyframes to make the animation much more smooth.
Find more inspiration, events, and resources on the new Adobe Community
Explore Now