You are probably trying to edit the wrong graph or using the wrong technique. You probably don't precisely understand how the speed graph relates to time in Time Remapping or how the value graph relates to the speed of the playback. The graphs, when the animation is exactly what you want it to be, probably don't look like you expect them to work.
Let's work through a simple example. Let's say you have animated the hands of a stopwatch. For visual effect, you want to have the hands accelerate to real-time, then run in real time, then slow down to the final number. The easiest way to do this is to set up the hands with expressions based on time to the stopwatch is running at the correct speed when the footage is running in real time. This is pretty easy to do because AE has a built-in timer function. You can easily create a null that rotates at one rotation per second by simply adding it to the comp and adding this expression to the rotation property.
(1 + time) * 360)
Now all you have to do is add the hands you want to see and put in the appropriate divisors or multipliers. The (1 + time) is to prevent divide by zero errors. It becomes pretty easy to get tenths or hundredths or even thousandths of a second. So you build your stopwatch and it's running just fine.
Nest the stopwatch comp in a regular comp and apply time remapping. You'll get a keyframe that starts the stopwatch, then it runs for the time of the comp, then after the end of the comp, you get another keyframe. The first thing to do is to add a keyframe at the last frame and delete the last keyframe. The stopwatch will now run in real time. You want the stopwatch to slowly start and be up to full speed with it gets to 1 second, then you want it to run in real time until it gets to 3 seconds, then you want it to slow down and stop at 3.564 seconds. The first thing to do is to move the CTI to the 1-second mark and set a new keyframe there. Then move the CTI to the 3-second mark and set another keyframe, then you move the CTI as close as you can to the 3.564 mark and set another keyframe there. The last step is to delete the last keyframe.
Here comes the manipulation. You want the stopwatch to start at 2 seconds into the comp so you move the CTI to the 2-second mark and then you grab all of the keyframes and move them to the left until the first keyframe is at two seconds. Now you move the CTI down the timeline to the 4-second mark, deselect the first keyframe then drag the remaining 3 keyframes until the second keyframe snaps to the CTI at 4 seconds. Now the stopwatch will start at 2 seconds then run in real time until it gets to the last keyframe and stops. This will happen close to 6.364 seconds in the timeline, not 5 because we slowed down the first part by a full second. The nest to the last keyframe should be at 7 seconds. Select only the last keyframe and move it to the left to slow down the stopwatch. About double the distance should do fine. Now you have half speed for 2 seconds, full speed for 1 second and then about half speed for the last half second.
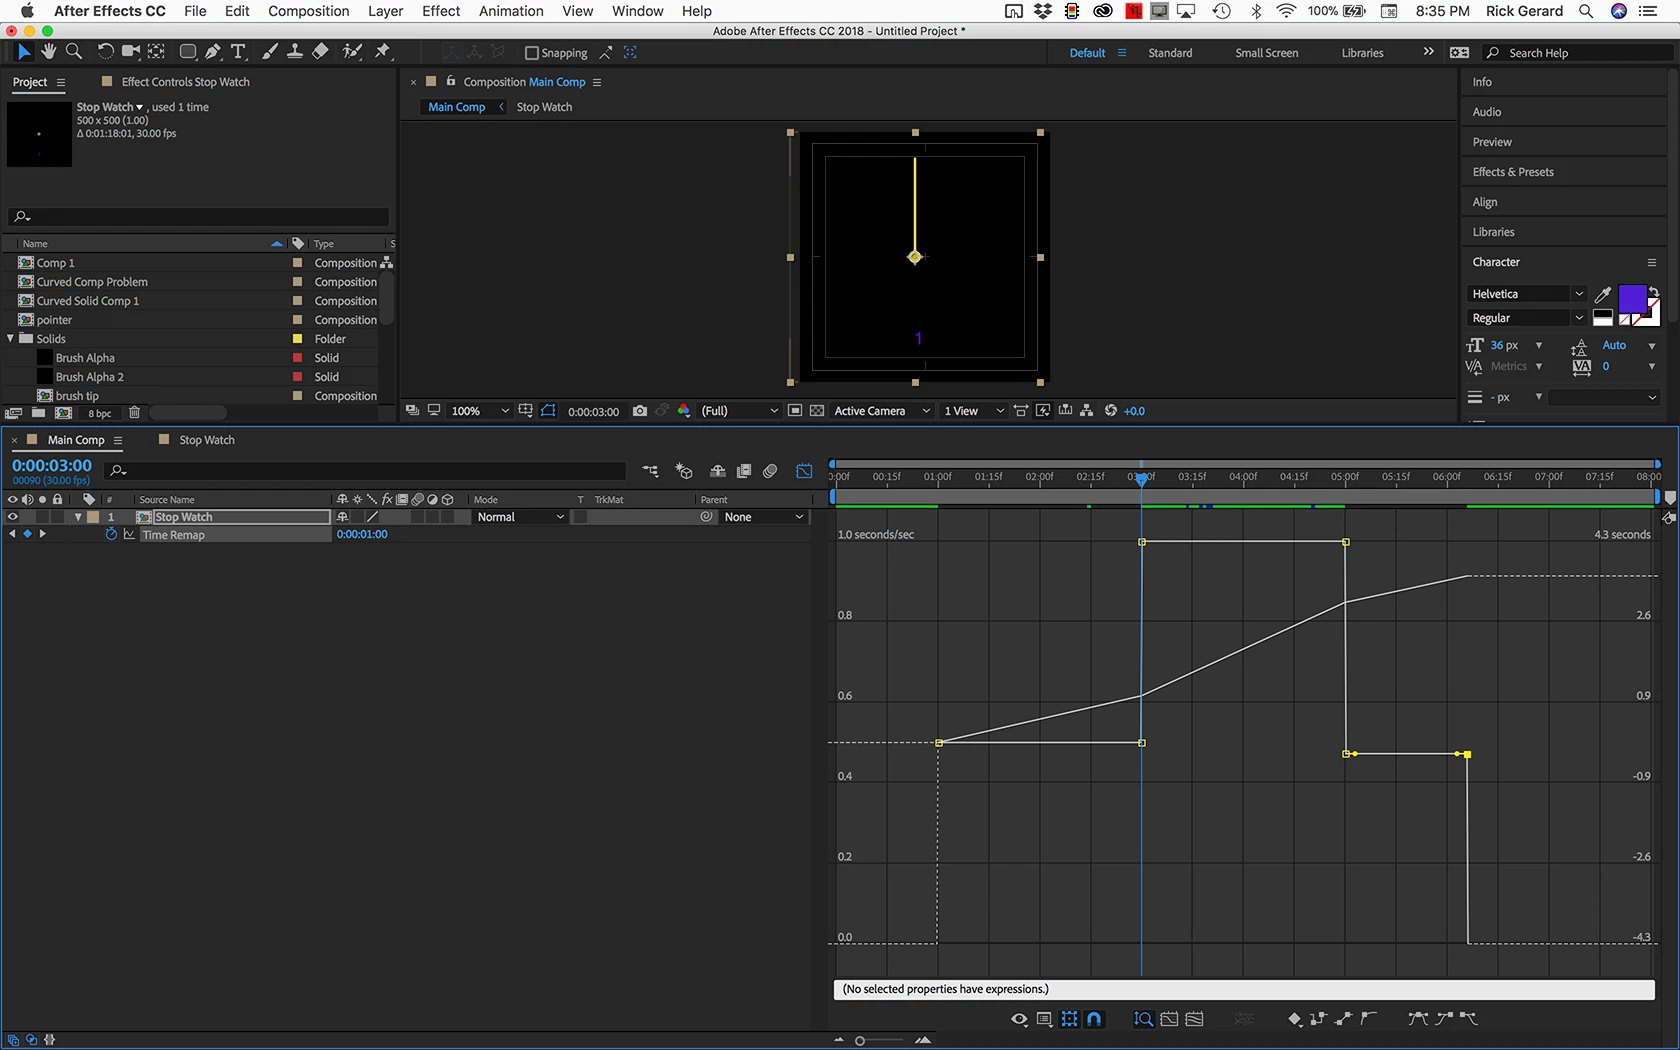
It's time to open up the graph editor. I think the easiest approach is to edit the speed graph with the reference graph showing It looks something like this:

It is easy to foul up the timing of the keyframes. If you use the j and k keys to move between keyframes so you have something to snap to.
The first thing to do is to bring the speed of the first and last keyframes down to zero.

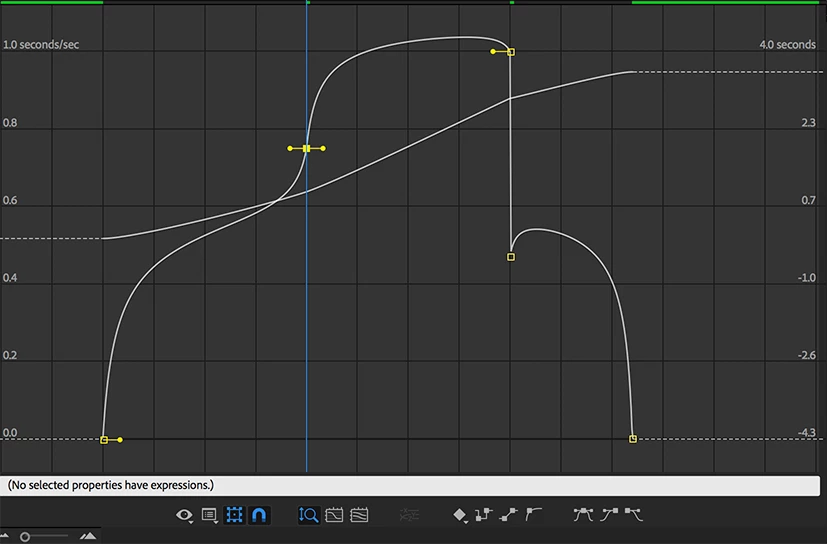
The next step is to bring the bottom handles of the two center keyframes together so they match the top flat part. The easiest way to do this is to make note of where the top straight part is. It is at 1.O seconds/sec. Now change to the pen tool (g), hold down the Alt/Option key to get the convert point tool click to merge the top and bottom control handles on the left side and you get this:

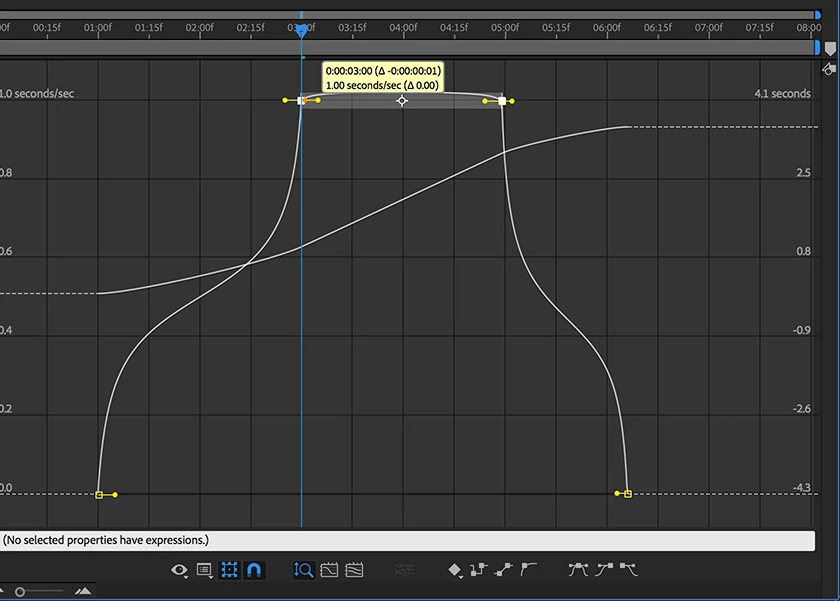
Now hold down the Ctrl/Cmnd key to bring up the selection tool (black pointer), grab the pair and bring them back up to their original position. If you hover for a second you'll get a helper panel to pop up so you can be precise. Repeat on the other side and you end up with this:

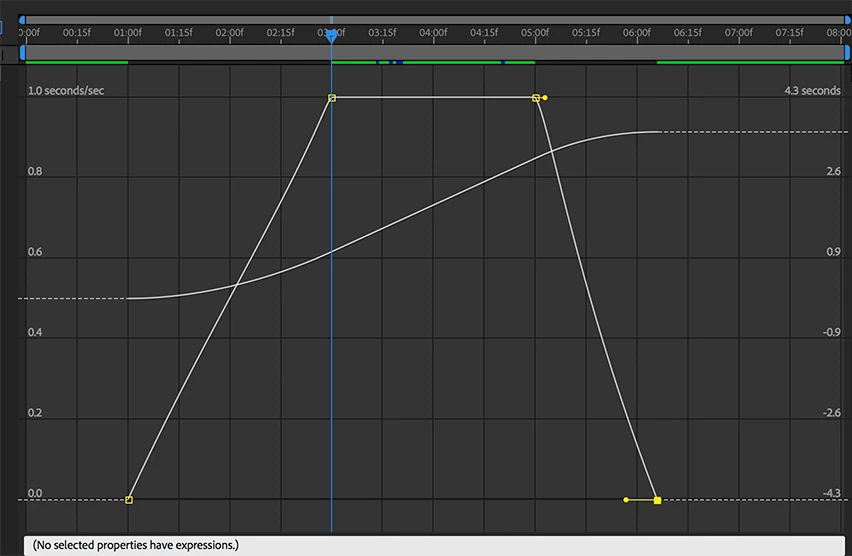
You can then change back to the selection tool and grab the handles on the bottom by grabbing the handles and moving them to the center while watching the top of the speed curve to make sure you don't put a spike in it. You end up with something that looks like this:

Nearly perfectly straight speed graph lines and a gentle curve in the value graph. This is not what most folks expect to see but it is correct.
If you want a different shape for the ramp up you have to move the first or left keyframe right or left and then adjust the handle on the bottom to get rid of a spike or dips. Then if you want to change the timing of the entire animation you need to grab all of the keyframes and slide them left or right in the timeline.
90% of the people I teach time remapping to at seminars and workshops do not understand how time really works. I have used the stopwatch example for many years and it seems to help. Perfectly smooth ramp up and ramp down with time remapping is almost impossible to accomplish if you start by editing the speed graph first or trying to force a faster ramp up or ramp down.
I don't usually go this far on a post but I'm working on a training series that I hope will be available soon.

