- Home
- After Effects
- Discussions
- Re: Track Motion works flawless, Null object on th...
- Re: Track Motion works flawless, Null object on th...
Copy link to clipboard
Copied
I have a video that I am doing motion tracking for text. When I use the Track Motion feature, the Attach Point (tracker) is spot on and looks perfect. I then Apply it to a Null object, and when I look at the Null Object, it follows the path in general, but is off by a little bit on about 50% of the frames. Enough that when I tie the text to the null object, that it looks horrible and jumps around. There's no way that the null object is using the exact data from the motion tracker.
Why is it that the motion tracker looks perfect, and the null object is off most of the time??? Do I have the settings setup wrong somehow??? I believe I am using the default settings.
I have tried this literally 50 times.
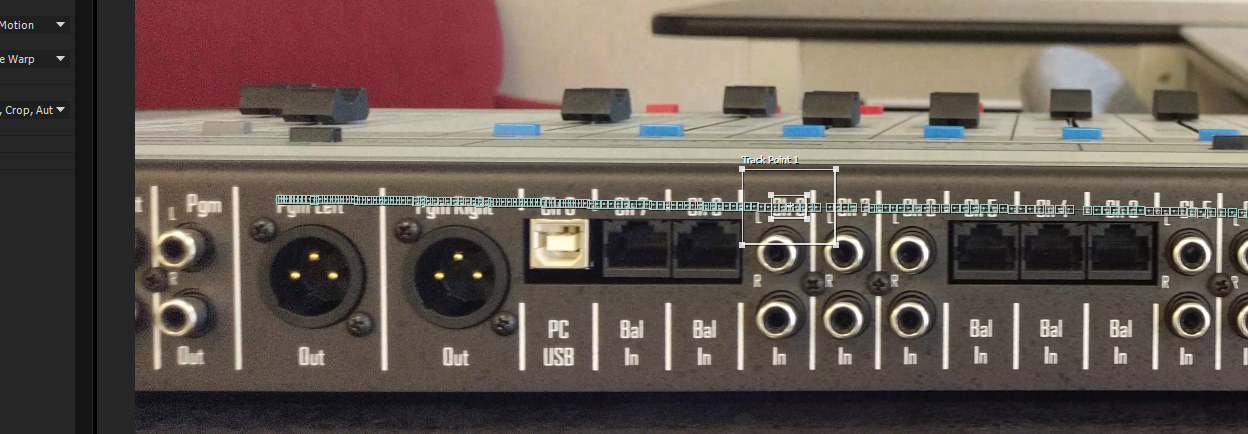
The top image shows the Tracker. It is dead on, and the Attach Point is in the exact spot every time.
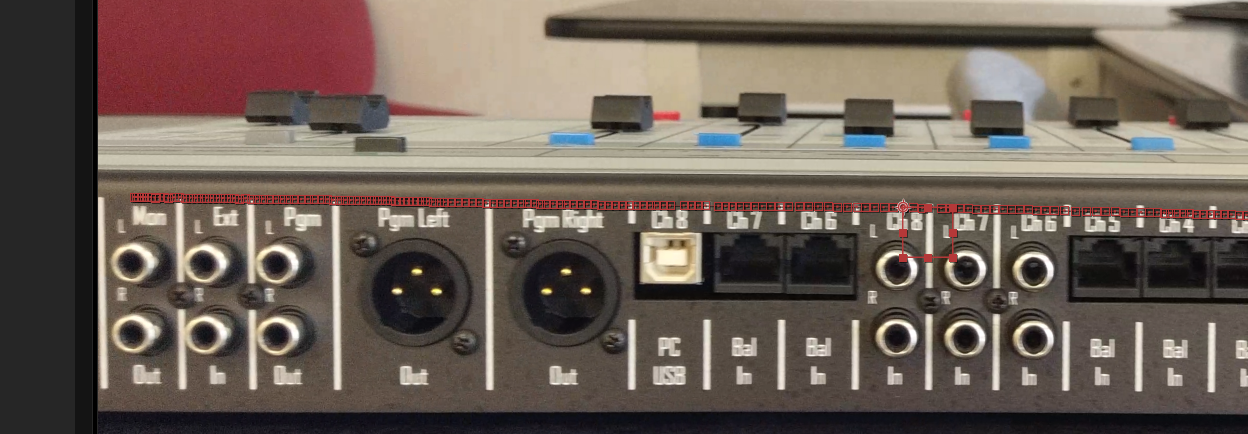
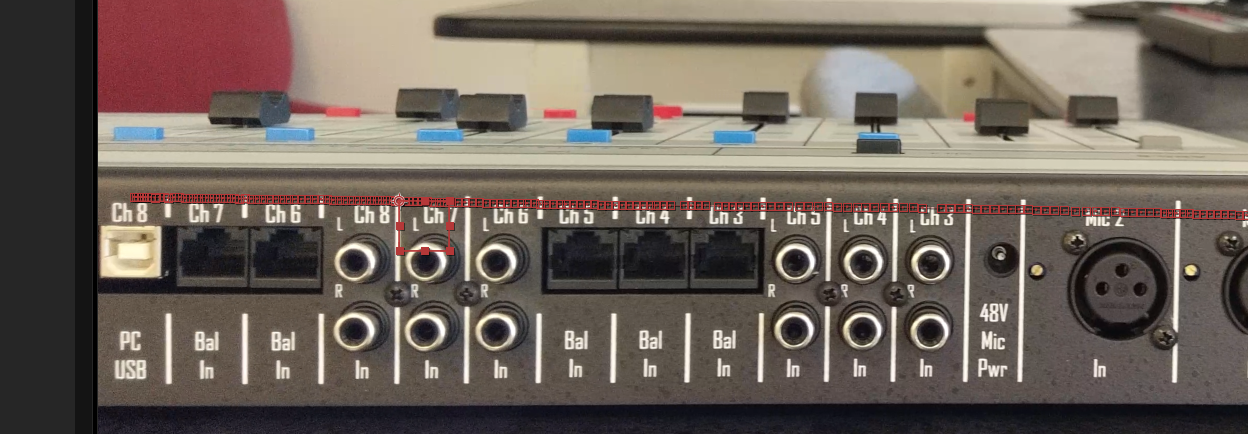
The second image shows the Null Object at one point in the clip, and then the last picture is the Null object at a different point in the video clip.
HELP! Thank you in advance for any suggestions.
 1 Correct answer
1) Changed the frame rate using the Interpret footage.
2) Add the modified video to a comp.
3) Use the Warp Stabilizer to stabilize the footage.
4) Make it into a pre-comp.
5) Use the motion tracker on the new pre-comp.
6) Apply to a Null.
7) Create text and line and set them to the null
YES! ![]() . think about it. it makes sense. WS effect is applied on your layer, Motion Tracking is using the information of the layer without the WS. unless you pre-comp and this essentially makes this a new stabilized foot
. think about it. it makes sense. WS effect is applied on your layer, Motion Tracking is using the information of the layer without the WS. unless you pre-comp and this essentially makes this a new stabilized foot
Copy link to clipboard
Copied
it is never a good Idea to crop your screenshots. full screenshots with full view of project, composition and timeline window please and press UU while your at it ![]()
I would check a couple of things:
1. that your footage is at the same frame rate, resolution and aspect ratio as your composition.

2. check for yourself if the data is exact. null position = attach point.

Copy link to clipboard
Copied
Thanks for the advice! This is my first post, so I'll be sure to post entire screenshots next time.
You're probably on to something with your comment about the frame rate. My camera recorded at 29.372fps, which is just weird in my opinion. My composition is 30fps. I conformed the frame rate of the video using the interpret footage function and set the video to 30fps.
So I guess my follow up question is, will it in its conformed state, still work? Or do I need to encode it at 30fps first?
Thank you to all the quick responses! You guys rock!
Copy link to clipboard
Copied
My composition is 30fps. I conformed the frame rate of the video using the interpret footage function and set the video to 30fps.
I am not sure about the term "conform" - you only interpreted the footage as 30fps so what will happen in your case is that Ae sets that many frames per second and adjusts the duration accordingly - 00:10:00 duration of 29.372 is 294 frames. at 30fps it's 00:09:24 duration. pretty close. anyways rendering the footage at 30fps will give you the same result in this case so no need to do that.
not sure if your footage and composition were not the same until now (or that this was the problem) if they are - try to track and tell us the results and let's see. if that doesn't work, show us clear screenshots and make it up to us maybe with a video capture showing your workflow if you can.
one last thing. see here
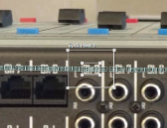
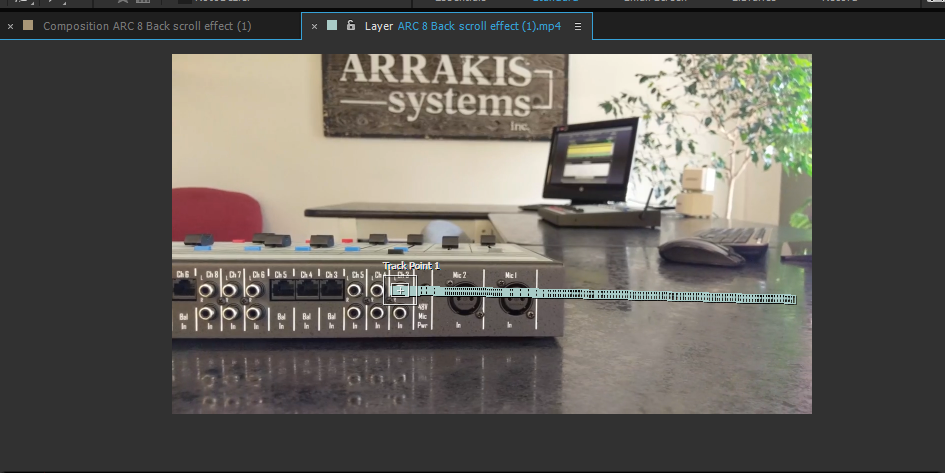
see how your tracker is squashed like that? I believe this means that the aspect ratio is not square - make sure that the aspect ratio of your composition matches your original footage.
and WELCOME TO THE AE FORUM! ![]() where the Ae geeks get to show how amazingly ingenious they are, on the expense of disoriented Ae newbies.
where the Ae geeks get to show how amazingly ingenious they are, on the expense of disoriented Ae newbies.
Copy link to clipboard
Copied
Thank you again for all the help!
This might be a clue, looking at the Position of the Null & the Attach Point, those numbers are spot on the whole time. Screenshot attached:
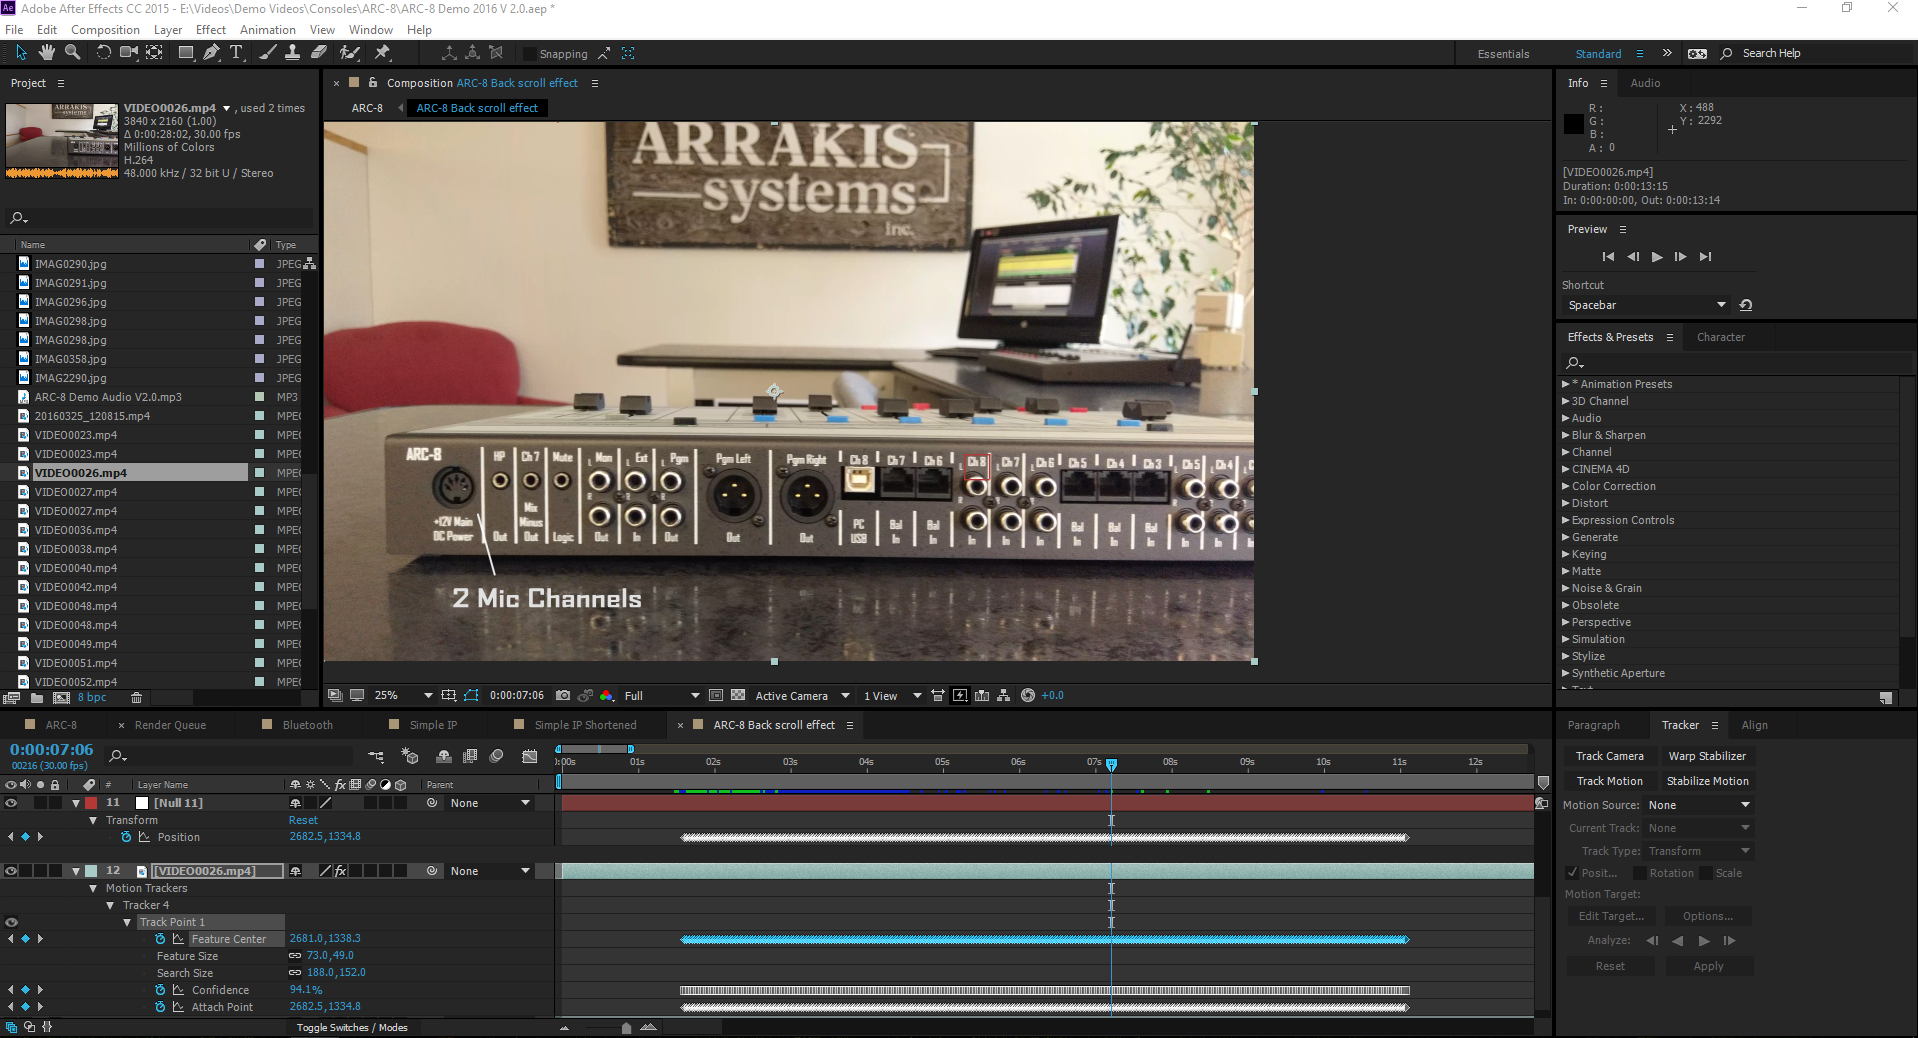
To fix jitter, I used the Interpret Footage function to change the video to 30fps. The composition is set to 30fps.
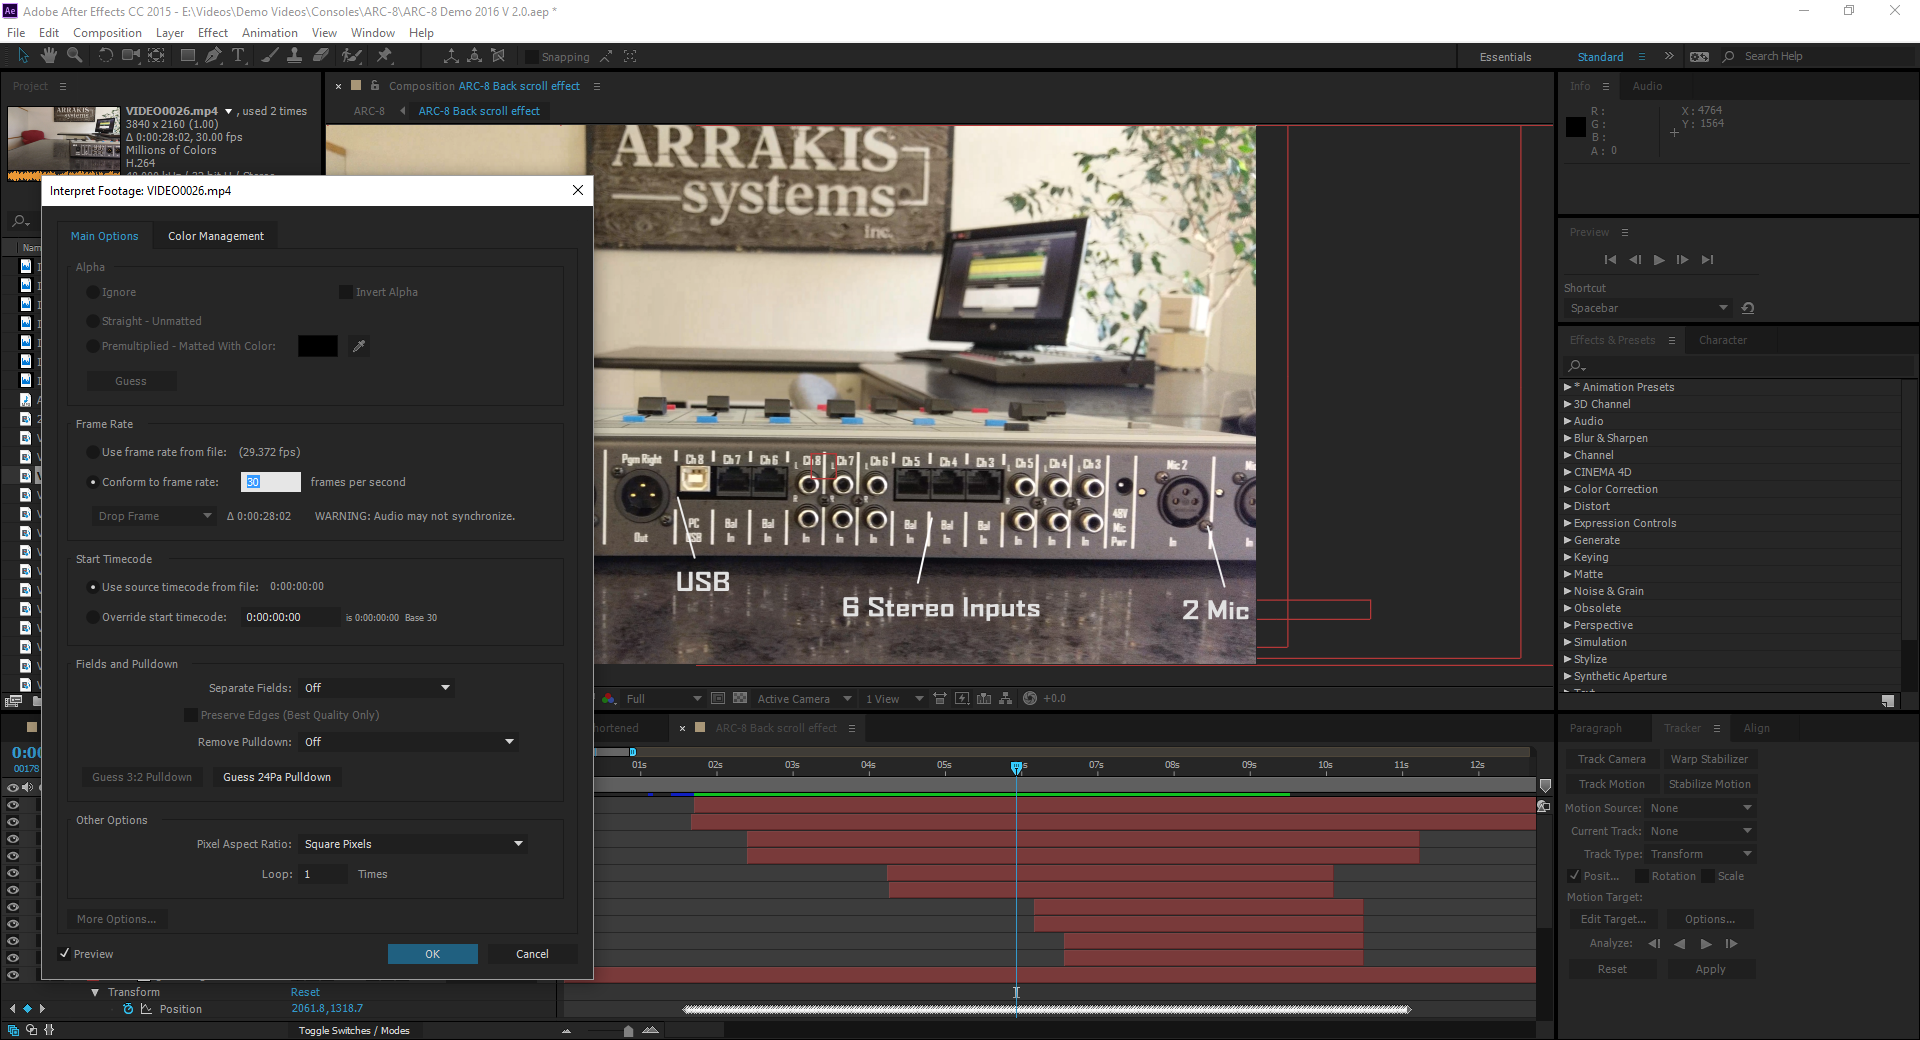
After which, I then generated the tracking information.
The video is the same aspect ratio as the composition: 3840 x 2160.
It seems like the attach point stays at the correct point the whole time. But the null looks to shift all over the place, which includes the moving text since it is tied to the null.
I believe you're correct on the assumption that it has to do with frame rate. How do I do this properly so that they match the correct location? Or am I going in the wrong direction?
Thank you again for the help!
Copy link to clipboard
Copied
everything looks fine from here. the null is the same as the attach point so if the attach point looked like it sticking in the layer panel as you tracked your footage - the null should do the same. we still did not see what is the problem because there is no video file showing a drift. maybe there is something in your workflow that messes this up. could you render a file to show where this shift occurs? you are not using 3D on your layers right? if there is a way for you to upload the footage - I could have a go at it and show you how to do this.
Copy link to clipboard
Copied
Hi Roei,
Let me know if this is what you were wanting:
It looks warped at the very beginning. disregard that, as that is the warp stabilizer going a little crazy.
Otherwise, you should notice the text and lines are a bit off at times. Whereas, the attach point always looks spot on.
Copy link to clipboard
Copied
yes. there's something wrong ![]() wait what? warp stabilizer? when did you mention you were using that? if you stabilized the footage first - of course there is going to be offset. the WS footage is not what you tracked but the un-stabilized footage. so when you attach points on the stabilized version there is an offset. you can pre-comp the footage with the WS effect and track this again instead. this way you are tracking the stabilized footage and placing the data accordingly. other then that, I am not exactly sure what you did wrong. this is how you do it:
wait what? warp stabilizer? when did you mention you were using that? if you stabilized the footage first - of course there is going to be offset. the WS footage is not what you tracked but the un-stabilized footage. so when you attach points on the stabilized version there is an offset. you can pre-comp the footage with the WS effect and track this again instead. this way you are tracking the stabilized footage and placing the data accordingly. other then that, I am not exactly sure what you did wrong. this is how you do it:
1. Track the footage
2. apply to a null

3. attach the text and line to it

4. get paid
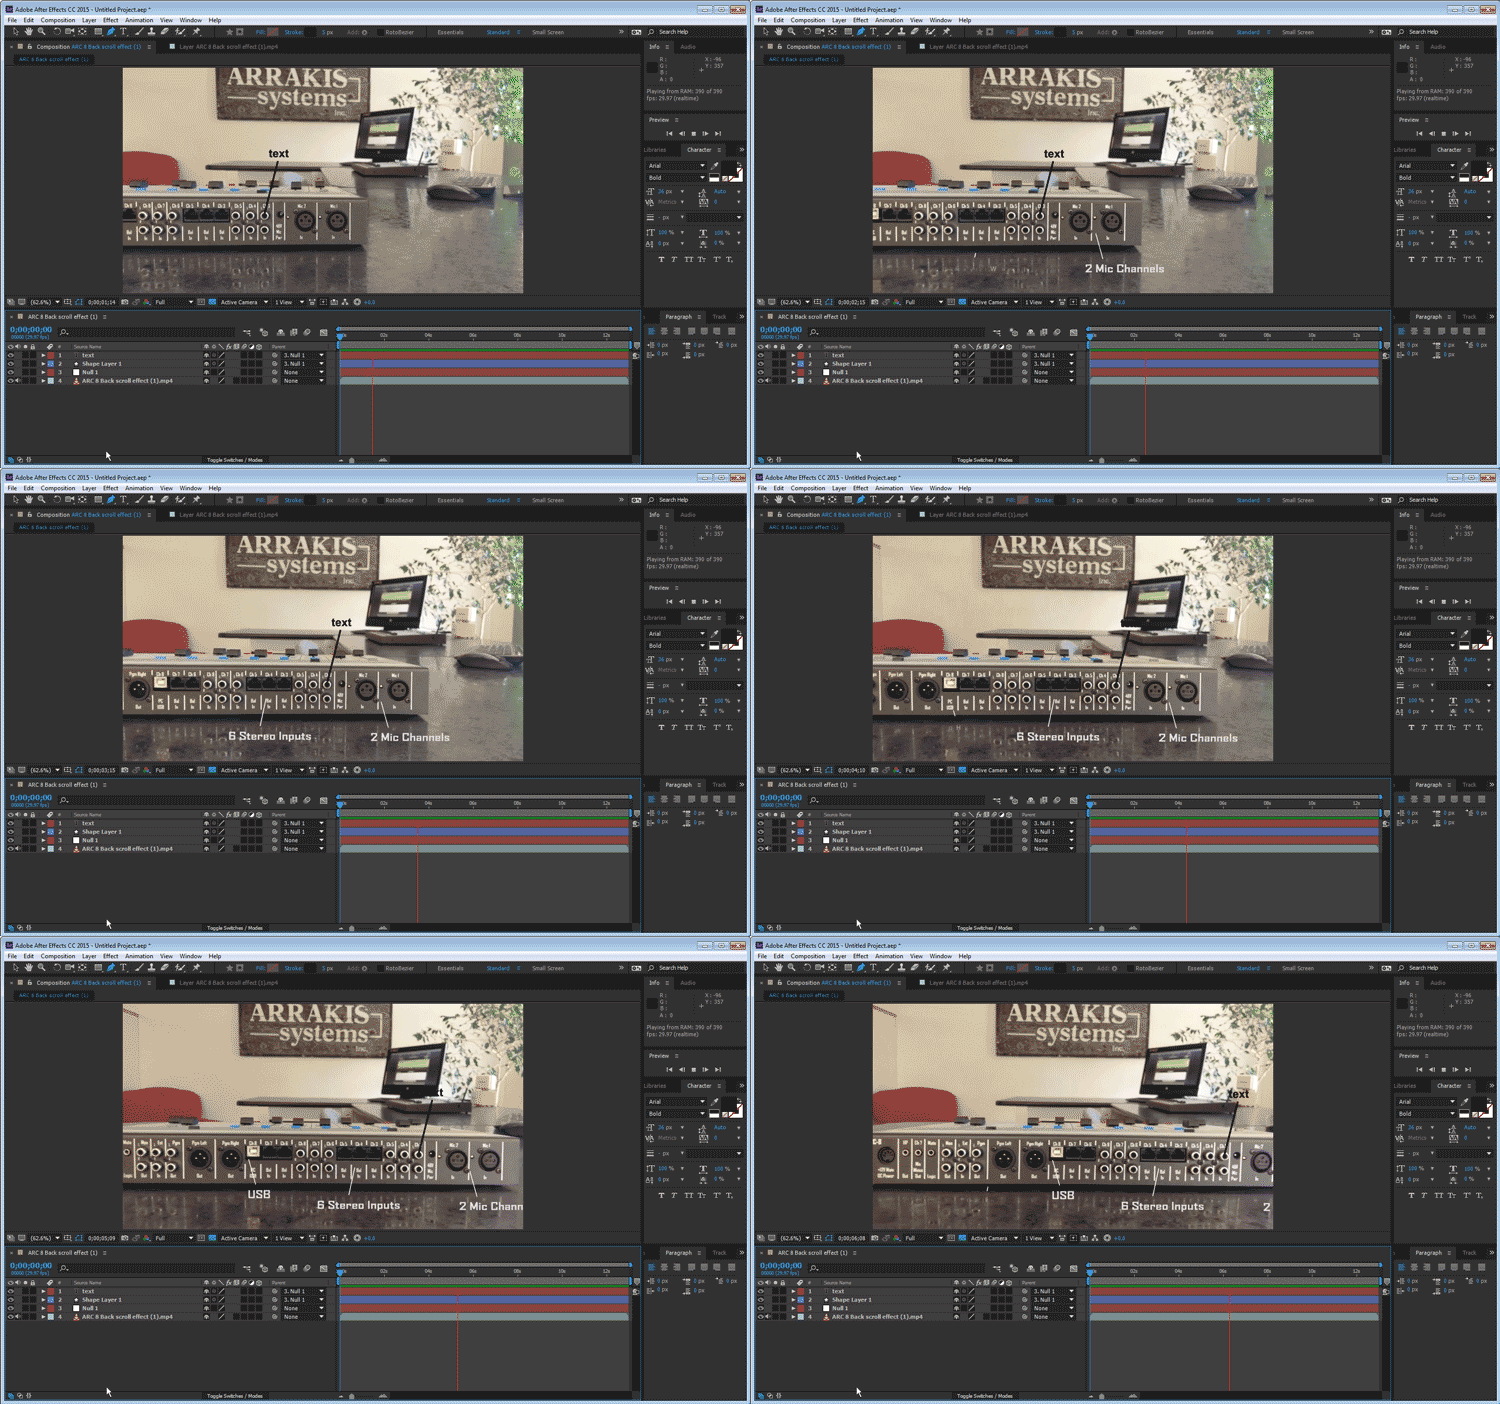
BTW looking at your scene and noticing that the track will get off screen means you can deal with it in two ways:
1.keeping the attach point to and move the search region (difficulty of technique: intermediate)
read here: Tracking and stabilization motion workflows in After Effects
2. use the 3D Tracker for this whole scene instead of the point tracker

now place everything anywhere you want! but this too requires practice and knowledge and you could actually mess things even more. read the link for more knowledge. Tracking and stabilization motion workflows in After Effects
Copy link to clipboard
Copied
Thank you for the help! So yes, I am using the warp stabilizer as well. Here's the steps I did:
1) Changed the frame rate using the Interpret footage.
2) Add the modified video to a comp.
3) Use the Warp Stabilizer to stabilize the footage.
4) Use the motion tracker.
5) Apply to a Null.
6) Create text and line and set them to the null
So is it the warp stabilizer that is screwing it all up?!? The tracker seems to follow the stabilized footage wrong, but if I am reading you right, it sounds like the tracker works based off the pre-stabilized footage?
You mention making the stabilized footage a pre-comp. I haven't done this before, how do you do that?
So if I am following you right, the steps really should be:
1) Changed the frame rate using the Interpret footage.
2) Add the modified video to a comp.
3) Use the Warp Stabilizer to stabilize the footage.
4) Make it into a pre-comp.
5) Use the motion tracker on the new pre-comp.
6) Apply to a Null.
7) Create text and line and set them to the null
Thank you again!
Copy link to clipboard
Copied
Warp Stabilizer??? That's why you need to give us workflow details when you are trying to solve a problem.
No need to camera track. It will give you a different look. When you run Warp Stabilizer that should be the only effect in that comp on that layer. Then you can either (preferred and professional way of doing things) render a digital intermediate of the warp stabilized footage or (Ok for shorter shots but a resource hog) nest the Warp Stabilized comp in another comp for further processing and compositing.
When you motion track the original you track before any effects get applied do that is your problem. If you simply nest your warp stabilized footage layer (pre-compose moving all attributes) and then use your original tracking procedure to track the footage everything should work just fine. I would use a bigger tracking area but everything else should work just fine.
If it were me I would Motion Stabilize the footage and add the text layers then use the Effects Preset and a null that I posted in my original reply. That means you only have to track once. Don't over complicate things. I make this recommendation because I have seen that you are applying several text layers. It's a better way to go.
Give me a few minutes and I'll show you a tutorial. Your only real error was not rendering or pre-composing your warp stabilized footage before you tracked that layer.
Copy link to clipboard
Copied
1) Changed the frame rate using the Interpret footage.
2) Add the modified video to a comp.
3) Use the Warp Stabilizer to stabilize the footage.
4) Make it into a pre-comp.
5) Use the motion tracker on the new pre-comp.
6) Apply to a Null.
7) Create text and line and set them to the null
YES! ![]() . think about it. it makes sense. WS effect is applied on your layer, Motion Tracking is using the information of the layer without the WS. unless you pre-comp and this essentially makes this a new stabilized footage to track to.
. think about it. it makes sense. WS effect is applied on your layer, Motion Tracking is using the information of the layer without the WS. unless you pre-comp and this essentially makes this a new stabilized footage to track to.
make sure you Move all Attributes

and about the warping -

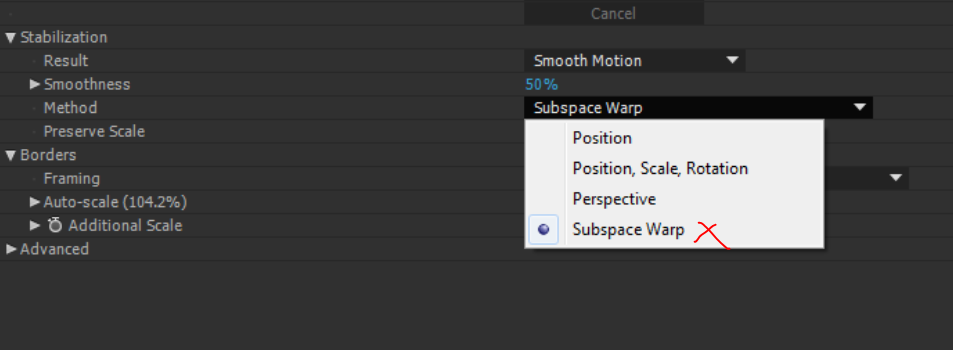
seems like the subspace warp is making a mess of things. choose another method, NOT subspace warp
next time we see each other you have read all about tracking and stabilizing. Tracking and stabilization motion workflows in After Effects
Copy link to clipboard
Copied
I took a few minutes to download your YouTube footage and take a look at the project. I have some suggestions. The footage that you posted has some problems because of the Warp Stabilization but here are two techniques that would work and one of them includes a project using your footage so you can see exactly how I set up the trackers.
Using AE's standard Tracker in the Stabilize motion mode. The reason I would use Stabilize Motion instead of Track motion is because with Track Motion you'll have to run a new track for every new point you want to add or add a bunch of other nulls or do parenting and hope everything lines up. It's also much easier to add one or two keyframes to the added elements to make corrections for perspective shifts when you use Stabilize Motion instead of Track Motion. Here's the steps I would try.
- Start with your original footage rather than the warp stabilized footage. It is always best to work with camera original or a DI (digital intermediate using a Mezzanine Codec suitable for the production process).
- Set an in and out point for your footage using AE's Footage panel so you are not wasting any time tracking frames you are not going to use
- Set up Stabilize motion using position rotation and scale
- Pick two prominent objects to track and adjust the trackers so you can get the plenty of detail and carefully observe the track as it proceeds
- Go back and make any corrections to the track that you need to so it is as perfect as possible
- Apply the stabilization to the shot
- Back in the main comp rename the stabilized footage layer stabilized, add a null and apply this animation preset to the null
Dropbox - destabilize Rotation Scale.ffx which will add expressions for position rotation and scale to the footage - Parent the Stabilized footage to the null layer and the motion is put back into the shot
- Add a shape layer, parent it to the null and draw all of the pointers you need
- Add a text layer and parent that to the null then position the text layer as needed
- Duplicate the text layer (saves a parenting step) and then move it into position and repeat until you have all your text layers added
- If you need to apply warp stabilizer to the shot then create a new comp and nest the first comp inside the new comp then apply Warp Stabilizer to that comp and you're done.
If you can get a really good warp stabilizer you can use either a pre-comp or a DI for the project. You'll end up with something like this. It took me about 15 minutes. Here's the project file which includes a MOCHA project.
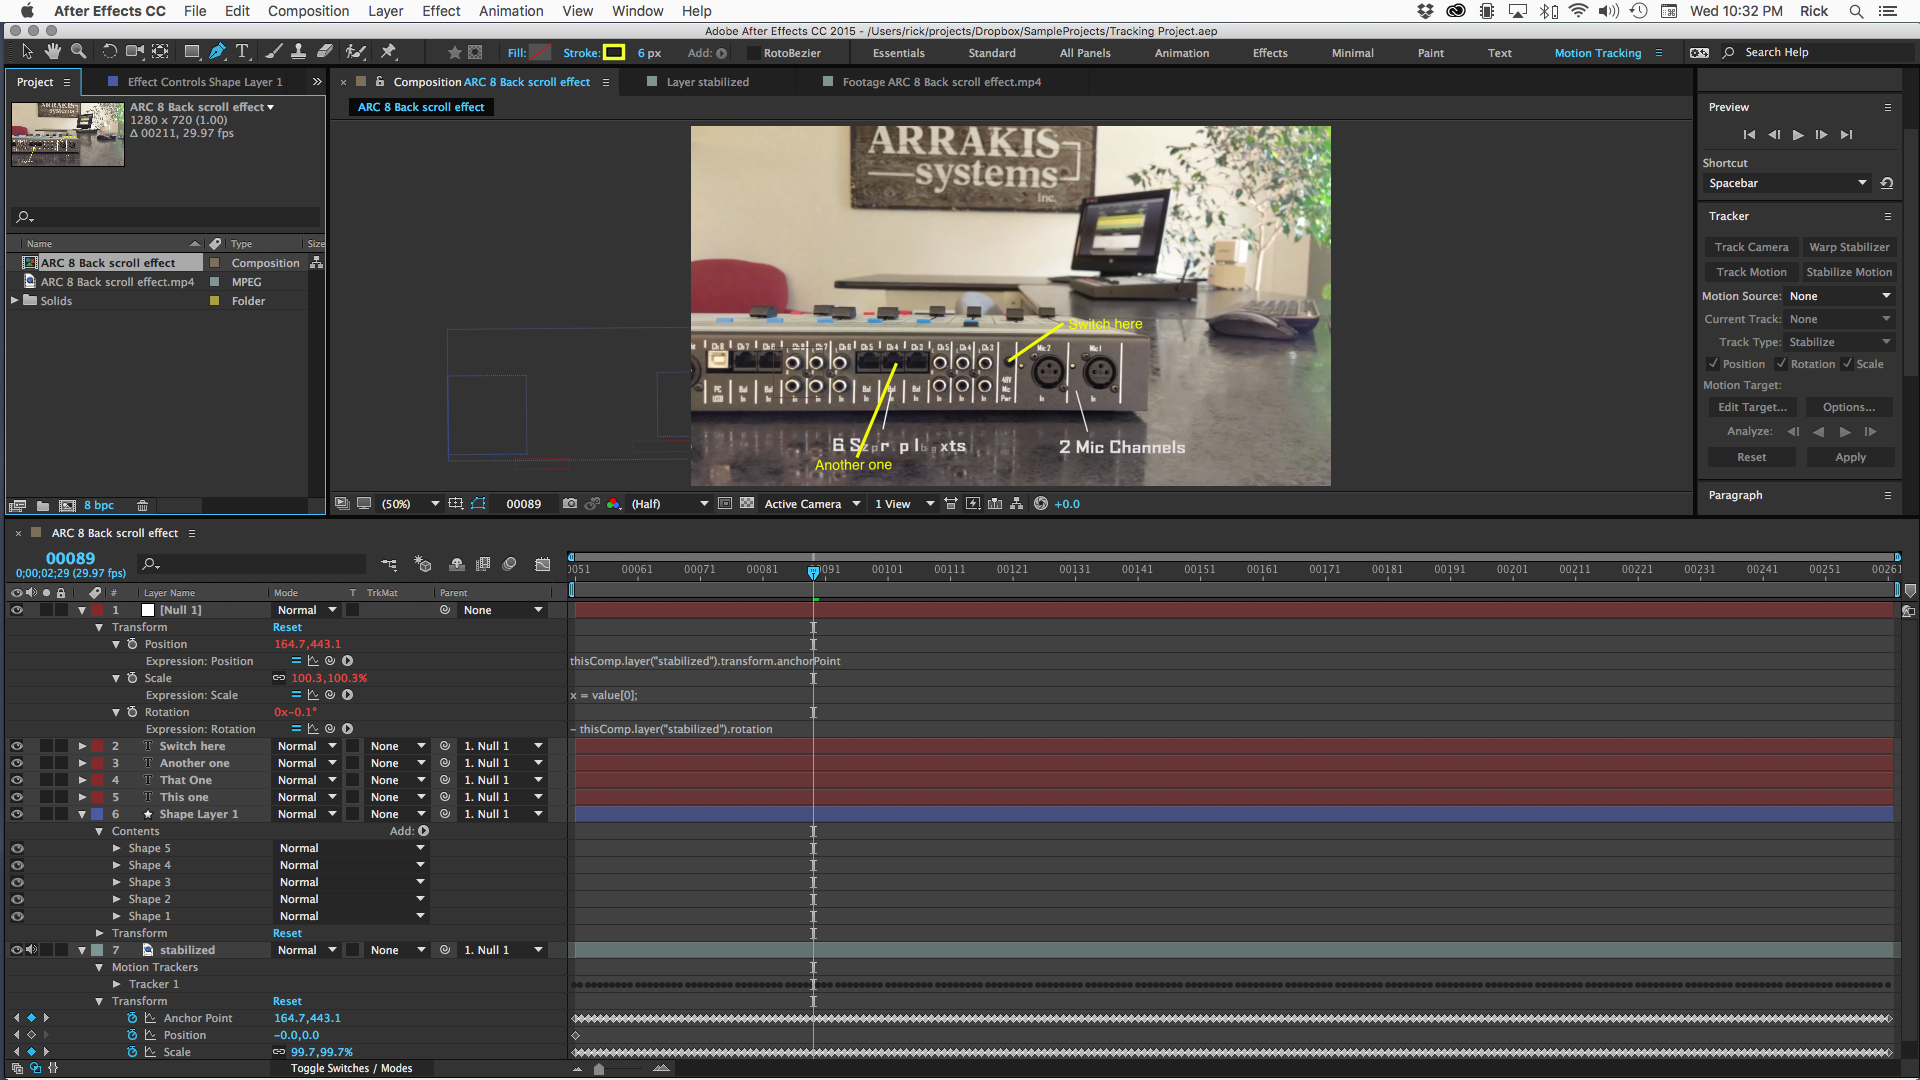
Personally, because there is a little skew distortion in the panning shot I would do the tracking in Mocha and use the techniques in this video to add your text and titles. You'll have to think about it a bit and expand the tracking area in Mocha a bit to give you enough room to add your text. This would be a better and more professional solution but it would take longer. The difference in the end quality of the two techniques would be very slight. If the project was on a tight budget I would use the first technique. If we had the luxury to spend a bit more time I'd use Mocha and the technique demonstrated in this video replacing the TV Screen with the text layers and pointers.
I hope this helps.
Copy link to clipboard
Copied
thank you Rick once again for sharing your techniques with such detailed posts and project files. the project file looks great. your technique of corner pin -> power pin stretch -> pre-comp -> corner pin is a beautiful reversible stabilization technique for stabilizing corner pin data. once again the "stabilized-first-for-match moving" workflow is worth it. I am afraid it does require a setup that I believe most beginners or even medium skill users will fail to pull through. there's also expressions involved and unless they have the full Rick Gerard Presets Tracking Package v3.0 (when is it out??), they may find themselves in over their heads ![]()
thanks for pointing that out it's also a good practice to use warp stabilizer at the end of the workflow chain, because this could mess with the data for the tracker. though I found that in some cases it helped me save a very shaky shot where I had to WS it, create a D.I, and send that to mocha for Corner Pinning. so this will be probably be left for the user's discretion to see what works best.
as for expressions: I am far from expert but I prefer to use an expressions that allows me fine adjustments and not locked to the corner pin data such as: value+effect("Corner Pin")("Upper Left"). for inverse scaling I use a simpler form of expression (for me) such as :
[10000/thisComp.layer("stabilized").transform.scale[0], 10000/thisComp.layer("stabilized").transform.scale[1]]
Copy link to clipboard
Copied
Warp Stabilizer is a blessing and a curse. For some shots it is better to apply Warp Stabilizer first and then do the effects work, for other shots it's best to do the composite first and then apply warp stabilizer. It all depends on the shot. The biggest problem with Warp Stabilizer is that most folks do no know how to use it properly or efficiently. Roei brought out some of the controls in WS that should be tried when you are having problems with some shots.
The only hard and fast rule that I follow with Warp Stabilize is that I never apply Warp Stabilizer in a comp that has more than one layer and unless the shot requiring warp stabilizing is very short I always render a DI using a Mezzanine Codec suitable for production and replace the usage, then delete the warp stabilized comp from the project. WS bloats the file size of the project, eats up a huge portion of your system resources, and if you have a problem with the comp it's highly likely that you will have to run Warp Stabilize again.
By the way, if you use Camera Tracking I have also found that it is a good idea to delete the Camera Tracking effect as soon as you have set the origin and ground plane and added your 3D placeholders, text layers and nulls. The only keyframes that are added to the project with camera tracker are on the camera layer and when the Camera is in the right spot you don't need the stored data from the Camera Tracker eating up your system resources and slowing you down.
One last point and a short story with a moral:
When you are working on any shot in AE it is always a good idea to trim the shot to include just the portion you will use in the project. I almost always give my shots "handles," a few frames at the head and tail, to allow for some fine tuning in the editing process, but I don't spend any time working on footage that I'm never going to use in the production. Just the other day I was called in to help on a project where the AE artist was complaining that they could not get a good camera track on a shot that was 45 seconds long. They had spent the better part of two days fiddling with the entire shot when they only needed to insert a 3D element in seven or eight seconds near the end of the shot. We opened up the project toughener, duplicated the footage layer , set the in point of the duplicate one frame before the CGI element needed to show up, set the out point one frame after the 3D element left the frame, pre-composed the shot trimming the pre-comp to the length of the layer, Camera Tracked the scene in the pre-comp in about 5 minutes, then set an origin and ground plane, added and color graded the 3D elements to match the shot, turned off the footage layer at the bottom, then went back into the main comp and used some matte tools and light wrap techniques to complete that portion of the sequence. I was out of there in less than an hour and fixed a problem that had wasted nearly 2 days of production time because the experienced AE artist with some mad skills was spending way too much time working on frames that were never needed in the final shot.
Copy link to clipboard
Copied
delete the warp stabilized comp from the project.
it is a good idea to delete the Camera Tracking effect as soon as you have set the origin and ground plane and added your 3D placeholders, text layers and nulls.
if it's long duration or heavy pixel count, I usually use D.I too. but I never delete the effects or pre-comps, I will usually create D.I proxies and keep the information in my project and not delete anything because I want my options open if I need to. when I render my final composition I have a template to render with proxies.
We opened up the project toughener, duplicated the footage layer , set the in point of the duplicate one frame before the CGI element needed to show up, set the out point one frame after the 3D element left the frame, pre-composed the shot trimming the pre-comp to the length of the layer,
why didn't you just trim the footage and use 3D Camera Tracker? (why duplicate and pre-compose?)
I was out of there in less than an hour
hope you got paid by a day's work and not per hour ![]()
Copy link to clipboard
Copied
Roei Tzoref wrote:
why didn't you just trim the footage and use 3D Camera Tracker? (why duplicate and pre-compose?)
I was out of there in less than an hourhope you got paid by a day's work and not per hour
I guess I wasn't clear. I trimmed, pre-composed and used the Camera Tracker in the pre-comp. We did the compositing in the pre-comp and then turned off the original footage layer so I would have a separate element with it's own camera in the main comp that perfectly matched the camera movement that we could composite using simpler tools for color matching and light wrap. I consulted on a music video not too long ago that had a single shot that was three and a half minutes and there were about 40 segments that required Camera Tracking. Used the same technique of pre-composing and compositing. In that case each nested comp was rendered as a DI.
I work on retainers for my consulting work so I'm on call. I get paid every month whether or not they call on me. If it's an emergency or they need more time it is extra. I don't know anybody that's successful in this business that freelances on an hourly basis. It's a really bad business model that would make your CPA shudder.
Copy link to clipboard
Copied
Got it thanks.
about Hours rates - that actually was a joke but if we are talking about this - when I freelance at home I do work hour rates many times. I got a few places (producers, directors, artists, production houses etc.) that supply me work from time to time. I work at my own time and when it's done I give the sum hours of my work. some will need an evaluation on how many shifts it could take and we accommodate the work to that number. if it's a big project say for instance a graphic package - then I will set a price for the whole thing in advance. if it's a client I haven't work with yet I will probably charge by shifts which is 10 hours. or maybe half a shift 5 hours and we will set the budget in advance.
Copy link to clipboard
Copied
Holy cow Rick! Thank you for the detailed steps, and better method. I will give it a whirl, and hopefully have better luck.
That makes sense about the warp stabilizer now. I didn't realize what I was doing, but this understanding should help me a ton in the future. Thank you!
Thank you to Roei as well!
Next time I'm stuck, I'll be sure to give a better description, including full screens, & a workflow. Should make it easier for you guys to figure out what I am lost on.
Thank you guys! Have a great day!
Copy link to clipboard
Copied
Are you new to motion tracking? Keyframe data is keyframe data so as long as you have not scaled the layer you are tracking and the frame rates match everything should be fine.
Close-up shots of your composition are really not very helpful. Press the U key twice to reveal all the keyframes on the layers in question and all of the modified properties.
Check the position of the Null against the attach point position. They should be exactly the same.
Looking at your tracking area I think that it is probably too small. Pick more detail. Expand the tracking area so that it includes two of the channel numbers and then position your attach point where you want it to center up.
Check the track and make sure it is perfect. You can adjust individual keyframes if you need to. Then set the target as the null and apply. As long as you have not scaled the layer you are tracking in the main comp everything should be just fine.
Another approach would be to stabilize position and rotation so the channel numbers do not move and then add the text layer. If you name the footage layer "stabilized" then add a null you can apply this animation preset to the null and then parent the footage and the text layer to the null. This will put the motion onto the text lawyer and remove the motion stabilization from the footage. That is probably the way I would've done the shot.
Find more inspiration, events, and resources on the new Adobe Community
Explore Now