


Copy link to clipboard
Copied
Hi
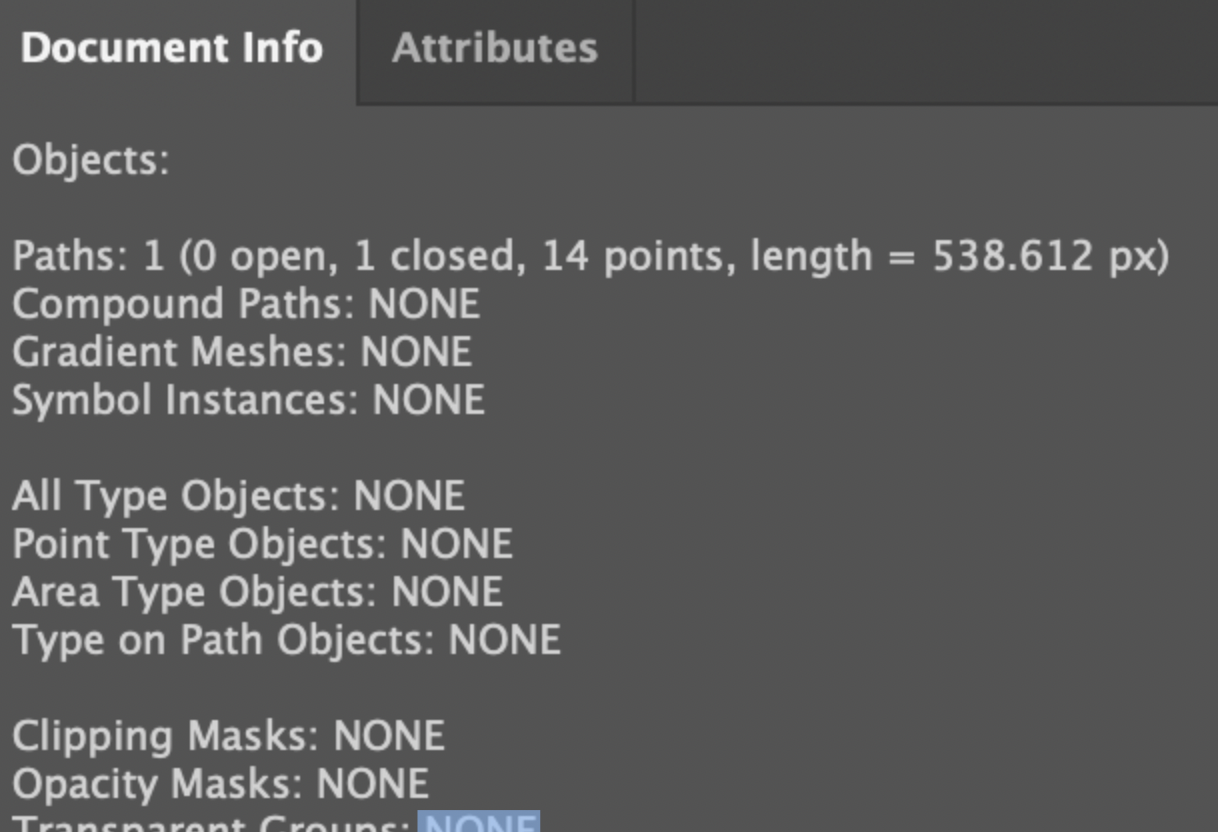
I'm trying to animate a shape layer in Ae using trim paths. I've applied the offset 180/90 degrees so that trim starts from a point I want it to. I created the path in Ai and is sort of like a rectangle, and then converted to shape layer in Ae. But the corner of the triangle where the trim ends to 100% leaves the corner faded and of a different color. The original path was closed using command+option+J and command+J to make a perfect corner. I've checked if the anchor points joined properly and they did. If I change the offset so that path starts from the corner or any other place, it animates the shape perfectly and no fade appears. Tried with different colors and with grey caps are clealy visible.


 1 Correct answer
Was able to fix it with solution from @ShiveringCactus. Simply select the vertex, right click and choose 'set first vertex' and it fixes the problem. In some cases glitches occur still but unsetting and then setting back as first vertex or adjusting the offset according to how one would like the trim path direction fixes the problem.

 19
Replies
19
19
Replies
19

Copy link to clipboard
Copied
I've moved this from the Using the Community forum (which is the forum for issues using the forums) to the AE forum so that proper help can be offered.
Copy link to clipboard
Copied
Oh! Thank you.

Copy link to clipboard
Copied
Could you post a screenshot of the shape layer's Stroke settings. It looks to me a little like each line is its own shape with it's own end cap. And is there a chance that there's your original layer still turned on underneath it? Actually could you also post a screenshot of your timeline
Copy link to clipboard
Copied
Copy link to clipboard
Copied
I've kept but hidden the original layer with shy switch.
Copy link to clipboard
Copied
Copy link to clipboard
Copied
The original artwork was created that way, yes! I made two halves then joined them at anchor points using cmd+J+option and cmd+J.
Copy link to clipboard
Copied
Copy link to clipboard
Copied
Apologies, I didn't get a chance to look at this until now.
I think you must be onto something with your shape layer bounding box theory, but I'm stumped as to the cause.
@Rick Gerard - you know shape layers forwards and backwards, any ideas?
Copy link to clipboard
Copied
I tried using grow bounds on my layer and it still didn't solve the problem.
Animating the layer individually in a new file doesn't cause this, I think. It's when all the layers of my artwork are together. I'm trying to animate a snowflake so every layer is like similar and artwork has symmetry so repetitive.
Copy link to clipboard
Copied
Could it be the shape layer outlines causing this?


Copy link to clipboard
Copied
Shubhi,
The Best and safest way to join is to ensure that the two end Anchor Points coincide, and then simply Cmd+J.
You can ClickDrag either path by its relevant end Anchor Point with the (normal) Selection Tool to snap to its counterpart on the other path, Smart Guides being your friends by saying anchor when you are within snapping distance.
Then you can deselect and ClickDrag over the two coinciding end Anchor Points with the Direct Selection Tool and Cmd+J.
If done in the right way, you get the option of clicking Corner rather than Smooth.
Using a less accurate way than the one described can lead to two non coincident Anchor Points which will need to be brought to together with Average or whatever, and this can lead further to unecessary issues.
Copy link to clipboard
Copied
Thank you Jacob I understand your points.
I think I'd tried Cmd+J but I weren't getting the desired pointy end. And so possibly wasn't done the right way. Couldn't get the points to snap even with 'snap to point' on and everything else unselected.
Copy link to clipboard
Copied
Shubhi,
If any of certain kinds of snapping is on, Smart Guides will fail to guide you, however smart they are, have you tried with all snappings off?

Copy link to clipboard
Copied
You will never get smooth corners unless the vertices are in exactly the same position. The endpoints of two shape layer paths will not snap to each other, but they will snap to a grid or guide. Unless the angle between both lines is 90º, you will never get a smooth corner from two lines unless you choose Round Caps. The artwork needs to be redrawn using a single path, or the points will always look strange.

The only other option you have for snapping endpoints to each other would be to use the Create Nulls from Paths/Points Follow Nulls script and snap the nulls for the endpoints to the same position. That will not solve the round cap issue. The endpoints of your paths may match up. If they do, there is no way to get a flat end to the lines because the flat ends of the lines will always be perpendicular to the path. Grouping or Merge Paths will not solve the issue. If you want flat ends to the pointed lines, redrawing the artwork is the only solution.
If you want to redraw the artwork quickly, select all of the paths, copy them, paste them into a comp-sized Illustrator document, and then use the direct selection tool (a) and drag a selection around the endpoints, right-click or use the Keyboard Shortcut Ctrl/Cmnd + j to join the vertices. When you have all of the paths joined and verified by checking the Layer Panel, you can copy and paste the path to a new shape layer in After Effects or just finish the artwork in Illustrator and import the new file as a composition retaining layer size.
You should see the mismatched endpoints if you toggle mask and shape path visibility to on.
Copy link to clipboard
Copied
Hi Rick
Apologies but I think you've misunderstood the issue.
I made the path in Illustrator. Followed - "use the direct selection tool (a) and drag a selection around the endpoints, right-click or use the Keyboard Shortcut Ctrl/Cmnd + j to join the vertices" (I made one half of the shape, replicated it and joined the end points).
Then imported it to Ae.
Copy link to clipboard
Copied
Not looking for a smooth corner.
I'm looking for a sharp extended corner like that of a triangle, perfectly crisp. Somehow when I use trim paths, in the preview and export the end of the sharp corner gets cut off or appears faded. Not sure how to fix it.
Copy link to clipboard
Copied
Was able to fix it with solution from @ShiveringCactus. Simply select the vertex, right click and choose 'set first vertex' and it fixes the problem. In some cases glitches occur still but unsetting and then setting back as first vertex or adjusting the offset according to how one would like the trim path direction fixes the problem.
Copy link to clipboard
Copied
If you connect all of those vertices so you have one path, you can get corners at the correct angle or points. You will have a devil of a time trying to fix every one of the separate paths.


Find more inspiration, events, and resources on the new Adobe Community
Explore Now
 AdChoices