  • 1496 Product updates
Red gradient background with an image depicting a production website banner crafted into multiple sizes

New in Adobe Firefly Creative Production: Workflow templates now organized by Banners at Scale and Product Assets

Hello Firefly community! The latest update to Adobe Firefly makes it easier than ever to find and launch the right workflow for the job. This enhancement helps enterprise teams get to production-ready assets faster, without hunting through menus.Example of Firefly’s ability to generate Product AssetsExplore the newly organized workflow templatesEasily find and use various workflow templates, organized by Banners at Scale and Product Assets, on the Creative Production home page.Banners at Scale Approved-asset banners — a scalable workflow that automates removing backgrounds, isolating products, cropping and resizing to every format, compositing products into templates, applying copy and offer variants, localizing content by market, and checking output against brand rules. Generative banner variants — generate hundreds of activation-ready banner variants in days by automating resizing, versioning, and asset assembly, which reduces production costs, minimizes manual design time, and produces more variants at speed. Product Assets Generate product imagery from 2D and 3D assets for PDPs, retail media, configurators, and packaging — creating product assets at SKU scale using digital twins and rich product data, and building pack shots, landing page imagery, and campaign visuals without waiting for physical samples. Transform 2D and 3D assets into production-ready product imagery — generating images from any angle, compositing 3D digital twins into AI-generated lifestyle photography, and applying product variants and configuration videos of hero assets. Learn more about Workflow templates on the Creative Production home page Why this mattersWith this release, Firefly makes it faster for teams to go from raw product and brand assets to finished, on-brand creative — cutting down the manual searching and setup that used to slow down high-volume production work. Try this new feature today! Click here to go to Firefly Productions We'd love to hear from you Give this feature a try and share your thoughts! Got questions or ideas? Drop them in the comments below — we're here to chat and help.

AE Beta 27.0x7: Text animators now keep combining marks attached to their base characters

Starting in the AE Beta 27.0x7, we've changed how text animators handle combining marks — the tone marks, vowel signs, and diacritics that sit above, below, or around a base character in scripts such as Thai, Arabic, and many Indic languages. Scope of the changeThis affects the per-character text animator properties:Scale Skew Rotation Tracking Variable Font axes that change a character's width (not only an axis literally named "Width" — any axis whose effect widens or narrows the glyph) What used to happenWhen you animated one of these properties on text containing combining marks, each glyph/mark was positioned independently. As the base character moved, scaled, rotated, or changed width, its marks did not travel with it and they drifted away from the character they belong to, so the mark could end up detached and floating over a neighboring character. What happens nowMarks are now grouped with their base character and transform as a single unit. As you animate, the whole cluster (base plus its marks) scales, rotates, skews, tracks, and changes width together, so marks stay correctly positioned on the character they belong to. We'd love your help testingIf you work in Thai, Arabic, Indic, or any other script that uses combining marks, please try your text animators with these changes and let us know how it looks — especially any case where a mark still lands in the wrong place, or where text that used to look right now doesn't.A note on the old behaviorThis change ships in the 27.0 Beta starting with Build 7. There is currently no option to switch back to the previous rendering. If that's something you think you still need, let us know. Otherwise, non-Beta releases such as 26.3 continue to use the older rendering approach if you need it.

A stylized, vector-looking skateboarder

New in Beta: Contour Paint effect

In After Effects Beta 27.0 Build 6 and later, we're happy to announce Contour Paint, a new visual effect that allows you to change your images and videos in creative ways!At it's core, Contour Paint analyzes your frames and finds the visible flows along the edges of the shapes (the contours) within it, and then simplifies and smears your images along these contour edges like finger-painting, as well as optionally posterizing the smeared shapes by drawing solid color fills using a reduced palette. You can get illustrative, or print-like effects or very abstracted imagery. We really think you're going to have some fun with it!Contour Paint Understanding How Contour Paint WorksHere’s some source footage we’ll be using. A skateboarder and a frog.Untreated Skateboarder footage frame (cropped) Untreated Frog footage frameContour Paint processes the frame via several different stages, illustrated here on the skateboarder footageContour Paint Pipeline (clockwise)To dig further in, let’s go through the controls in Contour PaintContour Paint View ModesPossibly the most important control in helping you understand Contour Paint is the first one, the View dropdown, which allows you to switch between the Final Result effect output or the internal Edge Map as Contour Paint sees it. Contour Paint has two different views: Final Result (Default) and Edge Map Similar to how the Keylight effect will allow you to see intermediate stages in the effect’s process, being able to see how Contour Paint is understanding your footage will be a huge help towards exploring different results. The Edge Map view displays the edges that Contour Paint sees (you may find this looks similar to Find Edges effect) as well as the direction and magnitude of the contour flows, as indicated by the direction and opacity of the cyan arrows. Here's a crop of the Edge Map for our frog. See how you can see the arrows traveling along the edges? This is the basis for a lot of the decisions you and the effect will be making using Contour Paint.Frog with Edge Map displays of edges and flow arrows(By the way, the External Edge Map controls allow you to use another layer's edges as the map for your smearing, and the Map Modifications section allows you to change the map before it smears your image and those changes are also visible in the Edge Map, but let's leave those aside for now). Now that you know how Contour Paint sees your image, lets talk about what you can do with it Contour SmearingOur frog, with varying levels of Stylization and CleanlinessThe Contour Smearing section is where you can control how much Contour Paint pushes your your frame's pixels along the contours.Stylization is how exaggerated the smears are and how much they focus on larger contours instead of smaller details (try changing this while viewing the Edge Map). Cleanliness is how much detail the smearing removes. Smear Iterations is how many consecutive times the smearing algorithm is applied overtop of itself. This value can go up to 100, but expect render times to increase accordingly since it is applying the effect multiple times.Important: Increasing Iterations is very similar to just stacking multiple copies of Contour Paint on the same layer, and as we just said, render times do increase. However, this allows for astonishingly abstracted visuals so we recommend you experiment. A comparison of one iteration versus 100 iterations on our skateboard footage Apply to Alpha smears the pixels in the alpha channel as well as the RGB channels. This can be useful if you have a text or shape layer that doesn't fill the screen, or if you have use Object Matte on an object in your frame that you want to stylize.An example of how Apply to Alpha: On can distort the edges of a text layer Now that we know how to smear our image lets look at how to do further stylization with Color Reduction.  Color ReductionColor Reduction adds another layer (literally) of simplification and stylization. Color Reduction draws fills along the contour flows found in your image and colors those fills using a reduced palette. Think of it like someone tracing the shapes in your smeared image and filling each traced shape with a flat color chosen from a limited set. This can create very smooth, vector-looking imagery from your videos and images. Draw Color Fills controls if and how the reduced color shapes are drawn and composited over the smeared image.By default it's None and you'll just see the original smeared image. Over Smeared Image layers the fills on top. Only renders only the fills and hides the smeared image. (There's a setting later on called Limit Fills which can create transparency in parts of the fills, this allows you to control what shows through.) Reduction Method controls how Contour Paint decides which limited colors to use. There are two Posterization algorithms (K-Means, Median) which reduce the colors to the amount you specify in the Posterization Level control The color reduction is done using a frame average sampling technique. Because this is an averaging of colors, you may find these posterization methods to be highly-stylized and they may change on each frame if the colors in the frame change enough.If you want more control, Reduction Method : Match to Nearest Custom Color is your friend and may be the secret star of Contour Paint and we’ll go into more detail now. A demonstration of all the different Color Reduction MethodsMatch to Nearest Custom ColorIt's important to understand what Match to Nearest Custom Color does and how it works: it uses a method that tries to match the way humans see color to find the closest color in the Custom Color set. Think of it as a smart posterization to a palette you define. Fire examples with a Nearest Custom Color set The remapping works based only on whatever the closest color is and there's no guarantee that all colors in the Custom Color Set will be used. If you add Contour Paint with a Custom Color Set that includes a hot pink color on a video of a green jungle with a blue sky, that hot pink will not be the nearest color for any of the pixels and no fills will be drawn with that color. But if a flamingo flies through the frame, that pink will start to appear.Adding Swatches to the Custom Color SetYou can use the + button above the Custom Color Set swatches to add any color you want but we strongly recommend using the eyedropper in the color picker dialog to sample colors from the original image (you may want to temporarily turn off the Contour Paint effect while sampling) to guarantee an exact match. This will gain you the most control over which colors in the image are visible.You can keyframe the Custom Color Set using the Custom Color Set property below the swatches. Enable the stopwatch on that that property and simply add or remove colors in the set of swatches to have them interpolate in and out of the palette. Custom Color Set swatches UI Limit Fills by Edge StrengthLimit Fills by Edge Strength allows you to control where the fills are drawn. Low detail areas of your footage have edges with a low Edge Strength. You can use these controls to limit which edges draw fills around them. The Low Strength limit has been raised here to knock out the low detail areas, and the Draw Color Fills option has been set to OnlyExternal Edge MapNow that we know how to use the downstream options, we can go back to the first controls in the effect, referencing and modifying the Edge Map.In addition to using the Edge Map derived from your image or video, you can point Contour Paint to an External Edge Map — another layer to use to drive the smearing. Our frog, smeared with an instance of Contour Paint that is referencing the Fractal Noise result displayed on the leftThis can lead to interesting inversions of typical workflow. For example, taking a visual Noise effect (Fractal Noise, etc) and then using Contour Paint to smear that noise across the contours taken from an image can lead to a very interesting contoured line art effect.  Noise smeared by the contours of an image.Map ModificationsOffset Flow Angles allows a global adjustment of every flow angle in your edge map. Our frog, with Offset Flow Angles Fire with different Quantize Flow Angle amounts.Quantize Flow Angles snaps the flow angles to specific values. This effect is more obvious at higher Iterations. This can be used for extremely stylized effects, particularly if you're trying to make imagery look "computerized." Freehand Flow AdjustmentsIf you want to make manual adjustments to the edge flow map — like if it just isn’t doing what you want in one particular area —  there's a suite of tools that allow you to paint changes on the flow map. UI for Freehand Flow Adjustments Just paint in the Comp Viewer and watch the angles adjust to your paint strokes. If your View is set to Edge Map you'll see a tinted outline of the strokes and colorizing of the arrows they're affecting.Change Contour Flow will allow you to push the directions on the flow map and are visible as green outlines in the Edge Map. Remove Contour Flow will nullify the flow map where the strokes are present. At full opacity, it will remove the flow and your image will not smear in those areas. At a low opacity, you can use this to reduce the magnitude of the direction. These strokes are visible as red outlines in the Edge Map.Delete Strokes Lets you click on existing strokes to remove them. The strokes are individual objects and a single click will remove an entire stroke.Keyframing Similar to the Custom Color Set, you can keyframe the Freehand Flow Adjustments using the Freehand Flow Adjustment property. The strokes themselves will not animate along as if they're being drawn, but they willinterpolate.Other Effects That Play Well With Contour PaintBecause Contour Paint uses the input pixels to drive a lot of looks, a lot of those decisions can be affected by adding effects before Contour Paint.Unsharp Mask (or any other Sharpening effect)Because Contour Paint works on the edges it finds in the image, using a sharpening effect to emphasize edges, you can get very different effects. You can see here that our surfing shot's colors and shapes are much more stylized if we pre-process by adding an Unsharp Mask effect beforehand. Side by side of how much Unsharp Mask used before Contour Paint can emphasize edges. Shadow / HighlightsShadow/Highlights is an underutilized effect that will brighten the dark areas of your frame and darken the light areas of your frame. This can add a lot more detail to an image that is being modified by Contour Paint.  Side-by-side of how much Shadow/Highlight can be used to reduce contrast and bring out details when used before Contour Paint Thank You!Thank you so much for coming on this tour of Contour Paint. This is in Beta so we really welcome your feedback on changes you’d like to see before this becomes an official release. We really hope you love using Contour Paint as much as we've loved creating it. Happy smearing!

Acrobat | 26.001.21745 にアップデート後、プリフライトを利用するとフリーズする件について

Acrobat および Reader をご利用中の一部のお客様で問題が発生し、ご不便をおかけして申し訳ございません。 【対象のAcrobat】Acrobat 26.001.21745 【対象OS】Windows 【事象の詳細】フォルダー、またはファイル名に 「ひらがな、カタカナ、漢字」 などの 2バイト文字が含まれている状態でプリフライトを実行した際に以下のエラーが表示されます。  【回避策】恐れ入りますが、フォルダー、またはファイル名を 「半角英数」 の 1バイト文字に変更し、プリフライトで作業をお願いします。 例 :以下のフォルダーパス、ファイル名の場合C:\Users\<Windows アカウント名>\Documents\テスト\注釈.pdf 以下に修正します。 テスト → test注釈.pdf → Comment.pdf C:\Users\<Windows アカウント名>\Documents\test\Comment.pdf  【調査状況】本件につきましては現在調査中でございます。調査が完了しましたら、本記事に記載予定です。ご不便をおかけして申し訳ございませんが、回避策のご利用をお願いします。26.001.21691 を再インストールした場合、起動時に黒画面と白いポップアップが表示されフリーズする問題 が発生する場合があるため、ご留意ください。

Job Hunting Made Easier: Use Adobe Acrobat Right Inside ChatGPT

Job Hunting Made Easier: Use Adobe Acrobat Right Inside ChatGPT

Hey everyone, Joe here.If you've ever juggled a resume, cover letter, and references across separate files while job hunting, I put together a quick way to pull them into one clean PDF without leaving ChatGPT.  What you need: A ChatGPT account. No Adobe account required; you can use it as a guest or sign in. What you can do: Combine your resume, cover letter, and references into one PDF, edit text like a company name, reorder or remove pages, and download the finished file. 👉🏼 Try it yourself: First, add the Adobe Acrobat plugin.   Go to Settings → Plugins, search "Acrobat," and add it. Choose "Sign in with Adobe Acrobat" if you want to save files to your Adobe account, or "Use without an account" to skip that step.  Then type:   Prompt 1: "@Adobe Acrobat, combine my resume, cover letter, and references into a single file"  Upload your three files, and Acrobat merges them in order. Need to tweak something first, like swapping in a specific company name in your cover letter? I ask directly: Prompt 2: "@Adobe Acrobat, I need to edit the company name in the file"  Once it looks right, you'll see a preview with a download button right there. Select it to save the finished PDF to your device. Watch the full walkthrough below Good to know: Free for all ChatGPT users, no paid Adobe subscription needed  Files aren't auto saved to your Adobe account unless you sign in  English-only for now  Upload limits: 10 files per chat, 512MB max per file. Free plans get 3 uploads a day; others get up to 80 every 3 hours (details)  Availability varies by region; check the overview page below if unsure  Scanned or image-based resume? You can still upload it; see supported formats  Installing the plugin requires ChatGPT web or desktop; once installed, it works in mobile chats too Note: You might also come across a plugin called Adobe in ChatGPT. It's the successor to the old Photoshop plugin, now expanded to cover Creative Cloud tools and Acrobat's document features too, including creating and converting PDFs. It works the same way, whether you are a guest or signed in. This walkthrough is dedicated specifically to the Adobe Acrobat plugin.  👉🏼 New to the integration? Start with the Acrobat for ChatGPT overview and the step-by-step setup guide, or read Introducing Adobe for ChatGPT for the full picture.  I'll be in the comments. Drop a note on how you'll use it for your own job search or ask me anything. — Joe 

Stock Panel Upgrade in Beta now!
Photoshop v27.9.1 Is Live! Explore Ideas Faster with Firefly Boards, Smarter AI Prompts, and Streamlined Editing

Photoshop v27.9.1 Is Live! Explore Ideas Faster with Firefly Boards, Smarter AI Prompts, and Streamlined Editing

The July 2026 update to Adobe Photoshop (version 27.9.1) introduces faster creative exploration, smarter AI-assisted image generation, and improved productivity tools to help designers, photographers, and creators work more efficiently and stay in flow. What’s NewPhotoshop 27.9.1 introduces several enhancements designed to streamline creativity, improve productivity, and make everyday tasks easier. You can now send layers directly to Firefly Boards for faster ideation and creative exploration, making it simple to compare concepts and develop new directions from existing Photoshop content. Editing workflows are now more efficient thanks to expanded Remove tool controls in the Contextual Task Bar, giving you quick access to options such as Find distractions, Add to, Subtract from, and Remove after each stroke without interrupting your workflow.Font management has become more reliable with the ability to save and restore your favorite fonts, ensuring your curated font lists remain available even after resetting preferences.Cloud file search now supports natural language keywords, making it easier to locate files, folders, and generated assets across your cloud content. Bug fixes – Thanks to you!Based on feedback from the Photoshop community, we've resolved several reported issues:Favorite fonts are lost after resetting or clearing Preferences. Transform tool bounding box is off-center when editing warped text. Photoshop crashes with a program error when changing channels in a Curves adjustment layer. In the Canvas Size dialog, with “Relative to current dimension” checked, the width nor height can be set to 0.How to UpdatePhotoshop 27.9.1 is available through the Adobe Creative Cloud desktop app. Open Creative Cloud, go to Apps, and update Photoshop to access the latest features, workflow improvements, and bug fixes.Click here to update the app. Join the conversation!Which update will have the biggest impact on your workflow? Are you exploring ideas with Firefly Boards, taking advantage of the new Remove tool controls, or using natural language search to manage cloud assets more efficiently? Share your experience, feedback, and favorite discoveries with the community. We'd love to hear how you're using Photoshop 27.9.1.

Lightroom v9.5 is Live! Generative Expand, Precision Masking, and Faster Photo Editing

Lightroom v9.5 is Live! Generative Expand, Precision Masking, and Faster Photo Editing

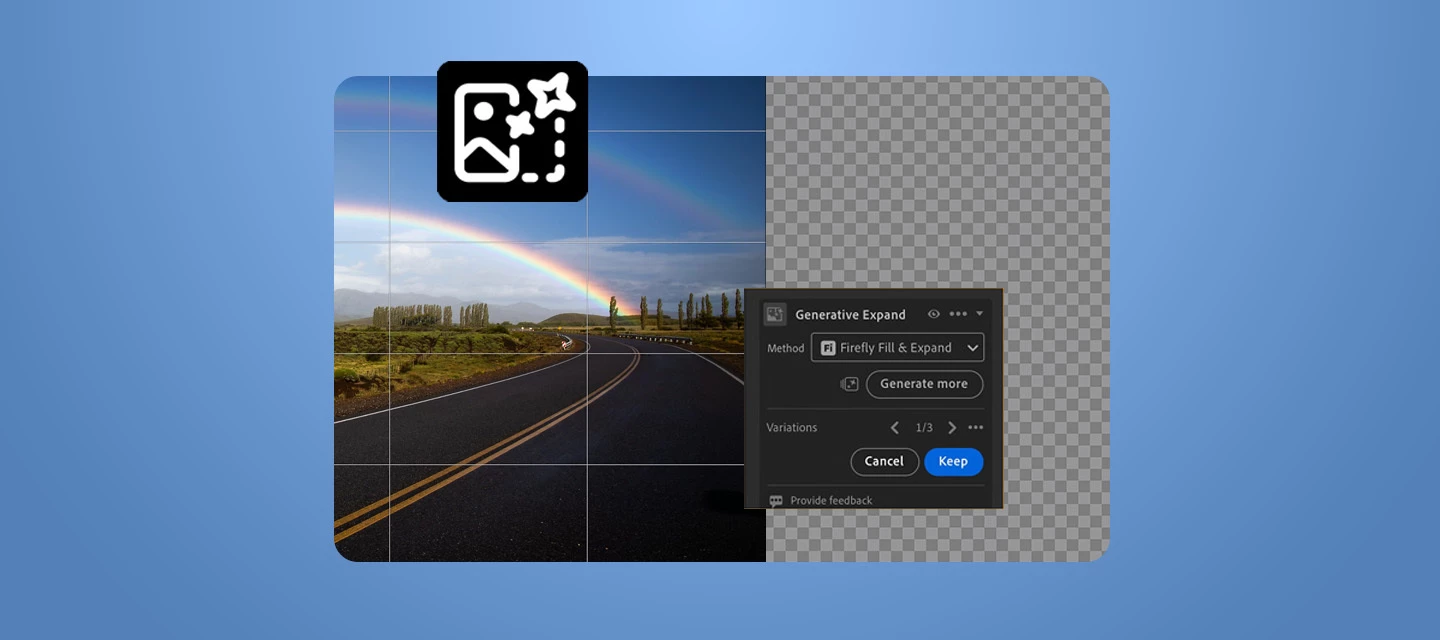
Lightroom v9.5 Is Live! Extend Photos with Generative Expand, Refine Masks with Precision, and Edit More Smoothly The August 2026 update to Adobe Lightroom (version 9.5) introduces AI-powered photo expansion, more precise masking controls, and performance enhancements to help photographers and creators work more efficiently and stay in flow. What’s New:Lightroom (version 9.5) brings more control and flexibility to everyday creative workflows with the introduction of Generative Expand, one of the release's most significant additions. This new Firefly-powered feature lets you extend photos beyond their original borders and intelligently generate content that blends naturally with the existing image, making it easier to recover poorly framed shots, create new aspect ratios for social media and marketing formats, reconstruct missing edges, or fill transparent gaps left behind after perspective corrections. Photographers can choose between Firefly Fill & Expand, which generates multiple AI-powered variations, or Content-Aware Fill, which fills expanded areas using surrounding image content without consuming generative credits.This release also introduces new Feather and Edge controls in Masking, giving you greater precision when refining local adjustments. Whether you're creating subtle transitions, enhancing portraits, or making selective edits to landscapes, these controls help you achieve cleaner mask edges and more natural-looking results. Beyond creative editing enhancements, Lightroom now supports additional GoPro camera models and GoPro, Laowa, and SIGMA lenses, helping more photographers take full advantage of Lightroom's editing capabilities from import to final output.Combined with critical bug fixes and stability improvements, this update helps streamline both everyday edits and larger creative projects. Learn more about the latest updates here.👉 Download the latest version of Lightroom here. Bug Fixes:Mask sliders don't reset when creating a new mask, even when the Reset sliders automatically option is selected. The star rating isn't working in Lightroom version 9.4. The GPS details are not saved when pasted into the GPS field in the Info panel. (macOS) Lightroom desktop crashes or does not launch when changing permissions on a required folder.  In the Include Graphic settings, when you select the Choose a graphic icon, it opens the last photo export folder instead of opening the last folder used for watermark PNG files.Thank you for helping improve our apps! You can check out the full list of bug fixes. How to UpdateOpen the Adobe Creative Cloud desktop app, go to the Apps tab, and update Lightroom to the latest version. Turn on automatic updates to get new features as soon as they’re available. Join the ConversationWhat are you excited to try first in Lightroom v9.5? Whether you're using Generative Expand to reframe images, taking advantage of the new masking controls for more polished edits, or enjoying the smoother performance improvements, we'd love to hear how these updates fit into your creative workflow. Share your feedback, favorite new feature, or editing tips in the comments.

Camera Raw v18.5 Now Available: Smarter AI Retouching, Enhanced Vectorscope, Render to DNG, and More

Camera Raw v18.5 Now Available: Smarter AI Retouching, Enhanced Vectorscope, Render to DNG, and More

The August 2026 release of Camera Raw (v18.5) introduces powerful new retouching capabilities, expanded control over AI-powered features, and enhanced Vectorscope. Whether you're refining portraits, managing AI-assisted workflows, or performing precise color grading, this release gives you greater flexibility and control throughout your editing process. What’s NewOne of the headline additions in Camera Raw v18.5 is the new AI-powered Remove Blemishes from a Photo feature, which automatically detects and removes skin blemishes, moles, freckles, and other facial marks. You remain in control with adjustable Amount and Fade sliders, and can fine-tune individual corrections by removing or restoring specific spots as needed.For users who prefer a more traditional editing experience, Camera Raw now lets you manage generative AI features directly from the Preferences dialog. Features such as Generative Remove, Generative Expand, and Distraction People Removal can be enabled or disabled based on your workflow preferences.Color workflows also receive a boost. The Vectorscope now includes a Show Red at 3 o'clock option, aligning the display with the color scopes commonly used in video editing applications. In addition, the scope now displays precise Lab color values, providing exact numeric color readings for more accurate grading and evaluation.Also new in this release is Render to DNG, allowing you to create a new DNG file with all current edits permanently applied. This creates a clean, non-raw starting point that's especially helpful for Generative Expand workflows, allowing you to expand beyond existing crop boundaries while retaining all previously applied edits.Camera Raw v18.5 also adds support for newly released GoPro camera models and additional GoPro, Laowa, and SIGMA lenses.Learn more about the latest updates here. 👉 Download the latest version of Camera Raw here.​​ Bug Fixes:Manual Transformations doesn't respect the enlarged canvas C2PA isn't working correctly in the Google Pixel 10See the full list of bug fixes here. How to UpdateUpdate to Camera Raw v18.5 via the Adobe Creative Cloud desktop application, or download & install it manually from here. Once updated, you'll have immediate access to the new Blemishes tool, expanded AI controls, enhanced Vectorscope functionality, and the latest camera and lens support. Join the ConversationHave you tried the new AI-powered Blemishes feature yet? Are you using the new Vectorscope enhancements for color grading, or do you prefer editing with generative AI features turned off? We'd love to hear how Camera Raw v18.5 fits into your workflow and what improvements you're most excited about.

Lightroom Classic v15.5 is Here: Better Masking Controls, Render to DNG, and More

Lightroom Classic v15.5 is Here: Better Masking Controls, Render to DNG, and More

The August 2026 release of Lightroom Classic (v15.5) brings a mix of creative enhancements, workflow improvements, and reliability fixes designed to help you edit with greater precision and confidence. From more refined masking controls to a new way to create rendered DNG files, this update focuses on giving photographers more flexibility while also addressing a wide range of issues reported by the community. What’s NewLightroom Classic v15.5 introduces enhanced masking capabilities with new Feather and Edge controls, giving you finer control over photo masks and more creative editing possibilities. Cropping workflows are also improved with the ability to temporarily adjust photo opacity, making it easier to see cropped-out areas and accurately frame your images.For photographers who want a fresh starting point after extensive edits, the new Render to DNG option allows you to save a rendered DNG file with all current edits permanently applied. This creates a non-raw version of your image that can serve as the foundation for further editing.The release also improves catalog reliability by automatically detecting and prompting you to repair issues related to lrcat-data files. In addition, support has been added for new GoPro camera models and select GoPro, Laowa, and SIGMA lenses.Learn more about the latest updates here. 👉 Download the latest version of Lightroom Classic here.​​ Bug Fixes:Export Slideshow as video progress bar fails to complete Canon tethering does not work after updating Lightroom Classic to version 15.4 In the Map module, Map markers are not updated when photos are movedSee the full list of bug fixes here. How to UpdateTo get Lightroom Classic v15.5, open the Adobe Creative Cloud desktop app, navigate to the Apps tab, and update Lightroom Classic to the latest version. Once installed, you'll immediately have access to the new editing controls, workflow enhancements, camera and lens support updates, and the latest fixes. Join the ConversationHave you tried the new Feather and Edge masking controls or the Render to DNG workflow? We'd love to hear how these updates fit into your editing process. Share your favorite new feature, creative workflows, or any improvements you've noticed since updating to Lightroom Classic v15.5.

Beta Build 30.8.72 Release Notes

Hello, Latest Beta Build 30.8.72 is now available in CCD. We have the below fixes in this build: "AI Assistant" Improvements:Since our last release in June, we've worked hard to improve the Assistant, most of it driven by your direct feedback. There's a big batch of improvements shipping now in the latest Illustrator Beta (v30.8).What is Assistant?: Think of AI Assistant as a product partner that takes care of the repetitive, time-consuming tasks, so you can spend more time doing what matters the most: designing, creating.What's new?:1. Skills: Save a reusable prompt so you get consistent output faster — no retyping a workflow you run often.How to use: Turn your last prompt into a Skill by typing "create a skill from the last prompt," or make a new one by typing "create a skill" along with its description in the text field.2. File attachment: Attach your own files (MD, XLSX, CSV, and more) to pull out reusable assets — colours, graphic/character/paragraph styles, symbols, brushes — give the Assistant a brief or reference to work from.How to use: Click the "+" icon in the Assistant panel and select the files you want to upload.3. Multiple chats per document: Run several independent conversations inside one document — e.g. a logo exploration in one, a production QA check in another — so different lines of work stay separate and easy to resume.How to use: Start a new chat in the Assistant panel by clicking on ‘new chat’ under the hamburger menu (3 dots) at the top right corner.4. Contextual starter prompts: Starter suggestions are now tailored to the file you have open instead of a generic set, so you know what to ask right away.How to use: Open your file and the Assistant shows suggestions based on its content — click one to get started.5. Probing: When the Assistant needs to clarify something, it's more flexible and easier to respond to. For multiple choice questions, you can now enter your own custom input and even skip a question you don't want to answer.How to use: When a clarifying question appears, type your own custom answer, skip the question, or move through multiple questions in the carousel.6. Image Trace & text improvements: Broader, more reliable coverage across the core workflows you use most, including Image Trace and text-related tasks.How to use: Just ask the Assistant to trace an image or run your text edits as usual — reliability has improved under the hood.New generative tools — now callable with a natural-language prompt, right inside the conversation:7. Text to Vector: Describe what you want and get editable vector art straight from the prompt. This is the first version inside the Assistant, with more to come.How to use: Type a natural-language description of the art you want in the chat.8. Recolor: Describe a mood or direction ("warmer," "cyberpunk neon") and restyle a whole selection in one pass, instead of recolouring object by object.How to use: Select your artwork, then describe the palette or direction you want in the chat.Easier to find and try: The Assistant now opens by default across all workspaces.How to open the Assistant1. Open Illustrator Beta (v30.8 or later).2. Click the AI Assistant button in the top-right of the application bar.3. Describe the task you want done.We need your feedback: After every response, you'll see thumbs up/down buttons. Please rate the result and tell us what worked or missed. Your feedback directly shapes where AI Assistant goes next.Fixed UV issues:[Vote Count : 2] : Illustrator crashes and quits immediately after executing Print.「プリント」を実行した直後に Illustrator がクラッシュして終了する With this beta build, we have also refreshed content libraries:Gradients & Patterns under Swatches just got a refresh! Explore new content and options. Your previous favorites haven’t gone anywhere, just find them under Classic.

Add tracks automatically when editing source clips

Add tracks automatically when editing source clips

There's a reason editors have been talking about automatic track creation in Premiere Pro for years. When you inserted a source clip with more audio channels than your sequence had tracks, Premiere would automatically create the additional tracks. For some workflows, that was helpful. For many editors, it was one of the first preferences they wanted to change.Back in March, editor Scott Simmons highlighted the new option in the Premiere Pro beta that finally addressed this long-standing request. Now it's available for everyone. As of Premiere Pro 26.3, you can decide how this works.Head to Settings > Timeline and uncheck Add tracks automatically when editing source clips.That's it. With the preference disabled, Premiere no longer creates tracks automatically when you insert or overwrite clips. Instead, your sequence stays exactly as you've built it. If you need additional tracks, you can add them yourself when you're ready.For editors who prefer to define their timeline structure up front, it's a small change that makes Premiere feel much more predictable. Set up your tracks at the beginning of a project, and Premiere will respect that layout instead of expanding it automatically.There is one tradeoff to be aware of. If a source clip contains more audio channels than your sequence has tracks, those extra channels won't appear until you create the additional tracks yourself. That's intentional—it puts you in control of your timeline instead of the application making the decision for you.This is one of those features that's easy to overlook in the release notes but has a meaningful impact on everyday editing. If automatic track creation has ever interrupted your workflow, it's worth taking a few seconds to change the preference once and forget about it.Have you switched it off already, or do you prefer Premiere creating tracks automatically? Let us know in the comments.

Something for the Weekend – Part 264 – ‘Where there’s smoke…’

Something for the Weekend – Part 264 – ‘Where there’s smoke…’

Thanks to all who took part in our previous ‘Fixer Upper’ challenge. As always, there were many interpretations of the image and the brief.This week, we start out with a simple object. This Victorian pipe can be found in Adobe 3D assets. I made the wrap-around wood materials using Adobe Substance 3D Designer and then added them to the surface using Adobe Substance 3D Painter, before rendering in Blender 3D.So, now we have our starting image. What can you make with it?The “rules”:Use the starter image as at least part of your own image entry. Anything goes, as long as it meets the forum rules on decency, copyright, etc. Anyone, and everyone, is welcome to have a go, whether you are a complete beginner or a Photoshop expert. This is not just for our forum “regulars”. The challenge is not limited to Photoshop. Any Adobe software can be used.  There are no prizes apart from the chance to practice, show off your skills, or bring a bit of humour and fun. Don't be shy, join in and have a go! The starter image is made available for you to use in this forum challenge only. To download the starter image, click it then, when the image opens in its own window, right click and choose “Save Image As/Save Target As” (or similar depending on your browser). When posting back your image, please use the reply button in this first post and use the 'Insert Photos' icon at the bottom of the reply box. If posting a comment on someone else’s entry, then please use the reply button next to their image post. Have fun! 

The Substance 3D OpenPBR documentation is here!
Need help identifying an Adobe charge?
Sign on the Spot with any device: Adobe Acrobat Sign In Person Signing

Sign on the Spot with any device: Adobe Acrobat Sign In Person Signing

  TL;DRIn-Person Signing lets a designated host collect a legally binding signature face-to-face on a single shared device, with no email or printing required. It is now available in Acrobat Sign Solutions and Acrobat Sign for Government (not included with Acrobat Standard or Pro on its own). An admin turns it on once at the account or group level, then any sender can add the In-Person Signer role to an agreement. It works online or offline, and every step is captured in a secure audit trail. Printing, scanning and endless email exchanges shouldn’t stand in the way of the business just for a signature. With the improved In-Person Signing feature from Adobe Acrobat Sign, documents can now be signed instantly, making the process faster and more seamless than ever with any device.Whether you are closing a deal, onboarding a client or finalising contracts, In-Person Signing helps keep business moving without interruptions.Less paperwork. Fewer steps. Better Signing Experience. ✍️ What is In-Person Signing in Acrobat Sign?It is a host-guided way to collect a signature when the signer is standing right in front of you. Instead of sending the document by email, the host opens it in a browser on a shared tablet, laptop, or phone and walks the signer through it directly. It is built for moments when the signer does not have easy access to email or a personal device, at a front desk, during onboarding, or out in the field. 📌 Who can use itIncluded with Acrobat Sign Solutions and Acrobat Sign for Government. Not available with Acrobat Standard or Acrobat Pro on their own. The host must be an internal user on the account, and an admin has to enable the feature first. Not yet supported in bulk send workflows or web forms. ⚡ Key benefits and featuresInstant signatures, no waiting on an email to land Works offline, submissions sync once the device reconnects Flexible signing, type, draw, or upload a signature Full audit trail, every action recorded with encryption 🛠️ How to enable In-Person SigningIn‑Person Signing is controlled at the account or group level and is typically disabled by default. Activating In-Person Signing is a quick and straightforward process.To enable the In‑Person Signing Services: Configure in-person signing in Acrobat Sign  Once set up, your document is ready for immediate face-to-face signing. This setting adds the In-Person Signer role to the list of recipient roles available during agreement creation.  When a sender selects In-Person Signer for a recipient, the recipient record changes to support hosted signing. The sender must provide:The host’s email address. The signer’s name. Note: Group-level settings override account-level settings. 🤝 How to host an in-person signing sessionIn‑person signing in Adobe Acrobat Sign enables a secure, host‑controlled signing experience where the host manages the entire session on a shared device, ensuring the signer can review and complete the agreement without direct access to it. To begin, the agreement must include an In-Person Signer, and you must be assigned as the host. Any required authentication steps must be completed to ensure a controlled, compliant, and guided signing process from start to finish. For a step-by-step workflow, go through: Host an in-person signing session in Acrobat Sign ✅ Tips for a smooth signing experienceEnsure that you verify identity before handing over the device Ensure your device is fully charged if you plan to sign multiple documents offline. Keep Adobe Sign updated to access the latest features and security patches. Use secure authentication for the host when needed Clear browser/device sessions between signers For a polished experience, pre-fill fields before presenting the document to the recipient. Remind recipients to review all fields carefully, as digital signatures are legally binding. Adobe Sign’s In-Person Signing transforms how businesses handle agreements. It’s fast, secure, and intuitive, eliminating the friction of traditional signing methods. Whether you’re a startup founder, HR professional, or sales representative, this tool empowers you to collect signatures efficiently and professionally—anytime, anywhere.Start signing smarter and experience the future of document management with Adobe Sign’s In-Person Signing today. ResourcesConfigure in-person signing in Acrobat Sign Host an in-person signing session in Acrobat Sign 💬 We want to hear from you! Have you used In-Person Signing to close a deal or onboard a client? Which workflows do you think it will speed up sales contracts, patient intake, field service forms, event waivers? Drop your first impressions, questions, or feature requests in the comments below. 

Lightroom Assisted Culling: AI-Powered Photo Culling for Faster Photo Selection

Lightroom Assisted Culling: AI-Powered Photo Culling for Faster Photo Selection

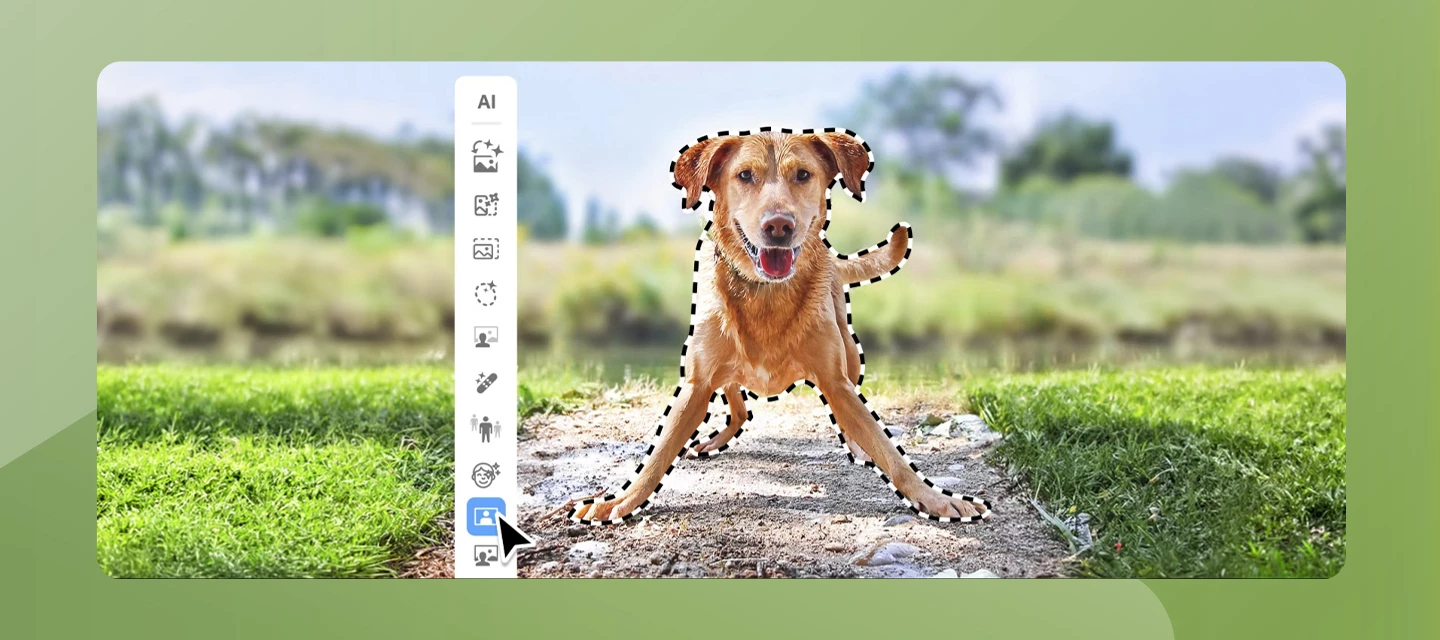
 Cull Faster, Not Harder: Meet Assisted Culling in LightroomSorting through hundreds of shots to find the keepers is one of the most time-consuming parts of any shoot. Assisted Culling takes on the heavy lifting for you by automatically checking subject sharpness, eye sharpness, open eyes, exposure issues, and even accidental "misfire" shots, then sorting everything into Select and Reject groups so you can review at a glance instead of clicking through every frame.Once Lightroom finishes analyzing your album, you can fine-tune the results with adjustable focus thresholds, dig into the Culling Info panel to see exactly why a photo scored the way it did, and apply batch actions. It's a big time-saver for wedding, event, and sports photographers working through massive photo sets, and you're always one click away from overriding any pick.  How to Use Assisted Culling: Open an album and select Assisted Culling > Cull. In the Select section, turn on the filters you want scored: Subject Sharpness, Eyes Sharpness, Eyes Open (with sub-options for detecting eyes or flagging "can't tell" shots). In the Reject section, turn on filters to exclude unwanted shots: exposure issues, misfires, or documents/receipts. Lightroom starts analyzing automatically as soon as a filter is selected — no separate "start" button. Use the Review buttons (Selects / Rejects / All) to browse each category. Check the Info icon > Culling Info to see the score behind each Select/Reject badge, or just hover over a badge for a quick tooltip. Once analysis finishes, use Apply Batch Actions to flag, star-rate, color-label, move, or delete your Selects/Rejects in bulk. Disagree with a call? Click the badge on any photo and choose "Mark as Select" or "Mark as Reject" to override it. Pro-Tips: Manual shortcuts still work during review. Standard pick/reject keys (P to flag a pick, X to reject) work right alongside the Assisted Culling badges, so you can speed-review without reaching for the mouse. It pairs well with auto-stacking. Running Assisted Culling's select/reject pass alongside auto-stacking by visual similarity is a strong combo for burst-heavy shoots — think sports, weddings, wildlife. Good import habits pay off later. Adding a copyright preset and basic keywords during import won't change your culling scores, but it makes the resulting Select/Reject groups much easier to search and reuse later.👉 Learn more about Assisted Culling here.Join the ConversationHave you tried Assisted Culling yet? What's the first shoot you're putting it to work on?

Enterprise Device Authentication Management for Creative Cloud Desktop Apps and Acrobat Pro

Not currently supported: web services such as Acrobat Sign, Adobe Assets, and Adobe Libraries, mobile applications, Acrobat Reader, and Dreamweaver.  What this feature does: This enterprise-level configuration lets you set the authentication mechanism for Creative Cloud desktop applications, including Acrobat Pro Desktop, at the device level. Pair it with your company's device deployment process so that when a user signs in, they're automatically redirected to your organization's identity provider for the claimed domain, instead of landing on Adobe's generic sign-in screen.  Before you start: To use this, your company must first claim the relevant domain in the Adobe Admin Console. You can claim more than one domain, but on any single machine the policy must resolve to one claimed domain. If you've claimed multiple domains, you can direct different users on different machines to different domains.  Why configure this:Users are automatically redirected to your company's identity provider at app launch, for any domain claimed in the Admin Console  Sign-in can be restricted to Organizational IDs only  Social sign-in options can be removed from the authentication screen entirely How to configure it: macOS Create a plist file specifying the claimed domain you want users redirected to  Place the plist file at /Library/Preferences/com.adobe.NGL.AuthInfo.plist  Restart the Creative Cloud desktop app (a full device restart is recommended) Windows Open Registry Editor (Windows + R, type regedit, press Enter)  Navigate to Computer\HKEY_LOCAL_MACHINE\SOFTWARE\Policies\Adobe\  Add a key named NGL  Within NGL, add a key named AuthInfo  Within AuthInfo, create a string value named login_domain, with the claimed domain as its value  Restart the Creative Cloud desktop app (a full device restart is recommended) Good to know: This configuration does not affect existing trust relationships  Users must authenticate with a Federated ID account for this to apply  Wildcards aren't supported when specifying a domain, use the exact domain  This won't work if browser-based login is configured by the admin  

How to Generate a HAR File

How to generate a HAR fileGenerating a HAR file would be helpful if you need detailed information about network requests within the user’s browser for troubleshooting. This article helps you know how to generate a HAR file in Chrome, Firefox, Edge, and Safari. Google ChromeThe following steps show how to use the developer tools in Google Chrome.For more information, see Chrome DevTools.In the Chrome browser, navigate to the step prior to where the issue occurs. Press F12 to launch the developer tools. You can also launch the tools from the toolbar menu under More tools > Developer tools. By default, the browser keeps trace information only for the page that’s currently loaded. Set the following options so the browser keeps all trace information, even if your repro steps require going to more than one page: Select the Console tab, select Console settings, then select Preserve Log Select the Network tab, then select Preserve log.   On the Network tab, select Stop Recording network log and Clear. Select the Record network log, then reproduce the issue in the browser. You’ll see a session output similar to the source page’s example.    After you have reproduced the unexpected behavior, select Stop Recording network log, then select Export HAR and save the file. Back in the browser developer tools pane, select the Console tab. Right-click one of the messages, then select Save as…, and save the console output to a text file. Package the browser trace HAR file and console output in a compressed format, such as .zip. Attach the compressed file to the support ticket.For latest information, see: Capture-browser-trace - from Google SafariThe following steps show how to use the developer tools in Apple Safari on Mac.For more information, see Safari Developer Tools overview.Enable the developer tools in Safari: Select Safari, then select Settings. Select the Advanced tab, then select "Show features for web developers". In the browser, navigate to the step prior to where the issue occurs. Select Develop, then select Show Web Inspector.By default, the browser keeps trace information only for the page that’s currently loaded. Set the following options so the browser keeps all trace information, even if your repro steps require going to more than one page:Select the Console tab, then select Preserve Log. Select the Network tab, then select Preserve Log. On the Network tab, select Clear Network Items. Reproduce the issue in the browser. You’ll see a session output similar to the source page’s example. After you have reproduced the unexpected behavior, select Export and save the file. Back in the browser developer tools pane, select the Console tab and expand the window. Place your cursor at the start of the console output, then drag to select the entire contents of the output. Use Command-C to copy the output and save it to a text file. Package the browser trace HAR file, console output, and screen recording files in a compressed format such as .zip. Attach the compressed file to the support ticket.For latest information, see:: Safari Developer Help FirefoxThe following steps show how to use the developer tools in Firefox.For more information, see Firefox Developer Tools.In the browser, navigate to the step prior to where the issue occurs. Press F12 to launch the developer tools. You can also launch the tools from the toolbar menu under More tools > Web developer tools. By default, the browser keeps trace information only for the page that’s currently loaded. Set the following options so the browser keeps all trace information, even if your repro steps require going to more than one page: Select the Console tab, select the Settings icon, then select Persist Logs. Select the Network tab, select the Settings icon, then select Persist Logs. On the Network tab, select Clear. Reproduce the issue in the browser. You’ll see a session output similar to the source page’s example. After you have reproduced the unexpected behavior, select Save All As HAR. Back in the browser developer tools pane, select the Console tab. Right-click one of the messages, then select Save All Messages to File, and save the console output to a text file. Package the browser trace HAR file, console output, and screen recording files in a compressed format such as .zip. Attach the compressed file to the support ticket.For latest information, see: Network Monitor: Managing HAR data Microsoft EdgeThe following steps show how to use the developer tools in Microsoft Edge.For more information, see Microsoft Edge DevTools.In the browser, navigate to the step prior to where the issue occurs. Press F12 to launch Microsoft Edge DevTools. You can also launch the tools from the toolbar menu under More tools > Developer tools. By default, the browser keeps trace information only for the page that’s currently loaded. Set the following options so the browser keeps all trace information, even if your repro steps require going to more than one page: Select the Console tab, select Console settings, then select Preserve Log. Select the Network tab. If that tab isn’t visible, click the More tools (+) button and select Network. Then, from the Network tab, select Preserve log. On the Network tab, select Stop Recording network log and Clear. Select Record network log, then reproduce the issue in the portal. You’ll see a session output similar to the source page’s example. After you have reproduced the unexpected portal behavior, select Stop Recording network log, then select Export HAR and save the file. Back in the browser developer tools pane, select the Console tab. Right-click one of the messages, then select Save as…, and save the console output to a text file. Package the browser trace HAR file, console output, and screen recording files in a compressed format such as .zip. Attach the compressed file to the support ticket.For latest information, see: Save all network requests to a HAR file