- Home
- After Effects
- Discussions
- Re: How to convert an AI file path to mask paths i...
- Re: How to convert an AI file path to mask paths i...
How to convert an AI file path to mask paths in After Effects
Copy link to clipboard
Copied
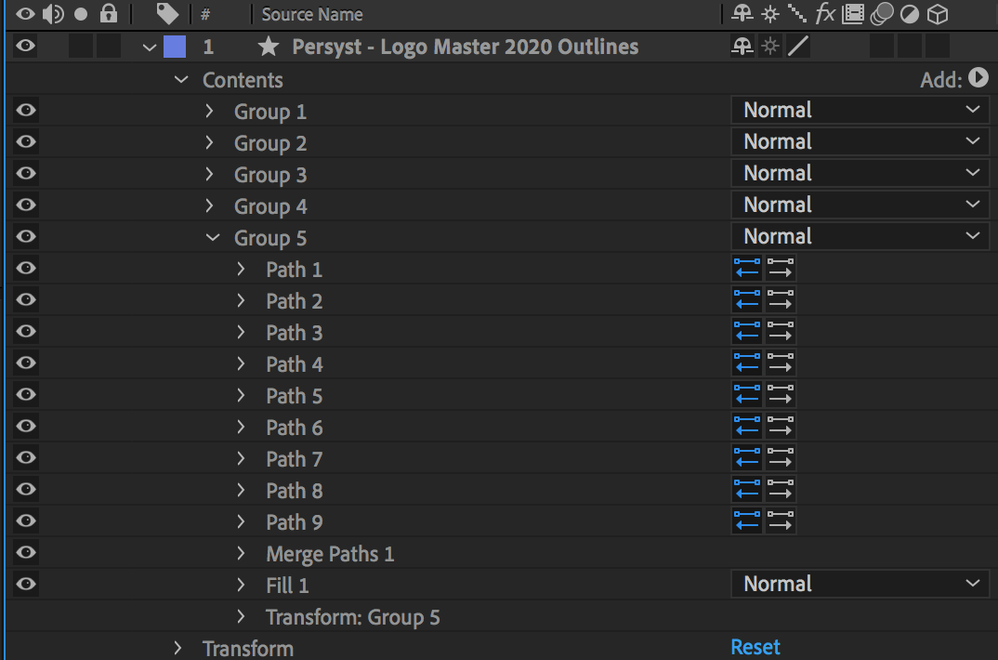
Greetings, I was able to do copy cmd+C a complex Illustrator path that had cutouts and paste it into After Effects onto an adjustment layer and the AI path was converted to various mask layer in AE which is exactly what I wanted. But I could not figure how to do this same thing by importing the actual AI file. I was able right-click 'Convert Shapes from Vector Layer', but all I get is a shape layer with a Contents drop-down that has a bunch of Groups that have Path and Fills, as shown in the screenshot below.
Is there a way to convert these shape groups/paths to mask paths?
The copy and paste from AI into AE is super fast, but I'm just curious about how do this from importing an AI, like I was attempting.
Any help is much appreciated!!
Copy link to clipboard
Copied
Yes you can do it. Once you have converted an AI to Shape Layer you can access to all paths under the Contents category in that layer. The way you convert to masks is:
1.- Select any of the path of your shape layer and use the copy command (CTRL/COMMAND+C)
2.- Create a Solid and create a single mask point in your solid layer using the pen tool
3.- Select the Mask Path parameter inside the Mask of your solid layer and paste the path data (CTRL/COMMAND+V)
Try it and tell us if this works for you.
Copy link to clipboard
Copied
Thanks for the reply. Can you please tell me what exactly I should be clicking on when doing the commad+C?
I can only click on the Group name under the Layer name (in my case I need the paths of Group 5) or I can click on the indivual paths under Group 5, but the individual paths are shape outlines and also shape cutouts, and since I need all the paths for the full composite mask, I clicked on the Group 5 name and did command+C, then created the point mask on a new Solid layer. I then did command+V but nothing gets pasted. What am I not doing correctly?
Thanks for any addtional help.
Copy link to clipboard
Copied
As Rick comments, you must copy the path (the one with the stopwatch on the left). Then, select the MASK PATH (not the Mask category) and paste it.
Copy link to clipboard
Copied
Hi Jose, the copying/cutting of the path keyframes does not seem to be working for me as demonstrated in my video post below. Could you please take a look at my video post below and let me know what I'm missing?
Thanks!
Copy link to clipboard
Copied
You have to spin down until you find the actual path. Typing Path in the Timeline Search Field will speed this up.
I usually set a keyframe for the path I want to use as a motion path then cut it (Ctrl/Cmnd + x). This gives a positive visual indication that you have copied the correct path and never fails.
As long as the layer with the path you are going to copy has not been moved, scaled, or rotated the motion path will match the path perfectly. If the motion path is offset you can add a null to the timeline, parent the layer with the incorrect motion path to the null, then move the null to move the layer and the motion path into position.
Copy link to clipboard
Copied
Hi, I "think" I followed all the steps you listed but it seems to not be working for me at the cut and pasting steps. Could you please take a look at this video showing and let me know what step I'm missing? Thank you!
Copy link to clipboard
Copied
You can only copy and paste one property at a time. If you have keyframes for position, rotation, scale, and opacity on one layer and you want to copy them and paste them to another layer you have to do it one property at a time. The same goes for masks. It's always one property at a time.
I looked at your screen capture video; I have one important question for you. Why are you converting your AI layer to a shape layer. The only reason you would ever want to do that would be to be able to use Shape Layer Animators or actually animate the path. Copying a shape layer path and adding it to another layer as a mask is only useful if you have an effect applied to that layer that can only be applied to a mask.
In your original post, it kind of sounds like you want to poke some holes in an adjustment layer so that the effects applied to the adjustment layer do not affect the entire comp panel. You can do that with a mask, but you could also just put your AI layer above the Adjustment layer and set it as an Alpha or an Alpha Inverted track matte.
When you post a question on the forum it really helps if you explain the design goal in the first sentence. Something like "I have an Illustrator file of a Logo that I want to use to mask an adjustment layer so the adjustment layer does not change everything in the layers below it." I think that might be what you are trying to do.
You can do everything you can do to a vector layer (AI File) that you can do to a Shape layer except animate the path shape or use the Shape Layer animators like Add: Repeater or Add: Trim Paths. If I ever need to convert a Vector layer to a shape layer I will open up Illustrator, remove all of the unnecessary shapes from the file, save it as a new file changing the name from something like MyLogo.ai to MyLogo Red BG Path.ai so I can keep things straight. I also always create or modify my existing AI artwork so that the primary elements are in their hero position and the artboard is the same frame size as my comp.
I hope this helps. You can only copy and paste one property at a time no matter what the property, and it is almost never an improvement to your workflow to convert vector files to shape layers.
Copy link to clipboard
Copied
Hi Rick, the Sapphire plugin UltraZap animates along AE mask paths and text and so ultimately I need to convert my AI file to a mask path/s in AE to use with UltraZap. The copy and paste directly from AI toAE works super fast in one shot, so it seems that copy and pasting one path at a time from the shape paths, might be the longer way to get to the same results, since it can't be pasted all at once.
Copy link to clipboard
Copied
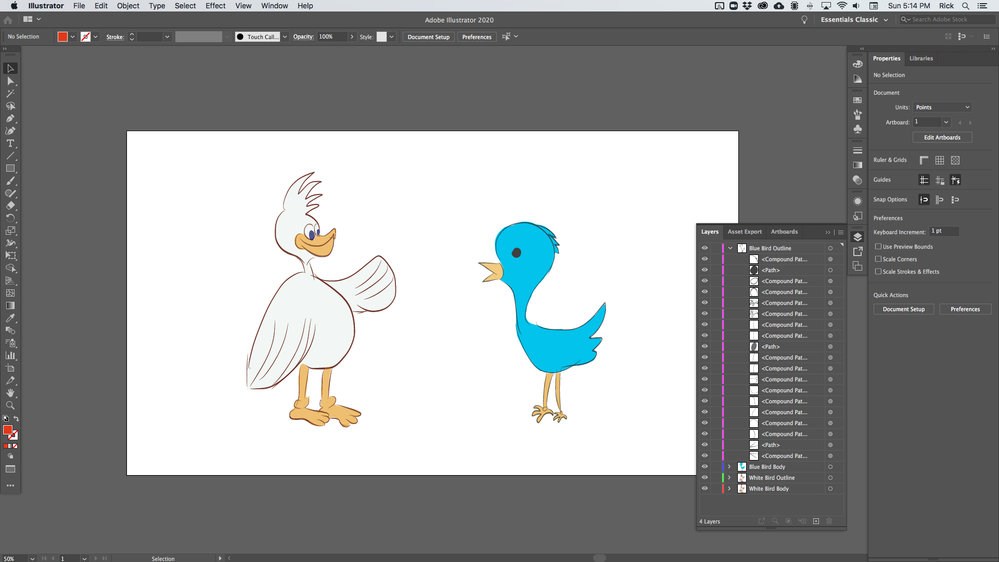
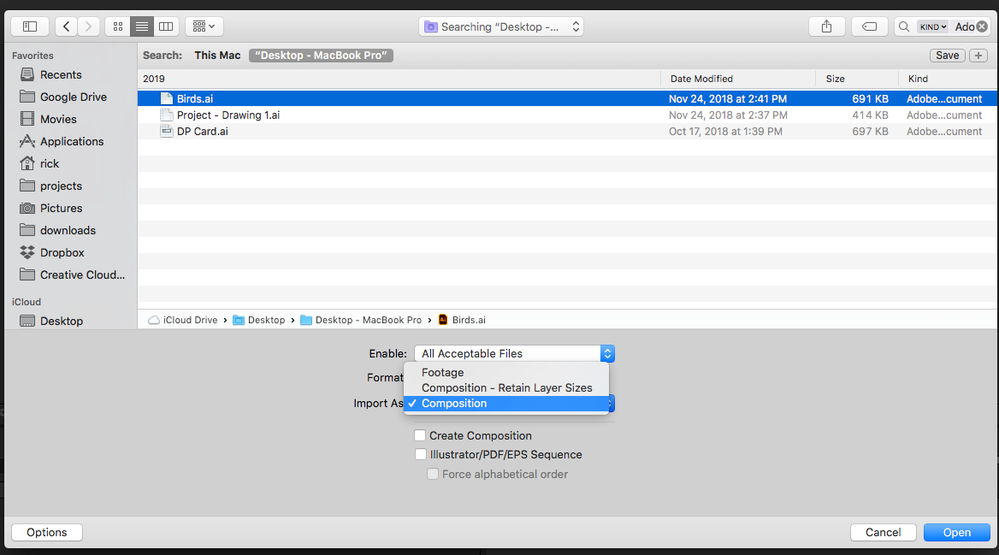
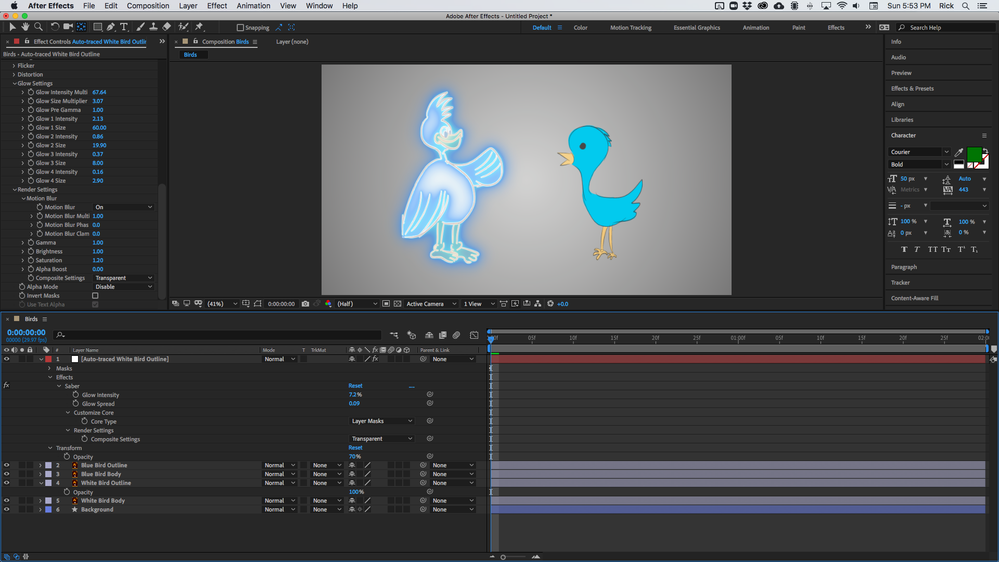
By far the easiest way to do this would be to prepare your AI file with each path you want to use on a separate layer in the proper position, import it as a Composition, then select the AI layer you want to use as a mask in the timeline, select Layer/AutoTrace from the menu, adjust the settings while previewing the output, then using those masks as needed.
Most of the time I import AI files as a Composition/Retain Layer Size, but this would give you a solid just the size of the layer and you probably don't want that. If you are using effects like Saber or UltraZap you'll want some room around the masks. Importing as a Composition makes every layer the size of the composition frame and that's what you want for this kind of work.
This is the workflow from the AI file to the comp through the final composite:
I don't have UltraZap installed on this machine so Saber was applied and set to use the layer masks. The default settings were slightly modified. You can see everything I edited in Saber.
For what you are trying to do this is by far the most efficient workflow. Creating outlines from vector files is almost always a bad idea. If you use that feature each layer you convert to outlines should have only simple shapes, no brushes, no layer masks, no vector effects, and no gradient fills, blends, or other fancy things applied in Illustrator. If you end up with masks you can select multiple masks, even multiple animated masks, copy them, and paste them to a new layer with no problems. If you want to copy paths, you have to select them one at a time and paste them one at a time.
Copy link to clipboard
Copied
Thank you VERY MUCH Rick for the detailed step-by-step. I'll definitely gives this a try.
Copy link to clipboard
Copied
Does anyone else find this to be the most complicated way to do a very simple task? Why can't you drag or copy a path/paths from a contents folder of a shape into a mask folder? Every solution I've found is a non-sensical workaround that just wastes time.
Let me guess, there's a 3rd party extension that does this perfectly to band-aid Adobe UX flaws.
I'm so tired of feeling like Adobe is giving me a hammer and chisel instead of powertools.


