
















Design the future of fashion, win Firefly Pro 👗✨
Announcements
Recently active
Now in beta in Premiere, After Effects, and Media Encoder is support for X-OCN files from the Sony FX5. Adobe’s video products already provide support for X-OCN from Sony cameras including the VENICE and BURANO. The Sony FX5 has new internal recording options including: X-OCN LT X-OCN C1 X-OCN C2Beta versions of Adobe’s video products provide support for these options. Not yet in beta but coming to beta later this year are additional changes to X-OCN support, providing improved playback performance and options for viewing & modifying raw parameters.
Now in beta are sequence presets for XAVC-Intra. The XAVC-Intra options are available in a variety of locations, including in the New Sequence dialog, in Sequence Presets > Legacy > XAVC-Intra. By adding XAVC-Intra as a Sequence Preset, we’ve enabled XAVC-Intra as a Preview File Format in the Sequence Settings dialog. In turn, this enables smart rendering. Smart rendering avoids recompression during export by copying matching source data directly to the output file. This preserves maximum quality and dramatically reduces export time. Smart rendering works only when the source codec, frame size, frame rate, and bit rate match export settings exactly. If you’re using XAVC-Intra and want to use smart rendering, you should:Choose an XAVC-Intra sequence preset when creating a new sequence or modify an existing sequence so that its editing mode is one of the XAVC-Intra options. Render your sequence, using one of the options from the Sequence menu When exporting, ensure that you’ve se
We’ve made several improvements to the Link Media process in Premiere Pro. You’ll typically see the Link Media dialog when you open a project and Premiere Pro can’t find some of your assets. What’s new New “Apply” button: You can now apply the changes you’ve made and continue opening your project — without having to relink every missing file or cancel your progress. Right-click options: Right-click one or more files to access Locate, Offline, and Reset commands, giving you more granular control over relinking. Bug fixes We’ve also fixed several issues that could slow down relinking or force you to go through the locate process multiple times, even when all the missing files are in the same folder path. Try it out We’d love your feedback. If you have a project where relinking has been frustrating in the past, please test these updates and let us know if the experience has improved. Thanks! Fergus
Editors have long expressed that automatic track creation can disrupt their editorial flow because it can upset intentional track setups, in particular when the source has more audio channels than the editing sequence. This new preference allows you to stay in control of your timeline and keep your tracks organized. Now you can go into Settings/Preferences → Timeline → Turn off “Add tracks automatically when editing source clips into the Timeline.” This update directly addresses the feature request here: Thanks to everyone who took the time to share feedback and use cases -- your input helped shape this improvement. Please try it out and let us know if you see any issues. Settings: Uncheck “Add tracks automatically when editing source clips into the Timeline”Preference onThis screenshot shows what happens when the preference is on. When you drag a track with ten audio channels into a sequence with four audio channels, it automatically creates them. Preference On Preference off (new)Thi
Hey everyone! We're excited to share a refinement to Ducking that just landed in Premiere Beta 26.5 (Build 12): Auto-update keyframes.This new option is enabled by default and is designed to keep your ducking in sync as your timeline evolves. No more manually regenerating keyframes every time you tweak a clip.What's New?With Auto-update keyframes turned on, Ducking now follows your clip changes automatically. As you trim, move, or swap out the audio you're ducking toward, the music ducking keyframes update on their own to match. Your mix stays in step with your latest edit decisions, without you having to think about it.Where to find itYou'll see the new toggle in the Ducking section of the Essential Sound panel, right above the Generate Keyframes button. It's on by default, but you can switch it off any time if you'd rather drive keyframe generation manually.Auto-update keyframes Why this mattersEditing is iterative. You move a clip, swap a VO take, re-time a section, and suddenly you
In 2025, we updated Premiere’s timeline to make edit operations dynamic. Previously, editing showed a static blue box, and the timeline only updated after you released the mouse. With the dynamic update, everything refreshes in real time as you edit. Since that release, a small but passionate group of editors has let us know they strongly prefer the original, static behavior, especially when trimming. We want to extend a huge thank you to everyone who shared their feedback, and especially to those who hopped on video calls with us to deep-dive into their workflows. We heard you loud and clear! In the latest Premiere beta, we’ve added a new preference to give you control over this behavior. You can now toggle this feature via Preferences > Trim > Update timeline dynamically during ripple edits. Here is a quick look at the setting in action. Please try it out and let us know your thoughts in the replies below. We look forward to hearing your feedback!
We’re excited to announce that you can now view audio waveforms and video playback simultaneously in the Source Monitor in Premiere Pro (Beta)! This highly requested feature (739 upvotes in the Adobe Community!!!) helps editors save time and tell better stories by making it easier to line up audio cues with video. Whether you’re cutting interviews, syncing dialogue, or finessing sound design, you can now see audio and video tracks together, allowing you to edit with greater precision and efficiency. What You Can Do with Audio + Video Waveforms Toggle to show both audio waveform and video playback at the same time Scrub through media while monitoring both visual and audio tracks Set In/Out points as usual Add and move markers with full A/V visibility Works seamlessly with multiple audio channels Why It Matters Previously, users had to switch between video view and waveform view in the Source Mo
We have heard your feedback: Those of you that have your own transcripts, already complete with proper spelling and punctuation, or in a language we don’t support, don’t want to re-transcribe using Premiere’s Speech to Text feature just so you can use captioning and Text-Based Editing. Captioning and Text-Based Editing requires Premiere Pro to have timecodes for every word. We are publishing a JSON spec format that supports word-level timecode for captioning and Text-Based Editing. Developers can now build support for exporting to this spec, or write scripts to translate from other transcript formats to this JSON spec. (JSON spec is attached to this post.) Guidance for non-developers While developers are adding support for this new format to their transcription tools, we’ve found that modern LLMs can do an excellent job of converting existing transcripts into this JSON format. Every LLM is different and their capabilities are always changing, so this advice is generalized
Beta versions of Premiere, After Effects, and Media Encoder now natively support Canon Cinema RAW Light files from the following Canon cameras: EOS C50 EOS R6 Mark III EOS R6 V EOS C400, with 3:2 / Open Gate firmware installedThis update allows you to import and edit raw files - up to 7K Open Gate - from these cameras. In addition, Premiere, After Effects, and Media Encoder continue to support raw video files from other Canon cameras. Raw settings - including Color Temperature, Tint, Exposure, Color Space, and Gamma - can be viewed and modified via Effects Controls > Source. If you have any questions or comments about this update, please let us know below. If you experience any performance issues or bugs, please share your OS, hardware specs, and specific camera recording settings.
Beta versions of Premiere, After Effects, and Media Encoder now natively support ARRICORE files from the ARRI ALEXA 35 Xtreme camera. ARRICORE files are approximately half the size of ARRIRAW and are similar in size to ProRes 4444. Unlike ProRes, exposure, white balance, and color tint settings can be changed non-destructively after capture, via the Source tab in the Effect Controls panel. More information about ARRICORE is available on ARRI’s website:ARRICORE overview Sample footageIf you have any questions or comments, please let us know!
Hey everyone! We’re excited to share a small but impactful quality-of-life update that just landed in Premiere Beta 26.2 (Build 14). You can now hide clip audio channel labels directly in the timeline.This update is all about giving you more control over how dense or minimal you want your timeline to feel, especially when working with multichannel audio or complex sequences.What’s New?You can now toggle the visibility of audio channel labels on clips in the timeline. When hidden, the timeline becomes cleaner and easier to scan, helping you focus on the waveform itself rather than extra overlays.This is particularly useful when:Working with multichannel clips Editing dense timelines Reading waveforms at a glance without obstructionWhere to find itThe new option lives in the Timeline wrench menu.You can toggle Show/Hide Audio Channel Labels on or off at any time, depending on your workflow and the level of detail you need in the moment.Bonus: This action can also be assigned to a custom
Beta versions of Premiere, After Effects, and Media Encoder now support X-OCN files from the Sony BURANO using firmware version 3.0. Firmware version 3.0 adds several important features to the BURANO, including:A full-frame 5.8K 6:5 recoding format for anamorphic shooting A Super 35 crop 3.8K 16:9 recording mode at up to 120 fps X-OCN recording support when the imager scan mode is set to S35 1.9K 16:9 up to 240 fpsMore information is available on Sony’s website: https://pro.sony/ue_US/products/professional-cameras/cinematography-burano-firmware-roadmapIf you have any questions or comments about this change, please let us know!
Beta versions of Premiere, After Effects, and Media Encoder now provide better support for ProRes RAW. Via Effects Control > Source, it is now possible to modify the attributes of a ProRes RAW file, including:Processing method ISO Exposure bias Color temperature Raw to log optionsProRes RAW support is available for all ProRes RAW files, including those recorded in-camera (e.g., iPhone 17 Pro, Nikon ZR), and those recorded by external recording devices from Atomos (e.g., Ninja, Shogun).ProRes RAW plugins are supported. These plug-ins enable camera manufacturers to provide their own custom processing pipeline, bypassing the default ProRes RAW pipeline. Two ProRes RAW plug-ins are currently available: iPhone 17 Pro - Pro Video Formats 3.1 (macOS only) Canon (ProRes RAW recorded using Atomos recorders) - Canon Plugin 1.2.0 for ProRes RAW (macOS only)Note: ProRes RAW support in our current, shipping Windows products relies upon installation of Apple’s Apple ProRes RAW for Windows 1.3 pa
In Premiere, our Speech to Text transcription model supports 18 languages. I am pleased to announce a new drop of our Speech to Text model in Premiere Beta, targeted for version 26.2. When you run transcription in Premiere, you should notice improved accuracy in languages, dialects, and overlapping dialogue.AccuracyExpanded language accuracy improvements: All of Premiere’s languages are showing higher accuracy. Some languages are seeing up to 36% reduction in errors.Better handling of overlapping dialogue: You should notice more words being attributed to the correct speaker as well improvements in the change points between speakers.English dialogue improvements: Premiere should be better at recognizing dialects for English speakers. When tested on both African American and Singaporean English data sets, Premiere has a 28% relative improvement in word error rate (tested in CORAAL and National Singapore Corpus).PerformanceTranscription wait time should be reduced, as long as you are on r
The Premiere Pro Team is excited to introduce a new Beta feature: Ripple Edit Live Feedback. This enhancement brings real-time visual feedback to ripple edits, allowing editors to instantly see how their changes affect the timeline as they work. By making ripple edits more transparent and intuitive, this feature helps streamline workflows, reduce errors, and improve sync across complex edits. Key Enhancement: Ripple Edit Live FeedbackWatch the timeline update dynamically as you perform ripple edits. Whether you're trimming clips or shifting content downstream, changes are reflected in real time. This eliminates guesswork and reduces the need to scrub back and forth. Why It Matters: Provides immediate visual confirmation of ripple edit impact. Helps maintain sync and rhythm across edits. Reduces the need for backtracking or rechecking. Makes the editing process faster, more precise, and more intuitive. Try It OutThis feature is available in the latest Beta build. Jump
We’re excited to release a new Smooth mode in Object mask to Beta which will let you create masks which handle fine edges better. When creating an Object Mask, you can now choose between Sharp and Smooth modes to achieve the best results for your specific masking needs. What's new The new Smooth mode creates masks with softer edges that are better suited for fine edges and detailed objects. This enhancement allows you to handle complex masking scenarios more effectively without compromising quality. Sharp mode Smooth modeMask quality modes Sharp mode Sharp mode continues to create masks as they are currently created, with crisp, well-defined edges. This mode is ideal for: Objects with clear, distinct boundaries Standard masking workflows Smooth mode Smooth mode creates masks with softer edges that provide superior handling of fine details. This mode is particularly useful for: Objects with intricate or delicate edges Hair, fur, or fabric textures Subjects with semi-transparent or
Now in Premiere Pro beta, the Obsolete Effects folder and plug-ins, Obsolete Transitions folder and plug-ins, and presets built from the obsolete effects are removed. These effects and transitions all have faster, modern alternatives either in Premiere Pro, or offered by third parties. Their current usage is extremely low but represent an outsized percentage of project slowdowns and performance bottlenecks. Please see the table below for suggested alternatives. CAN I OPEN OLDER PROJECTS THAT HAVE OBSOLETE EFFECTS & TRANSITIONS IN 24.6? Yes. You can open projects made in a previous versions of Premiere Pro that contain the removed obsolete effects and transitions. The effects and transitions will still appear in your sequences, and in the Effects Control Panel on the clips they’ve been applied to, but the Obsolete Effects folder, Obsolete Transitions folder and four Presets folders – Bevel Edges, Solarize, Convolution Kernel and Blurs (Win Only) will not be acce
We’re excited to introduce a powerful new tool in Premiere Pro Beta: Sequence Index – a smarter, faster way to navigate complex edits. Built for professionals working with dense, multi-track sequences, Sequence Index provides a comprehensive, spreadsheet-style view of all assets and attributes in a sequence. Whether you're trying to locate specific clips, identify flash frames, or filter for clips with effects or speed changes, this new feature makes it dramatically easier to search, sort, and troubleshoot your timeline. Why this matters Today, searching for specific clips or effects in long timelines is a manual, time-consuming process. There’s no simple way to surface offline media, spot transitions, identify what effects are used where, or track down issues without scanning every edit. With Sequence Index, we’re removing that friction, giving you an interactive, sortable table of your entire sequence that updates in real time as you edit. What you can do with it View every c
Hey everyone! We are excited to share that Global and Contextual Audio Mute is now available in Premiere Beta (Build 36). This has been a long standing request from many of you, and we are finally bringing it to life.What’s New? With Global Mute you now have full control over how and when Premiere plays audio. You can mute the entire application or mute only the Program Monitor or Source Monitor depending on your workflow. Where to find it There are multiple ways to access these new mute controls: Transport ControlsYou will find a mute button directly in the transport bar of both the Program Monitor and the Source Monitor. The icon clearly shows mute and unmute states, and it works together with the contextual meters of your active sequence or clip. When mute is enabled, the contextual meters will gray out to give you an extra visual confirmation of the mute state. Universal Header BarWe have also added a mute control in the Universal Header Bar. This
We’ve taken a fresh look at the application, panel, and context menus across Premiere Pro and developed a new organizational system to bring editors all the same functionality in a more concise and discoverable way. Even on a 13-inch laptop, you’ll never have to scroll a menu to get your work done. Our approach to organizing the menus: Aggressively organize into submenus. Commands stay in the same menu as before, but the submenus mean the menu stays short and readable. Give useful names to the new submenus. Editors new to Premiere Pro can more quickly learn what the menu items do. Be consistent when similar items appear in different menus. Whether in the Project or Timeline panel, common items like “Label” or “Media File Properties” appear in the same parts of menus. Across the application, menus that were updated average a 40% reduction in height, with some menus shrinking by half. This is a big change to the feel of using Premiere Pro, and while we took time an
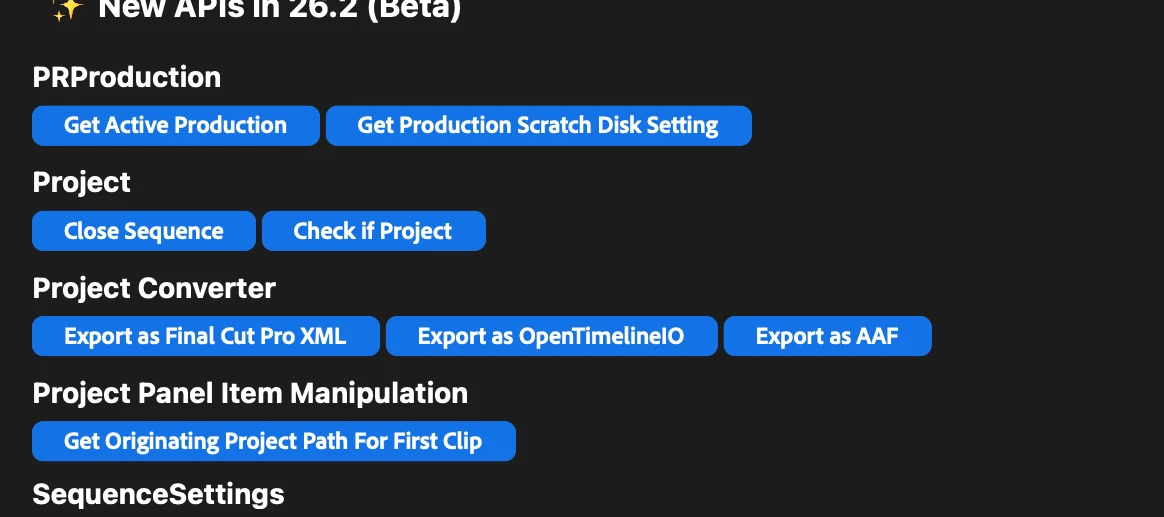
Hello, Premiere integration partners! We’ve added lots of new APIs to the premiere-api sample plugin; updated documentation to follow. These APIs are available in current beta builds, and in our next official release. Please direct any technical questions to the Premiere UXP Developer Forum. We hope you find them useful; more API expansion, coming soon! Thanks for developing your integrations, with Adobe products. -bbb Bruce BullisSenior Engineering ManagerPremiere Pro Integrationbbb@adobe.com
Edit: these effects are now available in Premiere v26.2. If you have question or comments, please post them in the Premiere forum: https://community.adobe.com/p/premiere We are adding some exiting new effects and transitions to Premiere, and they are ready to test out in beta right now. Effects (Gradient, Channel blur, Noise); Transitions (3D spinback, Push). Keep reading for descriptions of each. Gradient effectFind it in: Effects panel > Video effects > GenerateGradient is a new generator effect designed as a modern replacement for Ramp. It’s a great tool for creating background textures with support for a wide range of visual styles. It supports both linear and radial gradients and adds expanded color and texture controls for more creative flexibility. Gradient gives you precise control over position, scale, orientation, repetition, mirroring, interpolation, feathering, and grain, with master opacity and alpha preservation for predictable compositing. Color controls let you
We’re excited to announce a major update to our Content Credentials workflow in Premiere on desktop and Media Encoder. You can now use Content Credentials to add your identity to your work, helping you safeguard your creativity and build trust with your audience. What’s New? Sign your work with your verified name: Attach your real identity to your content, so viewers know it’s authentically yours. (requires a verified LinkedIn profile) Connect your social accounts: Link your social media profiles to your output, making it easier for your audience to find and follow you and your work. Ask generative AI models not to use your content: After adding your name or social accounts, you can request that generative AI models not use your content for training, helping to prevent creative theft. Participating models respect the “Do Not Train AI” request, but not all AI systems may comply. Premiere and Media Encoder can use your preferences from the Adobe Content Aut
Premiere Pro Beta has support for Open Timeline IO interchage format (OTIO). Our current implementation includes the basic information for interchange with other products that support the OTIO standard: names cutlist with clips at correct place in sequence source in/out durations starting timecode and timecode formats fps multiple tracks track names linear speed sequence markers (start time, duration, name, color) Premiere Pro's OTIO support includes Premiere round-tripping information as well: clip markers (start time, duration, comments, name, color). Seqence frame size Sequence sample rate When importing OTIO files created outside of Premiere Pro, some sequence settings may not transfer automatically and will require manual adjustment. To export a sequence to OTIO, go to File menu/Export/OpenTimelineIO. To import an OTIO sequence, go to File menu/Import or use the Media Browser. Please give OTIO Import and Export a try and l
Dear users, Beginning in the public beta version releasing on Wednedsay, August 14th, we’ll be making a minor change to how muting is handled in the effects control panel to simplify the process. In the Effects Controls panel, you will no longer have 2 ways to bypass keyframes on the Volume effect. The fx button behavior is unchanged. The control formerly called “Bypass” has been replaced with “Mute,” which will make the audio silent. If you were using “Bypass” in an existing project, you will need to switch to use the Fx button instead, otherwise your audio will be silent. If you wish to bypass your volume keyframes in the future, simply press the “fx” button on the left. In addition, in cases where Mute was activated via the Essential Sound Panel, and then individual channels altered, the Mute button in the Essential Sound Panel will no longer be checked. The mute effect will now be applied through the Effects Control Panel. &
Remix with Firefly Community Gallery
Thousands of free creations to fall in love with and remix in Firefly.
Already have an account? Login
Enter your E-mail address. We'll send you an e-mail with instructions to reset your password.