























Master Photoshop with the help of our global community.
Recently active
The June 2026 Photoshop update is here, bringing more creative choices and meaningful workflow fixes. What’s newThis release expands creative choice in Generate Image with access to custom‑trained AI models, similar to what you’ve seen with Generative Fill. You can now choose from Adobe and partner models, including Firefly Image 5, Flux.2 Pro, and Gemini, making it easier to explore different visual styles, achieve stronger photorealism, and get results that stick closer to your prompts. Whether you’re experimenting with concepts or polishing production‑ready visuals, having multiple models at hand gives you more control over how your ideas come to life. Bug fixes — thanks to you!Your feedback continues to shape these updates. In this release, we’ve addressed several customer‑reported issues to make everyday workflows more reliable:Canvas size relative mode fields display incorrect default values, reject zero and negative values, and use incorrect increment steps. Add support to renam
A realistic shadow helps your subject feel grounded in the scene. In Photoshop, there are several ways to create one, depending on your subject and lighting. Based on workflows shared by experts in the Photoshop community, we've brought together a few of the most effective techniques here. Choose the method that best fits your workflow. Method 1: Using Generative AIAI can speed up the setup, but you will still get the best results by refining the shadow yourself.Use Select Subject or Remove Background to quickly isolate your object. Use Generative Fill to extend the surface where the shadow will fall. Learn more. You can also use Harmonize. It analyzes the lighting, color, and tone of the scene, and can also generate a matching shadow to help the subject feel more naturally integrated. Learn more. Refine the generated shadow manually using one of the methods above for the most realistic result. Method 2: Drop Shadow EffectThis is the quickest way to add depth and separation to elemen
We've split the Photoshop community into two dedicated spaces so you can find the conversations, tips, and apps that fit how you actually work:🖥️ Photoshop (Desktop & Web)📱 Photoshop Mobile Two focused communities mean more relevant content, better discussions, and an easier way to connect with creators and experts who work the way you do. Were you part of the Photoshop Ecosystem community? That space has been renamed Photoshop and is now home to all Desktop and Web conversations. To jump in, head to the App Communities page and select Photoshop. You'll find desktop-first editing techniques, inspiration, and a place to share your creations. On mobile? Drop into the new Photoshop Mobile community to explore the space and connect with fellow mobile creators. We'd love to hear from you. Does separating Desktop & Web from Mobile make it easier to find what you need? Explore the new spaces and let us know how they're working for you in the comments.
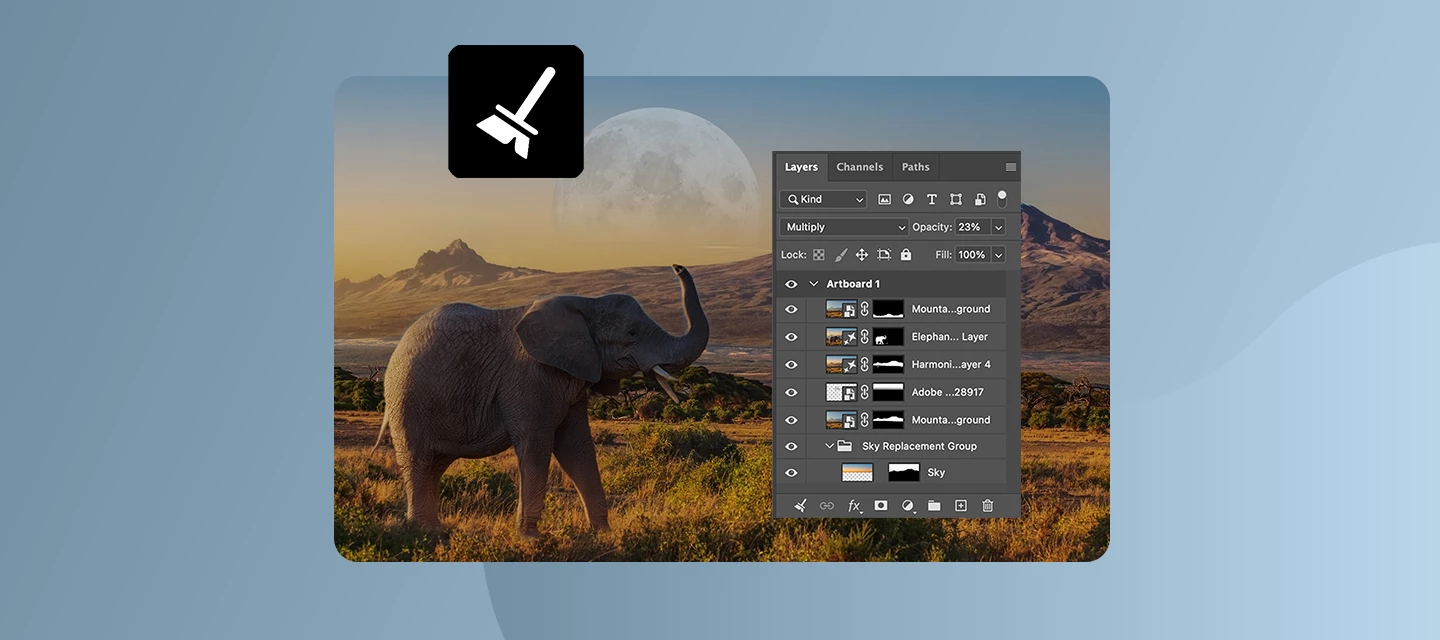
Keeping your Layers panel organized just got a whole lot easier. Layer Cleanup in Photoshop 27.6 and above automatically deletes empty layers and renames layers based on their content, so you can focus on creating, not housekeeping. With a single action from the Layers panel, Photoshop scans your document and removes blank pixel or text layers that tend to pile up during exploration. At the same time, it can intelligently rename layers, giving them clear, descriptive names that reflect what’s inside, so you no longer have to guess what “Layer 37 copy 2” contains. You’re in control of how much cleanup happens. Run it across the entire document for a full reset, or apply it only to selected layers when you want to tidy up as you go. Here is a quick tutorial demonstrating this feature. Why this mattersFaster navigation in complex files Cleaner handoffs when sharing PSDs with teammates Less friction when revisiting older projects Better layer discipline without manual effortWhether you’r
Help us shape this community: What content do you want to see? Whether you're a longtime community member or just found this space, your input will directly shape what we publish here. We want this to be a place you return to, not just when something breaks, but when you want to learn, get inspired, or connect with other creatives. What we’re considering:🚀 Feature Highlights: What’s new in Photoshop, explained with real workflows.📖 How-to Guides: Step-by-step tutorials for common tasks, errors, and workflows.💬 Community Discussions: Polls, questions, and conversations about how you work.🌟 Community Highlights: Spotlighting community members, standout work, and creative journeys. We’d love to hear your thoughts:What type of content do you find most useful when you visit this forum? Is there a Photoshop topic you keep looking up but never find a great answer for here? Would you want to share your own creative workflow or be featured in a community highlight? What kind of projects wou
How to Report a Bug in the Adobe App Community Run into something that’s not working the way it should in Photoshop? Let’s tackle it together. When you share bugs in the Adobe Community, you’re helping product teams see what’s really happening, recreate the issue, and fix things faster. Think of this guide as your sidekick—it’ll walk you through creating a clear, helpful bug report, no technical expertise needed. Before you startBefore jumping in with a new bug report, take a quick look around the community to see if someone’s already spotted the same issue. If you find a matching post, add your vote and feel free to add your experience there instead of starting from scratch. It keeps everything in one place and helps the team connect the dots and solve things faster. Note: Any duplicate posts will be merged into a primary post that you can follow for updates on the issue. What makes a good bug report?A great bug report tells the full story it explains what happened, what you expected
Create a GIF from a series of photos or a video clip Have you ever wanted to create a GIF of your own to post on social media? It really isn't hard!You can easily turn a series of photos or a segment of a video into an animated GIF in a few minutes using Photoshop. Here's how: Create a GIF from a series of photos Step1: Import the still photos you want to use to create a GIF Identify a series of photos that would make a good GIF Open Photoshop and go to File > Scripts > Load Files into Stack Click Browse and locate the photos you want to use (Use the Shift key to select more than one file) and click Open Click OK to import the photos into layers If it is not already open, click on Window > Timeline to open the Timeline panel Click the arrow to the right of the Create Frame Animation button in the middle of the Timeline panel and select Create Frame Animation Now click the Create Frame Animation button to the left of the arrow and it should look something
im trying to change the ppi of an image that is suppose to be at 1200 but reads as 72. I open the image in Mac and resolutions reads 72 even thought the originator said its suppose to be 1200. I then open it in PS, go to image, size and change to 1200ppi & resample then save as. Yet image is still at 72. How do I get art to stay & save at 1200?
Hi, hope someone can help, I am trying to track down a compatible version of DNG converter app (for Mac) as the current version available isnt compatible with my computer.Adobe, in their infinite wisdom, have removed all previous versions and despite getting in touch with their labourious online chat system their standard reply is 'update to the latest Mac OS'...something I can't do currently - and knowing they do exist would rather not shell out for a whole new machine just to overcome this very simple problem...(Feels very much like pulling LR6 support 'update your computer' seems a standard reply, which is utterly ridiculous). So, if there is anyone out there with a link/resouce to these it would be greatly appreciated. I run one machine on 10.12.6 (Sierra) and another on 10.11 (El Cap)... Many thanks!
I've been using Adobe for over 20 years, and I've encountered more issues in the past year than I did in the previous decade combined. I can’t be the only one feeling this.
I have a 2017 iMac running macOS Ventura 13.7.8. According to the forum, the best version of Photoshop is 23.x. Where can I download this version?
Action now produces a bluish, washed-out image instead of improved tones. Worked recently but now fails. Photoshop 27.9.0 on M1 Ultra/macOS 26.5.2. First Action step alone causes issue. Manual Levels Auto corrects it. Auto Tone shows same fault. Tested PSD/PNG/JPG.
SummaryA regression was introduced between Photoshop 27.4 and Photoshop 27.5 affecting Adobe Fonts integration.Starting with Photoshop 27.5, Photoshop permanently displays a fixed set of Adobe Fonts in the font picker, even when those fonts are not synchronized.The issue is isolated to Photoshop and does not occur in Illustrator, InDesign, or other Adobe applications.The regression is still present in the latest Photoshop release (27.8.x) and in Photoshop Beta.EnvironmentOperating SystemWindows 11 (clean installation)Adobe Applications TestedPhotoshop 27.4.x → Works correctly Photoshop 27.5.x → Regression introduced Photoshop 27.8.x → Issue persists Photoshop Beta → Issue persists Illustrator → Works correctly InDesign → Works correctlyCreative Cloud DesktopLatest available versionAdobe FontsEnabled only for manually synchronized fontsExpected BehaviorPhotoshop should display:Locally installed fonts. Adobe Fonts that are currently synchronized.If a synchronized Adobe Font is removed (d
Photoshop v27.9 auto updated but got stuck and so I cancelled it and now it is stuck cancelled. No way to reset or reinstall photoshop app on desktop (mac).
That’s a pretty big issue: Open a file Edit it launch Image Process using the same folder of the opened file as targetAt end end of the process all opened file get closed, withouth asking for saving.I’m getting pissed off about this, every release one fix and two regressions.
If a file is over the “Save for web” maximum resolution of 8192px it scales down the image to max res. Even though exporting slices that are smaller than the max. res. (1080x1350px) it still scales it down to about 75%. The original file is 10800x1350px big, and has 10 slices á 1080x1350px that are scaled down to a height of 1024px.
I have an image that that someone has sent to me and is suppose to 1200ppi. It's a .gif. When I open in Mac, resolution reads 72. I need it to be 1200. I then open it in PS, go to image size, change it to 1200 and resample and saved as. Yet when I open it, it still reads 72. How do I get it to stay at 1200 ppi??
So as the title explain my computer is dead and i wont be able to use my adobe subscritption for a while.I would like to unsuscribe from Adobe but without the fees since the situation is not something that i can do anything about… Thank for your help
I upload my PHOTOS from my Nikon Z9 to my MacBook Pro. ALL MY SYSTEMS are updated to the latest versions of operating systems, apps, etc. Since ADOBE updated all three of these (Adobe Photoshop, Photoshop Beta and Camera Raw) my photos are taken by ADOBE PHOTOSHOP and look OK but when CAMERA RAW coverts them to JPEG files, they are murky and cloudy. Even if I skip the first step, the photos are no longer delivered to Photoshop as vibrant although they are much better looking in the viewfinder and using the PREVIEW function.
Hello,I have encountered what appears to be a GPU-related rendering bug when converting RGB images to CMYK in Photoshop.SystemPhotoshop 27.8 macOS Tahoe 26.5.2 Mac Studio M2 Ultra Apple Silicon GPUProblemWhenever GPU acceleration is enabled, converting an RGB image to CMYK produces severe black rendering artifacts across the image. The artifacts appear immediately after the color conversion and make the document unusable.The issue occurs with multiple images and is fully reproducible on my system.Steps to ReproduceOpen an RGB image. Make sure Use Graphics Processor is enabled under Preferences > Performance. Convert the document to CMYK (either Image > Mode > CMYK Color or Edit > Convert to Profile). Large black artifacts appear throughout the image.Expected ResultThe RGB image should convert normally to CMYK without any visual corruption.Actual ResultThe converted image contains large black rendering artifacts that were not present in the original RGB document.WorkaroundDi
My PC lost power exactly as I was saving a large catalog. The file is 784 MB. I cannot open it in Photoshop, Photopea, or third-party repair tools.I verified with a hex editor that the 8BPS header and XMP metadata are intact, so it is not filled with zeroes. However, when I used ImageMagick to extract layer [0], it output a solid black PNG.Can anyone with advanced hex/scripting knowledge see if the individual layers are still recoverable? https://drive.google.com/file/d/1TyaifQjGDj-Fb2ooZsyHPVXr_rdpMZKS/view?usp=sharing
Ever open a photo and notice one thing that just doesn’t belong, a passerby, a wire, a random object stealing focus? The Remove tool in Photoshop makes those distractions disappear in just a few strokes, so your subject stays front and center.With the Remove tool, you simply brush over what you want gone, and Photoshop fills the space intelligently to match the surrounding area. No complex selections, no cloning gymnastics, just clean results that blend naturally into your image. Flexible AI, your wayThe Remove tool gives you control over how AI helps with your edit:Auto lets Photoshop decide the best method for the job Generative AI on uses AI to produce more context-aware results (with cloud or on-device processing) Generative AI off keeps things classic when you want full manual controlIf you prefer keeping things local, you can also run the on-device model, which processes removals directly on your machine after the model is downloaded—great for faster edits or working offline (sys
I’ve been compositing this project for a bit and I’ve been running into problems. One of them is this blur that happens when I remove parts of the masks. I use a soft-edge brush to remove the parts of the subject. If I use the hard-edge, it will give a bizarre result. Not all of the time this happens but this is often. Can anyone help me out with this particular issue?
llevo bastante queriendo ediitar una foto en 360 y photoshop no me lo permite, ni los videos de premier, ya hoy en 2026 adobe deberia estar listo para el 360
When I create a droplet in Photoshop 2025, it creates a folder instead of an EXE file. What is the solution?
Remix with Firefly Community Gallery
Thousands of free creations to fall in love with and remix in Firefly.
Already have an account? Login
No account yet? Create an account
Enter your E-mail address. We'll send you an e-mail with instructions to reset your password.