  • 1335 Product updates

🔎 Quick Tip : How to save image as PNG for Mix Workflow in iOS device

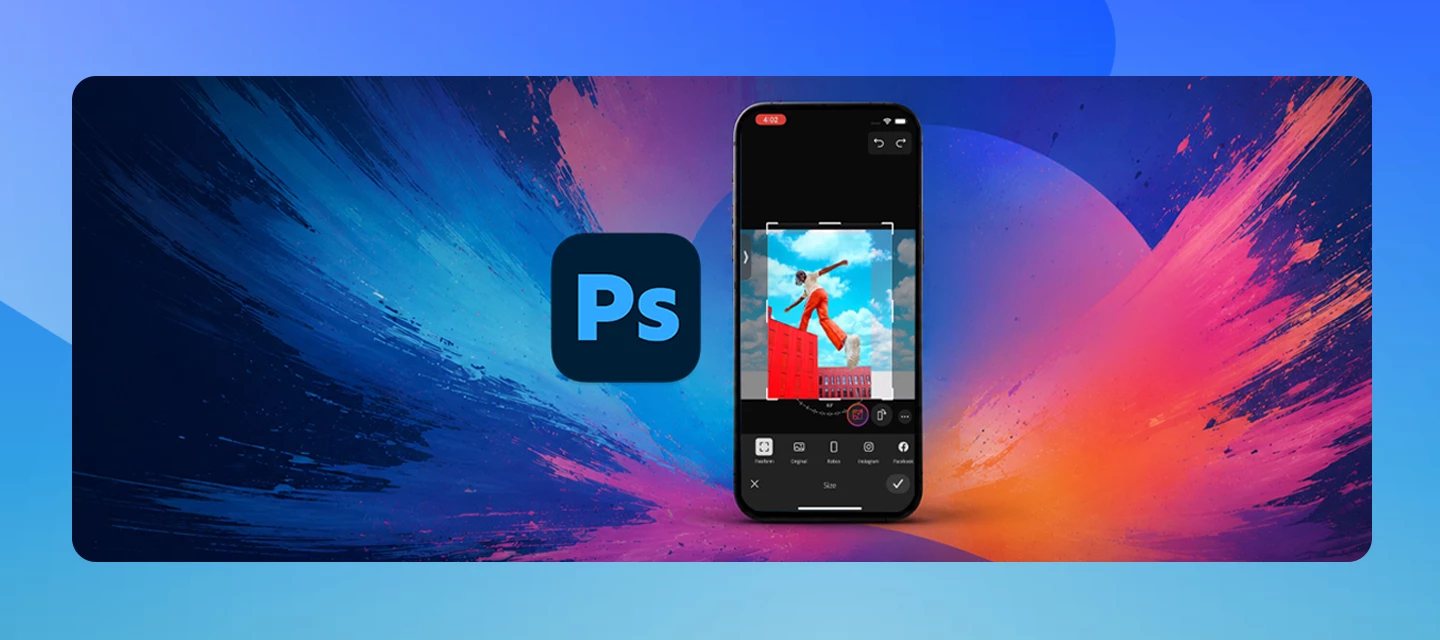
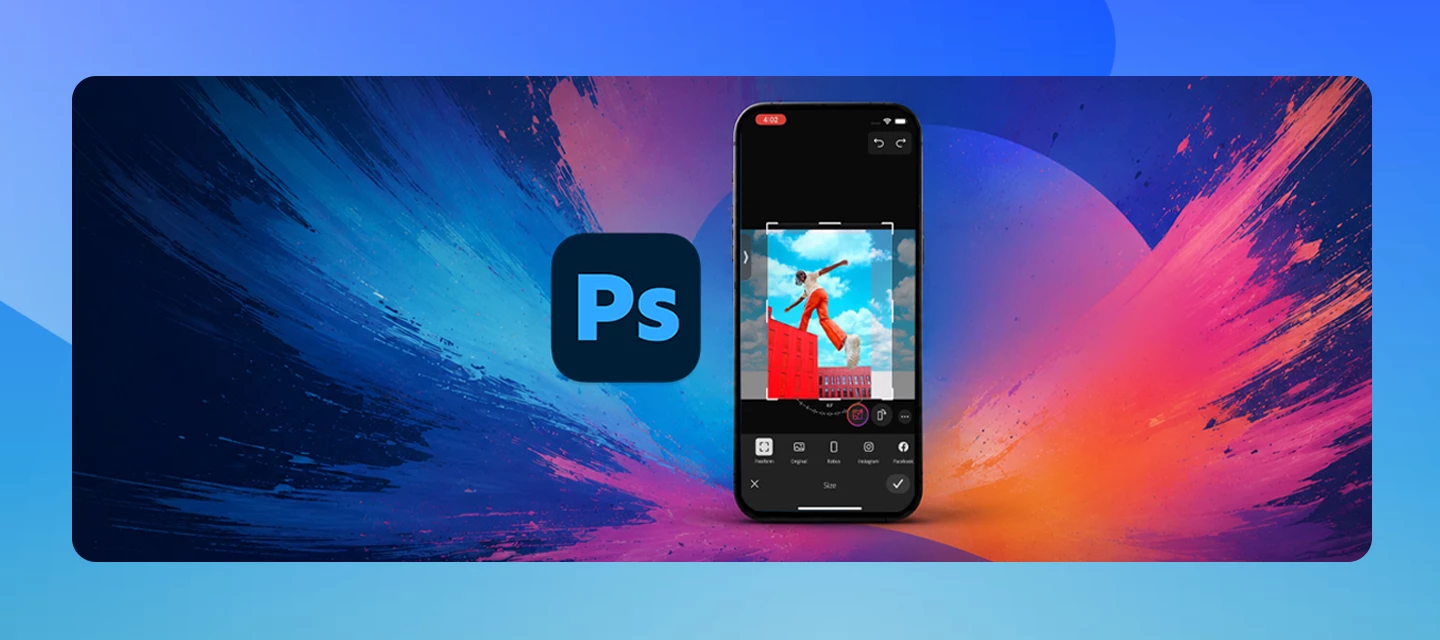
  Try it on mobile   Saving Images as PNG format in Mix Workflow Learn how to save images in PNG format in Mix workflow (Combine photos) on your iPhone device.        Quick steps to save an image to PNG   ❶ Select the image from your photo library ❷ Make a quick selection of the editing options you want to apply to the image using one of the selection tools available and Refine the selection. ❸ Commit to the selection when you're happy and click on the export and share option (which tells you if your image is in JPEG or PNG format). ❹ Click on the image format type mentioned, and you will find an option to change it, then click save.   Please Note:    If you open an Image in PNG, then by default, it will get saved as PNG (You will have the option to change to JPEG from share settings) If you open a JPEG image, it will be saved by default as JPEG (it cannot be changed to any other type).     Important Update on RAW photo support   RAW support for iPhone 15 was added with the 23.47.0 release.   To edit RAW images taken from an iPhone 15 PRO, please update Photoshop Express to 23.47.0 or later from the iOS App Store.     Vote! Threads in the Community forum now have an UpVote feature. The Photoshop Express team uses this vote count to know which bugs or issues are most important to you. If you're seeing a similar problem or bug that has already been reported, add your vote!      Useful Links   Get started with Photoshop Express on iOS: Learn how to use Adobe Photoshop Express on iOS devices. Get started with Photoshop Express on Android: Learn how to use Adobe Photoshop Express on Android. System requirements: Find the minimum technical specifications to use Adobe Express. FAQ: Get answers to common questions about Photoshop Express Quick actions: Get answers to common questions about Quick actions.      

各製品の設定バックアップについて

アプリの削除やPC環境の移動が必要になる場合、以下を参考に必要な設定のフォルダーをデスクトップなど分かりやすい場所へコピーして、バックアップを実施ください。 バックアップとして保存した設定は、再インストール後や別のPC環境へ移動した際にそのフォルダーを同じ場所へコピーや移動をすることで同じ設定をご利用いただけます。   ※サードパーティ製のプラグインやプリセットの場所は、各メーカーへお問い合わせください。場合によっては再インストールが必要な場合もございます。   以下のパスには、オペレーティングシステムの初期設定では非表示のフォルダーが含まれています。指定のフォルダーが見つからない場合、表示させる方法について以下の文書を参照してください。 隠しファイルおよび隠しフォルダーを表示する方法(Windows 10/8.1/8/7/Vista/XP) 非表示のユーザーライブラリフォルダーにアクセスする方法(Mac OS X 10.7 以降)   ------------------------------------------------------------- ■Photoshop 【UIなどの一般設定、アクション、ブラシやパターンなどの設定、ワークスペース(レイヤーなどのパネル位置情報)】 Windows  C:\ユーザー\<ユーザー名>\AppData\Roaming\Adobe\Adobe Photoshop<バージョン>\Adobe Photoshop <バージョン> Settings  Mac  Macintosh HD/ユーザ/<ユーザー名>/ライブラリ/Preferences/Adobe Photoshop <バージョン>Settings    【保存したプリセット】  Windows  C:\ユーザー\<ユーザー名>\AppData\Roaming\Adobe\Adobe Photoshop<バージョン>\Presets  Mac  Macintosh HD/ユーザ/<ユーザー名>/ライブラリ/Application Support/Adobe/Adobe Photoshop<バージョン>/Presets    【CameraRawの各設定 ※RAW(ロウ)画像を編集するときなどの設定】  Windows  C:\ユーザー\<ユーザー名>\AppData\Roaming\Adobe\CameraRaw  Mac  Macintosh HD/ユーザ/<ユーザー名>/ライブラリ/Application Support/Adobe/CameraRaw      ------------------------------------------------------------- ■Lightroom Classic  【一般設定】  Windows  C:\Users\[ユーザー名]\AppData\Roaming\Adobe\Lightroom\Preferences\Lightroom Classic CC 7 Preferences.agprefs  Mac  /Users/[ユーザー名]/Library/Preferences/com.adobe.LightroomClassicCC7.plist    【各種プリセット】   Windows  C:\Users\[ユーザー名]\AppData\Roaming\Adobe\Lightroom  Mac  /Users/[ユーザー名]/Library/Application Support/Adobe/Lightroom    【現像のプリセット】(LightroomClassic7.3以降)    Windows  C:\ユーザー\<ユーザー名>\AppData\Roaming\Adobe\CameraRaw  Mac  Macintosh HD/ユーザ/<ユーザー名>/ライブラリ/Application Support/Adobe/CameraRaw    ※カタログと共にプリセットを保存している場合には、カタログフォルダーがあれば上記プリセットは必要ありません。   以下のコミュニティ記事も併せてご参照ください。【Lightroom Classicのデータを別のパソコンに移動する方法について】 https://adobe.ly/3PxZHeE   ------------------------------------------------------------- ■Lightroom   クラウドにデータが同期されている場合設定のバックアップは必要ありません。同じAdobe IDでログインをすることで必要な設定や画像は同期されます。 画像やプリセットが同期されているのかを確認する場合、以下Lightroom Web版へアクセスしてご確認ください。 https://lightroom.adobe.com/     ------------------------------------------------------------- ■Illustrator 【一般設定、アクション、新規ドキュメント情報、ワークスペース、文字組み等】  Windows  C:\Users\<ユーザー名>\AppData\Roaming\Adobe\Adobe Illustrator <バージョン> Settings  Mac  Macintosh HD/ユーザー/<ユーザー名>/ライブラリ/Preferences/Adobe Illustrator <バージョン> Settings    【ユーザー定義スウォッチや禁則処理設定等】(Macのみ)  Mac  Macintosh HD/ユーザー/<ユーザー名>/ライブラリ/ApplicationSupport/Adobe/Adobe Illustrator<バージョン>      ------------------------------------------------------------- ■InDesign  【一般設定、ワークスペース、合成フォント、プリフライト設定】  Windows  C:\Users\<ユーザー名>\AppData\Roaming\Adobe\InDesign\Version <バージョン>-J  Mac  Macintosh HD/ユーザ/<ユーザー名>/ライブラリ/Preferences/Adobe InDesign/<バージョン>-J      ------------------------------------------------------------- ■Premiere Pro  【一般設定】  Windows  C:\Users\<ユーザ名>\Documents\Adobe\Premiere Pro\<バージョン>\Profile-<ユーザー名> Mac  Macintosh HD/Users/<ユーザー名>/書類/Adobe/Premiere Pro   【モーショングラフィックステンプレート】  Windows  C:\Users\user\<ユーザー名>\AppData\Roaming\Adobe\Common\Motion Graphics Templates Mac  Macintosh HD/Users/<ユーザー名>/Library/Application Support/Adobe/Common/Motion Graphics Templates   【カスタムLUT】※追加していない場合はフォルダが存在しません。 Windows  C:\Users\<ユーザー名>\AppData\Roaming\Adobe\Common\LUTs   C:\Program Files\Adobe\Common\LUTs Mac  Macintosh HD/Users/<ユーザー名>/Library/Application Support/Adobe/Common/LUTs   Macintosh HD/Library/Application Support/Adobe/Common/LUTs      ------------------------------------------------------------- ■AfterEffects 【一般設定】  Windows  C:\Users\<ユーザー名>\AppData\Roaming\Adobe\After Effects\Version <バージョン>  Mac  Macintosh HD/Users/<ユーザー名>/ライブラリ/Preferences/Adobe/After Effects     ------------------------------------------------------------- ■Dreamweaver 【一般設定】  Windows  C:\Users\<ユーザー名>\AppData\Roaming\Adobe\Dreamweaver<バージョン>\ja_JP\Configuration Mac  Macintosh HD/ユーザー/<ユーザー名>/ライブラリ/Application Support/Adobe/Dreamweaver<バージョン>/<バージョン>\ja_JP\Configuration   サイト設定については以下文書をご確認ください。 【Dreamweaver サイトの設定の読み込みおよび書き出し】 https://helpx.adobe.com/jp/dreamweaver/using/import-export-dreamweaver-site-settings.ug.html   ------------------------------------------------------------- ■XD 設定のバックアップは不要です。   ------------------------------------------------------------- ■Animate 【一般設定】 Windows  C:\Users\<ユーザー名>\AppData\Roaming\Adobe\Animate  Mac  ユーザー/<ユーザー名>/ライブラリ/preference/Adobe/Animate      ------------------------------------------------------------- ■Acrobat 【スタンプ格納ディレクトリ】 Windows  C:\Users\<ユーザー名>\AppData\Roaming\Adobe\Acrobat\DC\Stamps  Mac  Macintosh HD/ユーザー/<ユーザー名>/ライブラリ/Application Support/Adobe/Acrobat/DC/Stamps   証明書に関しては、必要に応じて以下文書を参考に書き出しをお願いします。 【証明書の書き出しと取り込み】https://helpx.adobe.com/jp/acrobat/kb/cq07131410.html   --------------------------------------------------------------------------------------- 【その他設定】   ■カスタマイズしたカラーや構成設定 Windows  C:\ユーザー\<ユーザー名>\AppData\Roaming\Adobe\Color Mac  Macintosh HD/ユーザ/<ユーザー名>/ライブラリ/Application Support/Adobe/Color/   ■PDFプリセット Windows  C:\ユーザー/[ユーザー名]¥AppData¥Roaming¥Adobe¥Adobe PDF¥Settings Mac  Macintosh HD/ユーザ/<ユーザー名>/ライブラリ/Application Support/Adobe/Adobe PDF/Settings      

Changes to Adobe Creative Cloud Storage Experience

  To enhance the Adobe Creative Cloud storage experience, we would like to inform you of upcoming changes to the Creative Cloud file syncing service that may impact your workflow.   Creative Cloud has previously enabled personal users to save files on their local devices in a folder called Creative Cloud Files. The contents of this folder can be synced (copied) to the user’s cloud storage via a process that runs on the local device. You can access those files locally on the device in a folder named Creative Cloud Files or through the Creative Cloud website within the Launch More menu (from the Synced files option)   Discontinuation of Synced Files: We would like to inform you that the Synced Files feature in Creative Cloud will be discontinued. Starting February 1, 2024, the Creative Cloud desktop synchronization service and the folder and file-sharing capabilities of Creative Cloud Synced Files will be phased out.   Impact on Users: If you are a personal user (free or paid) relying on Creative Cloud Synced Files for file syncing, folder sharing, or collaborative work, please be aware of the following changes: Files in the Creative Cloud Files local folder will no longer be copied to cloud storage. Copies of files in cloud storage related to Synced Files will be deleted. Files and folders shared with other users from Synced Files will no longer be accessible. Adobe apps leveraging Creative Cloud Synced Files for cross-device file sharing will remove those integrations. Your Assets are Secure: Rest assured, all assets in your local Creative Cloud Files folder on your device will remain intact and under your complete control. You have the option to leave the assets in the Creative Cloud Files folder or move them to other Adobe-supported storage solutions such as Frame.io or Adobe Experience Manager (AEM) assets. Additionally, third-party cloud storage solutions with sync capabilities are viable alternatives.   Adobe continues to offer and support cloud storage and syncing across Creative Cloud with Cloud Documents, Creative Cloud Libraries, Lightroom Cloud storage, and Frame.io cloud storage. None of these cloud storage solutions are impacted by this change. Quick Links Discontinuation of Creative Cloud Synced files Discontinuation of Creative Cloud Synced files for business plans  Creative Cloud Synced Files End of life for Premiere Rush   Creative Cloud Synced Files End of life for Media Encoder   Creative Cloud Synced Files End of life for Premiere Pro      Hey community! Upvote if this post was helpful, and leave a comment to join the conversation.

Changes to Adobe Creative Cloud Storage Experience

  To enhance the Adobe Creative Cloud storage experience, we would like to inform you of the upcoming changes to the Creative Cloud file syncing service that may impact your workflow.   Creative Cloud has previously enabled personal users to save files on their local devices in a folder called Creative Cloud Files. The contents of this folder can be synced (copied) to the user’s cloud storage via a process that runs on the local device. You can access those files locally on the device in a folder named Creative Cloud Files or through the Creative Cloud website within the Launch More menu (from the Synced files option).    Discontinuation of Synced Files: We would like to inform you that the Synced Files feature in Creative Cloud were discontinued. Starting February 1, 2024 (now extended through February 3, 2025), the Creative Cloud desktop synchronization service, folder, and the file-sharing capabilities of Creative Cloud Synced Files were phased out.   Impact on Users: If you are a personal user (free or paid) relying on Creative Cloud Synced Files for file syncing, folder sharing, or collaborative work, please be aware of the following changes: Files in the Creative Cloud Files local folder will no longer be copied to cloud storage. Copies of files in cloud storage related to Synced Files will be deleted. Files and folders shared with other users from Synced Files will no longer be accessible. Adobe apps leveraging Creative Cloud Synced Files for cross-device file sharing will remove those integrations.   If your Creative Cloud desktop version is less than 6.0, you should mandatorily make a copy or export files in your local Creative Cloud files folder to your chosen destination. They will be deleted from your local drive when cloud copies are deleted.   Your Assets are Secure: Rest assured, all assets in your local Creative Cloud Files folder on your device will remain intact and under your complete control. You have the option to leave the assets in the Creative Cloud Files folder, but we highly recommend to move them to a different local folder or to the other Adobe-supported storage solutions such as Frame.io or Adobe Experience Manager (AEM) assets. Additionally, third-party cloud storage solutions with sync capabilities are viable alternatives.   Adobe continues to offer and support cloud storage and syncing across Creative Cloud with Cloud Documents, Creative Cloud Libraries, Lightroom Cloud storage, and Frame.io cloud storage. None of these cloud storage solutions are impacted by this change. Quick Links Discontinuation of Creative Cloud Synced files Discontinuation of Creative Cloud Synced files for business plans  Creative Cloud Synced Files End of life for Premiere Rush   Creative Cloud Synced Files End of life for Media Encoder   Creative Cloud Synced Files End of life for Premiere Pro      Hey community! Upvote if this post was helpful, and leave a comment to join the conversation.

Download and Install Community Guide

Utilizing Adobe desktop applications can be a delightful experience that helps unleash our creative expressions through an ever-growing universe of art forms. It can also be frustrating when those Adobe applications fail to update or download, blocking us from our critical need to use a desktop app to edit a video, update a newsletter, read a PDF file, design brochures, restore and modernize photos, and so much more. Often, the only limit we encounter is when Photoshop fails to install or Acrobat may get stuck due to a conflicting process. The Adobe Community can help guide you on how to fix download and install error messages, regardless of whether you are an individual User or are offered access through an organization or Employer. Please see below for more information on where to find answers to the most common download and install-related questions. You can also use this guide to post any new questions or concerns to the Community of Experts best able to understand your situation. For Creative Cloud for Enterprise and Teams members, please contact your local administrator for assistance and see https://helpx.adobe.com/enterprise/using/support-and-expert-services.html for more information on how they can contact us if they need help. Community Forums: Download and Install Enterprise & Teams Acrobat Adobe Acrobat Online Acrobat SDK  Acrobat Reader Substance 3D Painter Bugs Substance 3D Designer Bugs Substance 3D Modeler Bugs Substance 3D Stager Discussions Substance 3D Plugins Bugs

【既知の問題】Premiere Elements2024で確認された問題について

Premiere Elements2024において確認された問題をご案内致します。   【テキストスタイルが1つしか表示されない】 ●確認されている症状 文字のスタイル選択時に〔Default Layout Style〕しか表示されない 現時点で、Windows環境のみで報告されている問題となります。 Premiere Elements 2024バージョンをご購入いただいたも関わらず、ご不便おかけし申し訳ございません。こちらにつきましては、海外開発部署へ上申しております。   ●現状の対応策 日本語のスタイルと英語のスタイルでは操作方法が異なりますので、お手数をおかけしますが、下記ご希望のスタイル移行方法をお試しいただきますようお願いいたします。   ※日本語のスタイルと英語のスタイルは内容も異なるため、以前から日本語版のPremiere Elementsをご利用の場合は、日本語のスタイル移行方法をお試しください。◆操作手順①  英語のスタイルを読み込む方法◆ 1.  エクスプローラーで下記階層のフォルダを開き、中に保存されている〔default.prsl〕ファイルをコピーします。 C:\Program Files\Adobe\Adobe Premiere Elements 2024\Presets\Styles\Common 2.  続いて下記階層のフォルダを開き、中にコピーした〔default.prsl〕ファイルをペーストし、ファイル名を〔workingset.prsl〕に変更します。 C:\ユーザー\<ユーザー名>\ドキュメント\Adobe\Premiere Elements\24.0\Styles 3.  変更が行えましたら、Premiere Elements 2024バージョンを起動し、スタイルが反映されるかをご確認ください。◆操作手順➁  日本語のスタイルを読み込む方法◆ 1.  下記リンクより Premiere Elements2023バージョンをインストールします。 <Adobe Premiere Elements のダウンロード | 2024、2023>https://helpx.adobe.com/jp/download-install/kb/premiere-elements-downloads.html 2.  インストールが完了しましたら、Premiere Elements2023の起動を行います。起動する際は体験版として起動を行い、起動の確認ができましたら、そのままアプリケーションを終了します。 3.  次にエクスプローラーで下記階層のフォルダを開き、中に保存されている〔default.prsl〕ファイルをコピーします。 C:\Program Files\Adobe\Adobe Premiere Elements 2023\Presets\Styles\ja_JP 4.  続いて下記階層のフォルダを開き、中に〔default.prsl〕ファイルをペーストし、ファイル名を〔workingset.prsl〕に変更します。 C:\ユーザー\<ユーザー名>\ドキュメント\Adobe\Premiere Elements\24.0\Styles 5.  変更が行えましたら、Premiere Elements 2024バージョンを起動し、スタイルが反映されるかをご確認ください。   【使用できるエフェクト数が少ない】 ●確認されている症状 これまでのバージョンのPremiere Elementsと比較して使用できないエフェクトがある ガイド機能に従って操作した際に、指示されたエフェクトがエフェクトの中にない 本事象につきましても海外開発部署にて確認がされております。 こちらは現時点で回避策がございませんため、恐れ入りますが別のエフェクトで代用いただきますようお願い致します。 大変ご不便をおかけし申し訳ございませんが、何卒ご理解賜りますようお願い致します。

Adobe Bridge Beta is now available (14.0.2.150)

We are happy to announce the release of Adobe Bridge Beta (14.0.2.150)   We have been tracking the issues reported on the latest release version of Bridge and have been working on fixing those issues. This Beta release contains the Metadata Column Resizing feature and other bug fixes.   Steps to install/update   Install: Go to the Creative Cloud desktop app and select Beta apps in the left sidebar of the Apps panel. Then select install for your beta app.   Update: Go to the Creative Cloud desktop app, click on Update in the left sidebar of the Apps panel, and Check for updates. Then click update for your beta app.   Note: As always, the update will be rolled out incrementally. If you do not see the update in the Creative Cloud Desktop app, please wait for a couple of days till we release the Beta update to all users   Metadata Column Resizing: This feature lets users drag and adjust the width of edit text boxes in the Metadata Panel.     Fixed Issues   Auto stack/Panorama and Process collections in Photoshop are not available on Mac ARM Some scripts are not working in the Secondary/Multi-window scenario Sort by Dimension, giving incorrect results Output templates are not getting migrated from 12.x to 14.x. Focus moved out of content panel assets while pressing the tab if a file/folder name is in edit mode.  Smart collection's source changes to "Use current folder" after migrating preferences. Lag in reflecting the selections made in filter panel Unable to add Recent folders in the favorites panel   For more info on what a beta is and how you can participate, see Adobe Creative Cloud Beta FAQ

Designer 13.1.0: new Frames, quality of life improvements and AxF export!

Substance 3D Designer 13.1 adds many quality-of-life improvements to the node graph, mainly regarding frames, to enhance the material creation experience. There is also the addition of AxF export which enables an interoperability workflow for users working with the AxF format.    Release date: December 12th, 2023 Major features Frames Improvements Frames are a mandatory tool to keep you graph well organized and readable. That's the reason why we decided to polish them in this new version.   Auto expand: as the graph grows, the frames' content may need to be rearranged. Nodes may shift to make room for additions or content may need to be spaced out more to promote readability. To facilitate these adjustments, it is now possible to automatically expand a frame when moving included objects: hold Shift at any point while moving an object to have the frame borders automatically adjust to keep that object within their bounds.     Fit size to content: as you make adjustments in your graph, a frame may not be gracefully adjusted to its content anymore. This new command allows you to automatically adjust the position and size of the frame so it adjusts to the span of its content, with a padding of one medium grid cell. If the frame has a description, its is adjusted to make use of any empty space next to the description, if possible.     Enhanced description: thanks to HTML code, you can now have formatted texts in frames description. This applies to Comments as well.       ...and much more: a lot of things have been rethought, like belonging rules to be more tolerant, interaction zones to easily resize frames, snapping rules to not misaligned your nodes on the grid, and the visual aspect to bring a bit of freshness. Feel free to visit the frames' documentation to learn more. Quality of life improvements Node menu improvements: in order to save time while searching for the node you need, we improved a bit the node menu. Search is now more forgiving and will give you a result even if there is no perfect match. Moreover, you can now use the up arrow to directly access to the last element in the list.  Node placement: if you like to have a perfect layout for your graph, these two small changes will please you! When you copy/paste nodes from one graph to one other, pasted nodes are now aligned to the main grid. And when you add a node on a long link, this one will now be placed at the middle of the visible part of the link, in order to make it visible in every situation.  2D View options: if you are an intensive user of the 2D view, you will save time as options like 'Show checkerboard', 'Keep view size', 'Use physical size' and 'Display tiling' are now saved, so you don't have to set them again when you create a new 2D view or even when you restart Designer.  AxF Export AxF is a format from X-Rite. It provides a way to capture, store, edit, and communicate complex material characteristics using numerical data throughout the digital design workflow. In previous versions of Designer, you were able to import AxF files and then improve the tiling or add procedural effects, but then, you were constrained to export changes as a new .sbsar file. In this new release, we introduce the possibility to edit AxF materials in place, and then export your changes as a new layer in the imported AxF file.    API Improvements Finally, this 13.1 version continues to improve the Python API by adding two more possibilities: "Visible if" properties: you can now set this property for graphs parameters, inputs and outputs.  Order of graphs Inputs / Outputs: use sdsbscompgraph::reorderGraphInput and sdsbscompgraph::reorderGraphOutput to organize parameters as you need.    Designer 13.1 is the last major version based on Qt5, next major versions will be upgraded to Qt6. It may have an impact on your custom plugins. Release notes  Features [Frames] Auto Expand [Frames] Change rules to define when an object belongs to a frame [Frames] Disable text scaling for frames description [Frames] Fit size to content [Frames] New default, hover and selected states [Frames] Snap to Large Grid [Frames] Support HTML code for Frames description [Frames] Update interaction zones [Frames] Update visual aspect [Graph] Create the node at the middle of the visible link instead of middle of the link [Graph] Display properties of an item if it is the only one item with properties available in a selection [Graph] Remove "Scaling" option for comments in the graph [Graph] Snap nodes on the main grid when doing copy/paste [UX] Allow fuzzy search in Node menu and Library search [UX] Make the Node menu list loop [AxF] Support AxF export [AxF] Disable AxF on Linux [API] Set the 'Visible if' property of graph parameters, inputs and outputs using the Python API [API] Set the order of graph I/O using the Python API [Dependencies] Update Boost to 1.80.0 [Dependencies] Update OpenSubdiv to 3.5.x [Dependencies] Update FBX SDK to 2020.3 [Dependencies] Update NGL to 1.35.0.20 [Color management] Add support for OCIO ICC displays [Levels] Add a way to reset the histogram [Python] Warn users if QtForPython cannot be imported [2D view] Save the state of the view options [3D View] Add Position technique to the mesh info shader [Export] Add a 'Save settings' button to save changes to export options    Bug fixes [3D View] Cannot assign a texture to an input of type texture_2d of a MDL Material [AxF] Graph identifiers in templates list can be blank [AxF] Substance graph template field is blank by default [Content] Atlas Scatter: incorrect behavior in specific cases [Content] Flood Fill Mapper: blank output when all shapes have same Bbox size [Content] FloodFill to Position: Imprecision artefacts in some situations [Content] Incorrect 'Specular' output in 'BaseColor/Metallic/Roughness converter' node [Content] Mask to Path doesn't work in non square vertical [Content] Missing description for Input value, Input Grayscale, Input Color and Output nodes [Content] Missing description for Set and Sequence nodes [Content] Shape Splatter: Imprecision artefacts in 'Splatter data 2' output [Engine] Booleans in Value Processors always evaluate to 'False' (Apple Silicon only) [Explorer] Order of toolbar buttons is inconsistent between OS [Frames] Do not grab nodes when moving a frame with CTRL modifier [Gradient Map] reset all option should also reset the gradient widget [GraphRender] Some nodes are rendered black when tweaking in preview mode [Graph] 'Input value' preview is stuck to 'False' when tweaking default boolean value (Apple Silicon only) [Graph] Dot nodes close to Frame edge are not moved by the Frame [Interoperability] Resend icon is not updated after sending to Substance 3D Stager [MDL] Impossible to change Roughness in nodes where this param is available [MDL] Invalid connections in 'AxF to Metallic Roughness' template [UI] 'Export outputs' window can be minimised (Windows only) [UI] Images appear pixelated in About screen when using display scaling [UI] Node align tools in graph toolbar create multiple undo steps    Known issues [AxF OpenGL Shader] Incorrect Ward for anisotropic distribution [AxF OpenGL Shader] Incorrect default roughness [AxF OpenGL Shader] Incorrect shading basis rotation [AxF OpenGL Shader] Incorrect ray below hemispheredetection [AxF OpenGL Shader] Incorrect contribution detection [AxF] 'Specular Color' map values are incorrect when exported [AxF] Preview and textures are not displayed correctly in 'Import AxF' dialog [AxF] Property "cc no refraction" is not injected correctly in AxF to AxF template

More new features!! 🎉 in Photoshop Express for iOS and Android (released in November)

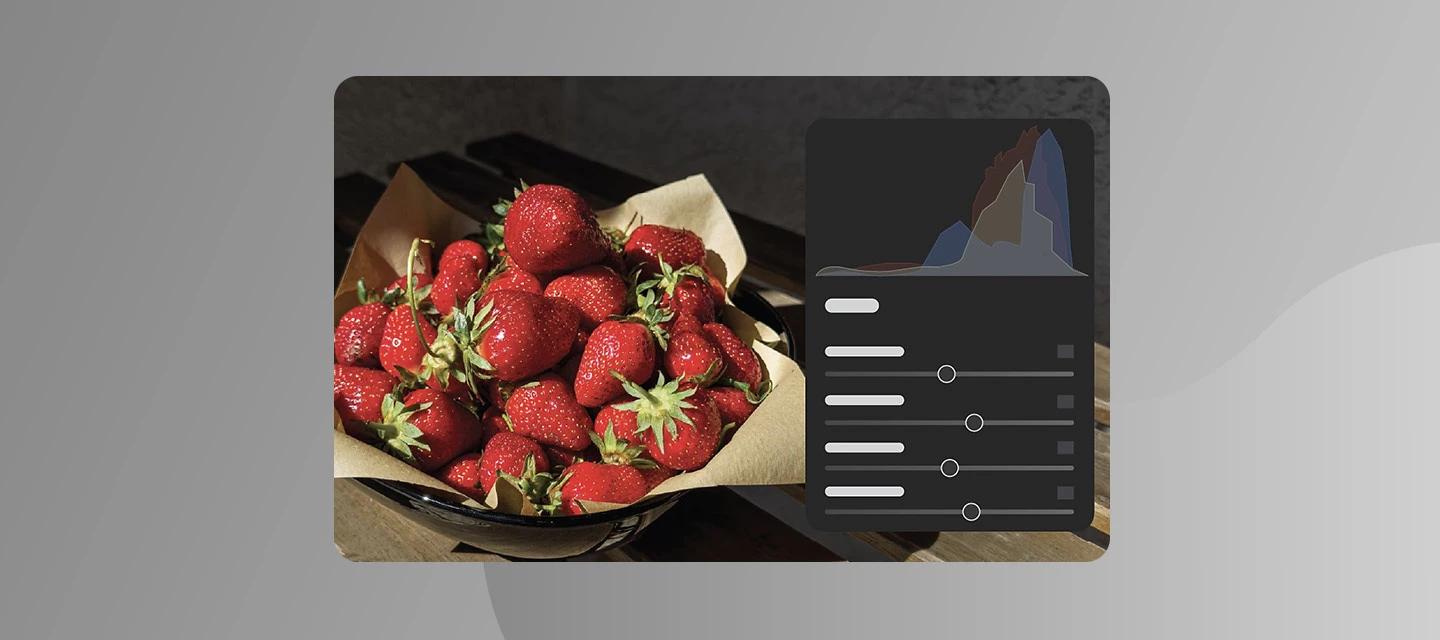
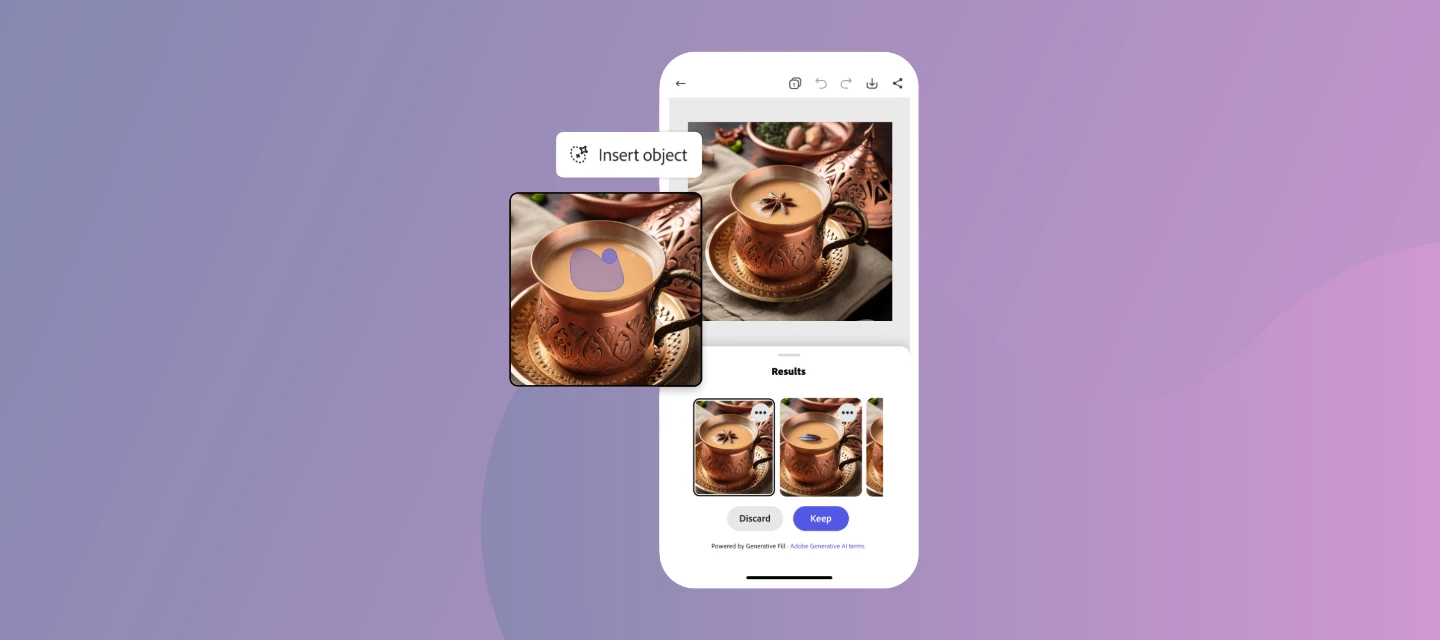
    Unleash your creativity with fun editing tools and effects that transform your photos into captivating works of art. With Photoshop Express, effortlessly edit, explore your creative side, and share your photos to make them stand out on social media.   Try it on mobile   Key Features in focus for iOS and Android Content Integration for iOS We've enriched our content collection by introducing a wide array of new content across various categories, including "Halloween," "Diwali," "Cricket," "Friendsgiving," and "Holidays."               Mix: Ps Engine integration for iOS Migrated to Ps iOS Engine for Mix functionality. It allows us to improve the stability and performance of existing tools and include more enhancements for the future.     Camera: Ps Camera (lenses) integration for iOS and Android Photoshop Camera functionality and lenses are integrated into PsX. It allows users to choose from a wide range of creative lenses and take gorgeous selfies.                Retouch : Retouch in Android Fix functionality is integrated into Android. It allows users to retouch their face using tools like Smoothening and editing facial features like lips, nose, eyes, and contours.                          Vote! Threads in the Community forum now have an UpVote feature. The Photoshop Express team uses this vote count to know which bugs or issues are most important to you. If you're seeing a similar problem or bug that has already been reported, add your vote!      Useful Links   Get started with Photoshop Express on iOS: Learn how to use Adobe Photoshop Express on iOS devices. Get started with Photoshop Express on Android: Learn how to use Adobe Photoshop Express on Android System requirements: Find the minimum technical specifications to use Adobe Express. FAQ: Get answers to common questions about Photoshop Express Quick actions: Get answers to common questions about Quick actions.

Welcome to Adobe Premiere Pro 24.1

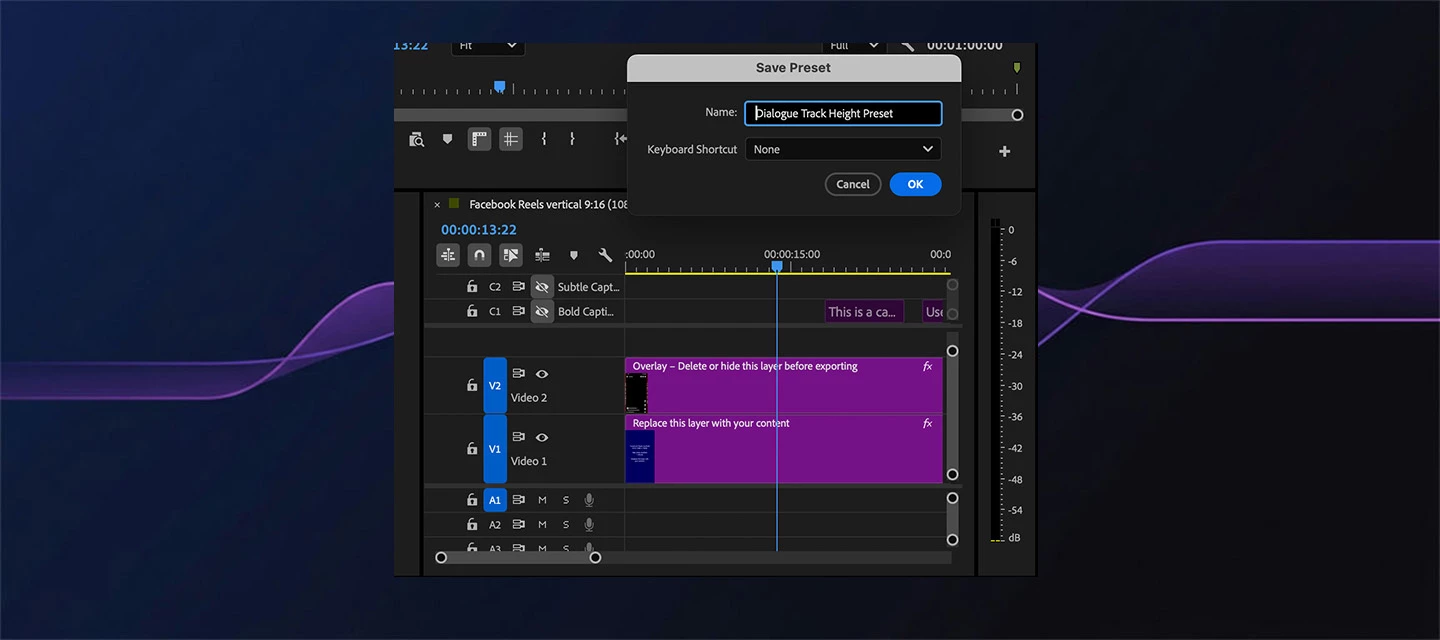
  Welcome to Premiere Pro 24.1! Hi Adobe Digital Video and Audio Community! Welcome to the December release of Adobe Premiere Pro! Premiere Pro 24.1 is now available from the Creative Cloud desktop app. The new features include the following:     Filler Word Detection with bulk delete for Text-Based Editing Redesigned MOGRT management New sequence presets Easier access to version history and Auto Save in Team Projects Browse Cloud locations from Import Mode Trimming and multicam improvements   This update is recommended for all users.    If you are experiencing any issues, please create a new post explaining your problem so that we can help. If you have a bug to report or any complaint, please do that on the Bugs forum.   Complete List of New Features in Adobe Premiere Pro 24.1   Editing and WorkflowThe October release of Premiere Pro (version 24.1) is now faster and more reliable than ever. Text-Based Editing workflows continue to evolve with Filler Word Detection. Redesigned management of MOGRTs, streamlined sequence presets, easier access to Team Project version history and Auto Save, and other incremental improvements to editing are all included in the newest update of Premiere Pro. Update today.   Learn about best practices for updating Premiere Pro.   Filler Word Detection with bulk delete for Text-Based Editing  Automatically identify "ums" and "uhs" in dialogue and quickly remove those filler words, pauses, or any other unwanted dialogue in one step using bulk delete.               Text-Based Editing lets you detect “uh” and “umm” filler words and bulk delete them so your transcripts are more accurate. Just like with pauses, you can click on a filler word and delete it from your sequence transcript. Filler words are language agnostic so that they work in all 18 languages supported in Speech to Text.   Learn more about Filler Word Detection in Text-Based Editing.                 Redesigned MOGRT management Motion Graphic Template management is now more intuitive making it simpler to find, view, and organize the MOGRT collections you need across multiple locations.                 Motion Graphics Templates (MOGRTs) give Premiere Pro editors the power of After Effects motion graphics, packaged up as templates with easy-to-use controls designed to be customized in Premiere Pro.    We’re responding to user feedback to make MOGRT management more intuitive. Find, view, and organize the MOGRT collections you need across multiple locations, including through folders on disk, with greater ease.   We now display MOGRTs as individual rows with check marks instead of in a dropdown menu, making it more straightforward to browse a collection across different locations.     And there are now two views to browse MOGRTs. The Browser Tree View displays your MOGRT locations. Below, the MOGRT view showcases all thumbnail templates from the selected locations. You have full control of how much space you provide to each view by dragging the window up and down or click on the top funnel button to toggle the Browser Tree View off and on.    Learn more about how to drag and drop between locations, navigate folders on disk, and remove default templates.     New sequence presets Get your sequence started fast with modern, updated sequence presets for HD, UHD, HDR, and social media projects. Sequence presets have also been reorganized and streamlined to put the most frequently used selections at your fingertips.               Get your sequence started fast with new sequence presets for HD, UHD, HDR, and social media projects. Sequence presets have also been reorganized and streamlined to put the most used selections at your fingertips.     To view the new presets, navigate to File > New Sequence or click the New Item > New Sequence button on the Project panel. You'll now find a simplified list of presets, including:          HD 1080p Social for 4x5, 9x16, and 1x1 timelines UHD (HDR) for 2160p timelines with an HDR color space UHD (4K) for 2160p timelines with an SDR color space  Legacy for all previously included presets  While these presets are meant to help you get started quickly, you can edit, delete, or create new presets to streamline your own workflow.    Tip: With Project Templates, you can create projects with sequences, bins, assets, and other settings already set up for even more efficiency.      Easier access to version history and Auto Save in Team Projects Auto Save and version history location for Team Projects can be accessed from the Premiere Pro header bar so you always know the state of your project.                 You can now access your Team Projects versions and Auto Save history by selecting the Team Project name in the Premiere Pro header bar. The new header bar menu has the following options:   Team Project Settings: Edit the Team Project name, description, collaborators, and other settings such as color, scratch disks, and ingest settings.   Version History: Open the Premiere Pro Media Browser with the version of the Team Project you are working on selected in the saved versions list.   Auto Save History: Open the Premiere Pro Media Browser with the latest auto save of the Team Project selected. You can create a new Team Project from the auto save or make any version the latest one.   Learn more about how Team Projects creates and stores versions of the project with every edit you make.     Browse Cloud locations from Import Mode Import media intuitively from cloud locations such as Dropbox or OneDrive, just as you would from a local disk.                   Import media intuitively from Import mode or Media Browser just as you would from a local disk.    Any updates in the files or media stored in the linked Dropbox or OneDrive folders will start reflecting in the Media Browser panel. In Import Mode, locations that are currently connected to your system are automatically listed in the right column under Cloud.     Learn more about adding and importing media while collaborating with Team Projects.       Trimming and multicam improvements The team is listening to feedback for feature and episodic workflows to make incremental improvements to editing, trimming, and multicam, with more to come.                 Now when creating a new sequence based on a multicam clip, the new sequence will have more predictable audio mapping settings.  A new preference called Ripple trim adds edits to keep both sides of trim in sync has been added to the Trim preferences under Shift clips that overlap trim points during ripple trimming.   When enabled, Premiere Pro will add edits to clips that overlap a trim. These added edit points will then trim alongside the selected edit points while trimming to prevent any clips from shifting out of alignment on either side of the edit.        Additional Updates We’ve added support for exporting 16-bit PNG files.  Destination groupings in Export Mode allow you to toggle sections to hide what you never use to keep your UI tidier. Creative Cloud Synced files are being discontinued. Starting February 1, 2024, Adobe will begin to discontinue Creative Cloud Synced files for all free and paid personal users not associated with a Creative Cloud for Enterprise or a Creative Cloud for Teams business account. Read more about Creative Cloud Files end of life process. Sync Settings are being discontinued across Creative Cloud products. You can migrate your custom preset collections from an earlier version of Premiere Pro to another on the same computer.  System requirements have been updated as of Premiere Pro 24.0 Adobe video and audio products no longer support Rosetta emulation (Intel versions running on Apple M1/M2). Premiere Pro now requires CPU support for AVX2 on x86 AMD and Intel hardware.   Selected Content Videos and articles you may find helpful in getting the most out of Premiere Pro 24.1.   What is new in Premiere Pro v24.1? Must-Have UpdateChannel: Premiere Gal   Premiere Pro Beta Check out the latest features and discussions about Premiere Pro Beta in the forums here.   Resources Complete documentation for Premiere Pro 24.1 New Features Fixed Issues Known issues