  • 1496 Product updates
What's new: Search for inactive users by first name, last name, and username

What's new: Search for inactive users by first name, last name, and username

TL;DR Admins can now search for inactive users in the Admin Console using their email address, username, first name, or last name. This makes it easier to locate a specific inactive user when you don't have their exact email on hand. Why this matters Previously, finding a specific inactive user required knowing their exact email address or manually paging through the Inactive Users list, which is impractical for organizations with a high volume of inactive accounts. This has been a frequently requested improvement from admins managing storage governance at scale. With this update, the search field now accepts email addresses, usernames, first names, or last names. Once you locate the user, you can act on their folder using the same options available today. What you need to know  Search by email, username, first name, or last name is available directly from Storage > Individual user folders > Inactive Users.  Search may return no results in a few specific cases: if the user's information was deleted from the system, if they were never part of your organization, if they were a directory user who was removed from the directory or deprovisioned, or if they have no inactive storage.  Once you find a folder, your options remain the same: share content now (sent as a ZIP to a user you specify), share content later (stays in Inactive Users until deleted manually), or permanently delete content (immediate, no recovery).  This is available to system admins and storage admins; no new role configuration is needed.  Get started Full documentation: Manage Adobe storage, see "Delete folders of inactive users." Quick links  Admin Console  Manage Adobe storage documentation  Have questions about this update? Drop them in the thread below. More questions? Start a conversation | Catch up on all updates: ICYMI 

What's new: Federated Guest Access is now generally available

What's new: Federated Guest Access is now generally available

 TL;DRFederated Guest Access (FGA) is now generally available. It allows enterprise customers to onboard external partners, agency staff, vendors, consultants, as federated users, without requiring ownership of their email domain. This feature is available to organizations that purchased an enterprise plan directly from Adobe and have at least one active federated directory. If that's not your setup, this capability won't appear in your Admin Console yet.  What changed  Previously, creating a Federated ID user required your organization to own the user's email domain. That meant you couldn't add anyone using a non-claimable domain, such as gmail.com, or a domain claimed by another organization as a Federated ID user. In practice, this blocked a common scenario: bringing an external vendor or consultant into your Adobe environment under the same SSO and authentication policy you use for employees.  FGA removes that restriction. You can now add a user with any email address as a federated guest, a new variation of the Federated ID account type. Federated guests authenticate through your organization's IdP, just like internal employees, and their account is scoped entirely to your organization, independent of any account they hold elsewhere, including with their own employer.  Federated Guest Access is particularly useful anywhere enterprises rely on outside expertise, marketing teams working with agencies, IT departments bringing in consultants, or organizations collaborating with partner companies. In each of these cases, FGA replaces the workaround methods teams previously used to onboard external contributors, which often led to inconsistent authentication, extra admin overhead, or gaps in access control. With FGA, external partners are brought under the same SSO and security policy as internal employees; their entitlements remain fully isolated from any other Adobe account they hold; and admins manage them through the same console and controls they already use for internal users.  A concrete example from Adobe's documentation: a contractor who already has a federated account through her employer can be added as a federated guest by the company hiring her. She signs in through the hiring company's SSO to access assigned tools. Her federated guest account carries its own entitlements and assets, fully separate from her employer-owned account. Neither organization has visibility into the other's data.  Who this applies to: This capability requires an enterprise plan purchased directly from Adobe, plus at least one active federated directory already configured. If your organization doesn't meet both conditions, you won't see the Guest domains tab in your Admin Console. Contact Adobe Support if you believe you should be eligible, and the option isn't showing.  Go to Admin Console What you need to know before setting this up  Supported products right now are limited to four: AEM Assets as a Cloud Service, Adobe Express, GenStudio, and Workfront. Assigning any product outside this list to a federated guest will fail without consuming a license. Check this list before you provision.  Setup occurs via a new Guest domains tab within each directory's settings in the Admin Console.   Every federated guest completes a one-time email verification and consent step before their first sign-in.   If your organization owns a claimed domain, you control whether other organizations can use it as a guest domain, and you can review that usage from Identity Settings at any time. If you wish to block your claimed domain usage as guest domain, please contact Adobe Support.  Federated guests use an account switcher to move between accounts tied to the same email address, but each switch requires re-authentication, since each account has its own federation.  Get started. Full setup steps, including guest domain management and the Global Admin Console hierarchy for multi-org setups, are documented in “Federated Guest Access” on Help document.  Quick links Federated Guest Access documentation   Admin Console  Supported products Hit an edge case setting this up? Drop it in the thread below. More questions? Start a conversation | Catch up on all updates: ICYMI

Now in Beta: Live Waveforms While Recording Voiceovers in Premiere

Hey everyone! We’re excited to share a new addition to the voiceover recording workflow that just landed in Premiere Beta 26.5.0 Build 59: Live waveforms while you record.This feature is on by default and is designed to give you immediate visual feedback as you record. No more recording blind and waiting until you stop to see what you captured.What’s New?When you record a voiceover now, the audio draws onto the timeline in real time. As you speak into the mic, the waveform renders live in the clip, so you can see your levels, pacing, and pauses as they happen. Your recording takes shape in front of you instead of showing up only after you hit stop.Where to find itYou’ll see the waveform render automatically in the target track the moment you start a voiceover recording. There’s nothing to turn on. As soon as you begin, the audio draws into the clip in real time so you can follow the take as it happens.Live waveform feedback while recording a voiceoverWhy this mattersRecording voiceovers is a performance, and performances need feedback. Without a live waveform, you’re talking into a void and hoping the take landed. Live waveforms remove that guesswork by tying what you hear to what you see, the moment you record it.You can:Watch your levels in real time and catch clipping or low input before the take is wasted See your pacing and pauses as you go, so you can adjust delivery on the fly Confirm the mic is actually capturing audio without stopping to check Spot the usable section of a take immediately, instead of scrubbing back after recordingTry It OutThis feature is available now in the latest Premiere Beta 26.5.0 Build 59. Record a few voiceover takes with your usual setup and let us know how it feels. Your feedback helps shape how voiceover recording keeps evolving.Happy Recordings!Note: We’re still polishing some interactions, so expect to see improvements as we iterate. 

Illustrator Creative Challenge #3: Design a Retro Neon Sign for a 90s Diner

Illustrator Creative Challenge #3: Design a Retro Neon Sign for a 90s Diner

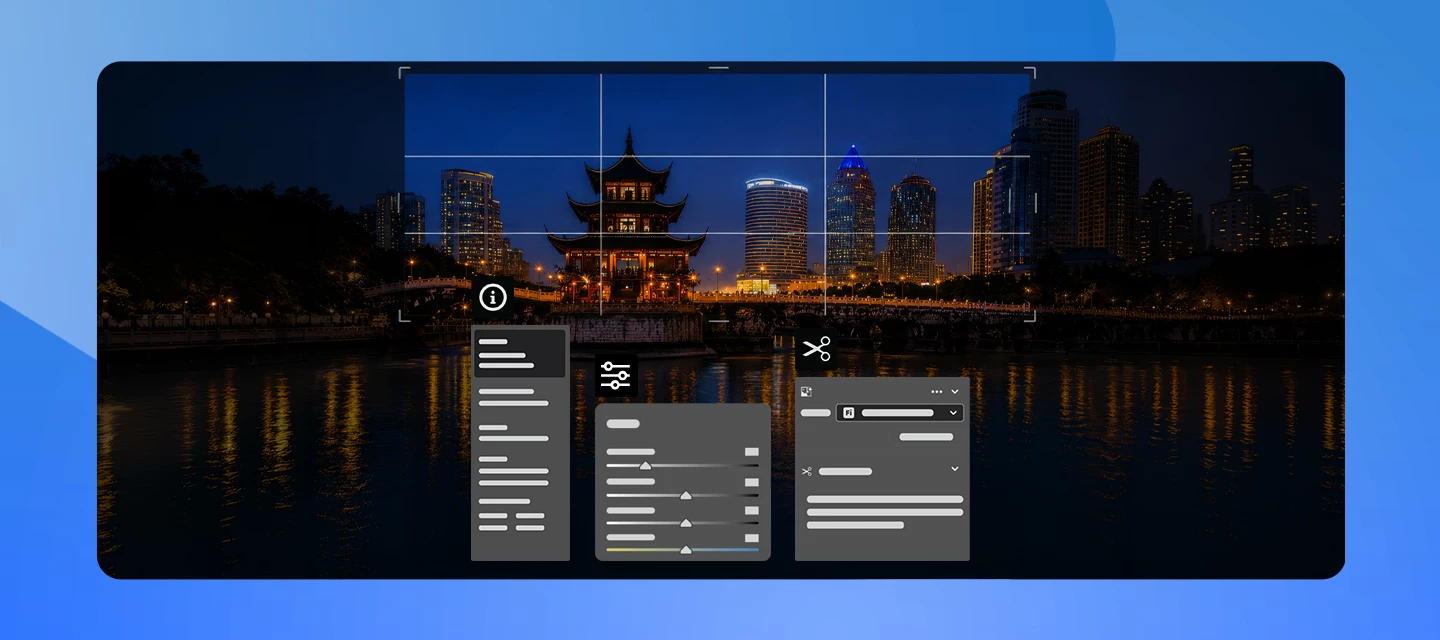
Welcome back to the Illustrator Creative Challenges - our monthly nudge to open Illustrator, try something new, and share it with the community. Last month, we turned beach photos into vector art. This month we're chasing that warm, humming glow of a classic neon sign: the kind that hangs over a roadside diner at the end of a long night. THE BRIEF:This isn't just any diner. Here's the fun part - choose a lane (or smash them together):🐾 The Animal Diner - a 24-hour joint run by, and for, animals. Maybe it's THE NIGHT OWL, open till dawn. Maybe it's a greasy spoon called COYOTE'S, or a flamingo-pink cocktail bar out on the strip. Your creature is the star of the sign.🛸 The Sci-Fi Diner - a roadside pit stop the way the 90s imagined the future: chrome, rockets, ray-guns, and flying saucers. THE MARS MALT SHOP. LAST STOP BEFORE HYPERSPACE. A neon rocket is optional but heartily encouraged.Want a raccoon running a diner on the moon? Even better. The brief is a neon diner sign - the world it belongs to is entirely yours.HERE’S MINE:Image Credit: Adobe StockI went with THE NIGHT OWL. Here's the workflow: I set the name in NeonStream, then rebuilt the letters as open paths so they'd behave like real neon tubing. The core trick lives in the Appearance panel: I stacked two strokes on every path - a thin, bright, near-white core sitting on top of a thicker, softer colored stroke underneath. That alone makes a line look lit from inside, before any effects. Effect → Stylize → Outer Glow on each element (Mode: Screen, a color close to the tube) through the halo. A little goes a long way. A dark navy-to-black gradient background gave the light something to sit against. I drew the owl with the Pen tool, because real neon is bent from a single length of glass. Keeping it "one unbroken line" or close to it, is what sells the effect. YOUR TOOLKIT:Neon is really a lighting effect, and Illustrator has everything you need to make it convincingly: Appearance panel - multiple strokes - the heart of it. Stack a bright thin core over a wider, softer glow color on a single path to build a tube that looks lit from within. Strokes with round caps & joins - set ends and corners to round so your tubes read as bent glass, not cut pipe. Inner & Outer Glow - the actual halo (try Mode: Screen on a dark background). Stack it lightly over the lettering and motifs; a Gaussian Blur applied to the whole sign adds an extra haze. Type & Adobe Fonts - hunt down a bold script or a fat retro face that feels like 1994. Pen & Curvature tools - to draw your animal or rocket as continuous, bendable tubing. Gradients - a dark, uneven background reads far richer than flat black and makes the glow pop. One pro tip that changes everything: work on a dark background from your very first shape. Neon only looks like neon in the dark. LIGHT IT UP:You've built a neon sign, now light it up in the thread. Reply with: Your final neon sign. A line or two on your process - which font, how you built the glow, which universe you chose. Honestly, this is the best part to read, so don't skip it. Not ready to post a finished sign? Drop your diner's name and the lane you're taking, and we'll be waiting to watch it light up. WHAT’S NEXT? We're already cooking up Challenge #4 - think about designing your own graphic and seeing it on a real product with Illustrator's Mockup feature. But that's for later. For now: find us that 2 am glow.If you found this helpful, hit 👍 Like. Tap ⭐ Subscribe to be first to see the next challenge. And feel free to share it with anyone who'd enjoy joining in.

Camera Raw v18.4.1: Extend your canvas with Generative Expand, present photos in fullscreen, and view autofocus points

Camera Raw v18.4.1: Extend your canvas with Generative Expand, present photos in fullscreen, and view autofocus points

The July 2026 update to Camera Raw (v18.4.1) pairs the creative power of Generative Expand with a new Fullscreen Presentation mode for showcasing your work and a new autofocus points overlay for supported raw files. What’s NewCamera Raw (v18.4.1) gives photographers more creative range and a smoother workflow. Generative Expand is ready whenever you need it, letting you extend your photo's canvas and fill the new areas with content that blends naturally with the original image. The new Full screen presentation mode lets you showcase/ review your photos in a focused manner, move through them with the arrow keys, and right-click to customize the background color and layout. A new autofocus points overlay shows your camera's focus points directly on the photo preview for supported Canon, Nikon, and Sony raw files, so you can check focus at capture time without affecting your edits or the file's metadata. This release also adds support for new lenses.Learn more about the latest updates here.Bug Fix:Pixel 10 C2PA not handled correctlyFeature Released:Support for HEIF files from Sony CamerasHow to UpdateOpen the Adobe Creative Cloud desktop app, go to the Apps tab, and update Camera Raw to the latest version. Turn on automatic updates to get new features as soon as they’re available. Join the ConversationWhat are you excited to try first in Camera Raw v18.4.1? Generative Expand, the new Full screen presentation mode, or the autofocus points overlay? Tell us how these updates fit into your editing workflow and share your feedback with the community.

Now in Beta: Generate Sound Effects and Video in the Premiere Timeline

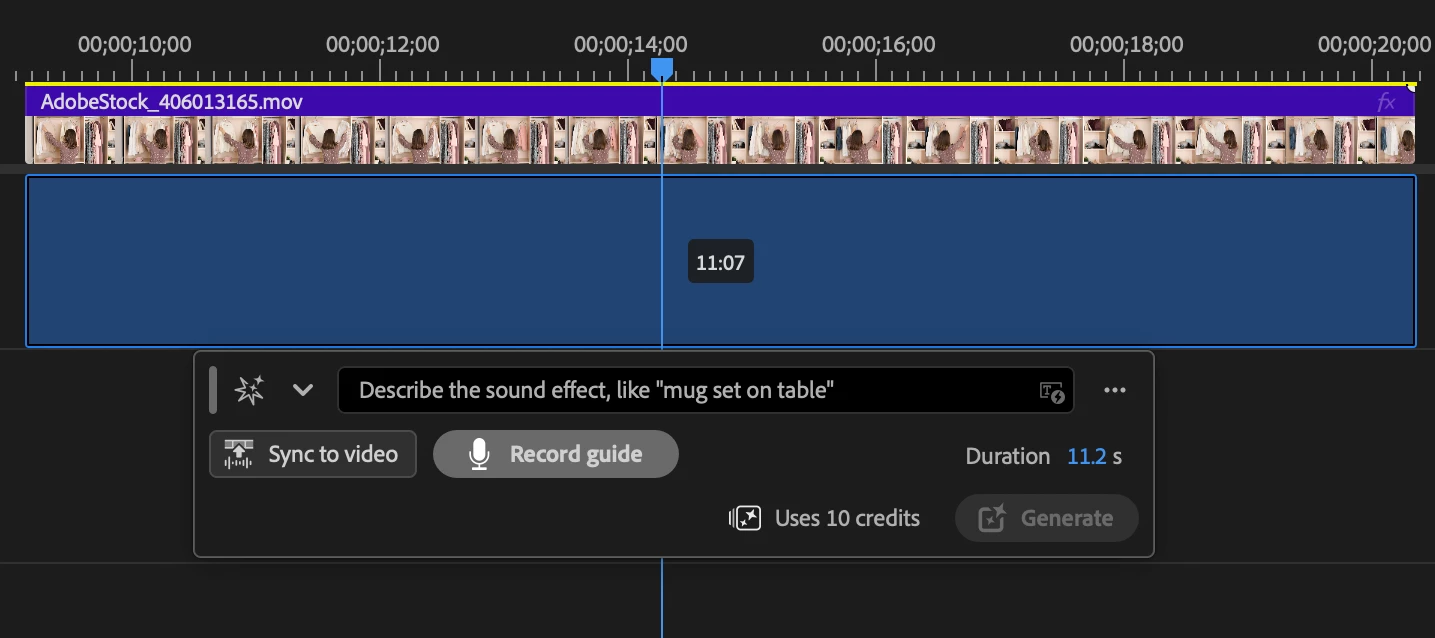
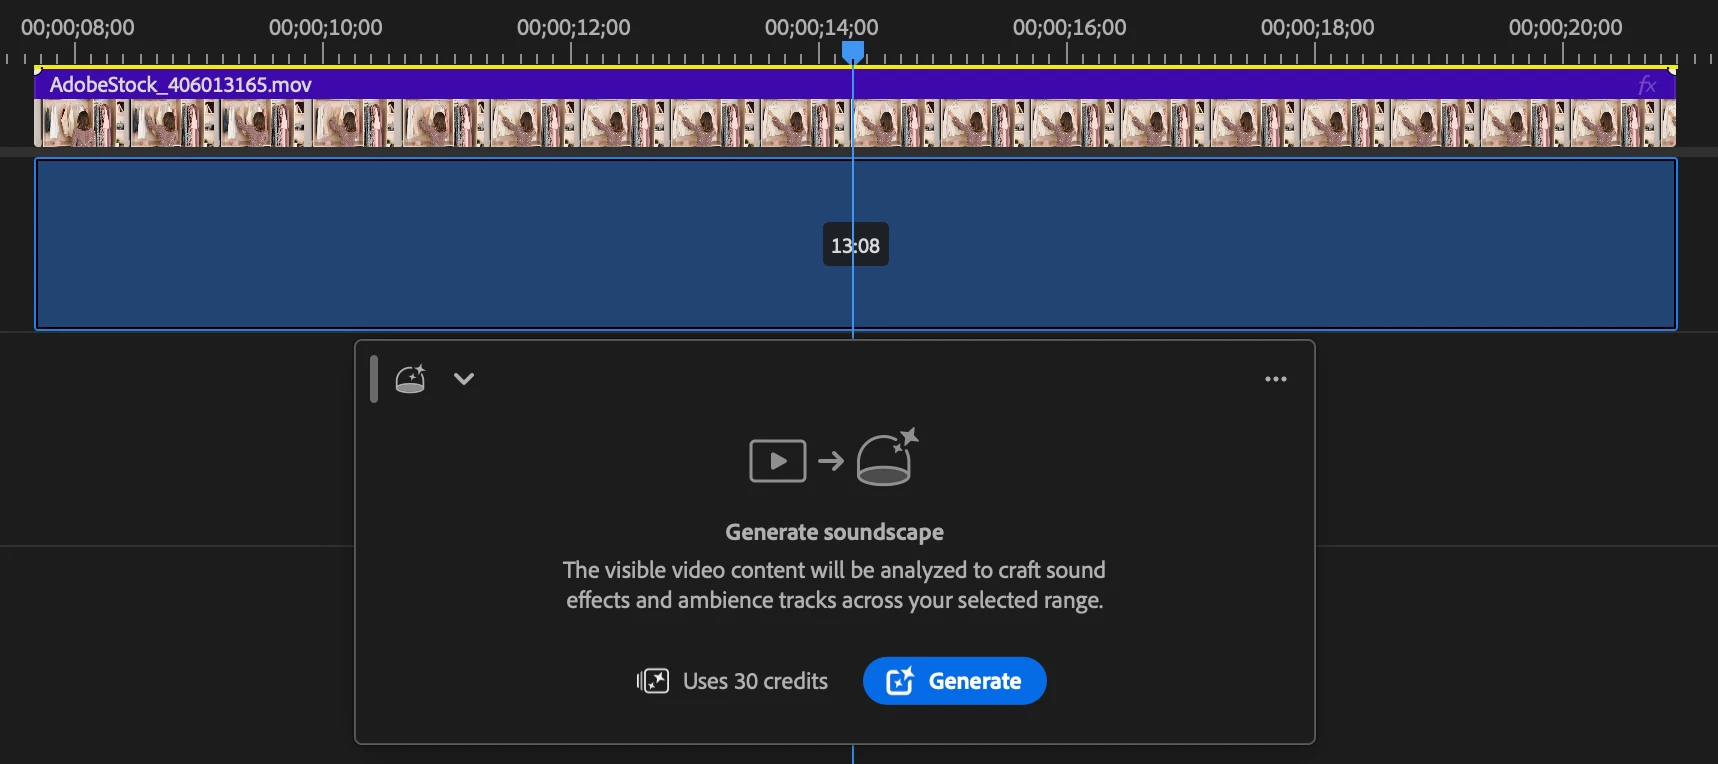
We’re excited to introduce a new generative workflow in Premiere. The new Generative Media Tool lets you generate sound effects and video exactly where you need them, directly in your timeline.  Simply select a range in your timeline, describe what you want, and you can generate media directly into your edit. Whether you need missing ambience, a custom sound effect, b-roll, a cutaway or an establishing shot, you can stay focused on editing without switching applications. To add the visual context of your project, use the eyedropper to sample reference frames without leaving the timeline.   Generate Sound Effects in ContextNow you can generate custom sound effects directly in the Premiere timeline.Select any audio range, describe the sound you want, and generate multiple variations that match the duration of your selection.Need more control? You can use your voice to guide the timing and intensity of the sound effect, making it easier to create sound effects that feel natural in your edit. Generating Sound EffectsSelect the Generative Media Tool from the toolbar. Drag across any audio track or double-click an audio gap to select the duration you want to generate. The range can be trimmed or moved to any audio track.  Describe the sound effect you want to generate. (Optional) Record your voice to guide timing and energy, then select Generate. Review multiple generated variations and choose your favorite by clicking on the AI badge. Tip: You can continue creating range selections while previous generations are still processing.  Generate Video without leaving the timelineNeed b-roll, a cutaway, an establishing shot, or to fill a gap in your edit? Generate video directly from your timeline using Adobe Firefly or supported partner models.Select a range, choose your model, add optional reference frames, describe what you want, and Premiere inserts the generated clip into your sequence.Generating VideoSelect the Generative Media Tool from the Toolbar. Drag across any video track or double click a gap to select the duration you want to generate.    Select your model, select any reference images (first, last, previous, next or reference), enter your prompt and generate. The Generative task bar supports Adobe Firefly Video Model and Partner models. The default model on the Generative task bar is Veo 3.1. You can use First Frame, Last Frame, Previous Frame, Next Frame or Reference Frames (for supported models) to guide video generation. Input frames can be sampled from the Program Monitor, Source Monitor, or Project Panel.  For gaps, Previous Frame and Next Frame automatically use the adjacent clips on either side of the gap. We recommend using input frames for more accurate results.   The eyedropper lets you input frames from the program monitor, the source monitor or from the project panel. Tip: Veo 3.1 (the default model) only supports reference frames for 8 second generations and 16:9 aspect ratio.  Enter your prompt, check your setting and click generate. The Generative task bar displays the settings used for generation, including resolution, aspect ratio, frame rate and duration. Premiere automatically selects the closest model settings that match your sequence wherever possible.  Content that includes AI-generated media or has been edited using generative AI tools will automatically receive Content Credentials at export to indicate the use of generative AI.We look forward to your feedback  and questions.Abhi SinghPrincipal Product ManagerPremiere Desktop 

Save for older versions with .idml

Save for older versions with .idml

How to Save an InDesign File for Older Versions (IDML) Did you know? InDesign files aren't backward compatible by default - a .indd file saved in InDesign 2024 simply won't open in InDesign CC 2019. But there's a simple workaround: export as IDML. What is IDML?IDML (InDesign Markup Language) is an open, XML-based file format that acts as a universal bridge between InDesign versions. Any version of InDesign from CS4 onwards can open an IDML file - making it the go-to format when collaborating with colleagues or clients on older software.But backward compatibility is only half the story. IDML is also one of the most reliable ways to recover a corrupted InDesign file. Because IDML is XML-based rather than binary, exporting a damaged .indd to IDML and then reopening it often strips out the corruption that's causing crashes, freezes, or "cannot be opened" errors - even when other recovery methods fail. Many InDesign users keep this trick in their back pocket specifically for emergencies, not just version-hopping. How to Export an IDML File Open your document in InDesign. Go to File → Save As Or. In the Format dropdown (Mac) or Save as type dropdown (Windows), select InDesign CS4 or later (IDML). Name your file and choose a save location. Click Save. That's it! You'll now have a .idml file alongside your original .indd - share the IDML version with anyone on an older version, or use it as a clean rebuild if your original file starts acting up.Note: As an alternate, you can also go to File → Export → IDML 💡 Pro tip: Always keep your original .indd file. IDML is great for compatibility and recovery, but your native file preserves full fidelity, linked asset paths, and version history. What to Watch Out For Some newer features may not translate perfectly. Effects, paragraph styles, or objects using features introduced after CS4 may appear differently or be flattened when the IDML is opened in an older version. IDML is not a replacement for your working file. Think of it as a "compatibility export," not your primary save format. Check your links before exporting. Broken links in your .indd will carry over into the IDML. If you're exporting to recover a corrupted file, try it even if the .indd won't open normally - IDML export/reimport can sometimes succeed where a direct open fails, since it forces InDesign to rebuild the file's internal structure from scratch.  Quick Recap Need Use Working file (same version) .indd Sharing with InDesign users on older versions or maximum compatibility .idml Recovering a corrupted or unstable file .idml (export, then reopen) Archive your finished project .indd + .idml  Have questions or run into issues with your IDML export? Drop them in the comments below - the community is here to help! 

What’s New in Adobe Express — June Highlights

What’s New in Adobe Express — June Highlights

June's Adobe Express releases focus on improving creative workflows, enhancing AI-powered editing, and giving you more control over design and print projects. What is it? What does it do? Why does it matter? Template Analytics (Enterprise) View analytics for custom templates and track how they're being used across your organization. Measure template adoption and understand engagement with branded content.  Extract Audio from Video Extract audio tracks from videos and edit them separately from the original video. Greater flexibility when editing podcasts, voiceovers, music, and video content.  Layout Guide Presets Apply professional guide grids instantly using preset layout options. Create well-aligned, consistent designs more efficiently. Remove Animations with AI Assistant Use AI Assistant prompts to remove motion, reset scenes to static designs, or clear animation effects. Quickly modify animated projects without manually editing every element. Multi-Page Navigation in AI Assistant Navigate and switch between pages in multi-page projects directly within AI Assistant. Makes managing larger documents and presentations easier. Custom Bleed Values Set independent bleed values and automatically extend backgrounds into the bleed area. More control over print-ready designs and professional production workflows.  What's the feature you're most excited to dig into? Drop it below — and if there's something you'd love to see in a future release, we're always listening! 👉 Want to stay ahead of what's coming? Bookmark the Adobe Express What's New page for the latest as it drops.

New Edit Guide Dialog

After Effects Guides Update: A Practical Guide to Responsive Layouts

Guides are a foundational tool for responsive, reusable layouts and simplifying design decisions. We're bringing new features to After Effects guides that make them closer in line with Premiere Pro, so guides behave more consistently when you move between apps. Here's how to get the most out of the new functionality.What's New in After Effects GuidesPercentage‑based guides Position guides relative to the composition or view, not just absolute pixels, making them resilient to resolution and aspect‑ratio changes. Pinned guides Pin guides to the bottom or right edge (in addition to top/left) so layouts stay stable as dimensions change. Per‑guide color control Assign colors to individual guides for better visibility and organization. Improved guide editing Right‑click a guide to open the Edit Guide dialog, where you can adjust Position, Unit (pixels or percent), Pinning (origin or opposite edge), and Color. Guide import and export After Effects and Premiere Pro use the same .guides format, so guide presets move between apps with full parity - percentage positioning, pinning behavior, and per-guide colors are all preserved. Guide editing power-ups - keyboard shortcuts for faster layout work We've added quick modifier-key shortcuts to speed up guide placement and tweaking. While dragging a guide, tap Alt / Option to switch between pixel and percentage units, and Ctrl / Command to toggle between pinned or unpinned states.  Your input helps shape the future of this feature, please share your thoughts. The Composition panel includes guides to help align and position elements accurately.Pixels vs. Percentage: Which Should You Use? Choosing between pixel-based and percentage-based guides depends on your workflow and deliverables. Here's how to think about it:Use Pixels When:Creating fixed, precise layouts - Logo placement at exactly 50px from the top-left corner Working in a single, fixed resolution - Broadcast-specific formats (1920×1080) Aligning to exact frame dimensions - Title-safe zones at specific pixel distances Matching pixel-perfect designs - When your design comp or style guide specifies exact pixel valuesUse Percentage When:Creating responsive layouts - Content that adapts across multiple aspect ratios (Instagram Story at 9:16, YouTube at 16:9, broadcast at 4:3) Building reusable guide templates - Grids you'll use across different project sizes Scaling compositions frequently - Working with proxies or different resolution tiers Collaborating across teams - Guides that scale intelligently when shared between projects Choose pixels or percent as the unit for measuring guide positions relative to the compositionReal-World Workflow Scenarios Scenario 1: Multi-Format Social Media ContentYou're creating a promotional video that needs to deliver to Instagram (1080×1350), YouTube (1920×1080), and TikTok (1080×1920).With percentage-based guides:Create a master composition at 1920×1080 Set guides at 10% from each edge (safe margin for text and graphics) Add guides at 50% vertical and horizontal (center alignment for logos) Export these guides as a .guides file Duplicate the comp to 1080×1350 (Instagram) Import the same .guides file—guides automatically position at 10% and 50%, adapting to the new aspect ratio Repeat for TikTok at 1080×1920Result: All three versions maintain consistent safe zones and alignment without manual adjustment. Scenario 2: Broadcast with Action-Safe and Title-Safe ZonesYou're delivering to multiple broadcast standards: HD (1920×1080) and DCI (2048×1080).Using pinned guides:Create guides pinned to the top at 10% (action-safe top margin) Create guides pinned to the bottom at 10% (action-safe bottom margin) Create guides pinned to the left at 5% and right at 5% (action-safe side margins) When you resize the composition or create a new one, these guides maintain their proportional distance from their pinned edgesResult: As broadcast specs change, your action-safe and title-safe zones scale proportionally without recalculation. Scenario 3: Organizing Complex Motion GraphicsYou're building a complex lower-third with multiple animated elements. You want to use different guide colors to organize your layout.With per-guide color control:Create blue guides for alignment zones (where graphics snap together) Create red guides for text-safe areas Create green guides for animation boundaries Right-click each guide to assign its color Team members instantly understand the layout logic by glancing at the guide colorsResult: Complex layouts become self-documenting and easier for teams to collaborate on. Quick Tips: Keyboard Shortcuts for Guide Power Users These shortcuts make guide editing faster—especially when you're setting up responsive layouts:While dragging a guide:Tap Alt (Windows) / Option (macOS) to instantly switch between pixel and percentage units Tap Ctrl (Windows) / Command (macOS) to toggle a guide between pinned and unpinnedExample workflow:Drag a guide to position it visually While dragging, tap Alt/Option to see the percentage value in real-time Drop it when the percentage looks right If needed, tap Ctrl/Command to toggle whether it uses the default position edge or is “pinned” to the opposite edgeThis is much faster than right-clicking to open the Edit Guide dialog every time.  What Hasn't Changed After Effects continues to support per-view guides, meaning guides can exist independently in:Composition views - Guides for aligning content in your main composition Footage views - Guides for aligning within source footage Layer views - Guides for aligning elements within a specific layerGuides remain relative to the view they're created in, and existing snapping behavior continues to work as always.  Ruler Display: A Note on Current Capabilities Currently, the composition rulers in After Effects display measurements in pixels only. While your guides can be defined as percentages, the rulers themselves don't show percentage markings (unlike Photoshop, Illustrator, and InDesign).Workaround: When working with percentages, the position values are always clearly displayed when you right-click a guide or drag it (you'll see "50%" on screen). This makes it easy to set precise percentage-based guides even without percentage rulers.  Premiere Pro Compatibility After Effects and Premiere Pro use the same .guides file format, so guide presets move between the apps with full fidelity. When you export percentage-based guides, pinned guides, or guides with custom colors from After Effects to a .guides file, Premiere Pro preserves all of those properties. The same is true in reverse, guide presets created in Premiere Pro keep their percentage positioning, pinning, and colors when imported into After Effects.The one difference: Premiere Pro's Guides panel can export multiple named guide templates in a single .guides file. After Effects applies the first template and ignores any additional ones. If you maintain a shared preset file with multiple template sets, make sure the set you want After Effects to use is listed first in the file.  Troubleshooting: Common Questions Q: I upgraded to the new version. What happened to my old pixel-based guides?A: Your existing guides remain unchanged and continue to work as pixels. New guides you create can use either pixels or percentages. You can mix both pixel and percentage guides in the same composition—right-click any guide to change its unit at any time.Q: I imported a Premiere Pro .guides file and only some of my guides showed up. Why?A: That file probably contained more than one named template. After Effects applies the first template and ignores the rest. If you want a different template to be used, re-order the file so the set you want is first, or export just that template set as its own file.Q: Can I convert all my pixel-based guides to percentage-based?A: You can, but it requires manual math. Right-click each guide, select Edit Guide, and use the position hottext field to calculate the percentage: original position ÷ comp dimension. For example, a guide at 960 px in a 1920 px wide composition is 960 ÷ 1920 * 100 = 50%. Then set the Unit dropdown to Percent.Q: Can I share guide presets with my team in Premiere Pro?A: Yes. Export a .guides file and share it—percentage positioning, pinning behavior, and colors are all preserved in both directions. Your team can use the presets in Premiere Pro exactly as you created them in After Effects.Q: Do guide colors affect rendering or output?A: No. Guide colors are for your workspace only and never appear in previews, renders, or final output.  Advanced: Understanding the .guides File FormatWhen you export guides, After Effects (and Premiere Pro) writes a plain-text JSON file with a .guides extension. Because both apps share the same format, guide presets move between them with full fidelity—positions, units, pinning, and colors are all preserved. If you build extensions, automation, or version-control your presets, use the schema below to see how guide data is stored in a .guides file.A .guides file is a list of named guide templates, each containing a list of guides:{ "version": 1, "guideTemplates": [ { "name": "template 1", "guides": [ { "orientationType": 0, "positionType": 1, "position": 50, "color:red": 1, "color:green": 0, "color:blue": 0, "pinToOpposite": false }, { "orientationType": 1, "positionType": 0, "position": 100, "color:red": 0, "color:green": 1, "color:blue": 0, "pinToOpposite": true } ] } ]}The two guides above are: a horizontal guide at 50% in red, unpinned (referencing the top edge), and a vertical guide at 100 px in green, pinned (referencing the opposite right edge). Field Reference (per guide) Key Type Meaning orientationType integer 0 = horizontal, 1 = vertical positionType integer 0 = pixels, 1 = percentage position number Distance in the unit set by positionType. Full precision is preserved (e.g. 1500.6951904296875). color:red / color:green / color:blue number 0.0–1.0 Per-guide color channels (not a hex string). 1, 0, 0 = red; 0, 1, 0 = green; 0, 0, 1 = blue. pinToOpposite boolean false = pinned to the top/left origin; true = pinned to the opposite edge (bottom for horizontal guides, right for vertical guides). Wrapper Fields Key Type Meaning version integer Format version (currently 1). guideTemplates array One or more named templates. name string Template name. May be empty ("") for a single unnamed export from After Effects. guides array The guides belonging to that template. Note — multiple templates: A .guides file can contain several named templates (for example, a file exported from Premiere Pro's Guides panel). After Effects does not have a multi-template guides manager, so on import it applies the first template and ignores any additional ones. If you maintain a shared preset file with more than one set, put the set you want After Effects to use first.Note — mixed units within a template: positionType is set per guide, not per file or per template. A single template can freely mix percentage and pixel guides (the example above does exactly that).Tip — automation: The same orientation / position / unit / color / pinning model is exposed to scripting, so anything you can store in a .guides file you can also create or read programmatically. See the [Guide Scripting Accessors] [link to be sent when ready] in the After Effects Scripting guides. Learn MoreGrids & Guides helpx Documentation Scripting Original Accessors added in After Effects 16.1  Newly Added Accessors in After Effects (Beta) (may not be live at time of post publishing)  Your FeedbackPlease share your feedback:How guide import/export works in your workflows Whether percentage‑based guides meet your expectations Any scripting or automation scenarios you rely on for guides Features you'd like to see in future releasesYour input is much appreciated! The After Effects Team

From Photo to Video: Using the Generative AI tool in Lightroom

From Photo to Video: Using the Generative AI tool in Lightroom

Bring your photos to life with Generate Video in Lightroom Ever wish a favorite photo had a little more motion, a subtle drift of clouds, a slow pan across a landscape, a gentle sway in the trees? Generate Video in Adobe Lightroom turns your edited photos into short, polished videos using AI, right from the app you already use to edit. How to Use Generate Video:Just open a photo in Detail view, right-click, and select Generate Video (or find it under the Photo menu). From there, choose a model: Firefly Video, Google Veo 3.1, or Google Veo 3.1 Fast. Then set your aspect ratio, resolution, and duration. Once you click Generate, watch you photo come to life! Not sure what to type in the prompt field?You don't need to be a prompting expert. Try one of the built-in presets:Slow pan for gentle camera movement Subtle motion for AI-generated natural motion Hyperlapse for AI-generated time-lapse style motionWant to keep your original photo paired with the new video? Select Create stack to group them together (currently supported in the Cloud). 👉 Learn more about Generate Video here. Where this makes a difference:Social media content: Turn still shots into eye-catching reels Portfolio pieces: Add subtle motion to portraits or landscapes for a more dynamic feel Storytelling: Bring a single image to life without needing video editing skills💡 Pro tip: Once your video generates, check the Filmstrip or your stack for the result. You can always try a different prompt or model if the motion doesn't match your vision. Join the conversation!What's your favorite photo to bring to life with Generate Video: a landscape, a portrait, something else entirely? Share your results or prompt tips with the community 👇

Beta Build 30.7.83 Release Notes

Hello Latest Beta Build 30.7.83 is now available in CCD. We have the below fixes in this build:Blends-related fixes:Make button were showing disabled in some cases Number field for Steps dropdown were showing overlay while scrolling Easing option has been disabled for spine-less blends Steps slider overshoots easily and up/down keys stop responding until panel tab-cycledKnown Issue - More than 2 objects at a time can't make blend.Workaround - You can click on the previous object 1 more time and click on 3rd object or next to create blend.Concept to Vector Changes :Generate more variations in one go: Select multiple sample prompts and generate all variations with a single click. New AI model available: Choose the new GPT-2 model for Concept to Vector generations. Improved background handling: Concept to Vector now generates background-free results when your prompt requests them. Previously, prompts requesting no background produced outputs with a white background instead. Additional invocation points: Launch Concept to Vector directly from a selected image traced object (before it's expanded). Access the feature from the Contextual Task Bar, Properties panel, Control panel, and other supported entry points. Concept to Vector uses the original raster image as the source.UV Bugs:[Vote Count : 12] : Partial selection of points is lost (the whole object becomes selected) when Undo and/or Redo are used [Vote Count : 33] : Effects menu is smaller/larger than other menus on Windows with larger UI scaling Switching keyboard layout with Win32 API message hangs Illustrator.

Run PDF Tasks Inside Copilot: Here's How

Run PDF Tasks Inside Copilot: Here's How

ABOUT THIS ARTICLE  · 4 min read  · Published June 30, 2026    TL;DR:  Acrobat for Copilot lets you create, edit, organize, and extract information from PDFs using natural-language prompts inside Microsoft Copilot. No switching apps. It's available to all Adobe Acrobat users, including the free plan, in English across all regions where Adobe products are offered. You activate it by typing @Adobe Acrobat followed by your request.  Adobe Acrobat for Copilot is a Microsoft Copilot extension that lets you handle PDF work without leaving the chat. If you've ever had a document task interrupt your flow: combining files before a meeting, redacting a name before sending something along, converting a scan into something editable. This is built to close that gap. You stay in Copilot, type what you need in plain language, and Acrobat picks it up from there.This post walks through what the extension does, how it works, a few real use cases from Adobe's own documentation, and where to go if you want to try it or weigh in on what's next. Before you beginSign in with the Microsoft and Adobe accounts required by your organization or personal setup. Connect the Acrobat for Copilot extension before using @Adobe Acrobat. English is currently supported.How does Acrobat for Copilot work?Connect the extension.  Once Acrobat for Copilot is connected to your Copilot environment, you activate it inside any chat. Start your prompt with @Adobe Acrobat.  This tells Copilot to route the request to Acrobat instead of handling it generically. Describe the task in plain language.  For example: "@Adobe Acrobat, combine these PDFs" or "@Adobe Acrobat, redact sensitive information in this document." Finish the task in the Acrobat editor.  Acrobat processes the request and, for steps requiring visual confirmation (like arranging page order or selecting redaction areas), opens the editor so you can review and save.You, the reader, get a practical advantage here: the extension's task list reads less like a feature catalog and more like a checklist for document-heavy weeks: editing, converting, exporting, combining, removing pages, reordering, rotating, splitting, compressing, and redacting are all covered as named, repeatable prompts rather than buried menu actions. That's a meaningfully different mental model than opening Acrobat directly: you're describing an outcome, not hunting for a tool icon.  Supported PDF tasks  Task Example prompt Combine PDFs @Adobe Acrobat, combine these PDFs Redact sensitive information @Adobe Acrobat, redact personal information Reorder pages @Adobe Acrobat, move the pricing page to the front Compress PDF @Adobe Acrobat, compress this PDF for email Extract information @Adobe Acrobat, summarize the totals in these receipts Real workflows people are already using it for:A few examples straight from Adobe's documentation give a sense of the range:Job application packet:  combine a resume, cover letter, and references into one file, then edit a detail (like a company name) directly through a follow-up prompt. Medical data protection:  redact sensitive information in a document before sharing it. Client proposal:  combine proposal PDFs, reorder so pricing leads, then compress for email. Travel expense summary:  combine scanned receipts into one PDF and extract totals into a summary. Personal finance review:  identify spending patterns or flag expenses over a set threshold from scanned statements.   Worth noting: Acrobat for Copilot is designed to protect sensitive information during processes like redaction and document editing, and that Adobe complies with industry standards and regulations for safeguarding user data. If your workflow involves anything regulated or sensitive, read the Acrobat for Copilot overview in full before relying on it for that use case.  Frequently asked questions Which Microsoft Copilot experiences are supported?Use a supported Microsoft Copilot experience where Acrobat for Copilot is available. Check the latest Acrobat Help documentation for current availability. Do I need an Adobe account?Yes. Sign in as required for your Acrobat entitlement and Copilot environment. Why does Acrobat open during some tasks?Tasks requiring visual confirmation, such as redaction or page arrangement, are completed in the Acrobat editor before saving. What if @Adobe Acrobat isn't recognized?Confirm the extension is connected and that you're signed in to the appropriate accounts. Current limitationsEnglish is currently supported. Some workflows require the Acrobat editor to complete. Availability may vary by supported Copilot environment and region.  Learn more Acrobat for Copilot overviewEdit and organize PDFs in CopilotAdobe Acrobat Help CenterJoin the discussion If you've connected Acrobat for Copilot, what's the first task you handed it, and did it save you the app-switch you were hoping for? If you haven't tried it yet, the lowest-effort first prompt is probably "combine these PDFs" on something you already have open.Drop your results, edge cases, or rough spots in the Adobe Community so Adobe's product team can see real usage patterns. If something didn't work as expected, report it directly.

Run PDF Tasks Inside Copilot: Here's How

Run PDF Tasks Inside Copilot: Here's How

ABOUT THIS ARTICLE  · 4 min read  · Published June 30, 2026     TL;DR:  Acrobat for Copilot lets you create, edit, organize, and extract information from PDFs using natural-language prompts inside Microsoft Copilot. No switching apps. It's available to all Adobe Acrobat users, including the free plan, in English across all regions where Adobe products are offered. You activate it by typing @Adobe Acrobat followed by your request.  Adobe Acrobat for Copilot is a Microsoft Copilot extension that lets you handle PDF work without leaving the chat. If you've ever had a document task interrupt your flow: combining files before a meeting, redacting a name before sending something along, converting a scan into something editable. This is built to close that gap. You stay in Copilot, type what you need in plain language, and Acrobat picks it up from there.This post walks through what the extension does, how it works, a few real use cases from Adobe's own documentation, and where to go if you want to try it or weigh in on what's next.Before you beginSign in with the Microsoft and Adobe accounts required by your organization or personal setup. Connect the Acrobat for Copilot extension before using @Adobe Acrobat. English is currently supported.How does Acrobat for Copilot work?Connect the extension.  Once Acrobat for Copilot is connected to your Copilot environment, you activate it inside any chat. Start your prompt with @Adobe Acrobat.  This tells Copilot to route the request to Acrobat instead of handling it generically. Describe the task in plain language.  For example: "@Adobe Acrobat, combine these PDFs" or "@Adobe Acrobat, redact sensitive information in this document." Finish the task in the Acrobat editor.  Acrobat processes the request and, for steps requiring visual confirmation (like arranging page order or selecting redaction areas), opens the editor so you can review and save.You, the reader, get a practical advantage here: the extension's task list reads less like a feature catalog and more like a checklist for document-heavy weeks: editing, converting, exporting, combining, removing pages, reordering, rotating, splitting, compressing, and redacting are all covered as named, repeatable prompts rather than buried menu actions. That's a meaningfully different mental model than opening Acrobat directly: you're describing an outcome, not hunting for a tool icon.Supported PDF tasks  Task Example prompt Combine PDFs @Adobe Acrobat, combine these PDFs Redact sensitive information @Adobe Acrobat, redact personal information Reorder pages @Adobe Acrobat, move the pricing page to the front Compress PDF @Adobe Acrobat, compress this PDF for email Extract information @Adobe Acrobat, summarize the totals in these receipts Real workflows people are already using it for:A few examples straight from Adobe's documentation give a sense of the range:Job application packet:  combine a resume, cover letter, and references into one file, then edit a detail (like a company name) directly through a follow-up prompt. Medical data protection:  redact sensitive information in a document before sharing it. Client proposal:  combine proposal PDFs, reorder so pricing leads, then compress for email. Travel expense summary:  combine scanned receipts into one PDF and extract totals into a summary. Personal finance review:  identify spending patterns or flag expenses over a set threshold from scanned statements. Worth noting: Acrobat for Copilot is designed to protect sensitive information during processes like redaction and document editing, and that Adobe complies with industry standards and regulations for safeguarding user data. If your workflow involves anything regulated or sensitive, read the Acrobat for Copilot overview in full before relying on it for that use case.  Frequently asked questions Which Microsoft Copilot experiences are supported?Use a supported Microsoft Copilot experience where Acrobat for Copilot is available. Check the latest Acrobat Help documentation for current availability. Do I need an Adobe account?Yes. Sign in as required for your Acrobat entitlement and Copilot environment. Why does Acrobat open during some tasks?Tasks requiring visual confirmation, such as redaction or page arrangement, are completed in the Acrobat editor before saving. What if @Adobe Acrobat isn't recognized?Confirm the extension is connected and that you're signed in to the appropriate accounts.Current limitationsEnglish is currently supported. Some workflows require the Acrobat editor to complete. Availability may vary by supported Copilot environment and region.Learn more Acrobat for Copilot overviewEdit and organize PDFs in CopilotAdobe Acrobat Help CenterJoin the discussion If you've connected Acrobat for Copilot, what's the first task you handed it, and did it save you the app-switch you were hoping for? If you haven't tried it yet, the lowest-effort first prompt is probably "combine these PDFs" on something you already have open.Drop your results, edge cases, or rough spots in the Adobe Community so Adobe's product team can see real usage patterns. If something didn't work as expected, report it directly.

LIVE- ColdFusion 2025.10 and 2023.21 June Security Update Released

Adobe has released ColdFusion 2025 Update 10 and ColdFusion 2023 Update 21. The releases introduce some important advancements that reinforce a clear direction: secure-by-default behavior, tighter control, and better developer governance. Download the updatesColdFusion 2025 updates ColdFusion 2023 updatesThis update focuses heavily on addressing critical security concerns while also giving developers more control over how their applications interact with external systems, attachments, and XML processing.Security fixes and cumulative patchesBoth updates address multiple vulnerabilities that could result in arbitrary code execution, privilege escalation, and security control bypass.From an operational standpoint, this update is cumulative, which means patch adoption does not require sequential upgrades. However, teams skipping prior updates should account for behavioral changes introduced in intermediate versions, especially in areas that now enforce stricter validation.Attachment handling: Explicit allow-listing via acceptThe introduction of the accept attribute across Exchange-related tags (cfexchangemail, cfexchangecalendar, cfexchangetask, cfexchangecontact) and alignment with cfpop and cfimap formalizes attachment filtering as an application-level concern.At runtime, accept acts as an extension-based allow list, evaluated as a comma-separated set (for example, .pdf,.txt). This shifts attachment handling away from implicit acceptance toward deterministic filtering at the tag level.From an implementation perspective:Matching is performed against file extensions, not MIME types The evaluation occurs before attachment persistence, reducing downstream validation overhead It enables developers to enforce context-specific filtering policies per integration pointFiltering model: Dual-layer validation (allow list + block list)The filtering pipeline now follows a more structured evaluation model combining:Application-level allow list (accept) Platform-level blocked-extension listThe resolution logic is deterministic:If accept is not specified, only the blocked-extension list is enforced If accept="*", the allow list short-circuits validation and bypasses blocked-extension checks entirely If a file extension is explicitly declared in accept, it acts as an authoritative override, even if the extension is present in the blocked list In all other cases, the file must satisfy both the allow list and block list constraintsThe key implication here is that filtering is no longer purely defensive (block-based), but policy-driven, where application logic can selectively override platform defaults when required.A JVM-level override (-Dcoldfusion.attachment.allowblockedextensions) allows reverting to legacy permissive behavior.MCP Client: Multi-layer command authorizationNOTE: Only applies to ColdFusion 2025 Update 10Update 10 introduces a composable authorization model for STDIO MCP server command execution.Command execution is now governed by three independent sources: Server-level whitelist (security-settings.json) Enforces administrator-controlled baseline restrictions Deny-by-default model: commands must be explicitly enumerated Application-level whitelist (this.security.mcp.commandWhitelist in Application.cfc) Enables per-application scoping of allowed commands Inline whitelist (passed in MCPClient() / MCPServer()) Maintains backward compatibility with existing implementations These lists are merged at runtime using a union operation. A command is executable if it exists in at least one list.This design introduces a federated control model, where enforcement is distributed across infrastructure and application layers. However, it is important to note that restriction requires explicit exclusion from both server and application scopes, as the model is additive rather than restrictive.From a security perspective, this reduces the risk of arbitrary command execution while maintaining flexibility for dynamic integrations.XML processing: Saxon feature gating via JVM flagsColdFusion’s Saxon-based XML processing (XMLSearch, XMLTransform) now enforces feature-level restrictions using JVM flags, all disabled by default.The newly introduced flags gate access to:xsl:result-document → controls file write operations unparsed-text() → accesses external text resources doc(), doc-available() → loads external XML documents environment-variable() → exposes runtime environment variablesThese capabilities are disabled unless explicitly enabled via JVM configuration.This has several implications:Prevents data exfiltration via XSLT transformations Blocks access to file system paths and environment variables Eliminates implicit trust in transformation inputsDevelopers enabling these features must now explicitly evaluate the security risk vs functional requirement, making the configuration process intentional rather than implicit.Package updates and platform consistencyThe updates also include updates to multiple core packages, including administrator, ajax, exchange, feed, mail, and websocket modules.From a runtime and deployment perspective:No connector reconfiguration is required Package updates are applied alongside the core update Package rollback is decoupled from core rollback and depends on minimum core dependency constraintsThis ensures consistency across modules while maintaining compatibility boundaries.Download the updates and validate them in your staging environment. If you encounter any regressions or unexpected behavior after upgrading, report them through the Adobe support channel or your standard issue-tracking process, including relevant logs and reproduction details.  

Illustrator 30.6 | Relink images quickly, Align & Distribute with Keyboard Shortcuts & Actions, bug fixes, and more

Illustrator 30.6 | Relink images quickly, Align & Distribute with Keyboard Shortcuts & Actions, bug fixes, and more

Hey all!Illustrator 30.6 is a focused release aimed squarely at the workflows that quietly eat up time - swapping a linked image across a multi-artboard file, aligning and distributing objects you reach for dozens of times a day, and getting precise spacing right the first time. This update lets you relink every instance of an image in one step, assign keyboard shortcuts to Align and Distribute commands, record those commands as Actions, and preview spacing before you commit. It also ships a solid batch of bug fixes. For more details, check out the release notes. Relink all instances of a linked image in a single stepWhen you replace a linked image, you can now apply that change everywhere the image appears in your file , across multiple artboards and repeated layouts, in a single step. No more hunting down each placement one by one.Learn how to relink images.Keyboard shortcuts for Align and DistributeYou can now assign custom keyboard shortcuts to Align and Distribute commands from Edit > Keyboard Shortcuts. The commands you use constantly are finally one keystroke away.Learn how to align and distribute objects.Record Align and Distribute as ActionsAlign and Distribute commands can now be recorded as Actions and reused across recurring workflows. Build them once and reuse consistent alignment and spacing across your files.Learn how to record and play Actions.Preview spacing before you distributeWhen distributing objects, you can now preview the spacing changes first, then apply them, fine-tune the value, and see how it affects your layout before committing.Learn how to distribute objects by specific distances.Fixed IssuesIllustrator 30.6 also resolves a range of issues reported by the community, including:Area Type Options incorrectly labeling vertical alignment as Center instead of Top. No overwrite warning when exporting a file with a name that already exists. The misspelled Spanish translation of "Flatten Transparency" in the View menu. The color sampling ring lagging when sampling colors for a gradient. Color Blindness Proof Preview disabling GPU rendering and causing performance issues. Spaces in numeric input fields not being ignored when entering values. Stacked dimensions responding slowly when working with artwork. Illustrator becoming unresponsive when opening files containing linked assets. The Open dialog appearing blank and opening duplicate windows. Illustrator no longer sharing color settings with other Adobe apps when saving. Width and Height values not staying linked when the link icon is active. Deselecting an artboard in the Artboards panel unexpectedly activating it.For the full list with linked bug reports, see the release notes.Get StartedExplore the latest updates and enhancements in Illustrator. Update to Illustrator 30.6 using this link or open the Creative Cloud desktop app and click Update next to Illustrator.For step-by-step guidance, check out the detailed update instructions.Share Your FeedbackWe encourage you to try the new features in Illustrator 30.6 and share your feedback with the community. If you have questions or suggestions, please reply to this post or create a new post for any issues.If you found this announcement helpful, click Like. Use Subscribe to stay informed about future updates. You may also share this post with others who might benefit from these enhancements.

What's new: Content Retention Policy for Work-in-Progress (WIP) Content

TL;DR: Admins can now create content retention policies to manage the lifecycle of Creative Cloud Projects stored in Adobe cloud for business. Define how long completed projects are retained before they're permanently deleted. This capability is available through the Adobe Admin APIs for Storage Management. Go to Admin Console What are the requirements?Your organization uses Adobe cloud storage for business with Creative Cloud Projects You have admin access to the Admin Console An authorized external system, such as a project management or workflow tool, is configured to signal project completion via the Adobe Admin API Why should admins set up WIP content retention?Admins can create one or more content retention policies to define how long Creative Cloud Projects are retained after being marked as complete, before they are permanently deleted. With WIP content retention, admins can:Create one or more retention policies for WIP content within an organization Modify policies at any time: extend or shorten retention periods, with changes applying to all active projects from each project's original retention start date Delete a policy to immediately stop enforcement without deleting any projects Manage precedence when multiple policies apply to the same project (earliest retention date wins) How does the retention lifecycle work?A Creative Cloud Project is considered marked as complete when it has reached the end of its working lifecycle and is no longer active work. This status is set through an integration with an authorized external system, which invokes the Adobe Admin API to start retention.Stage What happens Project marked complete Retention period begins Retention period ends Project is soft-deleted and moves to Deleted view 30 days after soft delete Project is permanently and irrecoverably deleted  Restoring a project: End-users can restore a soft-deleted project within the 30-day window. On restore, the project becomes active again. The original retention period does not automatically restart. Retention only re-applies if an admin explicitly re-associates a policy. If the project is subsequently marked as complete again by an authorized external system, a new retention period begins anchored to the new completion date. How do I get started?Review the API documentation and configure your policies through the Admin Console. View the Storage Management API documentation Already set up a retention policy? Running into issues or have feedback? Drop it in the thread, the team is reading. Quick LinksStorage Management API — Capabilities Overview Admin ConsoleWas this helpful? Click the Like icon below, it helps us know what's working.More questions? Start a conversation | Catch up on all updates: ICYMI

Adobe Since NAB 2026 — What Editors Should Know

Adobe Since NAB 2026 — What Editors Should Know

Adobe Since NAB 2026 — What Editors Should KnowA lot was announced at NAB in April. A few months on, it's worth taking stock of what actually shipped, what's evolved, and what's now available to try — because the landscape looks meaningfully different from where it did on the show floor.Color Mode in Premiere (Beta) — Now Award-WinningThis was the headline at NAB, and it's held up. Color Mode won Best Software at NAB 2026, which is a meaningful signal for a feature that was still in beta at the time.If you haven't explored it yet, the short version: it's a full redesign of the color workflow inside Premiere — not an update to Lumetri but a dedicated grading environment built alongside working editors over several years.Key capabilities:32-bit color processing GPU acceleration (NVIDIA RTX) Dedicated workspace: Color Monitor, Clip Grid, Color Controls, Comparison View, Video ScopesIt's still in beta and the team is actively taking feedback. If you've been round-tripping to other tools for grading, this is the time to give it a serious look.Premiere Pro 26.3 — What's New Since NABNAB showed 26.2. Since then, 26.3 has shipped, and it's a solid update for day-to-day editing. Here are highlights of the releases:AudioGlobal Audio Mute — mute all audio tracks in one click, useful for focus editing or client screenshares without killing your sequenceCaptionsSingle Word Captioning — generates word-by-word captions with individual timing, designed for the animated caption style that's standard on social contentTimelineMarker Search — search and filter sequence markers by name or color; genuinely useful on longer timelines A/V Display Mode — toggle between audio-only, video-only, or combined timeline viewEffects & TransitionsNew built-in GPU effects: Channel Blur, Gradient, and Noise — no plugins needed New modern transitions: 3D Spinback and 3D SlideMedia & OrganizationStock Panel Checkout — license Adobe Stock assets directly from within Premiere Object Masking refinements (Sharp and Smooth modes, building on the NAB preview)These aren't headline features individually, but they compound. The caption and marker updates in particular are the kind of thing you notice immediately in real workflows.After Effects 26.2 — Deeper Than It LookedThe Object Matte feature got most of the attention at NAB, and it's still the standout — select a subject, track it automatically, refine as needed. For roto work it removes a significant amount of manual setup compared to Roto Brush.But the full 26.2 release included more than that:Displacement Maps — a long-requested effect for distortion and warping workflows Depth of Field for 3D layers — realistic camera depth of field in the 3D environment SVG import as native shape layers — SVG files come in as fully editable vector shapes, not rasterized Parametric Mesh scripting APIs — extended scripting control for mesh-based effects 2–4x faster 3D render speeds — real-world improvement, not just a spec numberThe render speed improvement alone makes 26.2 worth updating to if you're doing anything with 3D.Adobe Creative Agent — No Longer "Coming Soon"At NAB, the AI Assistant was listed as coming soon. It's now here.Adobe Creative Agent launched in public beta on June 18, 2026, available in Premiere, Photoshop, Illustrator, InDesign, and Frame.io. After Effects is in private beta.In Premiere specifically, it's a conversational panel (Window > Assistant) that can organize footage, build bins, generate transcripts, create stringouts, and assemble rough cuts — all from plain language. Every action it takes goes into the undo/history stack, so nothing is hidden or locked.A few things worth knowing:Two permission modes: Always ask (step-by-step approval) or Auto approve (runs unattended) Daily complimentary credits during beta, separate from your paid Creative Cloud balance, reset at midnight GMT Not recommended for client work yet — test on duplicatesThe "conversational assistant across apps" vision from NAB is now a working tool you can open today in Premiere. The broader cross-app orchestration is still developing, but the foundation is live.Frame.io — Updates Since NABFrame.io has moved quickly since the NAB Drive announcement:Zero-click sign-in from Premiere — no more separate Frame.io authentication step when launching from Premiere Firefly assets in Frame.io — AI-generated content from Firefly is accessible directly in Frame.io projects Japanese localization — expanded language support Python and TypeScript SDK updates — for teams building custom integrationsFrame.io Drive (mount projects locally, work with media as if it's on your system) remains available for Enterprise, with broader rollout ongoing.Firefly Video Editor — ExpandingThe Firefly Video Editor has continued to develop as a standalone AI-assisted editing environment:30+ AI video models available, including Kling 3.0 and Omni Enhance Speech and audio cleanup built in Adobe Stock integration directly in the editor Basic color tools and one-click looksIf you previewed this at NAB and thought it felt early, there's more to see now.Where Things StandThe through-line from NAB to now is that most of what was previewed has shipped — Color Mode, the AI Assistant, After Effects 26.2, Frame.io updates. The direction was clear in April; the question was always about execution.A few things worth watching as the summer continues:Color Mode feedback is actively shaping the beta — this is a good window to influence the direction The AI Assistant is early and the team is iterating quickly based on community input Versioning and cut-downs in the AI Assistant are on the roadmap but not yet availableIf you've been holding off to see how things developed since NAB, this is a reasonable point to start testing.What's landed for you so far? Especially curious how Color Mode and the AI Assistant are holding up in actual projects.